georgeb138
having dreams about rocks

Member since April 2017
Posts: 68
|
Post by georgeb138 on Aug 28, 2017 18:06:53 GMT -5
Does anyone care to share a recipe for tumbling Blue Apatite? Any input is greatly appreciated.  |
|
|
|
Post by orrum on Aug 28, 2017 18:08:52 GMT -5
I tried it. A petite into the tumbler equals blemish graphics mud out. They ground up and mostly disappeared.
|
|
georgeb138
having dreams about rocks
Member since April 2017
Posts: 68
|
Post by georgeb138 on Aug 28, 2017 18:10:41 GMT -5
I tried it. A petite into the tumbler equals blemish graphics mud out. They ground up and mostly disappeared. That happened to the first batch I tried as well. I plan on checking these a few times a week. I'm guessing that they are so soft that the standard week per step is too long. |
|
|
|
Post by gmitch067 on Aug 28, 2017 21:56:17 GMT -5
Don't have any pics... sorry. The blue Apatite (from Amazon) I started with were similar to yours... VERY fractured. I was able to tumble them in a Lortone 3A and got good results despite all the fractures. The kids liked the pretty blues and quickly ran off with the whole load - I did not even get to keep one!
Skip 80-grit (rips them apart)
220-grit... I remember I had to tumble them for 3-weeks (full clean-out and grit re-charge each week... lots of fractured pieces to throw away!).
600-grit 1-week
1200-grit for 1-week
and just because another member mentioned good results using it...
Cerium Oxide in DRY OATMEAL for 1-week (no pellets or ceramics for cushioning... No water)
Burnish (1-TBS liquid Dawn, plus 3-TBS Borax) for 3 days (I did not see any improvement after)
Check the tumble every 6 hours and "top off" with more oatmeal... it breaks down quickly. When the internal barrel level reaches about 3/4-inches from the lid, you can stop adding new oatmeal.
I later tried to repeat the process using a better grade of Apatite (this time Green Apatite from the Rock Shed), but the rocks did not take a shine very well). I repeated the polish using Cerium Oxide with water and got the same results... Oh well...
|
|
Deleted
Deleted Member
Member since January 1970
Posts: 0
|
Post by Deleted on Aug 28, 2017 23:23:58 GMT -5
Hmmmmmm.....
Making notes.
Dry oatmeal.
Thank you.
|
|
jamesp
Cave Dweller 
Member since October 2012
Posts: 36,154
|
Post by jamesp on Aug 29, 2017 0:00:11 GMT -5
Useless for tumbling, my experience. Fractured and soft, crumbles. Maybe others can tumble it. Maybe small gem grade like this would be do able. In a small barrel. To make a gentle tumble. A good vibe like a Lot-O to polish.  |
|
|
|
Post by Drummond Island Rocks on Aug 29, 2017 6:11:43 GMT -5
Tried it one time. Probably would not try it again. Started with a bunch, ended up with a few. Ran these few ounces alone with all ceramic filler. 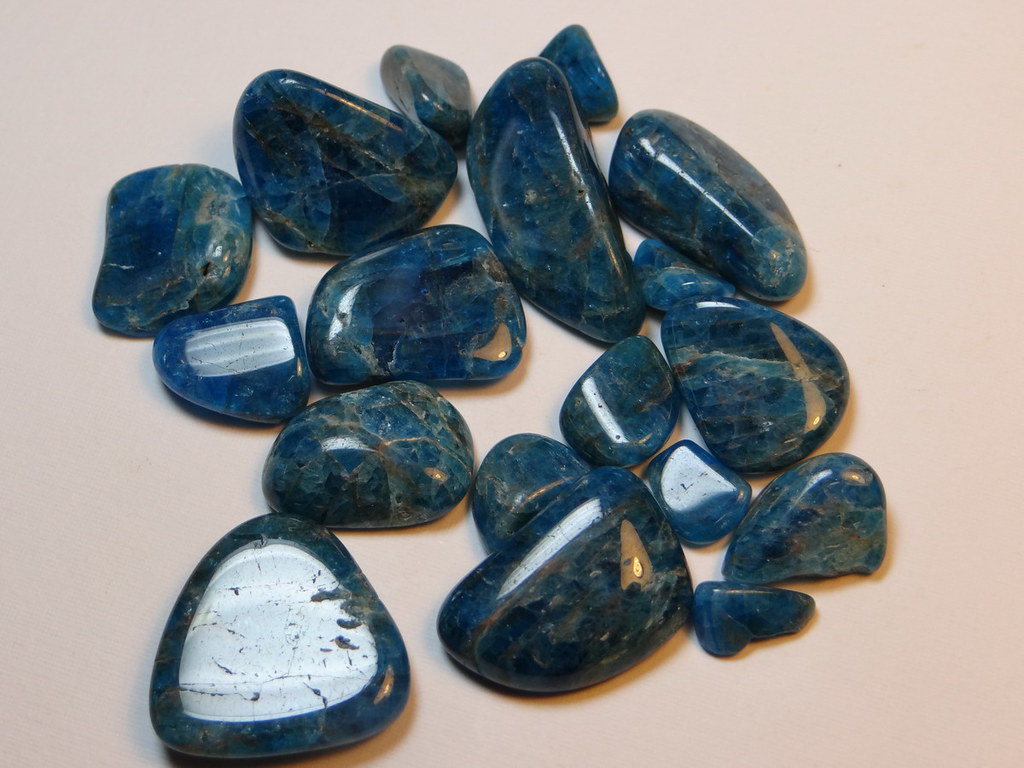 Chuck |
|
jamesp
Cave Dweller
Member since October 2012
Posts: 36,154
|
Post by jamesp on Aug 29, 2017 7:44:49 GMT -5
Tried it one time. Probably would not try it again. Started with a bunch, ended up with a few. Ran these few ounces alone with all ceramic filler. Chuck Those are trophies. Bet you would have nailed the gem grade on-fracture material Chuck. probably used you Lot-o for polish. |
|
tkvancil
fully equipped rock polisher

Member since September 2011
Posts: 1,546
|
Post by tkvancil on Aug 29, 2017 8:41:11 GMT -5
Saw something on here some time ago ...
Stabilize it. As I recall use epoxy 330 mixed 1 part to 16 parts acetone. Let rocks soak in 330/acetone mix for one week, shake the container once per day. Remove and let dry then tumble.
Never tried myself but had in the memory bank for future reference ...
Starting with 220 should help from turning them into nothing ... I know Labradorite will smooth and shape with 220 as will some other feldspars and obsidian.
|
|


