julieooly
Cave Dweller 
Member since October 2018
Posts: 714 
|
Post by julieooly on Jan 2, 2019 20:07:53 GMT -5
|
|
|
|
Post by vegasjames on Jan 2, 2019 20:20:51 GMT -5
I think you did a great job on shaping and getting a high polish on them.
The only one I do not care for is the first one due to all the cracking. But that is nothing about your skills, just the stone to begin with.
|
|
julieooly
Cave Dweller
Member since October 2018
Posts: 714
|
Post by julieooly on Jan 2, 2019 20:49:38 GMT -5
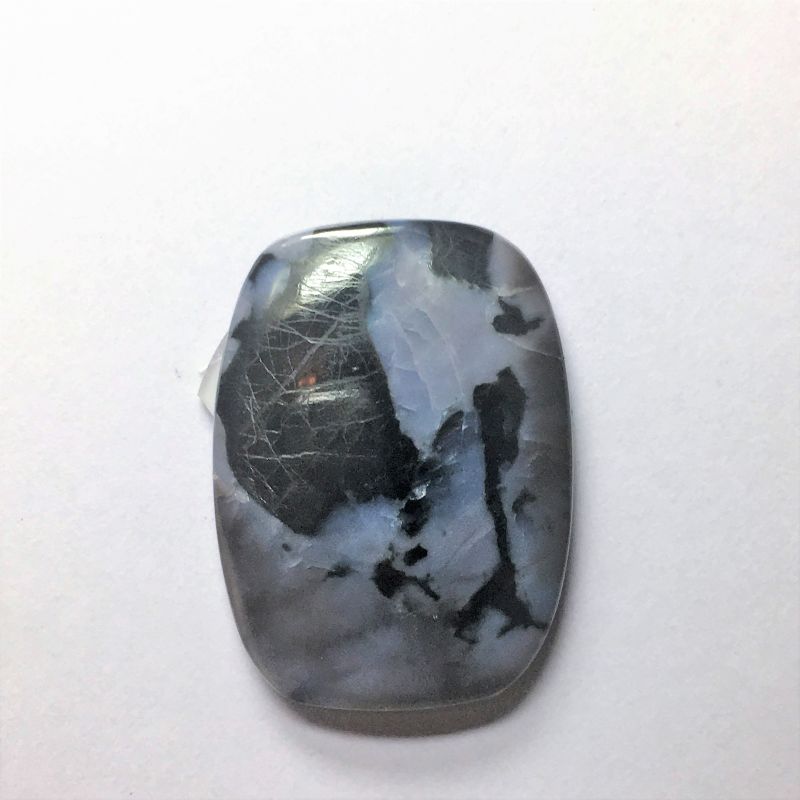
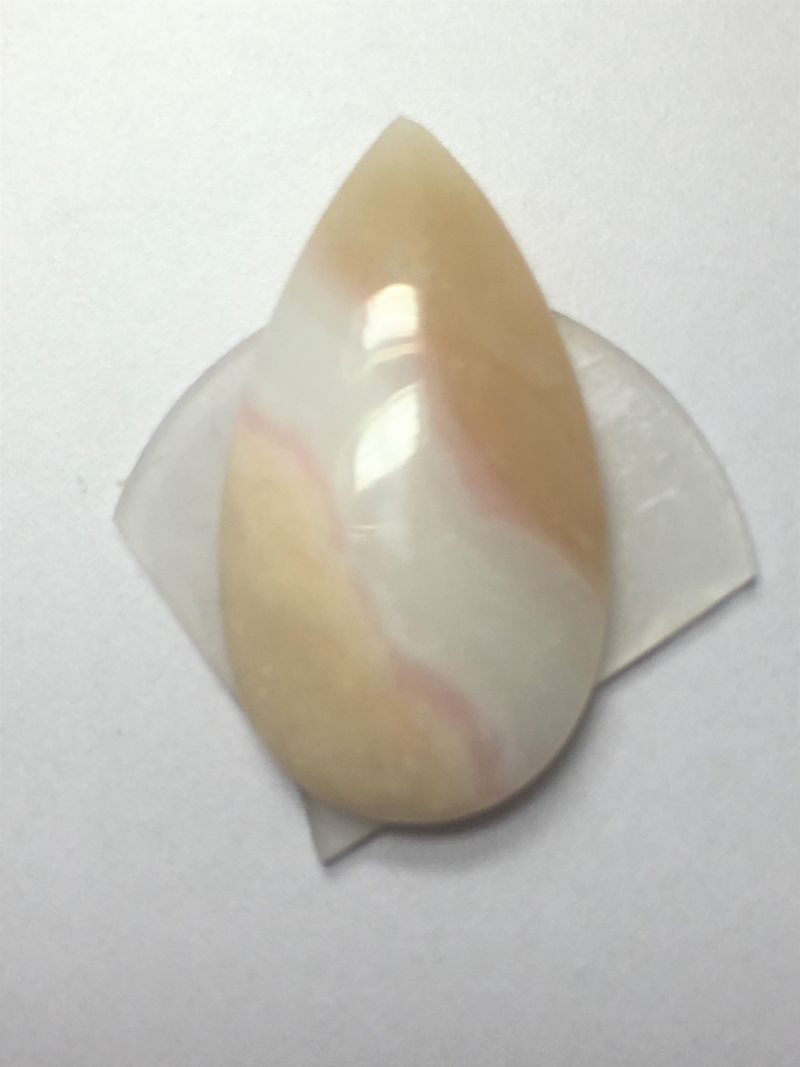
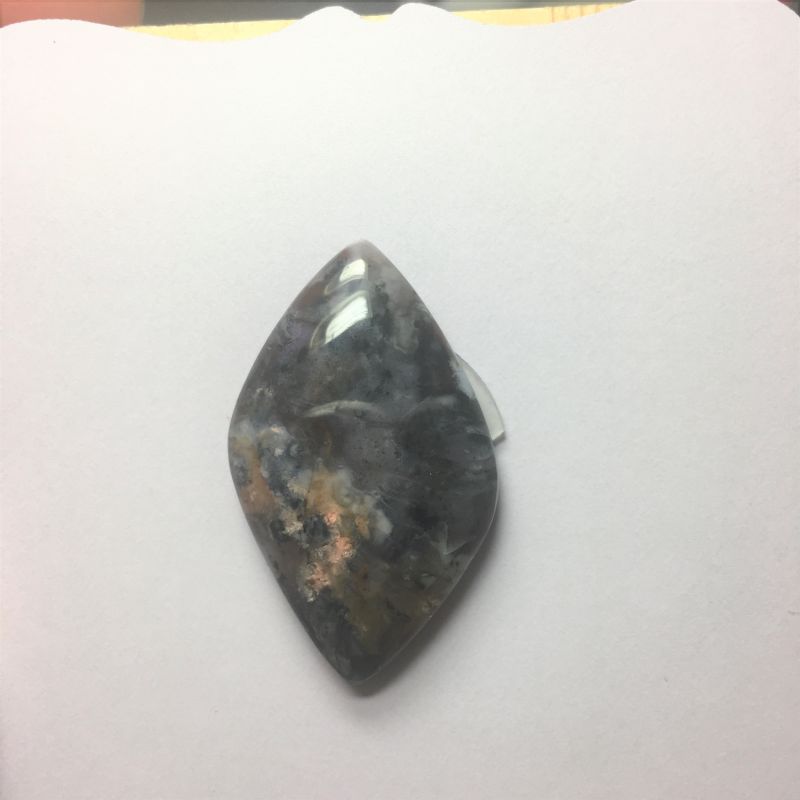
Thank you James, yes that stone is Indigo Grabbo/Mystical Merlinite. The crackle effect was interesting but I don't have much desire to work with this stone.
|
|
|
|
Post by stephan on Jan 2, 2019 20:55:00 GMT -5
Great job on the symmetry, domes and polish. I can’t see anything to critique for improvement. If you start using a lighting tent, you’ll be way ahead of many of us for photography.
|
|
|
|
Post by rockjunquie on Jan 2, 2019 21:12:39 GMT -5
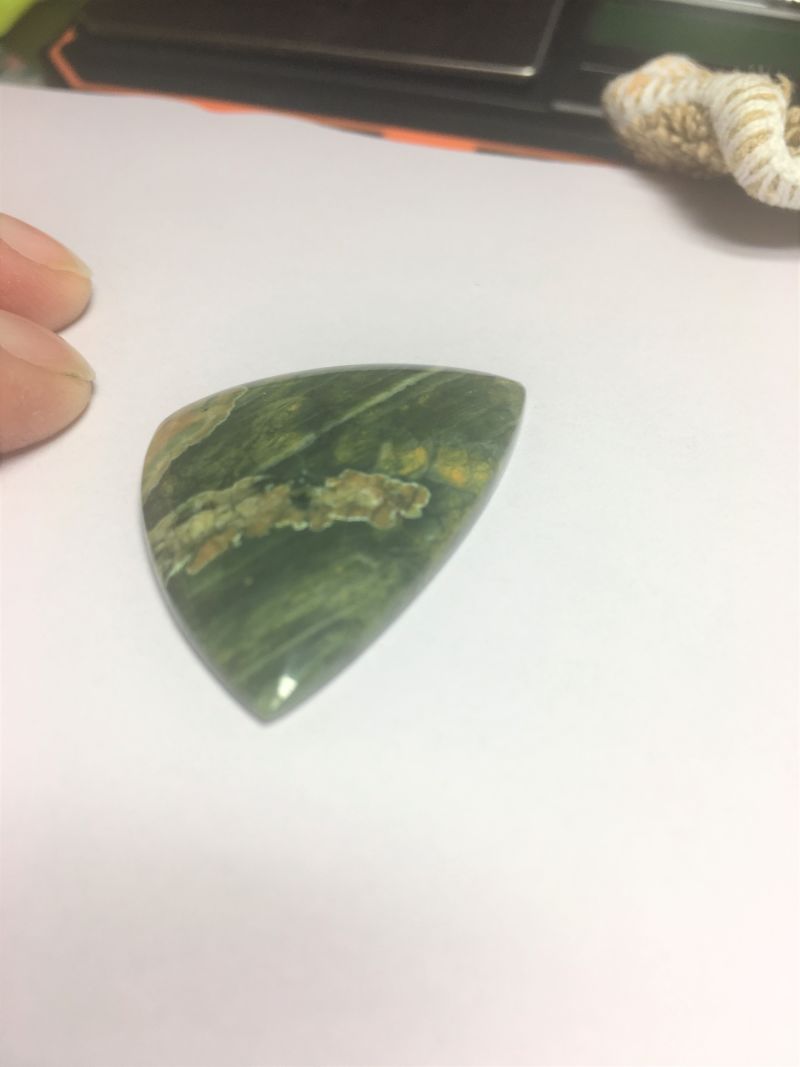
They look great! You have some nice shapes, polish and symmetry. The girdles look even, too. Except on the noreena, you really have to be careful on pointy corners that you don't cut too far into the girdle line. It's a really common problem and easy to work out. Focus on an even girdle line.
|
|
|
|
Post by stephan on Jan 2, 2019 21:36:52 GMT -5
The girdles look even, too... you really have to be careful on pointy corners that you don't cut too far into the girdle line. It's a really common problem and easy to work out. Focus on an even girdle line. I struggle with that. 😁 |
|
|
|
Post by MsAli on Jan 2, 2019 21:40:48 GMT -5
I really like them. I think the only thing is what Tela said (which I struggle with as well) and the photos
Good job!
|
|
|
|
Post by hummingbirdstones on Jan 2, 2019 21:47:28 GMT -5
Great job on those cabs!
I agree with rockjunquie on the Noreena. When you are cabbing any stone that has a point or a "corner" you need to pay special attention to keeping the girdle even all the way around the stone.
My personal way of doing this is to not dome those parts of the cab for each grit until after I've finished with the body of the cab. Then I go back to those points or corners and dome them to match the body. If you happen to roll a part of the girdle, go back right away and even it back out to match the rest. Doing it right away when you notice it will help keep the basic shape of the stone you wanted originally. Waiting until the stone is finished and the redoing it will change it a lot. |
|
hummingbirdstones2
fully equipped rock polisher
 Vince A., 1958-2023
Member since August 2018
Posts: 1,461
|
Post by hummingbirdstones2 on Jan 2, 2019 22:33:16 GMT -5
Compliments on the cabs - and the great rough you're working with. Really nice polish on these, especially that Turritella. I still remember being where you are now, and it took me a long time to get results I was happy with. You should be proud of what you've shown us here.
Girdle lines have been mentioned a couple of times. Cutting will become easier for you if you set the girdle thickness first - and then do your best to never "roll" over that line from either direction. You're obviously developing your own techniques, so just do whatever works for you.
If you want to check the symmetry of a cab in progress a good "cheat" is to use graph paper. It's also easier to see the actual shape from the back side, where the dome profile doesn't skew the way the shape looks from different angles. The flat back will give you a more true view. If you have it on a stick that complicates it a bit, but that's another topic altogether.
One of the pro cabbers on here (I think) talked about drawing the outline of the cab on a piece of thin paper and then folding it in half to compare how the two sides match up.
Domes look to be pretty smooth on your cabs. Light reflections should not waver or bend as you move the cab under a light. If you think you have a high (or low) spot hold it in your hand, look away from the cab, and run your thumb over the surface. You will be able to feel things that are almost impossible to see.
Whatever you're doing - keep doing it! Great work. I sat grinding rocks to mud on my used Genie until the sun came up many nights. Would look up and see the sky getting light outside the window. Didn't seem like I had been there all night... .
Sorry for the rambling. Hope some of it makes sense. |
|
|
|
Post by stephan on Jan 2, 2019 22:33:17 GMT -5
I should add that, for me, at least, keeping the girdle on the points even is especially challenging with softer stones (and all the Noreena I've worked with was fairly soft). Much easier to have a quick "oops" take away a significant part of the stone.
@ Robin: Thanks for putting that out there. I had not thought of that technique. I'll try that tip. Thanks. That's what i love about this board. So much to learn. Daily.
|
|
julieooly
Cave Dweller
Member since October 2018
Posts: 714
|
Post by julieooly on Jan 2, 2019 22:50:59 GMT -5
Thanks Vitzi
I'm pretty satisfied with the first three months for sure. I'm outlining the stones with a thin sharpie then dopping the side WITH the outline. I think most people do it the other way? Yes, I set the girdle line first thing, a little higher than I want then I can move it down a wee bit on the second grinding wheel. Then I don't run over it until I get a few wheels down, depending on the hardness of the piece. I "think" of the cab as two separate entities in the beginning, the girdle and the dome, then on the last two wheels I blur them together a bit.
Graph paper is a great idea, but I can always see the outline I've drawn. So far I have had zero issues getting the marker off, it's a super tiny line by the time I'm done, and when I smooth out the back on the very last step and add the bezel you'd never know it had ever been there. I also get up and move away from the machine and completely dry the stone and close my eyes and only use my fingers sometimes. It's way easier to feel it sometimes than it is to see the problems. I have a cool magnifying glass that helps too.
I wear a higher magnification safety/reader than normal when I work so I'm pretty close up on the stone and between that and keeping my left thumb out of the glove on the first couple wheels I've found I have to go back less often for smoothness/ridges.
Scratches were a bigger issue until I realized sometimes you just have to add more pressure, I found myself going back and forth between 280/600 and never quite getting out the scratches. When I press down more that helps tremendously. I also was keeping the stone 100% "ON" the wheel at all times, meaning I was not using the edges of the wheels properly. Now, I'm working the stone back and forth completely and OVER the edges of the wheels. This is a HUGE improvement.
Wow this is great and way easier than I had expected. I've been perusing Etsy and some of the artists there have been working lapidary 30-40 years. That's seriously intimidating.
|
|
hummingbirdstones2
fully equipped rock polisher
Vince A., 1958-2023
Member since August 2018
Posts: 1,461
|
Post by hummingbirdstones2 on Jan 3, 2019 9:06:42 GMT -5
Cool. Good to know how long you've been at it, and the way you do some things. That helps with not going over things you already know.
Yeah, just keep at it. Marking the back can be very useful. I always said I'd buy double-sided templates someday, but never did. |
|
julieooly
Cave Dweller
Member since October 2018
Posts: 714
|
Post by julieooly on Jan 3, 2019 10:18:08 GMT -5
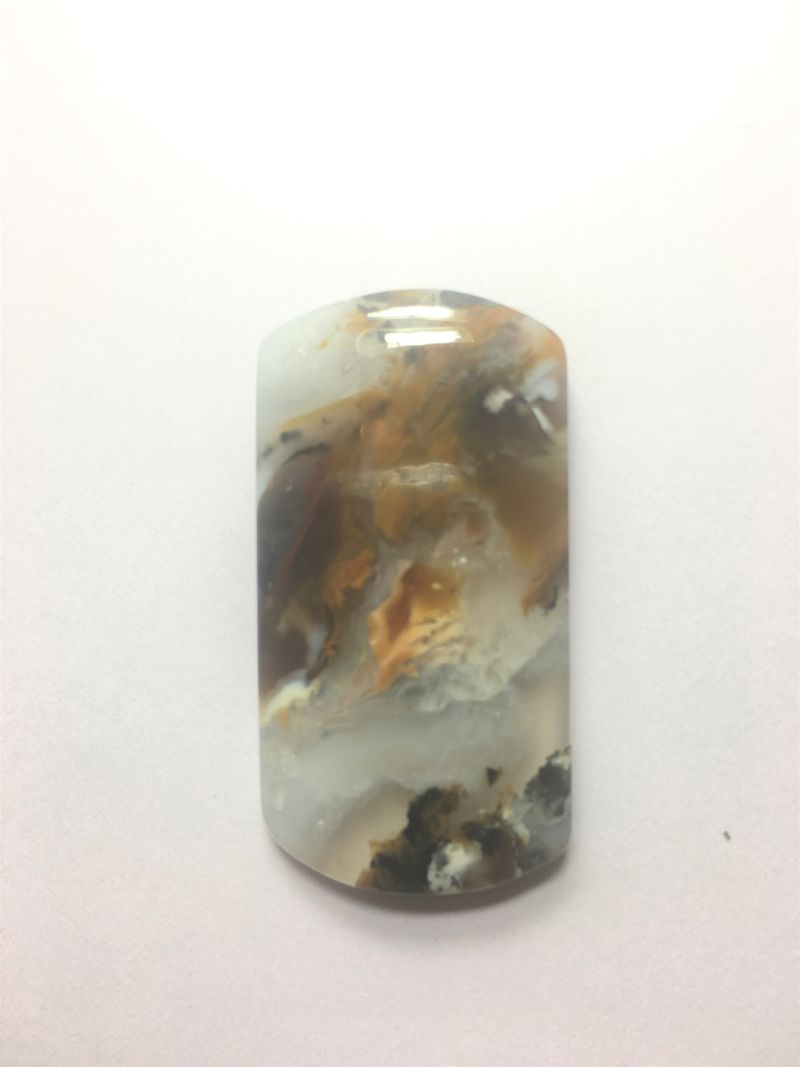
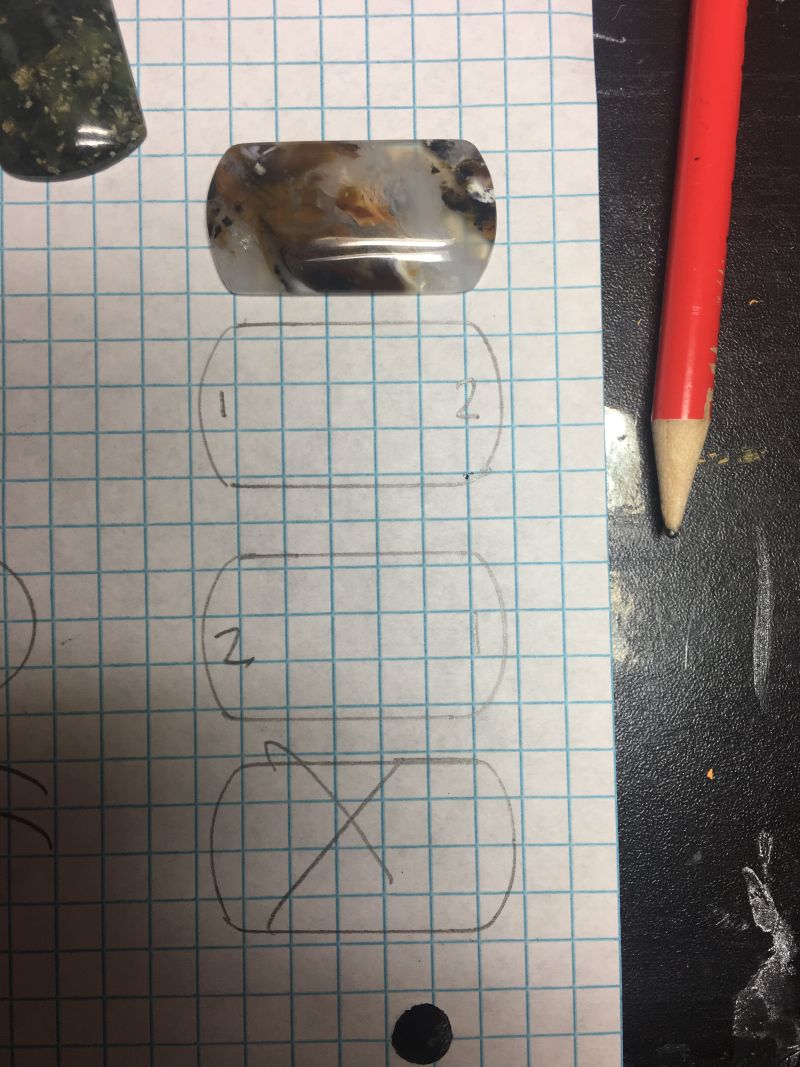 Vitz, this is the Tiffany you PM'ed me on. Looks pretty good? I can't draw too well. |
|
Tommy
Administrator 
Member since January 2013
Posts: 12,646
|
Post by Tommy on Jan 3, 2019 11:17:15 GMT -5
Those look very nice Julie - I would agree with the others that you're off to a great start! A little work on lighting and camera technique and many of those would pop right off the page with beauty. Just speaking only for myself I tend to take a lot less scientific approach than most to controlling the shape and the girdles. I set them once when I'm first doming the stone and then I putz around with them and make sure they have a slight inward lean with each wheel as I go. They finish when the stone is finished. If a sharp point rolls I stand it back up by changing the angle of the point and keep on moving. I also employ Robin's "leave it fat in places" approach if I know the stone well and I know what grit wheel will stop removing material and affecting the shape. Honestly I'd much much rather have a thin girdle in places when later in the process because it's a LOT easier to stand one back up, or round off what was intended to be a sharp point, than it is to bring down a fat spot. Bringing down a section of girdle that's too high means either going rough on the surface again OR re-doing the other 80% of the girdle to make it match the high spot. Anyway, keep at it - you're doing great!  |
|
|
|
Post by lpl on Jan 3, 2019 16:02:21 GMT -5
Julie I would agree with what everyone has said here...your cabs look great! I look forward to seeing pictures once you get your light box set up! I'm pretty much self taught, but one time at a show, a vendor was killing time making cabochons and I was pretty new at the time and he asked me if I'd like to give it a go, which I of course said yes! He showed me how he keeps the girdle even through pointed spots and it seems to work well for me. As we worked around the stone, when we got close to the point, he would tell me to keep rotating the stone, but pick it up off of the wheel, then when I got around the point to lower the stone to the wheel again. After some time, it all came together and it really works for me. I really appreciate him taking the time to show and teach me.
Good job on these!
|
|
|
|
Post by pauls on Jan 3, 2019 16:28:21 GMT -5
I'm outlining the stones with a thin sharpie then dopping the side WITH the outline. I think most people do it the other way? That's the way to do it, set your stone size accurately then dop it on the side with the mark. Far better than a sharpie is an aluminium pencil, get a bit of aluminium wire, (stop and have a chat to the workers next time you see power line work happening,) all you need is a scrap about six inches long sharpened on the end. But it wont mark polished faces as it relies on the roughness of the stone removing a thin smear of aluminium. I agree with lpl's technique of taking the stone off the wheel when you get to a pointy end to stop it overcutting, that's how I do it, though the other technique works too. Congatulations on those cabs you have nailed it. |
|
|
|
Post by fernwood on Jan 3, 2019 16:34:50 GMT -5
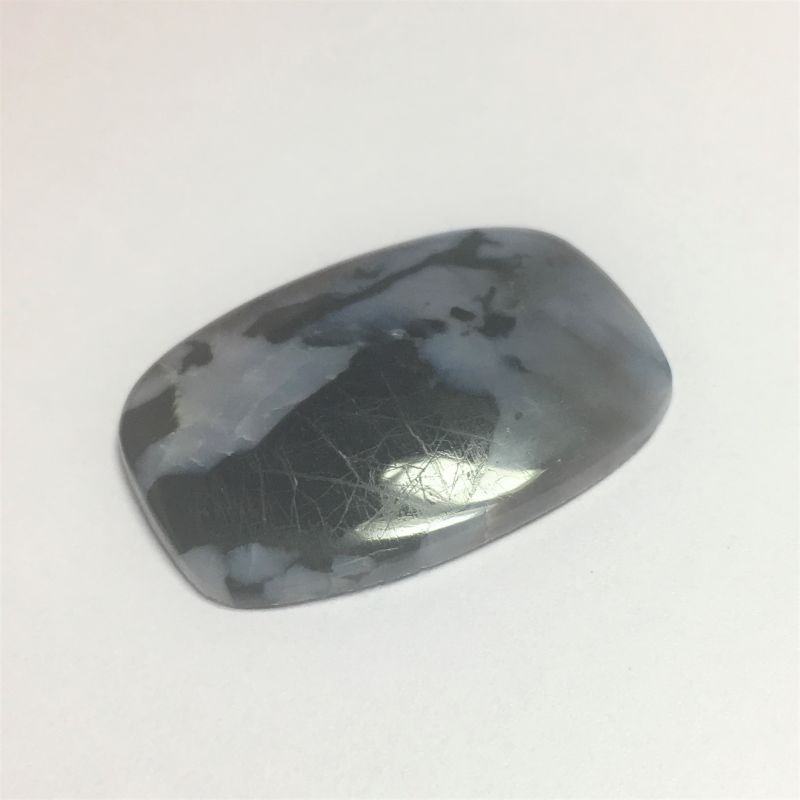
Nice cabs. Agree with above comments. You got some amazing shine on most. Yes, the MM is a tough stone to work with.
Thanks for sharing your work.
|
|
Fossilman
Cave Dweller
Member since January 2009
Posts: 20,676 
|
Post by Fossilman on Jan 3, 2019 16:37:38 GMT -5
Nice work.... After I got my light box, it was like night and day with my photos of cabs...
|
|
julieooly
Cave Dweller
Member since October 2018
Posts: 714
|
Post by julieooly on Jan 3, 2019 18:38:45 GMT -5
Thanks all again, as for the aluminum scribe I have a silver and a gold. Maybe with more experience I can ditch the sharpie but for now it really helps.
Any comments on using Iphone with the lightbox? I've been told that it can take pretty decent pics after you edit them? I'm really "in the dark" on this subject!
|
|