Post by adrian65 on Jun 9, 2008 11:39:35 GMT -5
ADMIN EDIT - repaired broken images - original code below
---------------------
Hi, everyone!
Today i took a piece of jade that I got from Tony - Nephrite. That piece simply told me "it's my turn" and i started to work at it. while working, I took step by step pictures because some of the members were interested about how i do these groove wraps.
So here it is:
That's the piece of jade: an end cut. I like end-cuts as much as slabs.

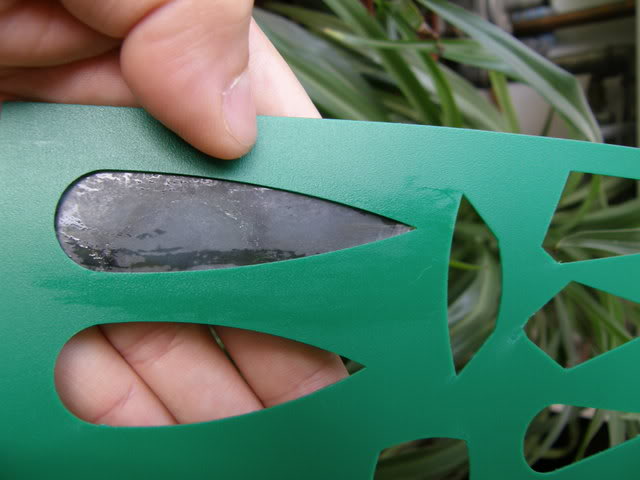
I know jade is a pretty good material, so I went for a slim shape:
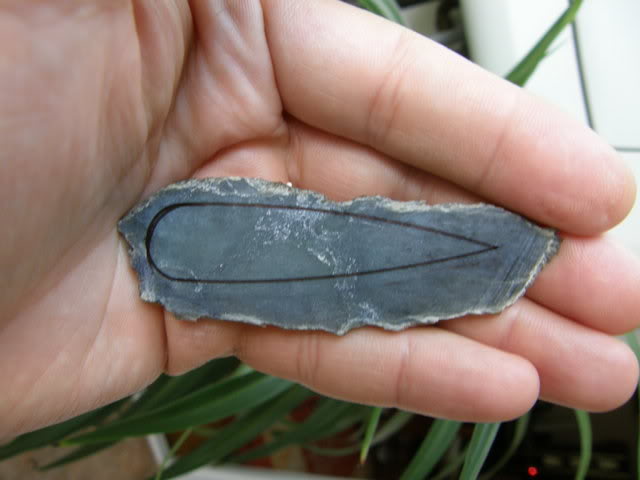
Then I cut the contour with the trim saw:

Then grinded the contour to the final shape:

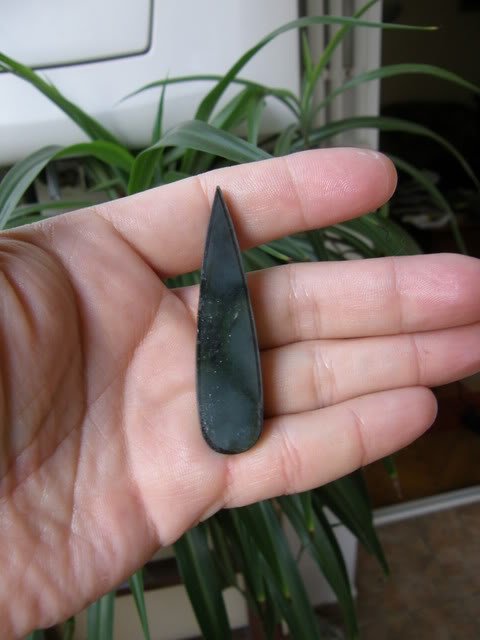
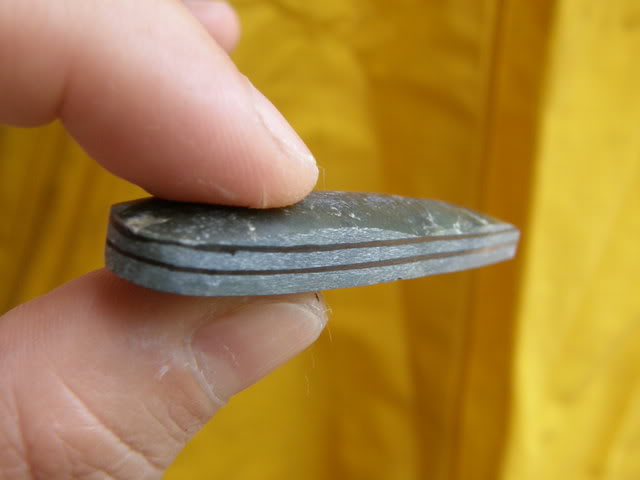
Now, after that, if it was a classic cab cut from a normal slab, I would had drawn a single line on the middle of the thickness of that slab. But as you see in the pic below, the thickness of the contour was not constant in this case so I had to draw an upper line that marks the minimum thickness of the border. This line would be the baseline of the dome. After that I drew another line that divides the thickness in two equal parts. This one would be the groove.
Now I took my thin diamond disk and put it on the cabbing machine:

And then I cut the groove. I find useful to look at the guiding line just like aiming, using a single eye. Don't cut the groove too deep, the depth might be a bit smaller than the diameter of the wire you will use. The picture is taken while the machine is not working. Hold the cab with both hands and cool with water.

I know this operation seems to be the most difficult, and in fact it is, but it's not as difficult as it seems. Start practicing with rather common rocks, having uniform toughness. Toughness changes would lead you to groove depth changes.
So, here's the groove:

Then I grinded the dome of the cab to its final shape, using the second line as a guide-line.

Now it's time for some wire work: take a piece of wire. The length of the wire depends on what you have in mind to do at the top of the pendant. I like to keep it simple so my wire isn't too long:

Now bend the wire around the cab, into the groove. Make sure you mark somehow the wire to know in the future which is the right side and which is the left side. Even cabs that have symmetry must be marked this way, because there are small differences in groove's depth, shape, etc. I always bend the left end of the wire (looking at the face of the cab), because in Romanian we use the same word for "right" and for "straight".

Now take the cab with the wire inserted into the groove, tension the wire by hand and grind them together (I use the 400 pad for this, a fine file would also work), until the wire flattens at the level of the border of the cab. Remember I told you before that the depth of the groove is better to be smaller than the diameter. That's the reason.

During this job, a small part of the back of the cab broke away so I had to re-shape the bottom. The cab became even slimmer and I like it this way.
The next step is final grinding and polishing the cab on its sides and on the border.
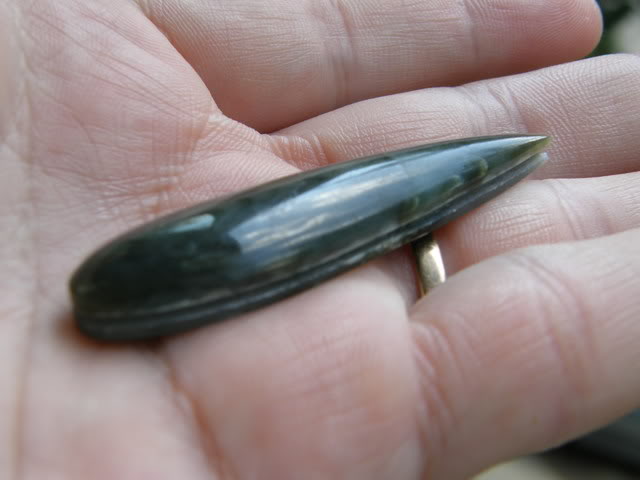
Now some more wire work:
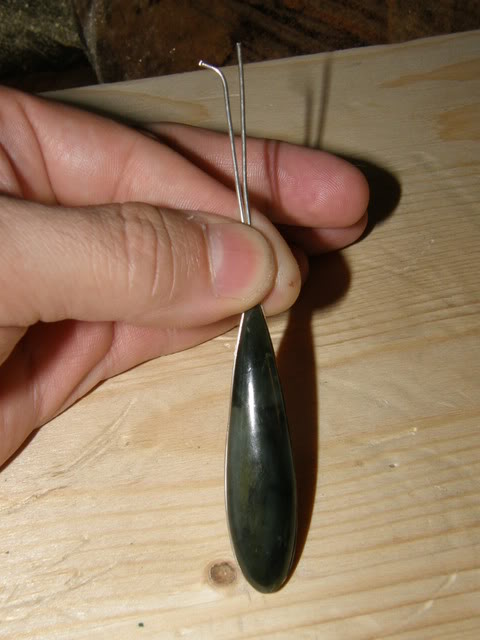
Take the wire and polish its outside (the side that was grinded before together with the cab). Do this either using the cab as a support, or something else. I polish it on that small anvil, as you see below. I use the smooth handles of a plier:
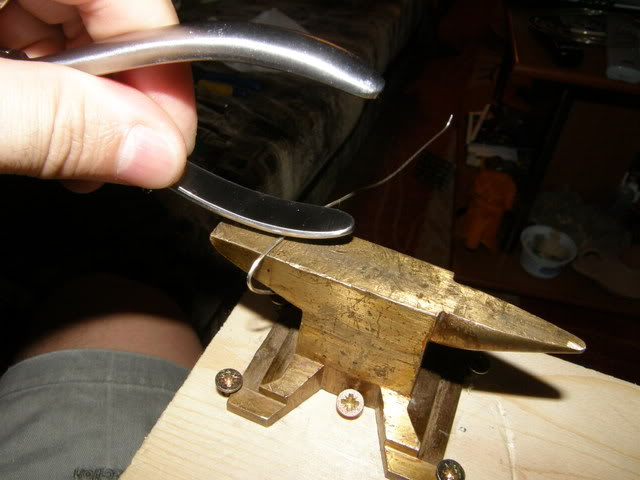
Now place again the wire into the groove and make the bail.

And it's ready
front views:


Side views:

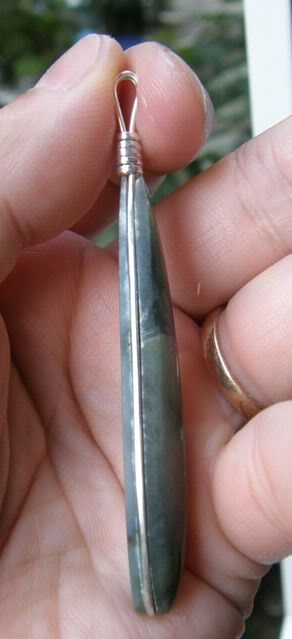
And back:

Thank you for looking. I hope you will find this tutorial useful and not too difficult to follow.
Good luck and have fun,
Adrian
---------------------
Hi, everyone!
Today i took a piece of jade that I got from Tony - Nephrite. That piece simply told me "it's my turn" and i started to work at it. while working, I took step by step pictures because some of the members were interested about how i do these groove wraps.
So here it is:
That's the piece of jade: an end cut. I like end-cuts as much as slabs.

I know jade is a pretty good material, so I went for a slim shape:


Then I cut the contour with the trim saw:

Then grinded the contour to the final shape:


Now, after that, if it was a classic cab cut from a normal slab, I would had drawn a single line on the middle of the thickness of that slab. But as you see in the pic below, the thickness of the contour was not constant in this case so I had to draw an upper line that marks the minimum thickness of the border. This line would be the baseline of the dome. After that I drew another line that divides the thickness in two equal parts. This one would be the groove.

Now I took my thin diamond disk and put it on the cabbing machine:

And then I cut the groove. I find useful to look at the guiding line just like aiming, using a single eye. Don't cut the groove too deep, the depth might be a bit smaller than the diameter of the wire you will use. The picture is taken while the machine is not working. Hold the cab with both hands and cool with water.

I know this operation seems to be the most difficult, and in fact it is, but it's not as difficult as it seems. Start practicing with rather common rocks, having uniform toughness. Toughness changes would lead you to groove depth changes.
So, here's the groove:

Then I grinded the dome of the cab to its final shape, using the second line as a guide-line.

Now it's time for some wire work: take a piece of wire. The length of the wire depends on what you have in mind to do at the top of the pendant. I like to keep it simple so my wire isn't too long:

Now bend the wire around the cab, into the groove. Make sure you mark somehow the wire to know in the future which is the right side and which is the left side. Even cabs that have symmetry must be marked this way, because there are small differences in groove's depth, shape, etc. I always bend the left end of the wire (looking at the face of the cab), because in Romanian we use the same word for "right" and for "straight".

Now take the cab with the wire inserted into the groove, tension the wire by hand and grind them together (I use the 400 pad for this, a fine file would also work), until the wire flattens at the level of the border of the cab. Remember I told you before that the depth of the groove is better to be smaller than the diameter. That's the reason.

During this job, a small part of the back of the cab broke away so I had to re-shape the bottom. The cab became even slimmer and I like it this way.
The next step is final grinding and polishing the cab on its sides and on the border.

Now some more wire work:

Take the wire and polish its outside (the side that was grinded before together with the cab). Do this either using the cab as a support, or something else. I polish it on that small anvil, as you see below. I use the smooth handles of a plier:

Now place again the wire into the groove and make the bail.

And it's ready

front views:


Side views:


And back:

Thank you for looking. I hope you will find this tutorial useful and not too difficult to follow.
Good luck and have fun,
Adrian
[img]http://i155.photobucket.com/albums/s308/adrian65prd/P6091047.jpg[/img]
[img]http://i155.photobucket.com/albums/s308/adrian65prd/P6091048.jpg[/img]
[img]http://i155.photobucket.com/albums/s308/adrian65prd/P6091049.jpg[/img]
[img]http://i155.photobucket.com/albums/s308/adrian65prd/P6091051.jpg[/img]
[img]http://i155.photobucket.com/albums/s308/adrian65prd/P6091054.jpg[/img]
[img]http://i155.photobucket.com/albums/s308/adrian65prd/P6091055.jpg[/img]
[img]http://i155.photobucket.com/albums/s308/adrian65prd/P6091058.jpg[/img]
[img]http://i155.photobucket.com/albums/s308/adrian65prd/P6091060.jpg[/img]
[img]http://i155.photobucket.com/albums/s308/adrian65prd/P6091062.jpg[/img]
[img]http://i155.photobucket.com/albums/s308/adrian65prd/P6091063.jpg[/img]
[img]http://i155.photobucket.com/albums/s308/adrian65prd/P6091068.jpg[/img]
[img]http://i155.photobucket.com/albums/s308/adrian65prd/P6091064.jpg[/img]
[img]http://i155.photobucket.com/albums/s308/adrian65prd/P6091065.jpg[/img]
[img]http://i155.photobucket.com/albums/s308/adrian65prd/P6091066.jpg[/img]
[img]http://i155.photobucket.com/albums/s308/adrian65prd/P6091069.jpg[/img]
[img]http://i155.photobucket.com/albums/s308/adrian65prd/P6091071.jpg[/img]
[img]http://i155.photobucket.com/albums/s308/adrian65prd/P6091076.jpg[/img]
[img]http://i155.photobucket.com/albums/s308/adrian65prd/P6091077.jpg[/img]
[img]http://i155.photobucket.com/albums/s308/adrian65prd/P6091081.jpg[/img]   [img]http://i155.photobucket.com/albums/s308/adrian65prd/P6091083.jpg[/img]
[img]http://i155.photobucket.com/albums/s308/adrian65prd/P60910791.jpg[/img]   [img]http://i155.photobucket.com/albums/s308/adrian65prd/P6091079.jpg[/img]
[img]http://i155.photobucket.com/albums/s308/adrian65prd/P6091080.jpg[/img]


