Post by sitnwrap on Apr 16, 2009 9:30:55 GMT -5
Wolfden asked if I could do a "how to" on a bracelet and this is what I came up with after learning how to format a tut from Randy's tutorial.
Honestly, now I realize just how much effort and time Randy put in that tutorial.
You will need:
Needle nose pliers
Flat nose pliers
Plastic flat nose pliers to straighten wire or just run your fingers along the wire to straighten it
Flush cutters
Small file
Bracelet mandrel (cuff shaped) If you don’t have a mandrel, another option is suggested in the tut when it comes time to shape the bracelet.
Wire:
For cab:
22g
You can use dead soft or half hard
Measure the amount of wire you normally would to
wrap a cab then add 1 ½ inches more to the length.
Cut three of these lengths then cut the lengths in half
So you have six strands of wire. (see cab in the 2nd pic below)
Wire:
For bracelet band:
2 lengths 16 ½ inches 22g half hard
4 lengths 8 ¼ inches 22g half hard
Wire:
For clasp hook:
2 strands of 22 g half hard 3 inches long
Wire:
For bindings
½ round for the bindings. I use 22g and I think it is dead soft. Half hard
is fine also. I have no idea how much ½ round is used to make this bracelet
so have 4 feet available.(that is probably way over what is needed)
This is the bracelet I made a couple days ago and I just kept taking pics as I went.. Select a cab that looks good on the wrist.
Round or rectangle would be the best shape for a first bracelet.
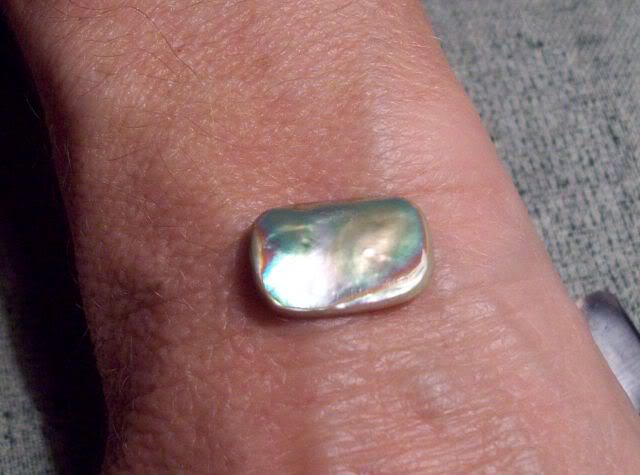
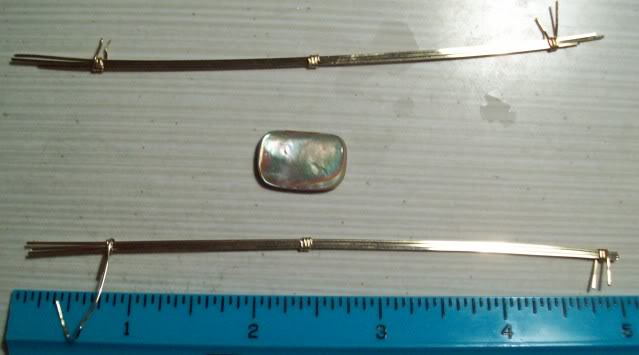
Take 3 strand of your cab wire and bind in the middle and do the same for the other 3 strands. Bind at the ends also to keep
The wire straight. You can use tape but I like using scrap ½ round.
Shape the bound strands to each side of the cab. Notice where the two bundles meet, I have slightly bent so that they meet neatly (kind of) And will not cross each other.
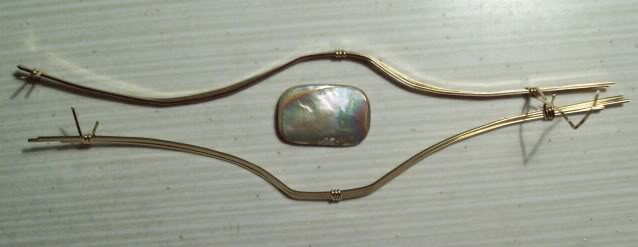
Bind the two bundles at each end. It does look messy but there is a lot of adjusting when the cab is in so don’t worry too much about how it looks, you are just making the general frame. I also bent the back wires with my fingers and fingernails to a shape that I know will hold the stone in place. I don’t use pliers. Use pliers if that is what you are use to

Once the stone is securely framed and wrapped (though a bit messy looking) set it aside.

Now take the two 16 ½ inch lengths of wire. Find the middle and measure 1/8 inch on either side of the middle. Start binding the strands at the 1/8 inch mark on one side and continue binding until you reach the 1/8 inch mark on the other side of the middle. This will give you a ¼ inch “bar” that will receive the bracelet hook.
(I chose to twist one 16 ½ inch strand with my screw gun for this bracelet but if this is your first bracelet, it will be easier to keep both strands plain)

Holding onto the wire by the binding bar, you will bend one strand at a time to a right angle. The first strands you bend will be the inside wire. The second strands will be the outside wire. When bending, take care not to twist the wire. Also be very careful and make sure that when bending the second strand up against the first strand it does not cross each other at the bend
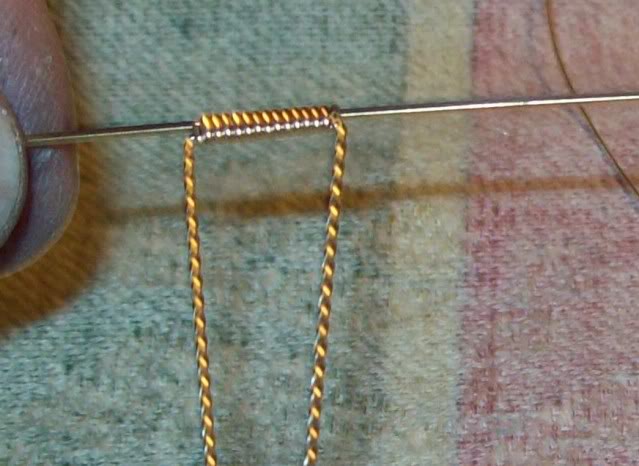
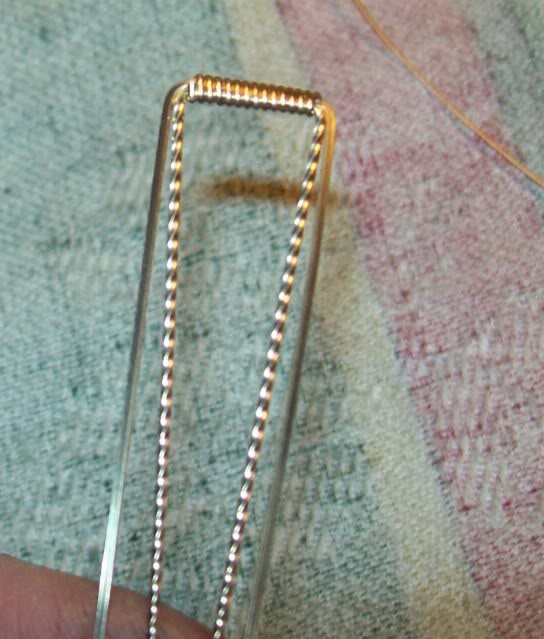
You will need to make a slight bend about ½ inch up from the binding bar with each wire on either side. This will give a slight triangle look.

Now take your 4 strands of 8 ¼ inch wire and align them inside the frame wires and bind them all at that slight bend. Make sure the ends of the four wires are touching the very end of the frame where the binding bar is as this gives extra length that you will need later. ****make certain that the cut ends of the binding bar are on the same side as the cut ends of all your bindings. As that will be the back side of the bracelet****

Keep the wires straight by using tape. I happen to use scrap ½ round.

Now I set the bracelet aside and go back to the cab and finish wrapping it. Wrap it however you want but keep in mind that the wire should stay tight to the cab and/or the bracelet to minimize them catching on clothing or anything else. You must not use the last two back wires on either side of the cab and at either end of the cab as these wires are necessary to secure the cab in the bracelet.


I take the bracelet at the middle spot and gently separate the wires to see a space in the center but take care not to put a bend or crease in these wires.. This is where I will place the two back wires of the wrapped cab. Also at this point you will need to take off the tape that kept the wires straight. Only take off the inner two. Leave the binding tape at the end of the wires in place.

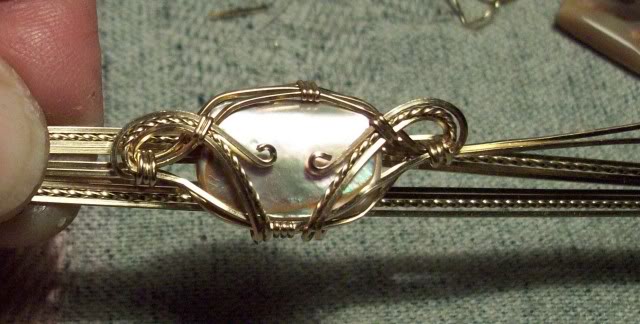
Now bind all wires together. You will need to wrap the binding around at least 4 or more times to ensure that the cab wires stay flush with the bracelet wires and not pop up and sit on top of the bracelet wires.

Do the same for the other end of the cab wires. If you need to, use your flat nose pliers to get the cab wires nice and flush with the bracelet wires.

Once bound, you can gently slide the bindings up tight against the wrapped cab. Ignore the bent wire for now just note the binding placement in this next pic.
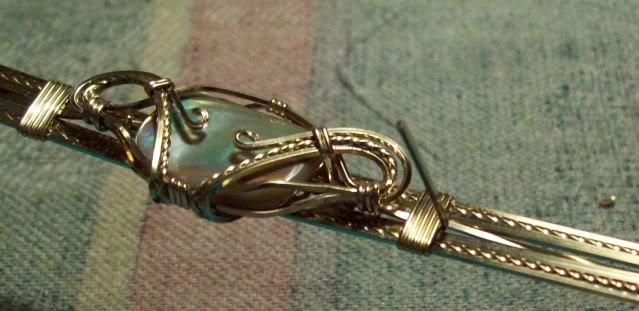
The ends of the cab wires will probably be poking through the back of the bracelet. These wires need to be brought up and out as they will be cut short and bent up against the binding on the front side of the bracelet (continue reading before this step)
Back of bracelet

I had to use a sewing needle and thread so I could wrap the thread around the wire and pull that wire up and out since there is really no room between the wires.

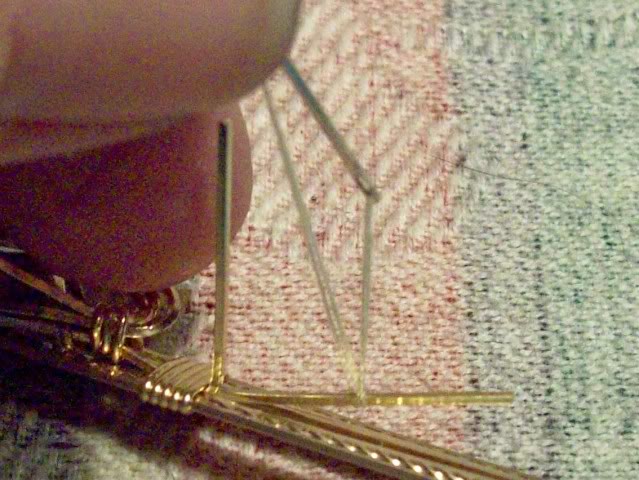
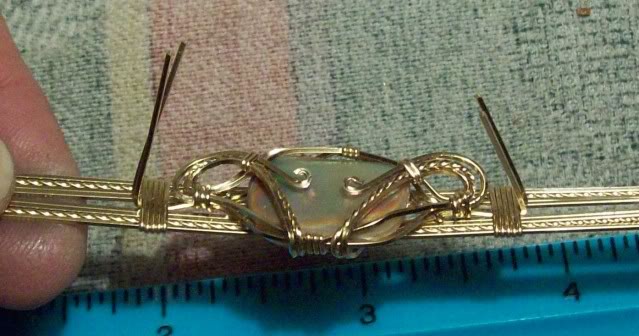
The idea is to cut the two wires evenly, file them slightly to smooth any sharp edges, then bend them over against the binding wire. Do this for both sides of the cab.


Double check that the middle of the cab sits at the middle of the bracelet. This bracelet is going to be 7 ½ inches so the middle is at 3 ¾ inches. Although the cab is bound to the bracelet, if it is off center you should be able to gently slide the entire unit including the bindings.

It’s time to bind the other end and make the loops that you will use to attach the clasp. Since the triangular end took up ½ inch, and my bracelet is to be 7 ½ inches, I bound this end at just under the 7 inch mark.

This pic is just so you can see the measurements and to note where the right side bindings are placed in relation to measurement. Ignore the finished end as we haven’t got to that part yet.

Make certain that the two outside strands are left alone. Bend the inner strands towards the bindings,(you may need the threaded needle to grasp and pull the wires, especially the wires that are at the end where the triangle is) clip the wires short, file to smooth the ends of the wires and bend them up against the bindings. I chose to bend two of the wires towards the front of the bracelet on both ends of the bracelet and curled them to decorate the bindings a little. The rest were bent towards the backside of the bracelet.

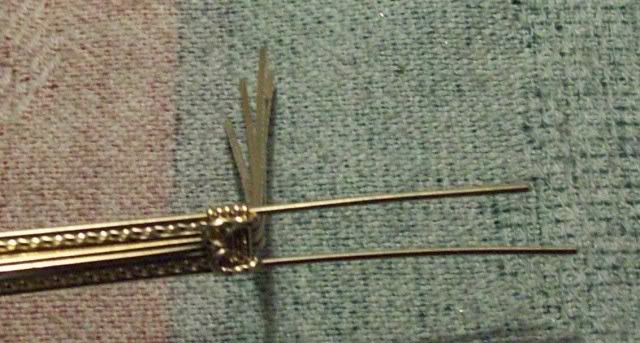

I did the same with the wire at the other end of the bracelet where the triangle is. Front and back pics 5368, 5369


Notice that the length of the outside wires extend ½ inch from the binding. These two wires need to be spread slightly and then curled inward with your needle nose to make the loops. Start the loops at the wide end of your needle nose so that the loops are large enough. I then bound the inner part of the loops so that they stay in place plus it gives the loops extra strength. Make sure you clip the ends of this binding so that the ends are on the backside.
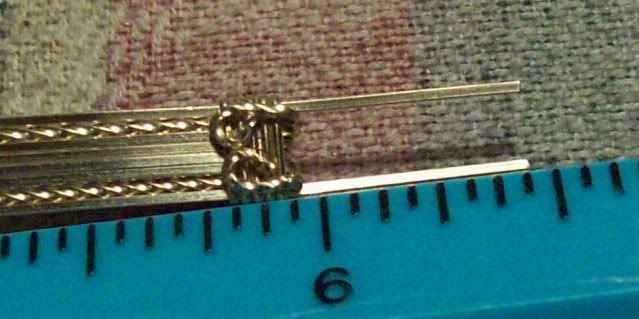

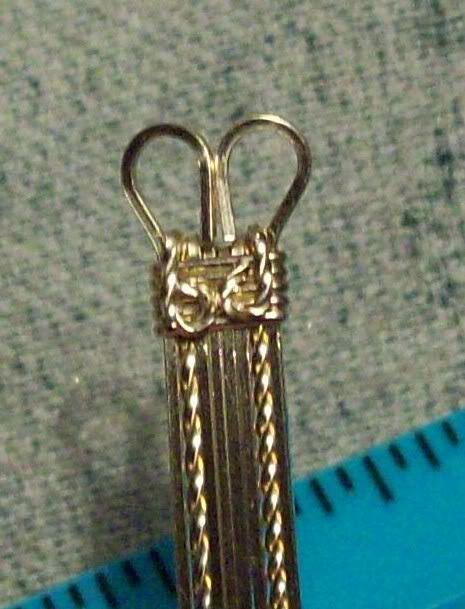

The actual hook will come later but now the bracelet is ready to be shaped. (I know, you already saw this pic. lol)

The shaping has to be gradual so start at the largest end of the mandrel and work the bracelet down. If your mandrel is a gradual like mine, as you work your way down, don’t forget to continually flip the bracelet so that it stays even. If you don’t continually flip, the bracelet will come out angled. When I first started making bracelets, I did not have a bracelet mandrel so I used different sized glasses, cups and anything else that was round and strong and it worked fine, the trick is to find several round things that will shape it gradually. You can also create a C with your hand and thumb and gently shape each side by applying gentle gradual pressure with your hand. This will work but only after you have made an initial curved shape with something round.
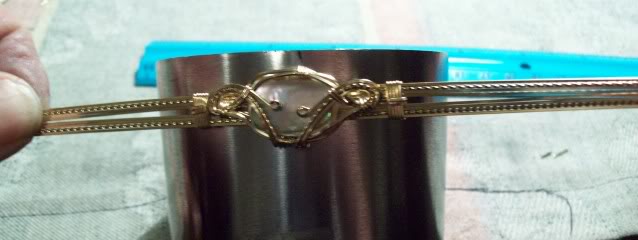
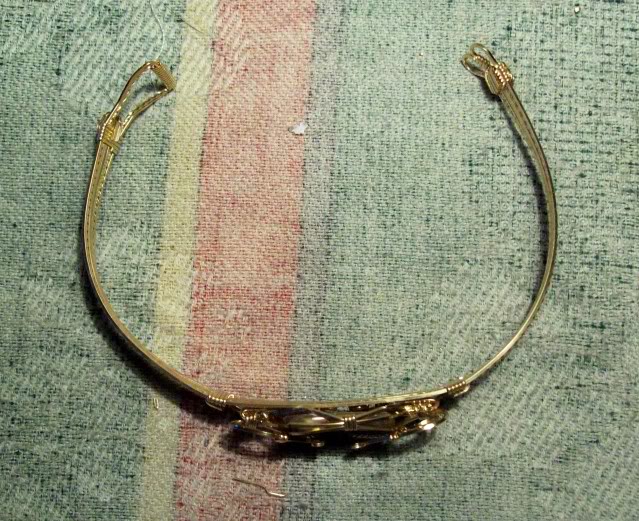
Now to make the hook. The pics are pretty descriptive by themselves. I included the ruler so you know the measurements. Just remember, when you bind the two wires together, the clipped ends will determine the back side of the wires. When you curl with your needle nose to make the hook, the side with the clipped ends should be facing down and when you curl the ends to make the loops that will attach to the bracelet, leave a little space so you can attach it to the bracelet.
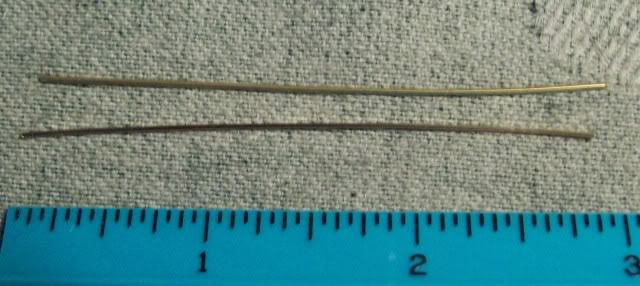
note that I only wrapped twice around the wires

this is the backside of the hook where the ends are clipped.


front side of the hook

use the large end of your needle nose pliers to make this hook
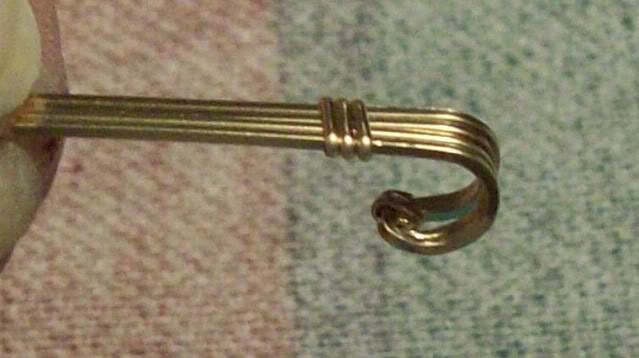
spread the wires

clip wires evenly and file the ends to make sure there are no sharp edges. Notice the length of the clasp on the ruler.
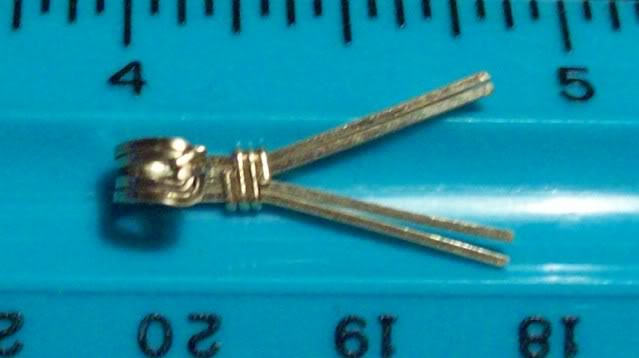
The hook is curled down so you want the ends to curl up. When you curl the ends with the needle nose pliers, you will do each side separately but when you curl one side, you want to grasp both wires on that side at about the middle or a little higher on the pliers so the loops are not tiny and curl both wires at the same time. Leave some space so you can attach it to the bracelet. Also, curling the second side is a little bit of a pain because the first curl you made will be in the way. (I held the hook with my bent nose pliers as my fingers were getting in the way when I was taking the pic

Attach the hook to the bracelet making sure the curl of the hook faces the inside of the bracelet. Then close the spaces of the curls that are attached to the bracelet with your needle nose pliers.
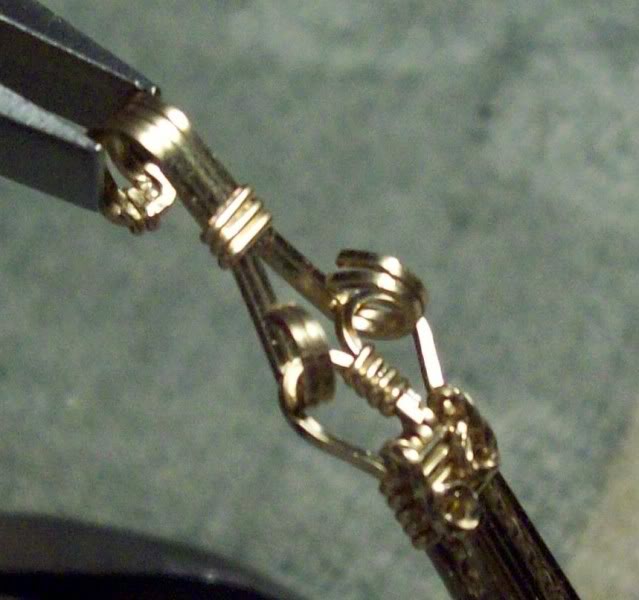
You will probably need to shape the bracelet a little more but make sure that there is tension when you clasp the bracelet together.
The end result should look something like this

Well, I think that is it. I hope I didn’t forget any steps and that it is easy enough to follow. If you have any questions feel free to ask and as always, thank you for looking.
Lori


