mwv
off to a rocking start

Member since February 2011
Posts: 18
|
Post by mwv on Feb 20, 2011 21:03:48 GMT -5
Hey All!
I am new to the boards here and was hoping someone could provide some advice on a water drip setup and drainage setup for me. I recently purchased a Rock Rascal (Model T6) with the grinding wheel. It has a spot on top of the wheel you can remove to allow for a drip setup, as well as a spot on the front for drainage.
I am just struggling in where to start. I haven't seen any kits made for the Rock Rascal (although maybe I am searching the wrong terms), and I have never put a drip or drainage setup together. I am really looking for any help (ie, Step-By-Step / For Dummies) that anyone is will to share.
Thanks in advance!!
MWV
|
|
|
|
Post by jakesrocks on Feb 20, 2011 21:18:26 GMT -5
A drip system isn't hard to set up. Most of the fittings can be gotten at your local hardware store. You just need a small valve and tubing, and some sort of container to sit above your grinder on a shelf. Punch a hole big enough for the tubing in your container near the bottom, and use silicon sealer to hold and seal around the tubing where it fits into the container. For the drain, just a piece of plastic tubing squeezed through the drain hole, and running to a bucket under your work bench will do.
Don
|
|
mwv
off to a rocking start
Member since February 2011
Posts: 18
|
Post by mwv on Feb 20, 2011 21:24:09 GMT -5
Hi Don! That is fantastic!! I was hoping it would be this easy and straight forward. I appreciate the quick response too!!
MWV
|
|
NDK
Cave Dweller 
Member since January 2009
Posts: 9,440
|
Post by NDK on Feb 20, 2011 22:07:58 GMT -5
Welcome to the board MWV. Ice maker kits also work wonderfully for the drip set up. I used a coffee can (or would they now be called a tub because they're plastic?  ) for the water resivoir. Enjoy the cabber, and be sure to post lots of pix! Nate |
|
mwv
off to a rocking start
Member since February 2011
Posts: 18
|
Post by mwv on Feb 20, 2011 22:43:33 GMT -5
Thanks Nate! I like the ice maker idea too! I'll have to see what is easily available around near me. I will also be sure to post some pics once I get started!! Thanks again!!
MWV
|
|
|
|
Post by deb193redux on Feb 20, 2011 23:27:14 GMT -5
the galss jars with spicot for ice tea can be a good water source, it already has the valve. Or you can put a valve of sorts on a plastic bucket. run rubber tubing down, ending in 1/4" OD tubing. This will fit into the hole on top of the wheel
the drain is trickier. if the size hole is right, it will take threaded pipe, you can insure it with plumbers putty, and you can screw a ball valve on the pipe, then run tubing down into a bucket/drain.
let me know if you want pics
|
|
drjo
fully equipped rock polisher
 Honduran Opal & DIY Nut
Member since May 2008
Posts: 1,581
|
Post by drjo on Feb 21, 2011 7:22:07 GMT -5
Welcome mwv. You've got yourself a great little system there. Air valves www.aquariumguys.com/twowayvalve.html for aquariums work well for this as do the tubing www.aquariumguys.com/airlinetubing7.html (silicone doesn't kink). and connectors www.aquariumguys.com/airline-control-kit.html . Use atleast a 2:1 container ratio, ie 1 gallon fresh water : 2 gallon waste (no over-flowing). The ice maker adapter is great for a constant flow. You can also use drip irrigation system parts, ie pressure regulator. tubing, connectors. Or bits and pieces from all of them ;D. Then there's the pre-made systems too... Overhead Water System #075-097 - $37.50 www.lortone.com/arbors.html 2 at the bottom.Good luck, can't wait to see pix of your setup and the final products  . Dr Joe . |
|
mwv
off to a rocking start
Member since February 2011
Posts: 18
|
Post by mwv on Feb 21, 2011 8:58:10 GMT -5
Thanks Dr. Joe!
I am hoping to make a trip out after work today to try and find most of the things I will need. Hopefully I will have my full setup done by early March (still waiting for some things to get delivered from eBay and Covington).
I have to admit that I am very touched at how helpful and encouraging folks seem to be here! I promise to post pics as soon as everything is ready to go! Thanks again!!
MWV
|
|
keystonecops
freely admits to licking rocks

Member since October 2010
Posts: 957
|
Post by keystonecops on Feb 21, 2011 16:33:12 GMT -5
You can also use a spray bottle that you use for the yard. Cut the fancy handle off and run tubing from water valve. You can pump it up and have a pressurized set up versus a drip. I did this on my sander and its great> Ya get nuff pressure to take a shower if ya want LOL Later Clyde
|
|
drjo
fully equipped rock polisher
Honduran Opal & DIY Nut
Member since May 2008
Posts: 1,581
|
Post by drjo on Feb 21, 2011 18:16:15 GMT -5
Way to take up the slack keystonecops!!! I haven't used mine in a while and forgot about it. It's so much better than a bucket on a shelf.
Dr Joe
.
|
|
quartz
Cave Dweller
breakin' rocks in the hot sun
Member since February 2010
Posts: 3,341
|
Post by quartz on Feb 21, 2011 22:14:33 GMT -5
Or, you can do it like this; 3 1/2 gallon reservoir for our Diamond Pacific grinder. Wife wanted a timeout doll, we needed a water tank. Attachments:
|
|
Wolfden
fully equipped rock polisher
Member since November 2007
Posts: 1,368
|
Post by Wolfden on Feb 21, 2011 22:34:43 GMT -5
Welcome to the board .. I have the Rock Rascal (Model T6) also .. it uses a bath or reservoir system. why make a drip system? just fill the reservoir until the water level is 1/8 - 1/4 inch up the blade and start cutting. KIS keep it simple lol I refill when there is no water getting on the rock
Wolf
|
|
|
|
Post by Woodyrock on Feb 22, 2011 1:46:13 GMT -5
I mounted a riveted a small aluminium pot on a pieces of mild steel flat bar, drilled, and tapped the pot for 1/8 pipe, screwed a barb hose fitting, connected tubing to the wee valve on the Rascal to supply water. Woody 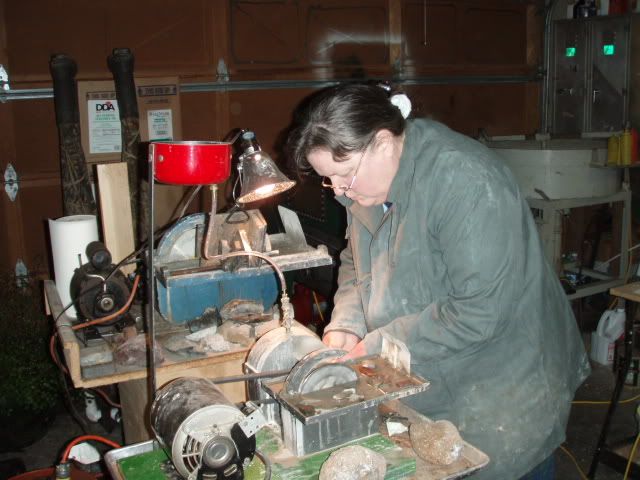 |
|
stefan
Cave Dweller
Member since January 2005
Posts: 14,095
|
Post by stefan on Feb 24, 2011 11:35:01 GMT -5
I attached a 5 gallon bucket to the ceiling joist of my basement. Simple brass comperssion fitting wrapped with teflon tape screwed right into the plastic bucket (drilled the hole in the bottom a bit small so the fitting was TIGHT) tubing connected to a tee then to the shut off valves in the hood of the grinder (this was all in place when I bought it). For a drain- again a simple brass angle connector (again threaded) hooked to silicon aquarium airtubing (no kink with silcon- plus it does not have coil memory like the cheaper vinyl does) that drains into a catch tub (actually a 2 pound salsa container I salvaged from the recycle bin).
|
|
mwv
off to a rocking start
Member since February 2011
Posts: 18
|
Post by mwv on Feb 25, 2011 12:17:42 GMT -5
Thanks everyone for the suggestions and ideas! I am hoping to get everything done this weekend and will post pics of my creation once it's done. Can't wait to get working!!!
MWV
|
|
mwv
off to a rocking start
Member since February 2011
Posts: 18
|
Post by mwv on Feb 28, 2011 21:17:44 GMT -5
As promised, after I finished setting everything up I took some pictures and posted them on my blog. If you want to see my handy work (or lack there of), please check out my blog at: www.myboxofrocks.com/Thanks again to everyone for their help and suggestions!! I can't wait to get started!! MWV |
|
|
|
Post by jakesrocks on Feb 28, 2011 21:52:50 GMT -5
That'll work. Only a couple of things I see wrong.
#1 -- Your shop is much too clean.
#2 -- Your shop is much too organized.
What ? Ya trying to make the rest of us look bad ? lol
Don
|
|
juzwuz
has rocks in the head
Member since April 2010
Posts: 526
|
Post by juzwuz on Feb 28, 2011 23:24:36 GMT -5
Nice setup! I noticed that you bought some Las Choyas Solid Coconut Geodes from ebay. I was looking at the same auction and I was just wondering what you thought of the geodes? Thanks!
|
|
mwv
off to a rocking start
Member since February 2011
Posts: 18
|
Post by mwv on Mar 1, 2011 8:53:25 GMT -5
Hey All,
Don - LOL...well I haven't really started working just yet, so give it time, I am sure I can get it nice and dirty and much less organized if I try!
juzwuz - yes, I won an auction a little while ago, but I haven't been able to get around to opening them yet. I don't have the chisels and hammer that I need to crack them open (unless anyone has other suggestions - I am always looking to learn!). As soon as I get one or two open I will post some pics.
Thanks!!
MWV
|
|
|
|
Post by jakesrocks on Mar 1, 2011 8:58:48 GMT -5
Oh please don't crack those geodes. Wait until you can cut them with a saw. Cracking destroys geodes.
|
|


 ) for the water resivoir.


 .
.


 Ribbbbit
 Drifting along with the tumblin' tumbleweeds