|
|
Post by catmandewe on Sept 30, 2013 11:08:47 GMT -5
Lookin Good!
That is the same paint I use also, it works good as long as you let it cure first.
Tony
|
|
panamark
fully equipped rock polisher

Member since September 2012
Posts: 1,343
|
Post by panamark on Oct 11, 2013 19:25:39 GMT -5
BTW, I got the Hammerite paint through Amazon. It was sold there by BIC Warehouse. Best price anywhere I could find, and they only charged about $6 to ship 2 quarts! And it came very quick. Highly recommend these guys.
|
|
panamark
fully equipped rock polisher
Member since September 2012
Posts: 1,343
|
Post by panamark on Nov 7, 2013 19:41:20 GMT -5
Got some more good work done. Purchased the pillow block bearings. Now to install them. Sounded simple, but what a hassle! We have a really good bearing store near here, so I took the old SealMaster bearing in. The guy said, "wow, that's old". He said he could order in a SealMaster but he showed me some similar IPTCI bearings that were MUCH cheaper and he said just as good. In my research it looks like they should function just fine. And they were about 1/4 of what SealMasters cost. Time to install. But first, a few problems. The base feet on the new bearings were just a bit too long to fit between the saw-squaring adjustment bolts. The new base was about 1/2" longer. 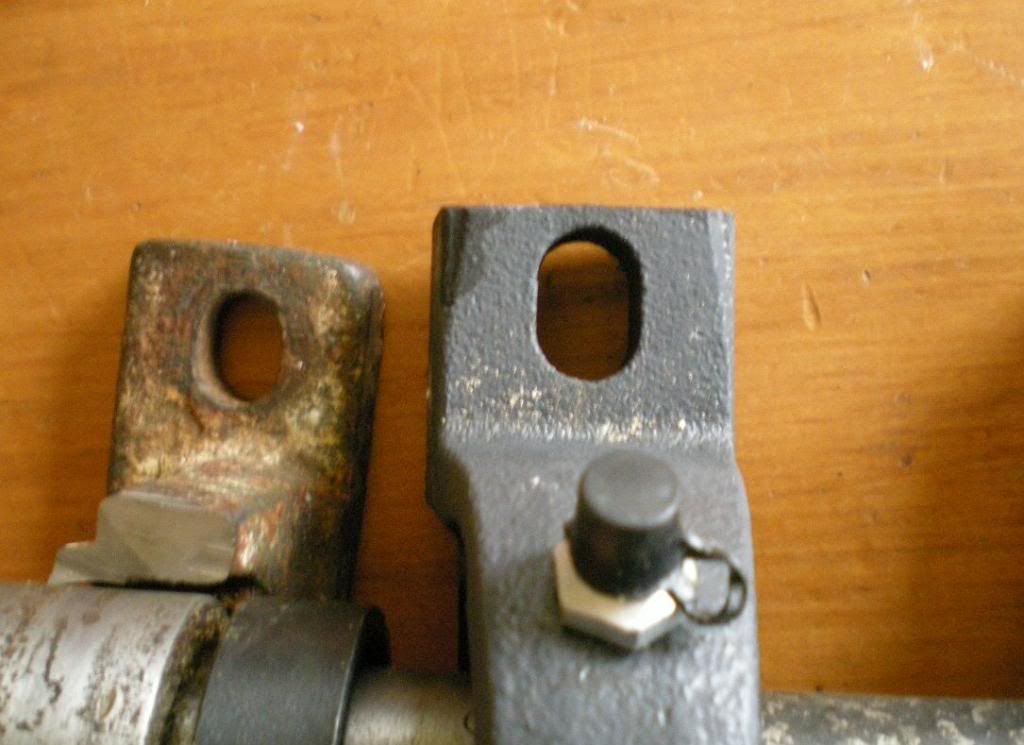 I maybe could have mail ordered a better fitting one, but the hole pattern matched the original perfectly and I didn't think it would be a big problem. All I had to do was cut 1/4" off each end right? Well, it was hardened steel and I didn't want to overheat the new bearing and its grease. So it turned out it was a VERY slow cutting process.  Sheesh! But I finally got it done and repainted. 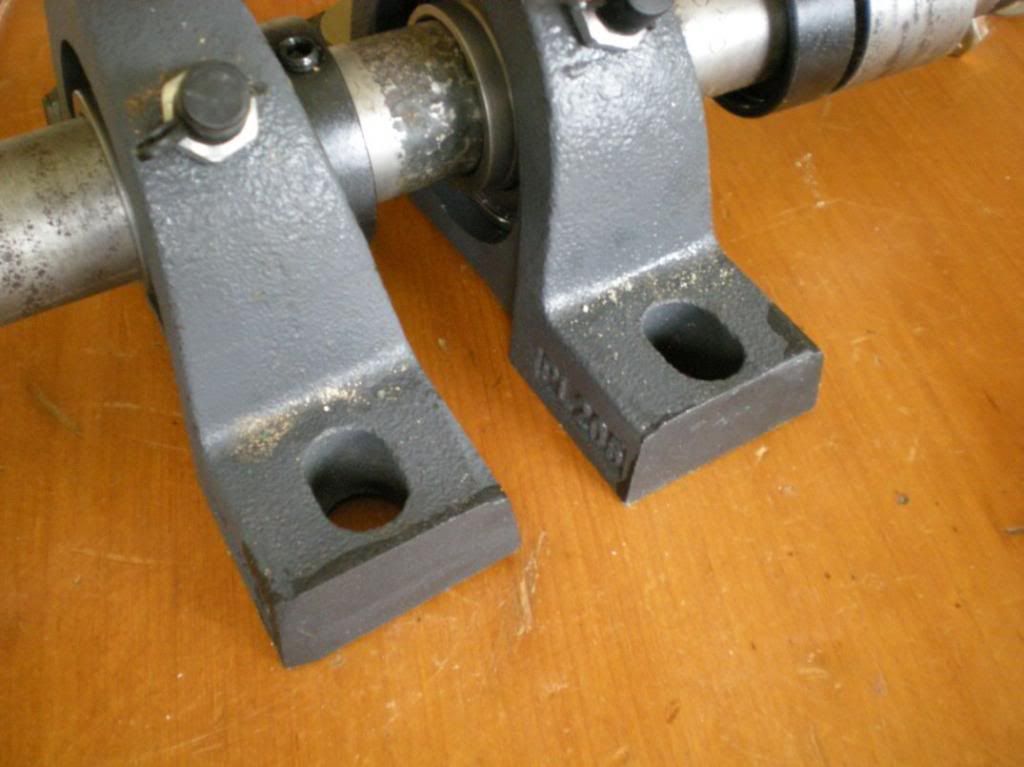 Then I installed them. You can see here the shaft alignment (blade-squaring) bolts that caused the fit problems. (Note everything is going to be "dry fit" on this part as I will be coming back, opening it up to square-up the saw blade to the carriage/vice. Therefore not all the bolts will be fully tightened.) 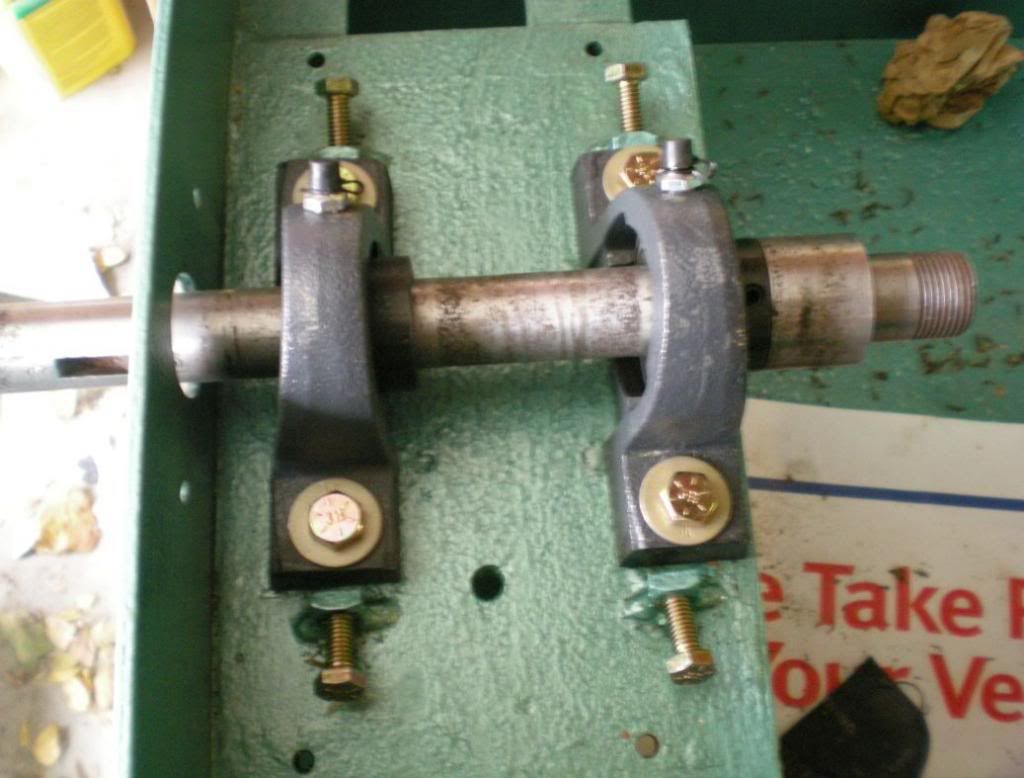 It is interesting that HP now uses a different system for fine adjusting the shaft alignment. I suspect my bearings would have fit fine unaltered in their new set up. Also HP now uses pillow block bearings with zerk fittings. (And I don't think they use SealMasters any more. Can anybody confirm??) I was unfamiliar why sealed bearings would have zerks, so I called. They said they are shielded bearings, not sealed, and that if one uses the correct grease and not too much, then it is much better to periodically grease them. I like this idea. Not only gets fresh lube, but it also helps flush out water/dirt contamination if you get some inside. Hopefully the hardest stuff was now over. But no! you silly man. HP wisely uses gaskets around the shaft and bearing cover to help protect the bearings from dirt, etc. As we saw, it didn't work too well on mine. Maybe because the back gasket was missing! So I made a new one out of neoprene from an old computer mouse pad. You can barely see the gasket between the tank and the aluminum bearing cover. 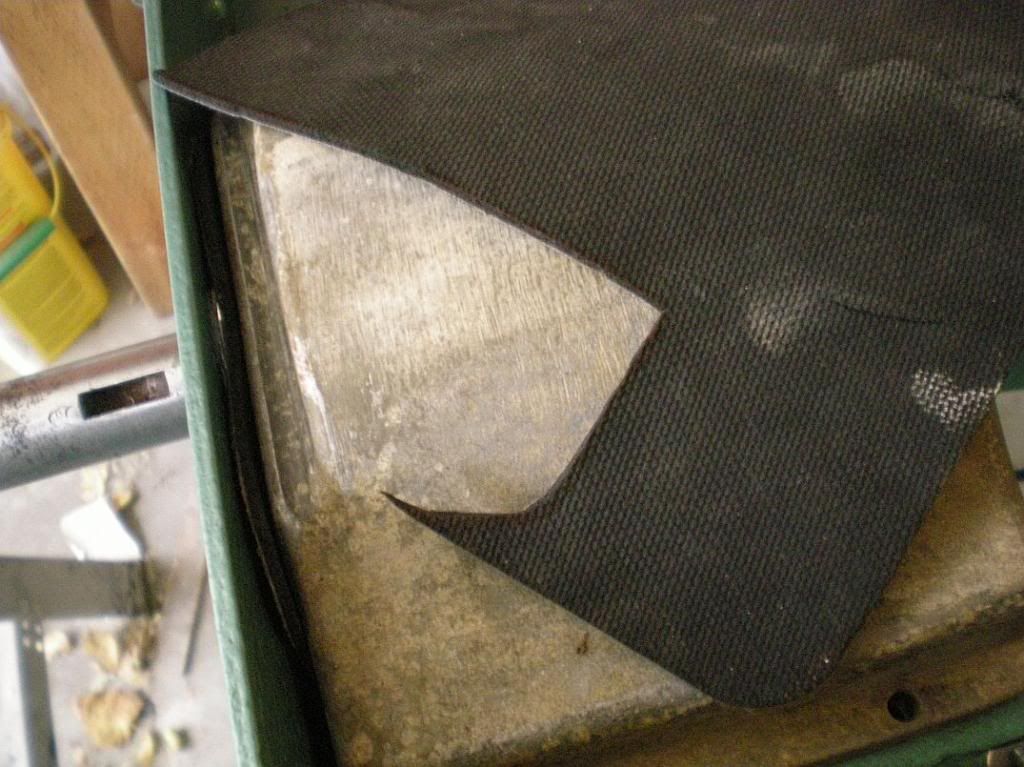 Then I went to install the front gasket and cover. For some reason, with the new bearings the shaft sits lower so it was no longer centered and the screw holes didn't line up. (The shaft it perfectly horizontal though, so no problem there) 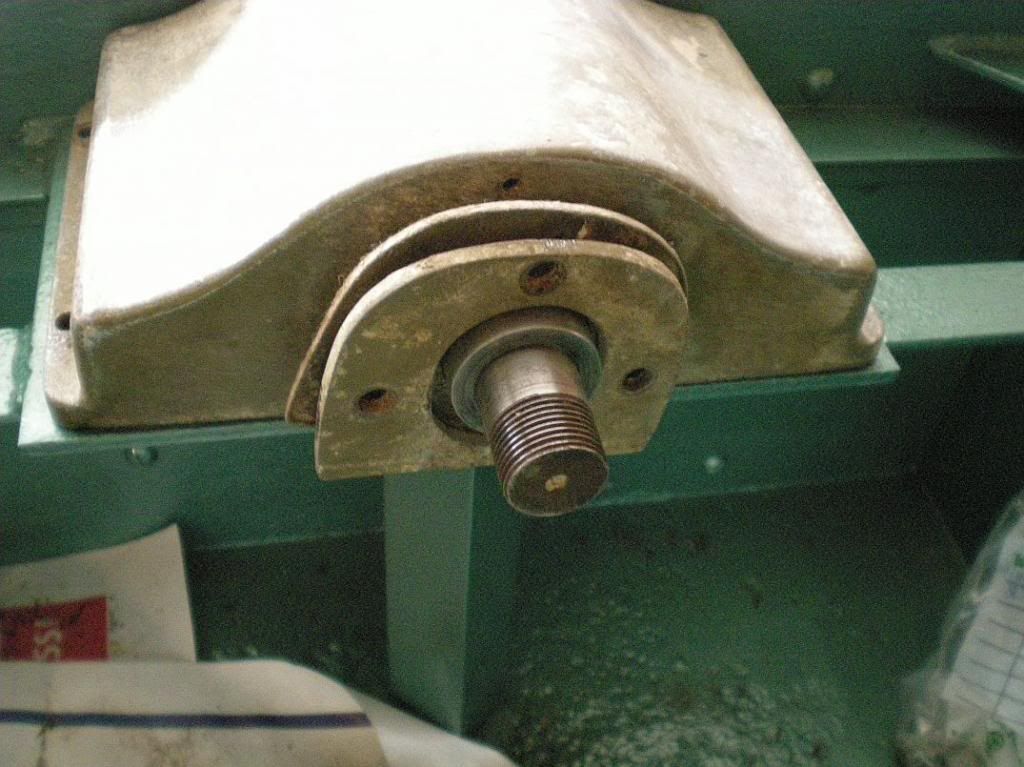 So I did a bit of modification. No, not "JamesP" style mod's. I just needed to drop the alignment a bit by adjusting some holes. 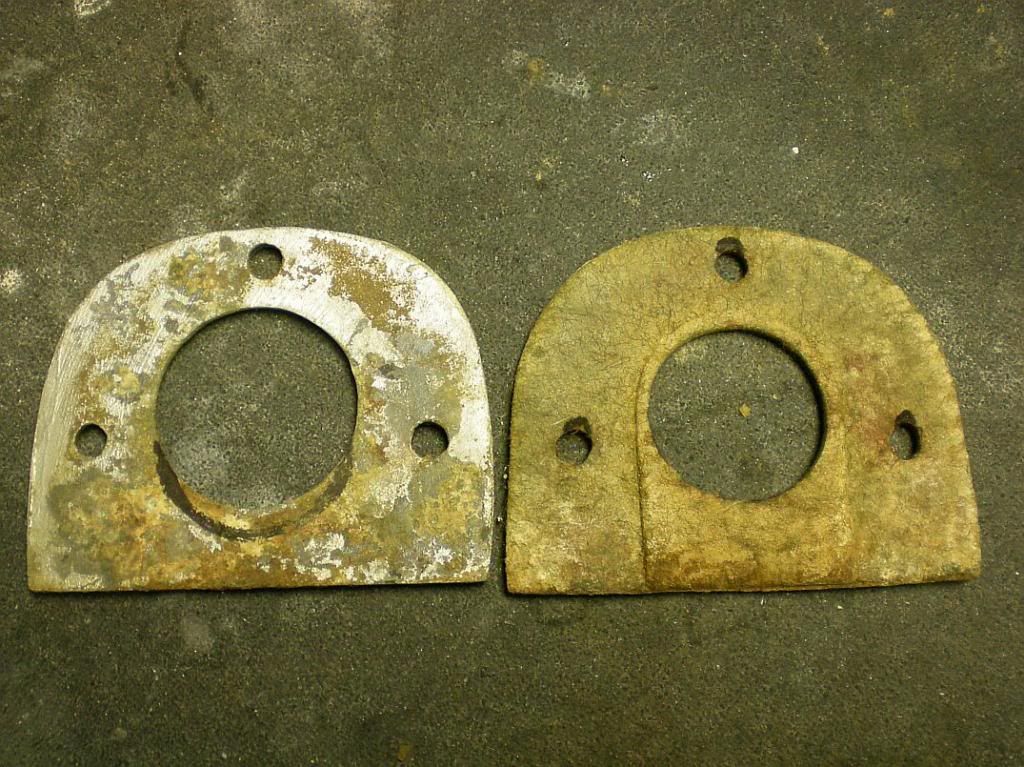 With just a little abuse of a saber saw blade I was able to cut the aluminum cover so the shaft was centered in its hole. 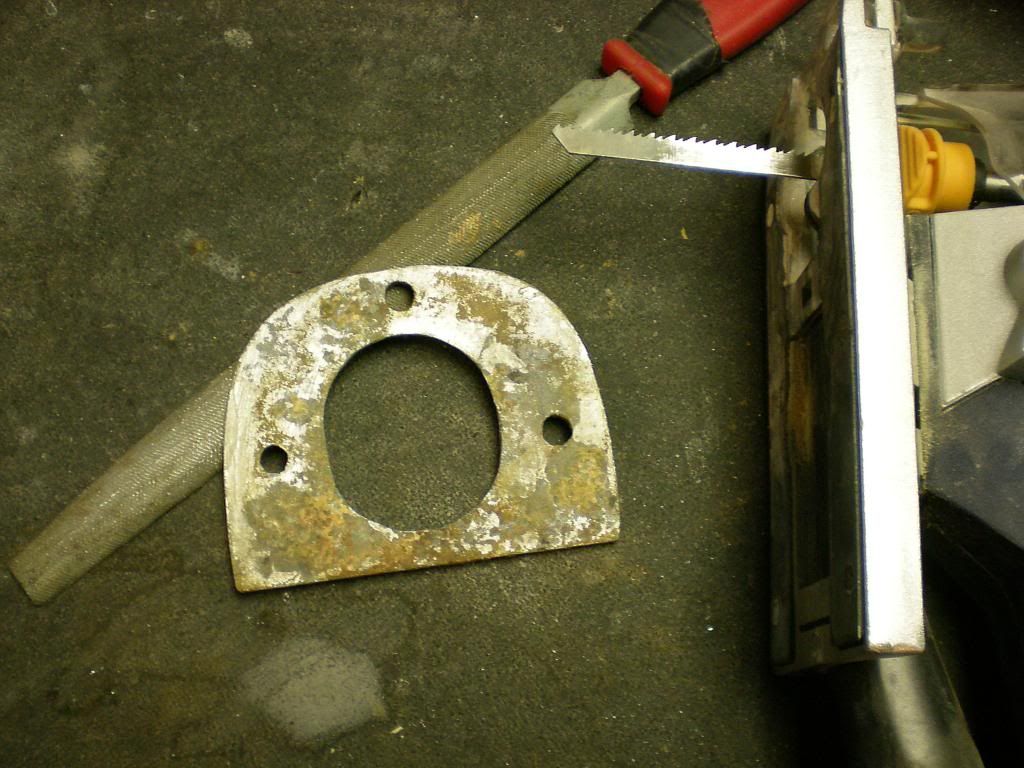 Then I had to recut the holes in the felt gasket. One could use a leather hole punch, but in this case a .270 case with the neck sharpened worked perfect.  Note that you want to get a quite tight fit of the gaskets to the shaft. I was able to gently pound on the felt gasket to make the slightly worn hole smaller, and tighter fitting. Now that the bearing and shaft assembly is done, I think the rest is just reassembly and will go quite fast. (except for the totally rusted screws that broke off in their holes and have to be drilled out and retapped.) 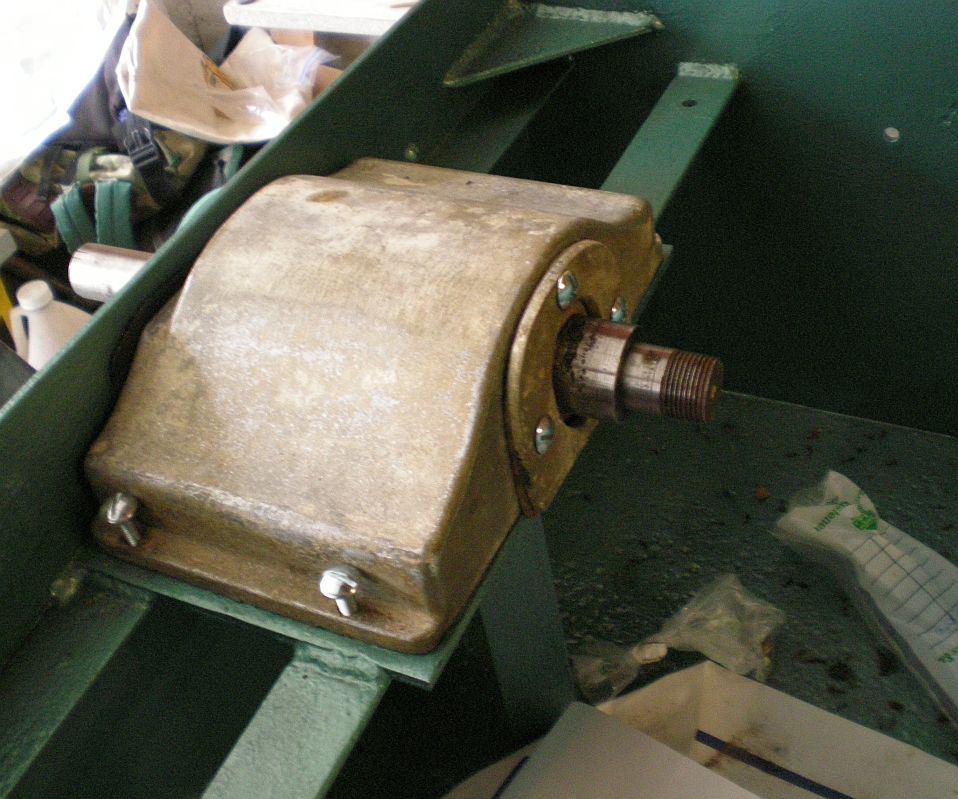 I put the arbor and saw blade back on to see what it looked like and I am really encouraged. It looked like a rock saw again! Hopefully not too much longer. Too bad the temps are in the teens now. Makes it hard to cut rocks, ha. I will post again when there is more progress. Thanks for watching. |
|
kaldorlon
spending too much on rocks

Member since October 2013
Posts: 413 
|
Post by kaldorlon on Nov 7, 2013 20:02:39 GMT -5
Very nice rebuild and almost there. Great job!
|
|
|
|
Post by DirtCleaner on Nov 7, 2013 21:00:12 GMT -5
Glad to see progress and thanks for the update.
|
|
panamark
fully equipped rock polisher
Member since September 2012
Posts: 1,343
|
Post by panamark on Sept 14, 2014 22:57:05 GMT -5
It took me over a year, but it is finally done!! Work got in the way, plus I have 2 other saws so it wasn't top priority. It was a real challenge, especially since I didn't have a similar saw anywhere nearby to look at when I got confused by the various pieces of rusty parts that belonged somewhere. But this one is now done and is número uno. These old HP saws are pretty impressive. When I last posted, I had just gotten the bearings and bearing housing finished. I thought the rest would be a breeze. Ha, ha. I hadn't noticed it before, but apparently the previous owner had a pretty major catastrophe with the carriage. One of the aluminum brackets that the carriage rails rest on had a bad crack in it. The owner had used JB Weld to "fix it". 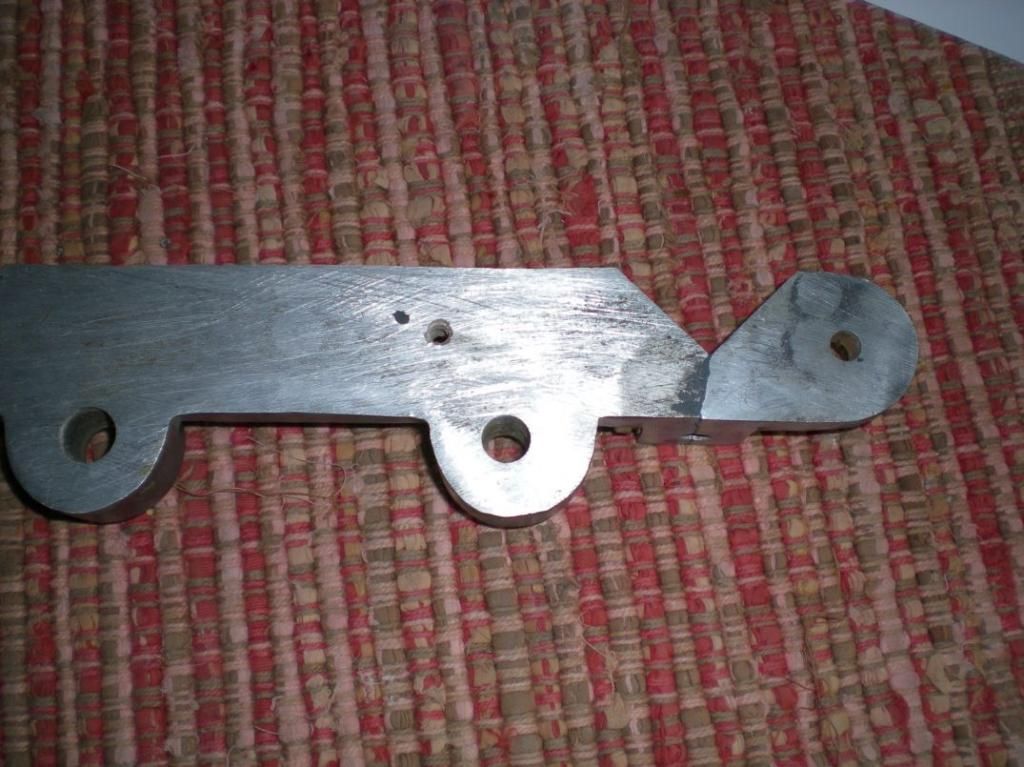 I wasn't going to trust my saw to that kind of fix. If the bracket let go while the saw was running it would be really bad. So I drilled and installed a strengthening bolt. This should hold fine. 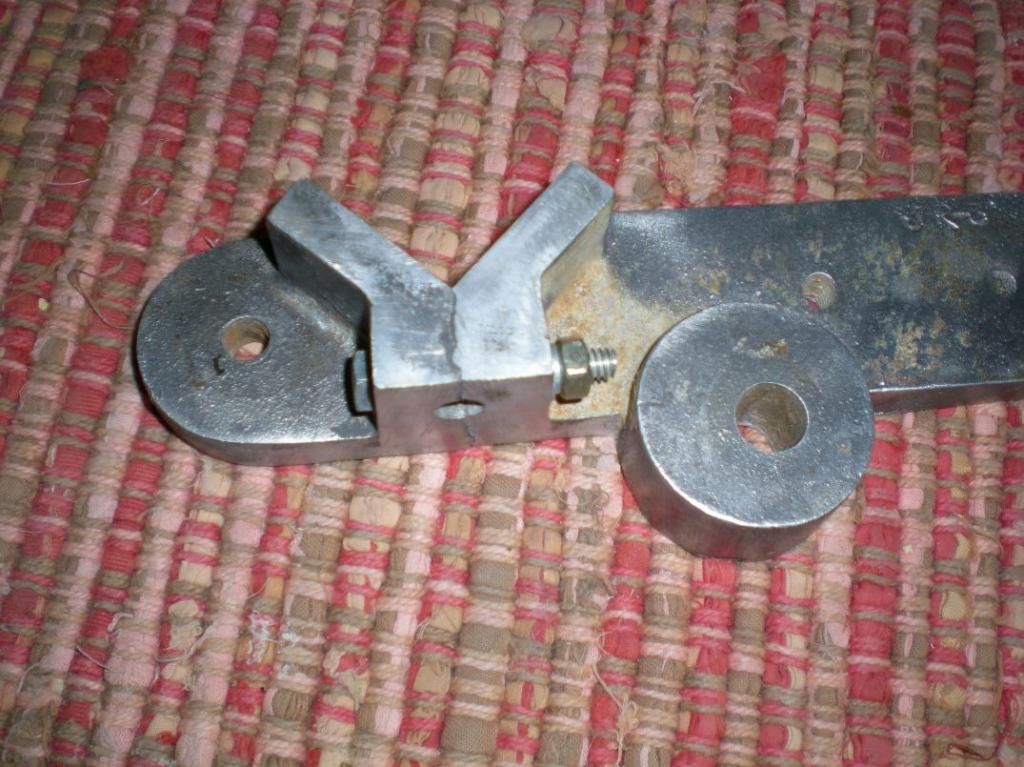  The next problem was the oiled bronze bushing that the auto-feed screw runs in. Perhaps this happened when the bracket broke, but anyway the hole was worn terribly out of round as you can see below. I was able to order a new bushing.. Luckily the feed screw is just fine. 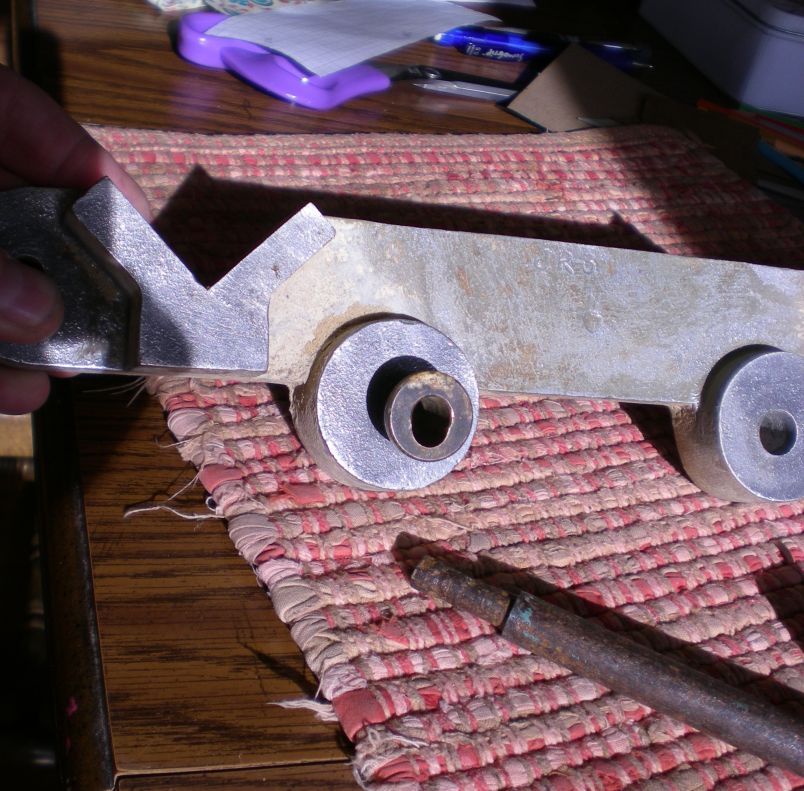 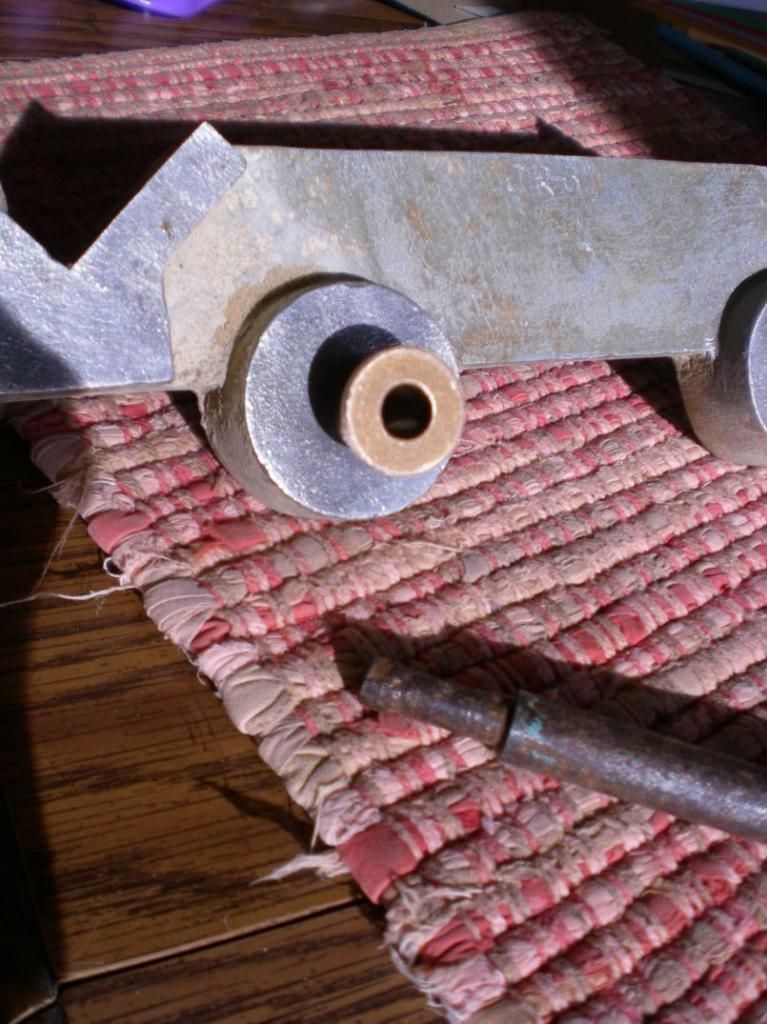 Now that the carriage rails and feed screw were installed it was getting really close to done. Assembling the carriage and vise were a bit tricky, but luckily I found some detailed pictures on-line that helped greatly. The bearings on the carriage were shot - old on right, new on left. 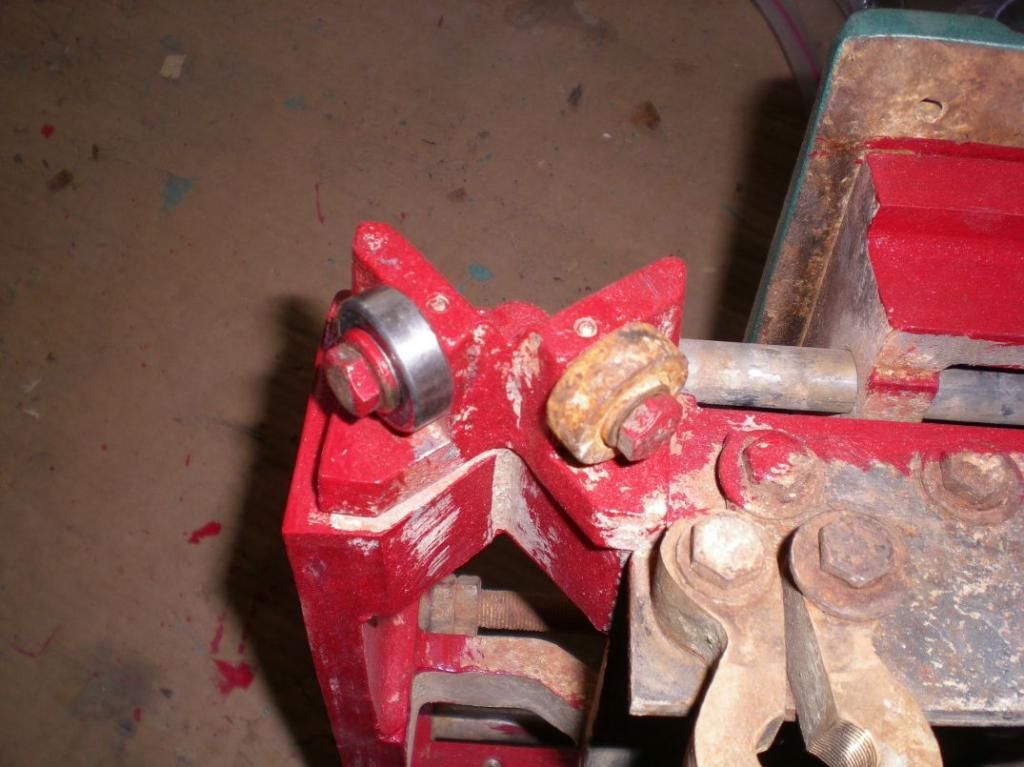 Some of the bearings had straight bushing inserts and some had shouldered bushings. Not sure why, but I tapped them all out of the rusty old bearings and installed them in some new bearings I bought. 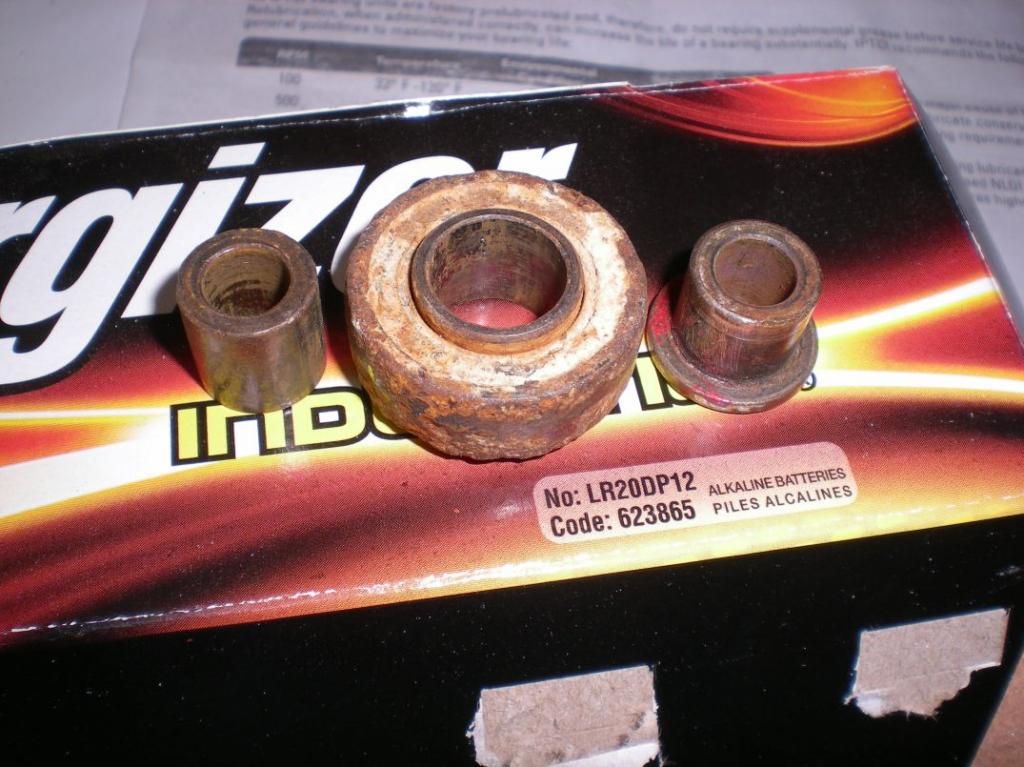 The carriage and vice are very impressively heavy (maybe 40 lbs) and I wondered how it would move, but it is really neat that it now goes across the rails with the slightest pressure. I next installed the blade and trued it square to the vise to get nice smooth cuts. Then installed the safety shields, put wood in vice, and redid the electrical wiring. I had found a nice used motor on eBay that was perfect, except I had to figure out how to reverse the rotation. At first I thought they mistakenly sold me a motor for Australia, LOL. I installed the motor, then bolted the lid on and threw the switch .... victory! 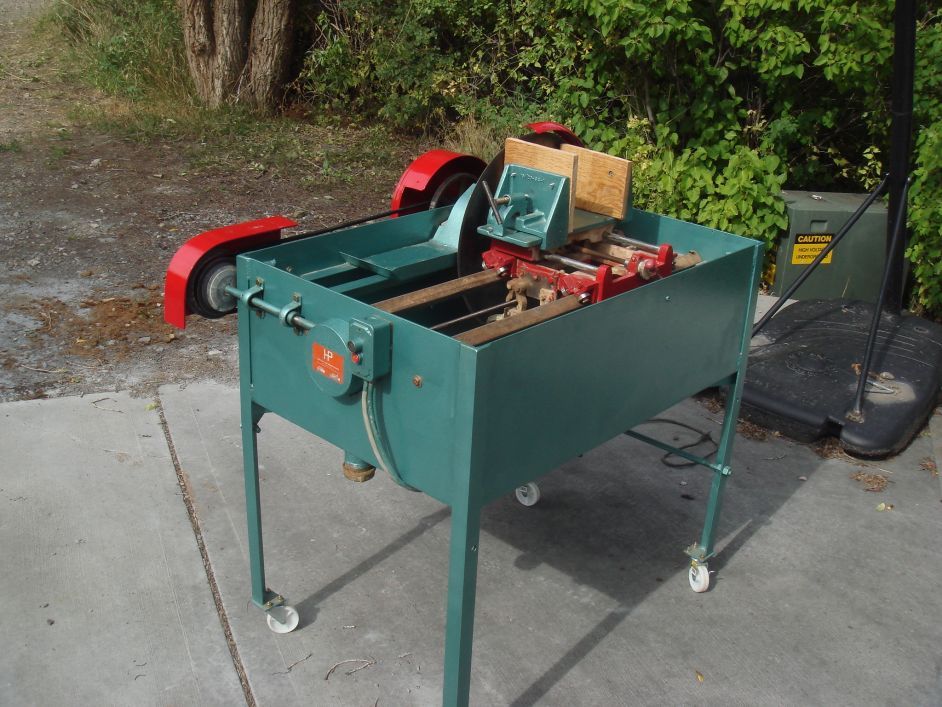 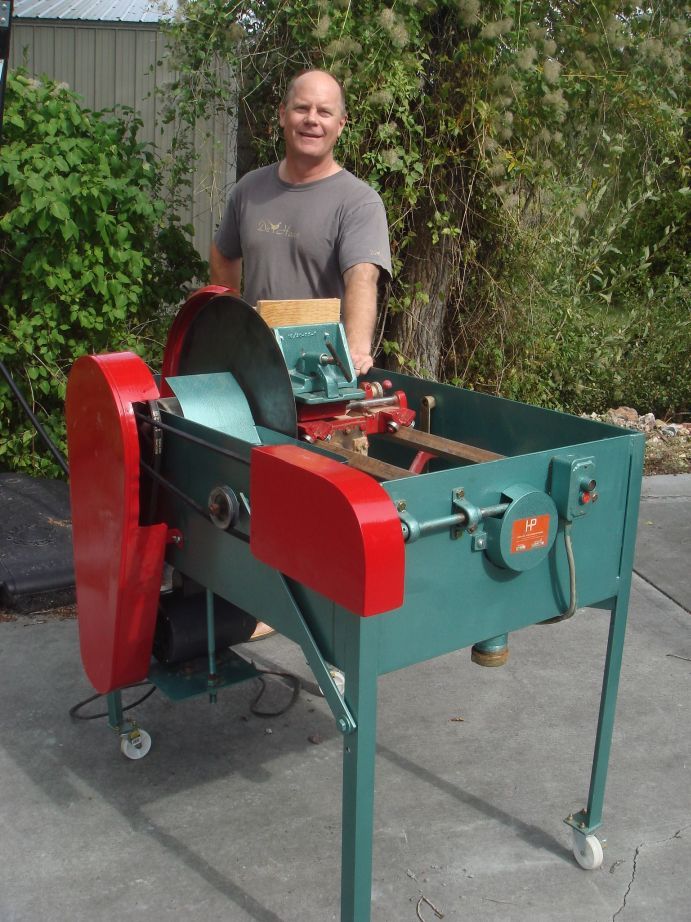 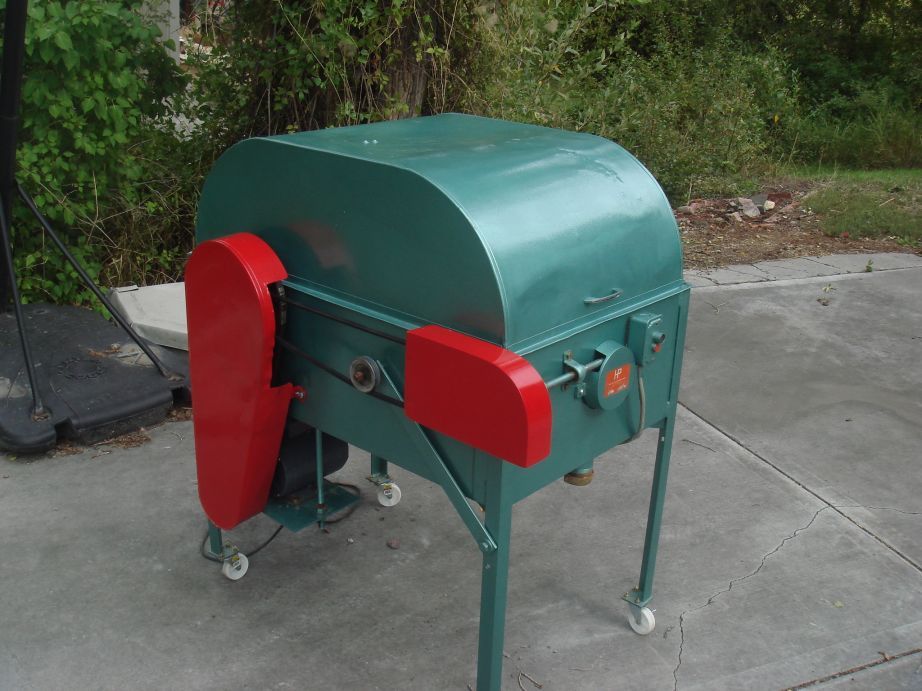 To test the saw, I cut some Gary Green slabs. 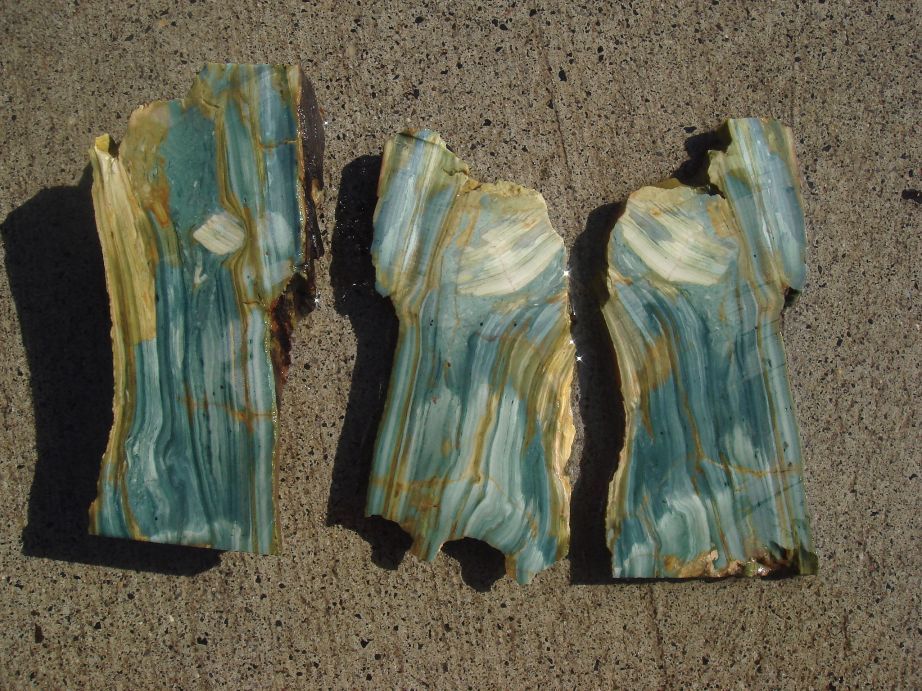 I am loving this saw. It is very satisfying to take a pile of rusty parts from something made in the 1960's and have it turn out so well. Thanks to everyone who helped and encouraged me. |
|
spiritstone
Cave Dweller 
Member since August 2014
Posts: 2,061
|
Post by spiritstone on Sept 14, 2014 23:13:36 GMT -5
Looks new. A fantastic restoration you have done to it.
|
|
gemfeller
Cave Dweller
Member since June 2011
Posts: 4,019
|
Post by gemfeller on Sept 15, 2014 0:25:45 GMT -5
Beautiful work! Wish I had those skills (and the saw.) You have a treasure and will get much enjoyment from it.
|
|
Fossilman
Cave Dweller
Member since January 2009
Posts: 20,709
|
Post by Fossilman on Sept 15, 2014 9:03:54 GMT -5
Mark,excellent job on the saw..............makes a guy feel good after doing something like that! Thumbs up.
PS: that Gary green is killer too...........
|
|
|
|
Post by roy on Sept 15, 2014 9:18:05 GMT -5
you did good Mark ! next time you have a broken aluminum part broke let me know i can weld it up for you
|
|
|
|
Post by Drummond Island Rocks on Sept 15, 2014 9:32:51 GMT -5
Thats a great looking restoration. you can call your first slabs "highland park" green. They are a good match to the color of HP saws.
Chuck
|
|
panamark
fully equipped rock polisher
Member since September 2012
Posts: 1,343
|
Post by panamark on Sept 15, 2014 21:37:04 GMT -5
Thanks everybody for the kind words!
|
|
|
|
Post by catmandewe on Sept 15, 2014 23:17:55 GMT -5
Nice!
I knew you would do a fantastic job with that one!
Looking great, very nice job................Tony
|
|
|
|
Post by DirtCleaner on Sept 16, 2014 7:36:08 GMT -5
Strong work! Careful though as this may become an overwhelming business.
|
|
1nickthegreek
spending too much on rocks
Member since February 2014
Posts: 383
|
Post by 1nickthegreek on Sept 16, 2014 16:09:50 GMT -5
Wow, fabulous restoration there, Mark!!! Gonna have to put ya to work slabbing some rough for me soon now!!!  |
|
panamark
fully equipped rock polisher
Member since September 2012
Posts: 1,343
|
Post by panamark on Sept 16, 2014 16:49:45 GMT -5
Wow, fabulous restoration there, Mark!!! Gonna have to put ya to work slabbing some rough for me soon now!!! Glad to, after I get caught up on my own LOL. I am having so much fun seeing what is inside the big stuff I have been storing for this saw. I still have to get over and visit you Nick. Oh, work. |
|


 Sheesh! But I finally got it done and repainted.