romo
starting to spend too much on rocks
 
Member since September 2018
Posts: 104
|
Post by romo on Apr 16, 2019 6:36:12 GMT -5
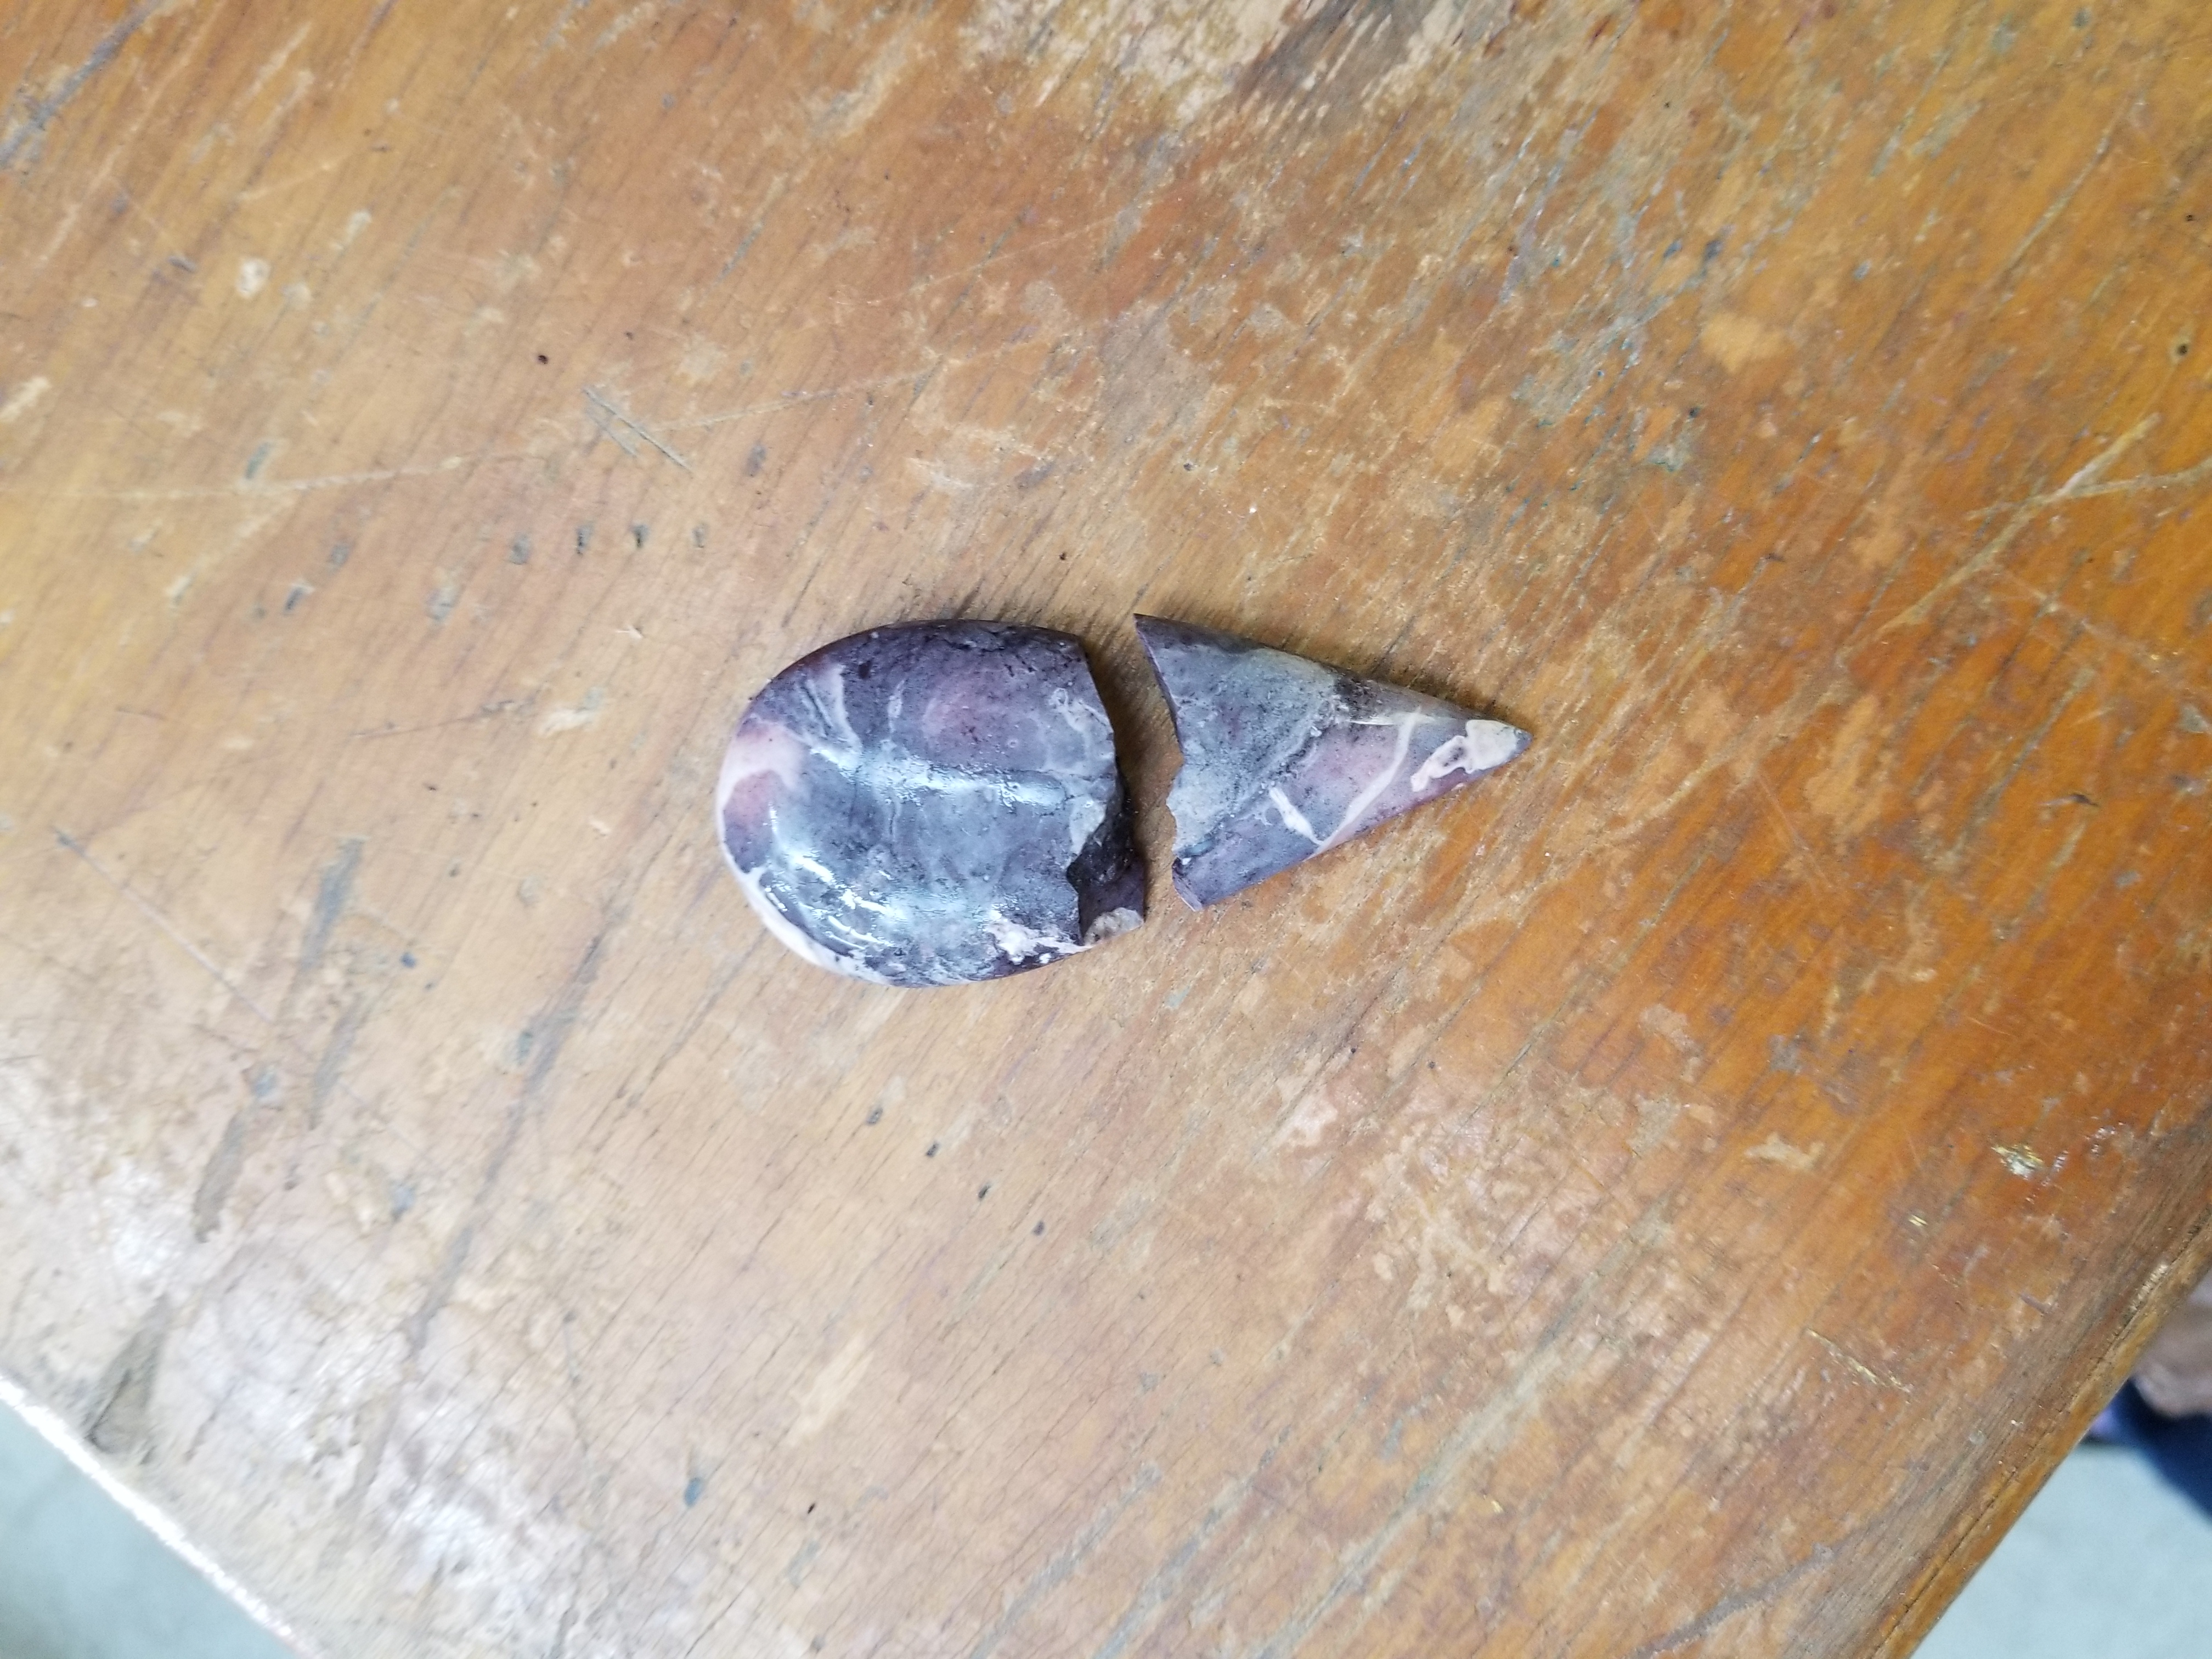
Just finished up on the 1000 wheel at our rock club and it dropped right out of my hand. Several members recommended silver repair, which I know nothing about. Any ideas?  |
|
|
|
Post by rockjunquie on Apr 16, 2019 8:04:30 GMT -5
I feel for ya! It's happened to me before. One time, when I was getting ready to package a pendant, I dropped it on the floor and the tip broke. I contacted the buyer and they still wanted it!
If you can imagine an intarsia with a thin line of silver in the middle, that's what they were talking about.
|
|
|
|
Post by greig on Apr 16, 2019 9:46:28 GMT -5
I bet anybody listening when that happened learned a few new words.
|
|
|
|
Post by opalpyrexia on Apr 16, 2019 10:23:29 GMT -5
I would recut both halves at the breaks, smoothing but maintaining their relative convex and concave break lines, and finish them as a pair. Someone who makes jewelry could create a very nice pendant by making bezel settings for both and then soldering those together (with a gap) using two short lengths of wire or tubing.
|
|
romo
starting to spend too much on rocks
 
Member since September 2018
Posts: 104
|
Post by romo on Apr 16, 2019 15:17:26 GMT -5
I bet anybody listening when that happened learned a few new words. Indeed they did! |
|
|
|
Post by stardiamond on Apr 16, 2019 15:39:28 GMT -5
The area where I cab is about the size of a small bedroom and is under the roof. There was a concrete patio that was all cracked and I had it removed, so I cab on dirt. Any time a cab is dropped or goes flying, it has a soft landing. I've dug a pit next to my cabbing machine from moving around while cabbing.
|
|
|
|
Post by Rockindad on Apr 16, 2019 16:41:42 GMT -5
Pulling our very first batch of stones out of the tumbler after polishing my boy was so excited he grabbed a real cool piece of Rose Quartz that we had been watching the whole way and at the exact moment he exclaimed "Hey Dad look how awesome it turned out" that super shiny and slick stone flew out of his hand and onto the concrete floor where it met its demise. He felt so bad and it was just a mistake due to being so excited, I just tried to get him to focus on other rocks. Now if I had done that  Al |
|
|
|
Post by hummingbirdstones on Apr 16, 2019 19:35:58 GMT -5
I feel for ya! It's happened to all of us at one time or another, I guess. Still sucks when it happens, though.
|
|
|
|
Post by greig on Apr 17, 2019 10:06:06 GMT -5
I put down a 1/4 inch sheet of plywood on the floor under where I set up the lap. I did it for dirt/water, but now see it just might save a dropped stone. It has some give to it.
|
|
|
|
Post by rockpickerforever on Apr 17, 2019 10:39:20 GMT -5
Concrete is so unforgiving! Other solutions - rubber mats work well, but can sometimes be pricey. You can also try carpet remnants. Inexpensive, if not free, and your stones will have soft landings.
|
|
NevadaBill
fully equipped rock polisher
  
Member since January 2019
Posts: 1,332
|
Post by NevadaBill on Apr 18, 2019 16:55:10 GMT -5
That sucks. After all that work too.
I dropped and broke my first rock just yesterday. It wasn't special like yours. But I was surprised to see how easily the little Agate broke in to so many pieces. I guess I was expecting it to bounce, maybe? I don't know.
I hope that one of the suggested repair ideas works.
|
|
romo
starting to spend too much on rocks
 
Member since September 2018
Posts: 104
|
Post by romo on Apr 25, 2019 14:08:51 GMT -5
Well, I have decided to try and repair it myself. I am attempting the kintsugi method but I have altered it by using an automotive fabrication epoxy instead of varnish paste. I chose this particular epoxy because it needs to be finished by sanding, same as the stone which will hopefully allow me to finish all surfaces evenly. If all goes well the epoxy will be coated in silver plate prior to final polish...finger crossed!  |
|
|
|
Post by miket on Apr 25, 2019 14:14:36 GMT -5
Well, I have decided to try and repair it myself. I am attempting the kintsugi method but I have altered it by using an automotive fabrication epoxy instead of varnish paste. I chose this particular epoxy because it needs to be finished by sanding, same as the stone which will hopefully allow me to finish all surfaces evenly. If all goes well the epoxy will be coated in silver plate prior to final polish...finger crossed!  Good luck, sir! |
|
romo
starting to spend too much on rocks
 
Member since September 2018
Posts: 104
|
Post by romo on Apr 28, 2019 11:22:29 GMT -5
|
|
|
|
Post by miket on Apr 28, 2019 12:10:15 GMT -5
Looking good
|
|
|
|
Post by rockjunquie on Apr 28, 2019 14:51:24 GMT -5
Ah damn! Now we gotta wait to see the end product! TEASE!
|
|
MommaGem
spending too much on rocks
 
Member since April 2019
Posts: 312
|
Post by MommaGem on Apr 28, 2019 17:22:42 GMT -5
Looks amazing! Great job!
|
|
romo
starting to spend too much on rocks
 
Member since September 2018
Posts: 104
|
Post by romo on Apr 29, 2019 9:44:46 GMT -5
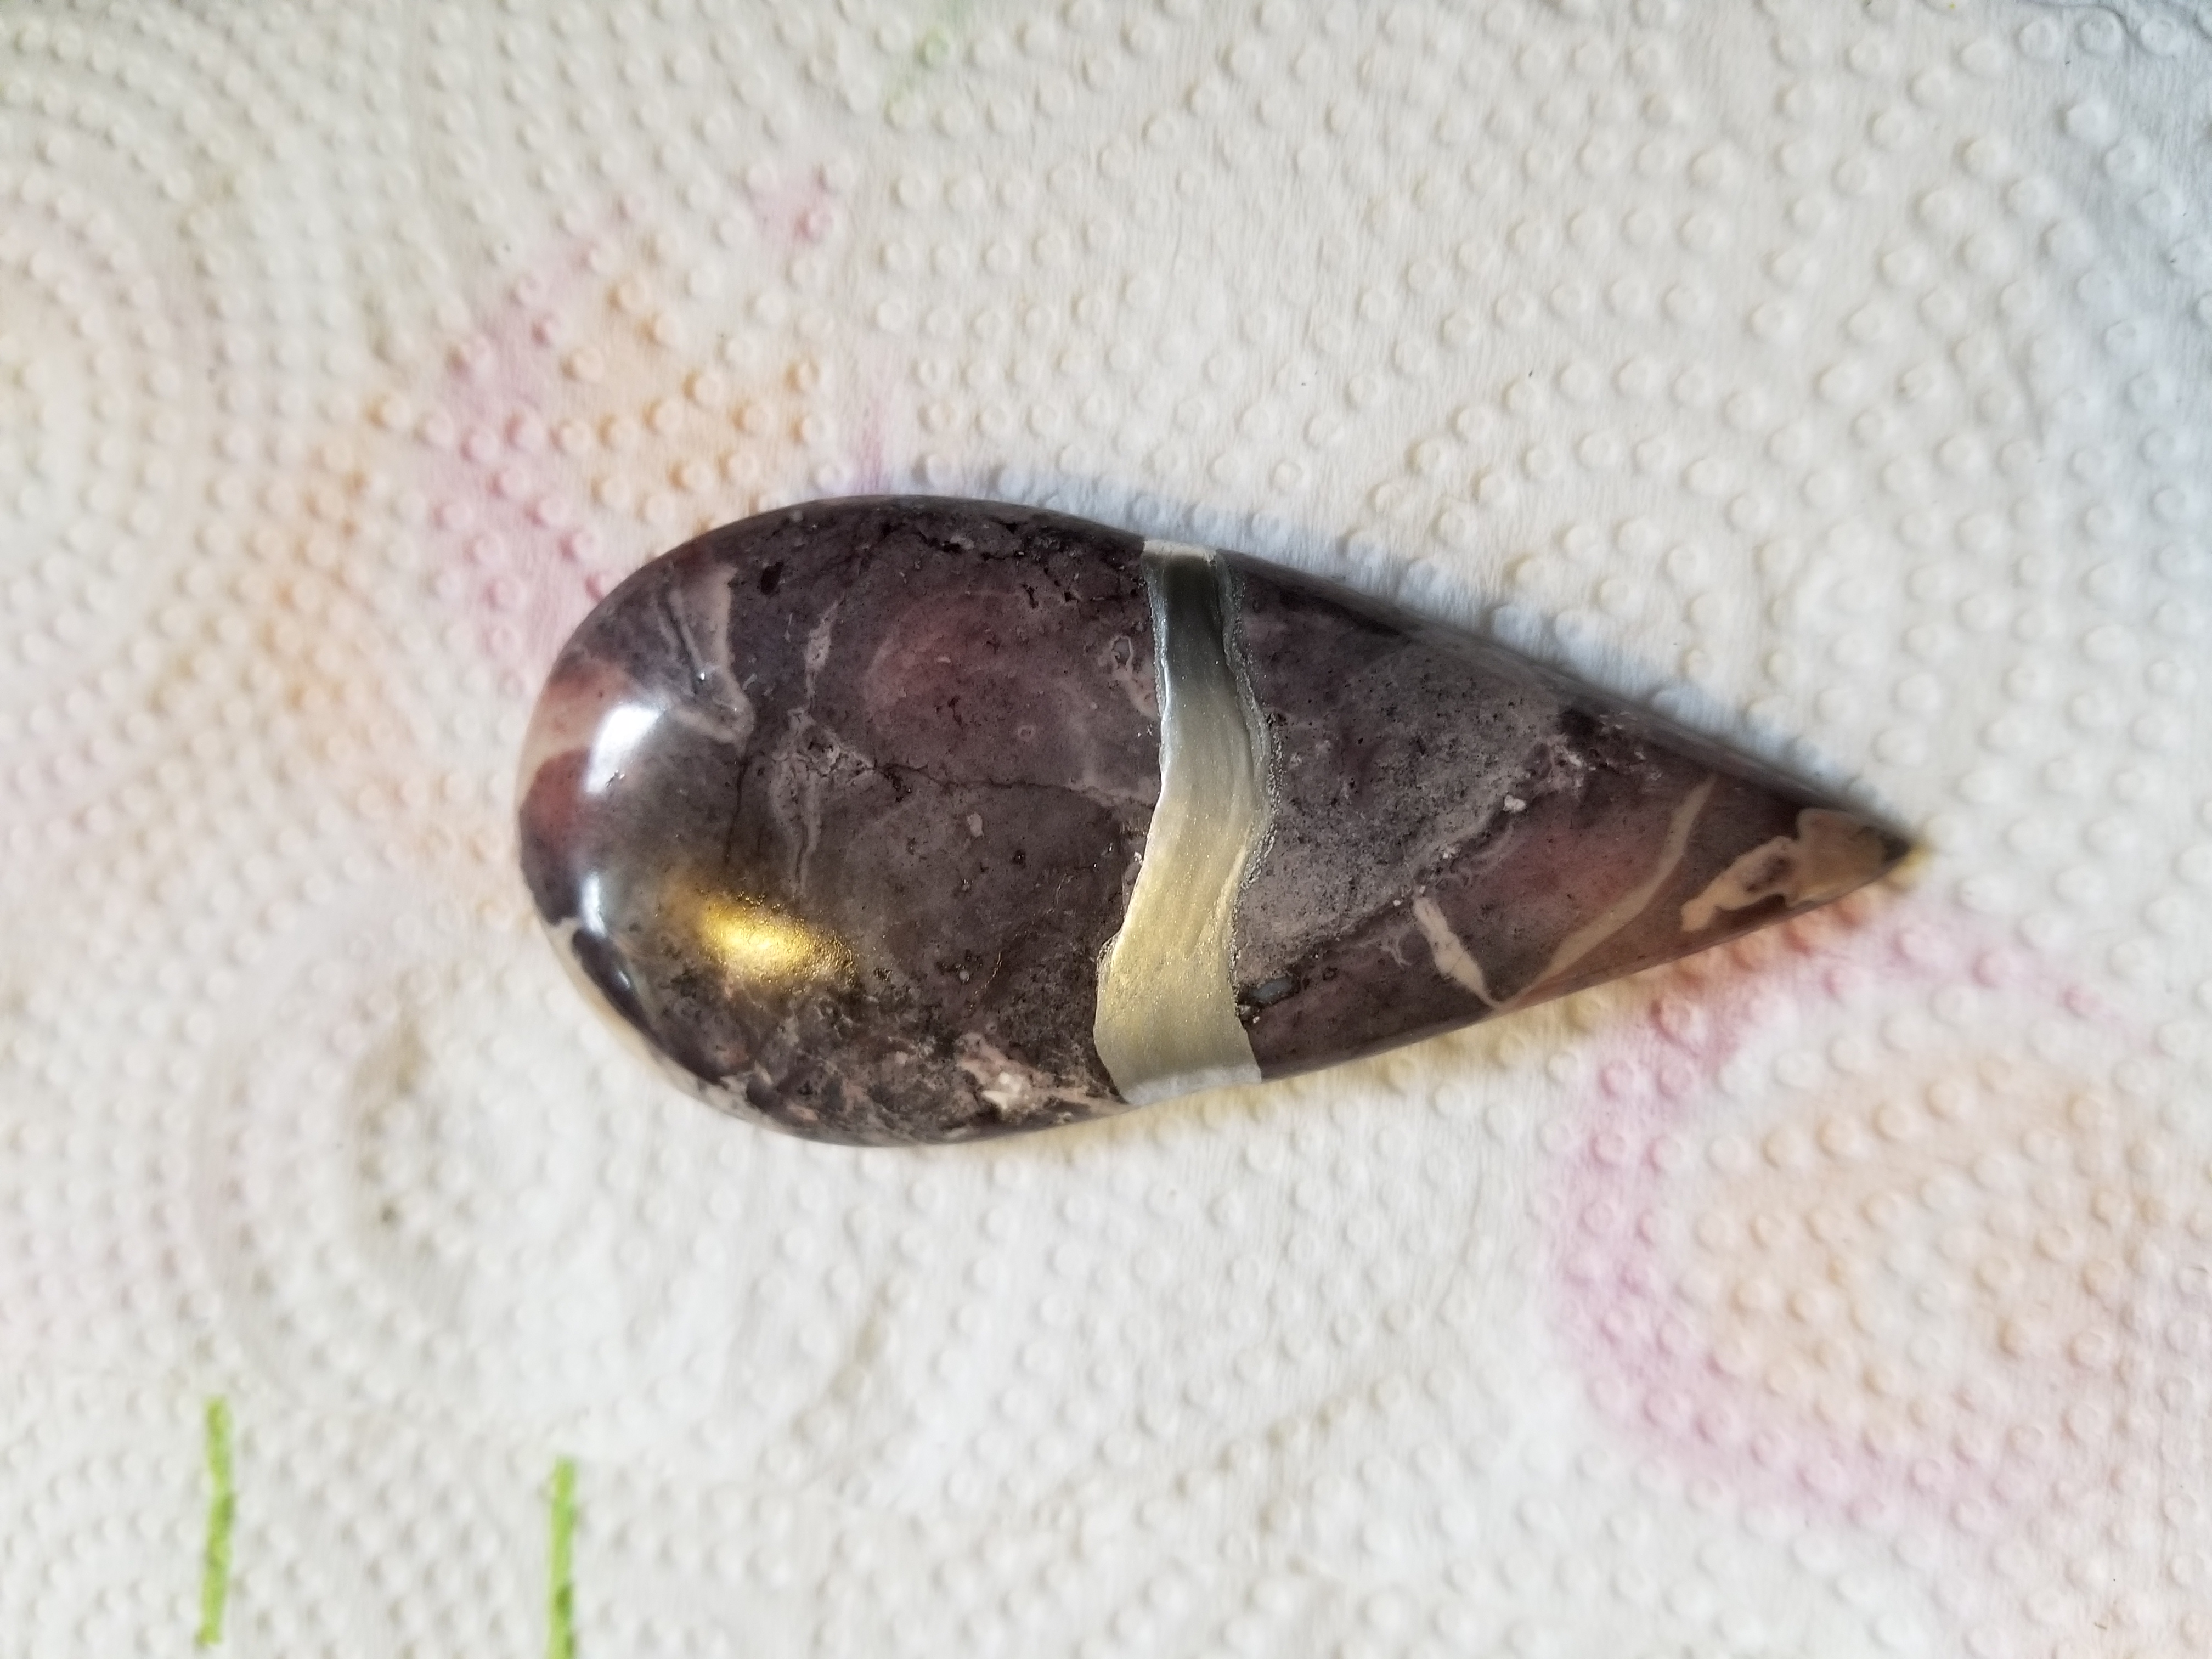
Well, here it is after final polish and plating. That final plating is no joke, bubbles and streaks and you are applying it with the tiniest brush in the world. I am trying to adopt the true kintsugi spirit of loving the imperfection, really I am, but don't know if I would go through that again!  |
|
MommaGem
spending too much on rocks
 
Member since April 2019
Posts: 312
|
Post by MommaGem on Apr 29, 2019 9:47:15 GMT -5
I think it is truly beautiful! Great work making something new and lovely after a tragic breakage :-)
|
|
|
|
Post by miket on Apr 29, 2019 9:51:58 GMT -5
Honestly that almost looks completely natural from what I can see. Like it was supposed to be there.
Good save.
|
|