|
|
Post by rockpickerforever on Apr 30, 2019 14:29:40 GMT -5
Any stone that does not fit a prescribed shape (round, oval, pear, etc) is said to be a free-form. I'd narrow it even further: shape is irrelevant except in those relatively few shapes and sizes for which pre-made cabochon settings are manufactured. Other than those (mostly ovals for cabs, and mostly aimed toward stones cut for the mass market), a custom setting is going to have to be made. So you largely needn't worry about this unless cutting for particular pre-made settings. Go for the best pattern, color, optical phenomenon, etc. that you can from any given stone. If you are doing matched sets or graduated sets of cabs, then shape is more of a consideration, though they still needn't be standard ovals and rounds. Great point. Just go for the best! ETA - I might add that templates are great for people that have trouble drawing out a round circle, or a symmetrical oval. After it's been drawn out, then it is up to the person to cab to the lines! |
|
gemfeller
Cave Dweller 
Member since June 2011
Posts: 4,059 
|
Post by gemfeller on Apr 30, 2019 14:31:19 GMT -5
Everyone seems to develop different techniques. My goal is always to find the best and most interesting patterns in a slab and capture them in the finished cab. That sometimes requires lots of "course-corrections" as I grind due to previously unseen flaws or that I simply see a better shape than I originally intended. I shape cabs "on the fly" and many of my stones simply evolve. Sometimes I use a template to isolate the area I want to feature but that shape is only a suggestion to me. Here are some examples. This was an extra-nice Deschutes jasper slab and I wanted to get the best out of it. Whether I did is a matter of opinion but this is how it came about: Descutes slab 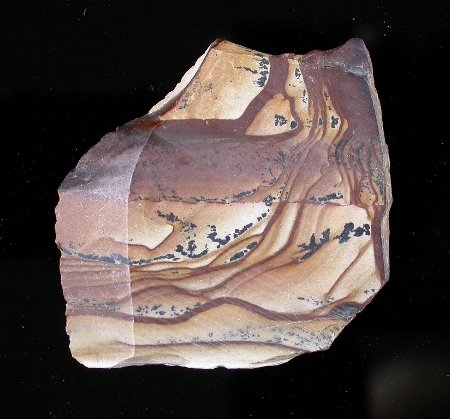 And here's what happened: Deschutes  I also had a slab of Laguna agate that had all sorts of problems: soft areas, fractures, and especially one end that was of varied thickness. Laguna agate slab  This stone truly "evolved" as I worked to come up with a shape that pleased me without leaving any of the "uglies." I wasn't entirely successful because there's still a tiny flaw but on the whole I'm very happy with the result. Laguna finished 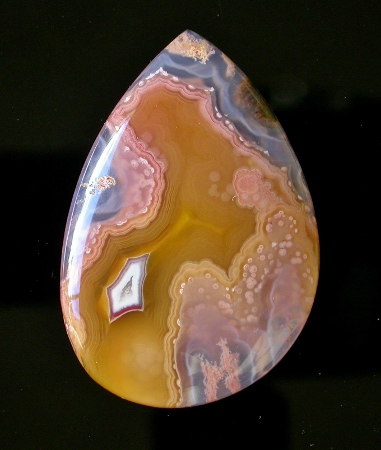 I think the key is to let your imagination flow while keeping in mind that the stone may be set in some way, so attention must be paid to various setting techniques while the stone is being cut. That means a proper girdle, etc. Have fun! |
|
Tommy
Administrator 
Member since January 2013
Posts: 12,989
|
Post by Tommy on Apr 30, 2019 14:49:02 GMT -5
I'd narrow it even further: shape is irrelevant except in those relatively few shapes and sizes for which pre-made cabochon settings are manufactured. Other than those (mostly ovals for cabs, and mostly aimed toward stones cut for the mass market), a custom setting is going to have to be made. So you largely needn't worry about this unless cutting for particular pre-made settings. Go for the best pattern, color, optical phenomenon, etc. that you can from any given stone. If you are doing matched sets or graduated sets of cabs, then shape is more of a consideration, though they still needn't be standard ovals and rounds. That's well-said right there! A true nugget of wisdom that will live in this thread  |
|
|
|
Post by miket on Apr 30, 2019 14:59:34 GMT -5
I like these! That's exactly how I've been doing things and I've wondered if what I was doing was wrong or right. 99% of what I've been trying to learn to cab with is self-collected and I decided that maybe there wasn't a "correct" shape. They are what they are. Some of it is from slabs I've cut from those stones and some are just cab-sized rocks that I thought would look nice so I start grinding away. The cab usually takes on a life of it's own and shows it's shape to me- or fractures and I deal with what's left!  Anyway, nice cabs! Thanks, Mike. There is no right or wrong. It is a creative process. And, just like art, everyone may have a different feeling about it. I'd say you are doing it right! Thank you for the compliment. I've NEVER had any artistic abilities. Wouldn't it be funny if I finally found something creative that I enjoyed doing at this point in my life? I suppose things happen for a reason- but figuring this out 20 or 30 years ago would have been nice! |
|
|
|
Post by rockjunquie on Apr 30, 2019 15:03:17 GMT -5
Just finished cabbing. Every one was a freeform for one reason or another. Most started with a template.
|
|
|
|
Post by rockjunquie on Apr 30, 2019 15:05:44 GMT -5
Most of my freeform cabs are variations on triangles, many from small bits and scraps
Mojave turquoise (man made)
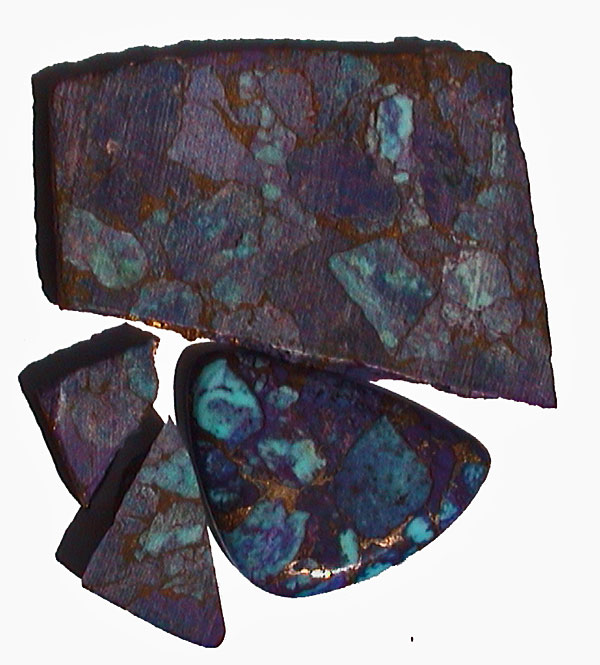
More of a flat top than a cab. 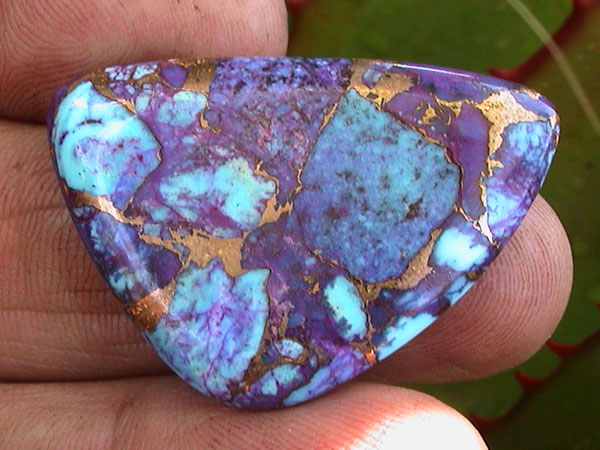
Unknown green rock from a small bit, I think from near area 54. Gift from barclay , cabbed some time ago
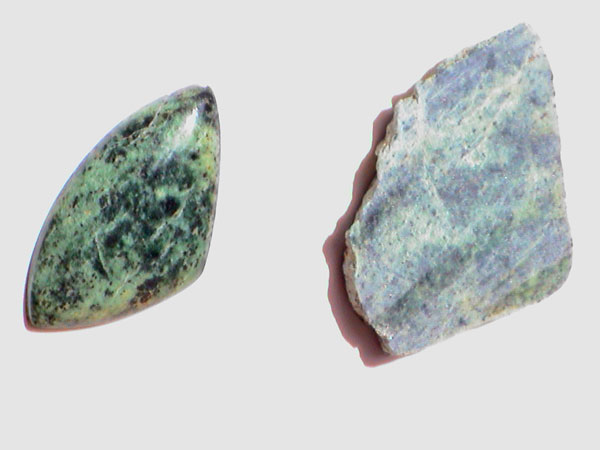
Pilbara Picasso jasper
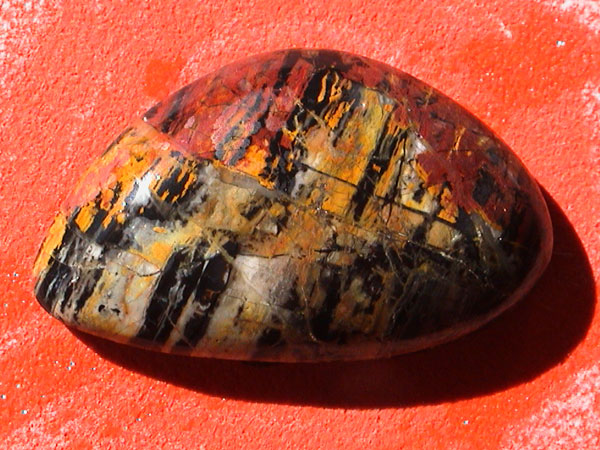
Mine end up as triangle variations or pear variations. |
|
|
|
Post by miket on Apr 30, 2019 15:08:33 GMT -5
Just letting you know I'm enjoying this thread and learning a lot.
Thanks!
|
|
NevadaBill
fully equipped rock polisher
  
Member since January 2019
Posts: 1,332
|
Post by NevadaBill on May 1, 2019 0:07:21 GMT -5
So am I, Mike. I just came in from a busy day out, and realize that the forum thread has just jumped to a whole new level! I have to double back tomorrow and read the last 2 pages (I keep separate notes from all of this as well), and try to absorb all of the great input on Freeforms, Templates, and absolutely stunning examples of rocks that have been posted (above). You know, when I first got started with Rock Tumbling 101 a few months ago, I never ever imagined that I would come to learn that there was so much depth to the subject. So far from just throwing some rocks in a barrel. I was overwhelmed. Now, when reading this thread about cabs!! I am kind of scared. Just what did I get myself in to?!? Me thinks this is far beyond Rock Tumbling.  Thank you all for your great contributions! |
|
|
|
Post by hummingbirdstones on May 1, 2019 10:31:24 GMT -5
So am I, Mike. I just came in from a busy day out, and realize that the forum thread has just jumped to a whole new level! I have to double back tomorrow and read the last 2 pages (I keep separate notes from all of this as well), and try to absorb all of the great input on Freeforms, Templates, and absolutely stunning examples of rocks that have been posted (above). You know, when I first got started with Rock Tumbling 101 a few months ago, I never ever imagined that I would come to learn that there was so much depth to the subject. So far from just throwing some rocks in a barrel. I was overwhelmed. Now, when reading this thread about cabs!! I am kind of scared. Just what did I get myself in to?!? Me thinks this is far beyond Rock Tumbling.  Thank you all for your great contributions! Bill, you'll be fine. It is very similar to tumbling in that you go through the grits to get to polish. The difference is you get to determine the shape of the stone and pick the exact spot on a slab that you want to use. It's also a helluva lot quicker once you get the basic cabbing technique under control! |
|
|
|
Post by rockjunquie on May 1, 2019 17:33:41 GMT -5
I've got a tip for newbies: You know how you get those little scratches on the 280? The ones you just can't seem to get rid of? You get frustrated and go over the scratches over and over, pushing harder and harder. Think about it logically- the scratches are there because there is a minuscule dip where the wheel can't reach. Even though your dome looks perfect, you still have a divot. So, stop going over them and start going around them. Just keep going around them and you will lower the sides on the divot, eventually leveling the spot, allowing you to get the scratches out. This may not work every time. Sometimes, you just have to go back to the last wheel.
|
|
gemfeller
Cave Dweller 
Member since June 2011
Posts: 4,059 
|
Post by gemfeller on May 1, 2019 19:00:41 GMT -5
I've got a tip for newbies: You know how you get those little scratches on the 280? The ones you just can't seem to get rid of? You get frustrated and go over the scratches over and over, pushing harder and harder. Think about it logically- the scratches are there because there is a minuscule dip where the wheel can't reach. Even though your dome looks perfect, you still have a divot. So, stop going over them and start going around them. Just keep going around them and you will lower the sides on the divot, eventually leveling the spot, allowing you to get the scratches out. This may not work every time. Sometimes, you just have to go back to the last wheel. Quite right, and here's another thought on the same subject. I've found many people push too hard when sanding. I've learned to lighten the pressure and let the wheels do the work as they're designed to do. Too much pressure often works in the opposite way intended and it definitely wears Nova-type wheels out much faster. Just a thought... |
|
|
|
Post by hummingbirdstones on May 1, 2019 19:16:15 GMT -5
I've got a tip for newbies: You know how you get those little scratches on the 280? The ones you just can't seem to get rid of? You get frustrated and go over the scratches over and over, pushing harder and harder. Think about it logically- the scratches are there because there is a minuscule dip where the wheel can't reach. Even though your dome looks perfect, you still have a divot. So, stop going over them and start going around them. Just keep going around them and you will lower the sides on the divot, eventually leveling the spot, allowing you to get the scratches out. This may not work every time. Sometimes, you just have to go back to the last wheel. Quite right, and here's another thought on the same subject. I've found many people push too hard when sanding. I've learned to lighten the pressure and let the wheels do the work as they're designed to do. Too much pressure often works in the opposite way intended and it definitely wears Nova-type wheels out much faster. Just a thought... Both are totally true. Let the diamonds do the work. If the cab is not grinding fast enough, drop down a grit and let the coarser diamond work. DON'T press harder on the higher grit wheels. |
|
NevadaBill
fully equipped rock polisher
  
Member since January 2019
Posts: 1,332
|
Post by NevadaBill on May 2, 2019 13:01:17 GMT -5
Well, I am waiting for Dop Buddy and other supplies to arrive (rrrRrRh!), and bored, staring at the grinder in anticipation. It occurs to me that I can just practice on regular rocks! Duh. BEGINNER QUESTIONS: - It seems like the FLAT spots on the rock are harder to polish? Like these little streaks won't go away, and you push harder and harder ... wait .. Tela just answered question this 3 posts (above). Thank you! - I read that you should not grind in the very middle of the wheels' surface? Only use the outside edges mainly? Like on a diamond grinding wheel? I'm being careful to do this, but did I read that right? - Do you keep a dry rag handy, always checking the stone by drying it, and seeing if the part you are working on is 'even'? I can't even tell what I am doing without checking like this. Advice? - Do you think it's really necessary to wear safety goggles? Just in case? This obviously makes best practice sense, but there are probably a bunch of safety things (gloves, ear plugs, etc) if I really wanted to get all perfect about it. Here are some practice rocks from just now. Chert Nodule, and Agate chunk.  Probably more beginner questions to come. Thank you to anyone that has input. |
|
NevadaBill
fully equipped rock polisher
  
Member since January 2019
Posts: 1,332
|
Post by NevadaBill on May 2, 2019 13:03:43 GMT -5
By the way, the Chert Nodule on the right, I think looks like Snoopy, on top of his dog house chasing down the Red Baron! Probably just me.
|
|
|
|
Post by miket on May 2, 2019 14:28:36 GMT -5
Glasses for sure. Spoken from experience.  |
|
|
|
Post by rockjunquie on May 2, 2019 14:44:16 GMT -5
Well, I am waiting for Dop Buddy and other supplies to arrive (rrrRrRh!), and bored, staring at the grinder in anticipation. It occurs to me that I can just practice on regular rocks! Duh. BEGINNER QUESTIONS: - It seems like the FLAT spots on the rock are harder to polish? Like these little streaks won't go away, and you push harder and harder ... wait .. Tela just answered question this 3 posts (above). Thank you! - I read that you should not grind in the very middle of the wheels' surface? Only use the outside edges mainly? Like on a diamond grinding wheel? I'm being careful to do this, but did I read that right? - Do you keep a dry rag handy, always checking the stone by drying it, and seeing if the part you are working on is 'even'? I can't even tell what I am doing without checking like this. Advice? - Do you think it's really necessary to wear safety goggles? Just in case? This obviously makes best practice sense, but there are probably a bunch of safety things (gloves, ear plugs, etc) if I really wanted to get all perfect about it. Here are some practice rocks from just now. Chert Nodule, and Agate chunk.  Probably more beginner questions to come. Thank you to anyone that has input. #2- I read that, too and was scratching my head because I never heard that. I've have always been told by everyone, including manufacturers, that you use the entire width of the wheel going back and forth. That said-- what I usually do is mostly that, but I reserve some freshness of the wheel on the sides for doing the girdles. I wear a terrycloth adult bib (like for older or handicapped people). I get them on amazon. Extremely handy and convenient. I think most of us wear some kind of eye protection even if it's a vision aid. I have readers and an optivisor- which I recommend. |
|
julieooly
Cave Dweller 
Member since October 2018
Posts: 721 
|
Post by julieooly on May 2, 2019 17:35:50 GMT -5
Definitely safety goggles. If you wear reading glasses you can get goggles with magnification, I got mine on Amazon. I've also considered terrycloth bibs but ended up using regular hand towels clipped on with binder clips, I hate things around my neck. I wear over-the-ear protection when I'm spending longer amounts of time grinding, and I wear a surgical mask when I use my rock saw. It runs on oil and a fine mist seems to get on me so without the mask I'm probably breathing it in. I wear a purple disposable glove on my right hand because all the twirling of the dopsticks irritates my fingers (also when I spend longer amounts of time cabbing). Also I love working on the flat vertical lap and the glove gives me better grip and saves my skin from the disc.
A dry towel is a must and sometimes I dry my cabs under a warm lamp to get them totally dry. I was missing a lot of scratches before I started doing this.
A lot of what I'm learning to do when working on the dome is to use my thumb to feel the shape of the cab/dome. Sometimes when I just can't tell if something is right, I dry the stone completely and put a drop of hand lotion on the stone. Then I close my eyes and feel the dome with my thumb, going in circles and back and forth. This typically tells me things my eyes don't see especially when working with materials that have color variations.
Everything I've read seems to recommend using the entire wheel. I have a tendency to work on the left of my wheels but I plan to flip them around when there is visible wear. There's also a magic amount of pressure to use when working on the flexible wheels.
Are you using a newer Cab King? I got one at the end of last year and had been using the plastic wrist-rests that came with the machine. It took me A LONG time to realize they were hindering me from making critical motion and when I took them out it was way way easier!! (I use dopsticks, maybe this feature works better for those who work without dops?) I put a piece of pipe insulation on the front lip of the tray and use this to rest my wrists.
I think there are also differences depending on the size of your hands, and definitely on how nimble your fingers may (or may not) be.
Don't forget there are LOTS of people who don't dop and many who say you should learn to do it both ways!
QUESTION: Can I flip my Nova wheels over on a CK6? I need to know before I settle into a bad habit. Any thoughts from the crowd?
|
|
|
|
Post by rockjunquie on May 2, 2019 19:10:11 GMT -5
Definitely safety goggles. If you wear reading glasses you can get goggles with magnification, I got mine on Amazon. I've also considered terrycloth bibs but ended up using regular hand towels clipped on with binder clips, I hate things around my neck. I wear over-the-ear protection when I'm spending longer amounts of time grinding, and I wear a surgical mask when I use my rock saw. It runs on oil and a fine mist seems to get on me so without the mask I'm probably breathing it in. I wear a purple disposable glove on my right hand because all the twirling of the dopsticks irritates my fingers (also when I spend longer amounts of time cabbing). Also I love working on the flat vertical lap and the glove gives me better grip and saves my skin from the disc. A dry towel is a must and sometimes I dry my cabs under a warm lamp to get them totally dry. I was missing a lot of scratches before I started doing this. A lot of what I'm learning to do when working on the dome is to use my thumb to feel the shape of the cab/dome. Sometimes when I just can't tell if something is right, I dry the stone completely and put a drop of hand lotion on the stone. Then I close my eyes and feel the dome with my thumb, going in circles and back and forth. This typically tells me things my eyes don't see especially when working with materials that have color variations. Everything I've read seems to recommend using the entire wheel. I have a tendency to work on the left of my wheels but I plan to flip them around when there is visible wear. There's also a magic amount of pressure to use when working on the flexible wheels. Are you using a newer Cab King? I got one at the end of last year and had been using the plastic wrist-rests that came with the machine. It took me A LONG time to realize they were hindering me from making critical motion and when I took them out it was way way easier!! (I use dopsticks, maybe this feature works better for those who work without dops?) I put a piece of pipe insulation on the front lip of the tray and use this to rest my wrists. I think there are also differences depending on the size of your hands, and definitely on how nimble your fingers may (or may not) be. Don't forget there are LOTS of people who don't dop and many who say you should learn to do it both ways! QUESTION: Can I flip my Nova wheels over on a CK6? I need to know before I settle into a bad habit. Any thoughts from the crowd? I know you can flip he soft wheels on a DP, so I am assuming you can on the CK. |
|
|
|
Post by hummingbirdstones on May 2, 2019 22:53:55 GMT -5
Well, I am waiting for Dop Buddy and other supplies to arrive (rrrRrRh!), and bored, staring at the grinder in anticipation. It occurs to me that I can just practice on regular rocks! Duh. BEGINNER QUESTIONS: - It seems like the FLAT spots on the rock are harder to polish? Like these little streaks won't go away, and you push harder and harder ... wait .. Tela just answered question this 3 posts (above). Thank you! - I read that you should not grind in the very middle of the wheels' surface? Only use the outside edges mainly? Like on a diamond grinding wheel? I'm being careful to do this, but did I read that right? - Do you keep a dry rag handy, always checking the stone by drying it, and seeing if the part you are working on is 'even'? I can't even tell what I am doing without checking like this. Advice? - Do you think it's really necessary to wear safety goggles? Just in case? This obviously makes best practice sense, but there are probably a bunch of safety things (gloves, ear plugs, etc) if I really wanted to get all perfect about it. Here are some practice rocks from just now. Chert Nodule, and Agate chunk.  Probably more beginner questions to come. Thank you to anyone that has input. Use the whole wheel. Using only one spot on the wheel will eventually give you an uneven grinding surface. I move my cabs around the whole wheel as I'm forming or doming, but I do like Tela does and reserve a small bit of the outside edges of the wheel for the girdle. The other reason I do this is because on occasion I've accidently slipped off the very edge and have put a nice divot in my cab necessitating starting over to get the dang divot out. Doing that also causes me to swear like a banshee.
I always have a dry towel on my lap to wipe my cabs off for inspection. I also use the Genie lamp as a heat source to dry them if I don't dry them completely with the towel.
I always have my glasses and an Optivisor on, so that protects the baby blues.
|
|
|
|
Post by stardiamond on May 2, 2019 23:30:28 GMT -5
edges for edges, middle for middle. Take the face too close to the edge and gouges can appear. On the 80 grit hard, grinding the face perpendicular near the edge can cut faster when there is less use there.
More water on the wheel, faster cutting. I don't know if anyone else has observed this. More water clears the debris better and exposes the diamond to the stone.
|
|


