|
|
Post by Drummond Island Rocks on Sept 5, 2019 16:29:55 GMT -5
|
|
harrym
having dreams about rocks
 NH - The Granite State
Member since January 2019
Posts: 59 
|
Post by harrym on Sept 5, 2019 18:43:17 GMT -5
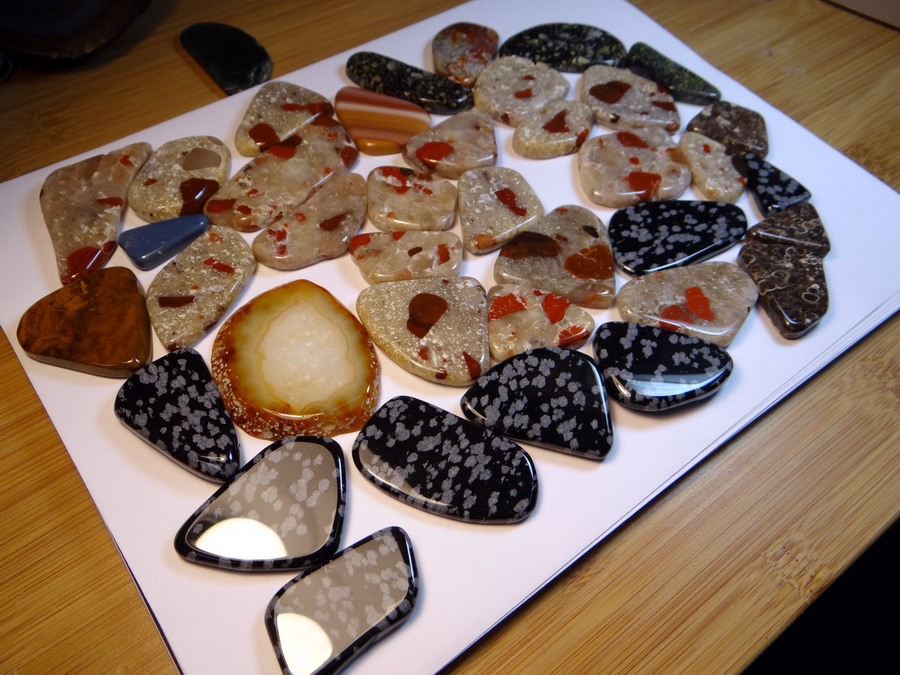
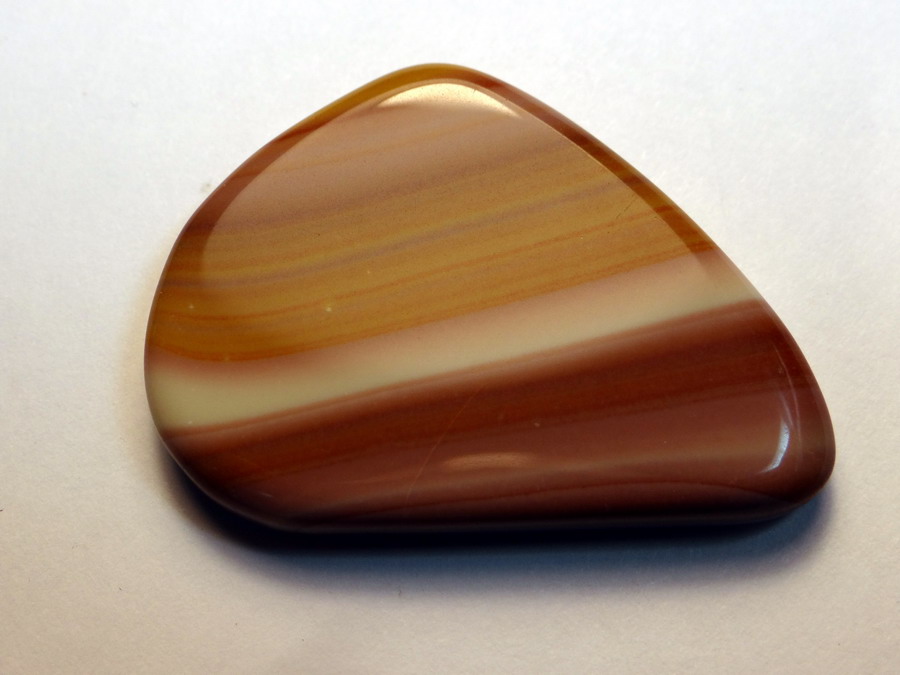
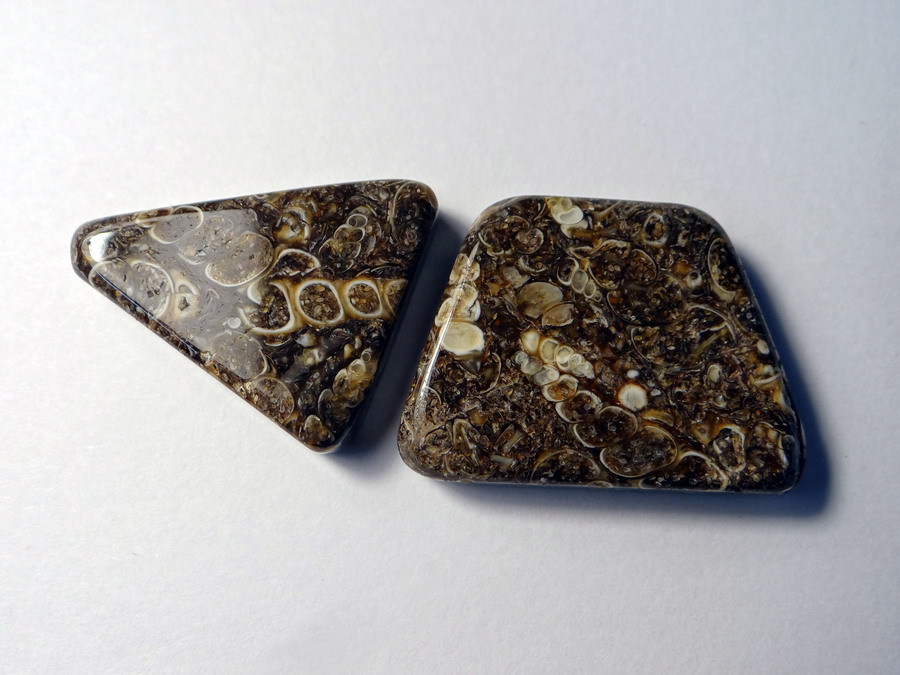
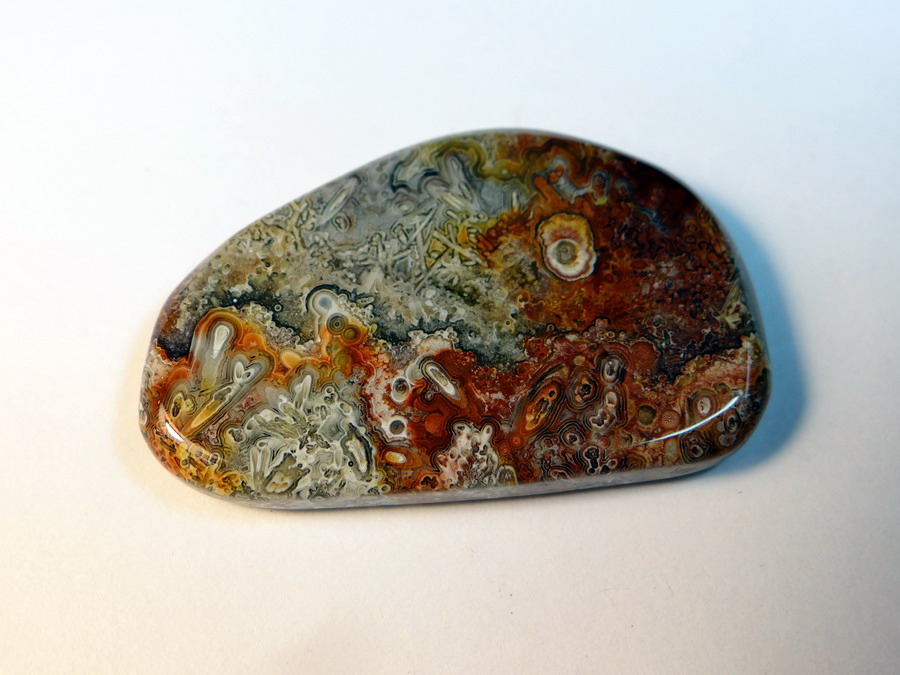
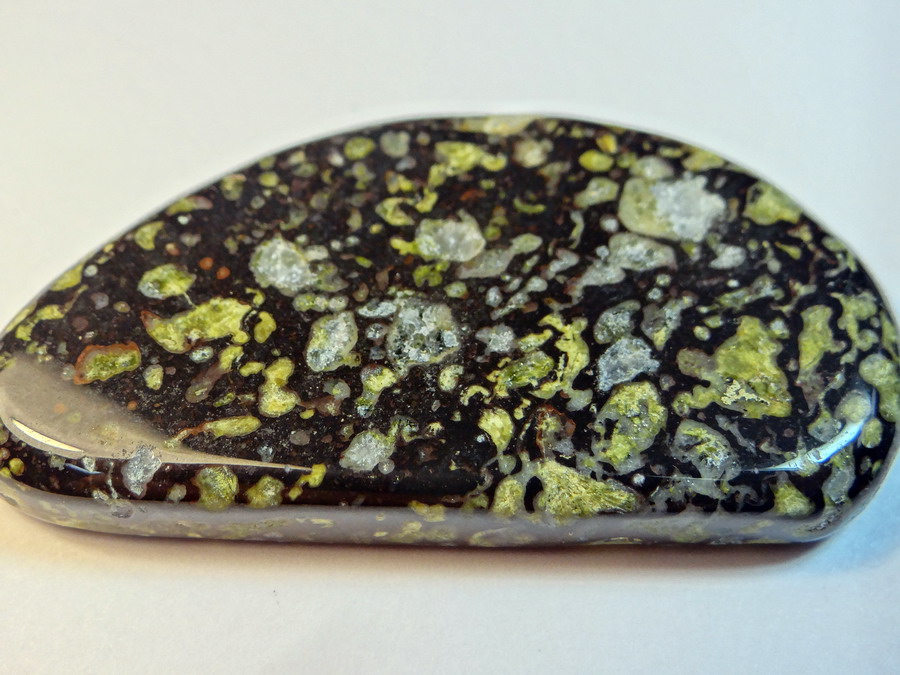
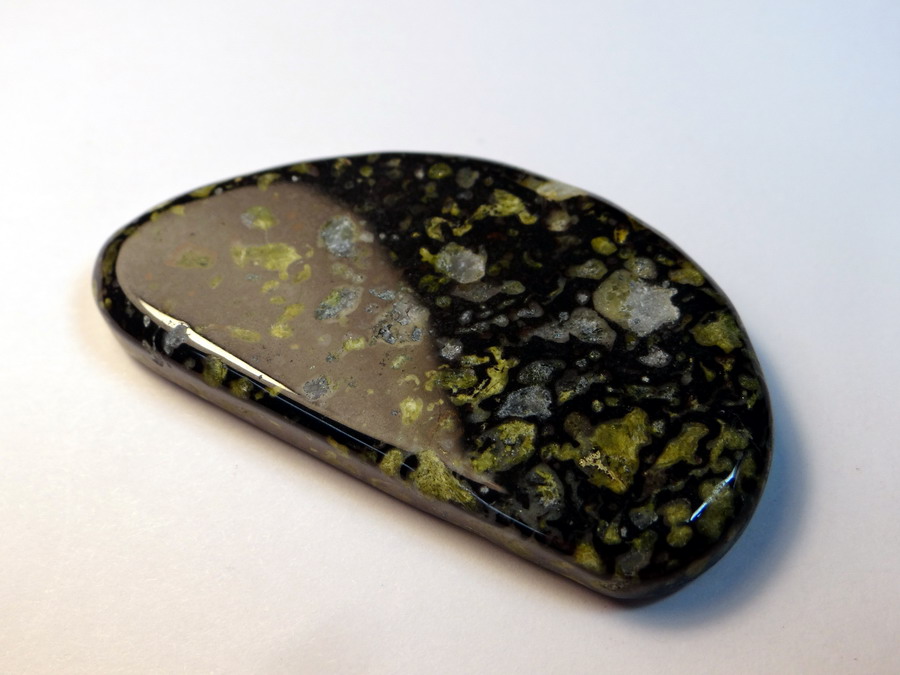
The stone in picture 3 is really nice. The Turritella has some great cross-sections, and the stone underneath it in picture 5 sure had a lot on its plate when it formed - all sorts of things going on there.
|
|
|
|
Post by fernwood on Sept 6, 2019 5:02:51 GMT -5
That turritella really did good.
|
|
|
|
Post by rockjunquie on Sept 6, 2019 8:09:27 GMT -5
Great! I'm glad to see that skipping the first step is ok, because that I was planning next for my flats. Thanks!
|
|
|
|
Post by Drummond Island Rocks on Sept 6, 2019 8:15:00 GMT -5
Great! I'm glad to see that skipping the first step is ok, because that I was planning next for my flats. Thanks! Knocking the edges off on the 80 grit wheel beforehand is key. Without doing that these would have pretty sharp edges due to skipping stage one. The other key factor is a smooth cutting saw. Luckily my saw cuts extremely smooth. Chuck |
|
|
|
Post by rockjunquie on Sept 6, 2019 9:31:28 GMT -5
Great! I'm glad to see that skipping the first step is ok, because that I was planning next for my flats. Thanks! Knocking the edges off on the 80 grit wheel beforehand is key. Without doing that these would have pretty sharp edges due to skipping stage one. The other key factor is a smooth cutting saw. Luckily my saw cuts extremely smooth. Chuck I do that, too. Of course, I learned it from you in one of your posts.  |
|
|
|
Post by Jugglerguy on Sept 6, 2019 18:35:18 GMT -5
A four day tumble with results like that is impressive.
|
|
pizzano
Cave Dweller 
Member since February 2018
Posts: 1,390
|
Post by pizzano on Sept 6, 2019 22:24:58 GMT -5
Great! I'm glad to see that skipping the first step is ok, because that I was planning next for my flats. Thanks! Knocking the edges off on the 80 grit wheel beforehand is key. Without doing that these would have pretty sharp edges due to skipping stage one. The other key factor is a smooth cutting saw. Luckily my saw cuts extremely smooth. Chuck Chuck.........those are awesome examples of (1st stage) saw/wheel shaped flats (without cabbing).........The polish job is great too.....! I've taken a page from your'e previous examples of this process and have prepared all of my last four batches in that manner........one of the main reasons I purchased the variety of diamond faceting disc's was to eliminate the 1st stage rotary 60/90 process and vibe 120/220 thru polishing stages after disc shaping. As you have so wonderfully exhibited, the results can be much more predictable when you "control" the cut, shape and depth of grinding as the preparation for the 2nd, 3rd, 4th stages of the (to get polished) cycle. As soon as it cools down here a bit, I'll be disc grinding a batch I cut a few weeks ago......http://forum.rocktumblinghobby.com/thread/88382/mornings-cuts-aug-2019........As you know, I don't Lot-O, but I'll be trying real hard to end up with results at least 1/2 as nice as your latest batch.....thanks for reminding me to get with the program........lol |
|
|
|
Post by Drummond Island Rocks on Sept 7, 2019 7:20:51 GMT -5
Thanks - I just checked out your post of what you sliced up. I really like the stuff you labeled Faust, UT. Is that a type of flint maybe? It really looks like some Flint Ridge Ohio material I have.
Chuck
|
|
gatorflash1
spending too much on rocks
 Active in Delaware Mineralogical Society, Cabchon Grinding and Polishing, 2 Thumlers B's and a UV-18
Member since October 2018
Posts: 375
|
Post by gatorflash1 on Sept 7, 2019 9:15:57 GMT -5
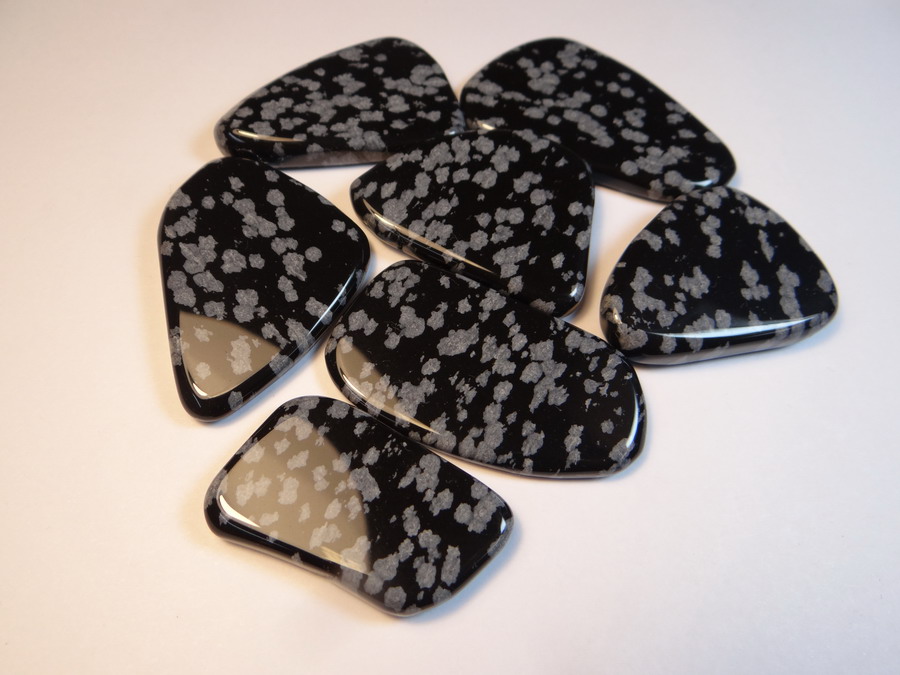
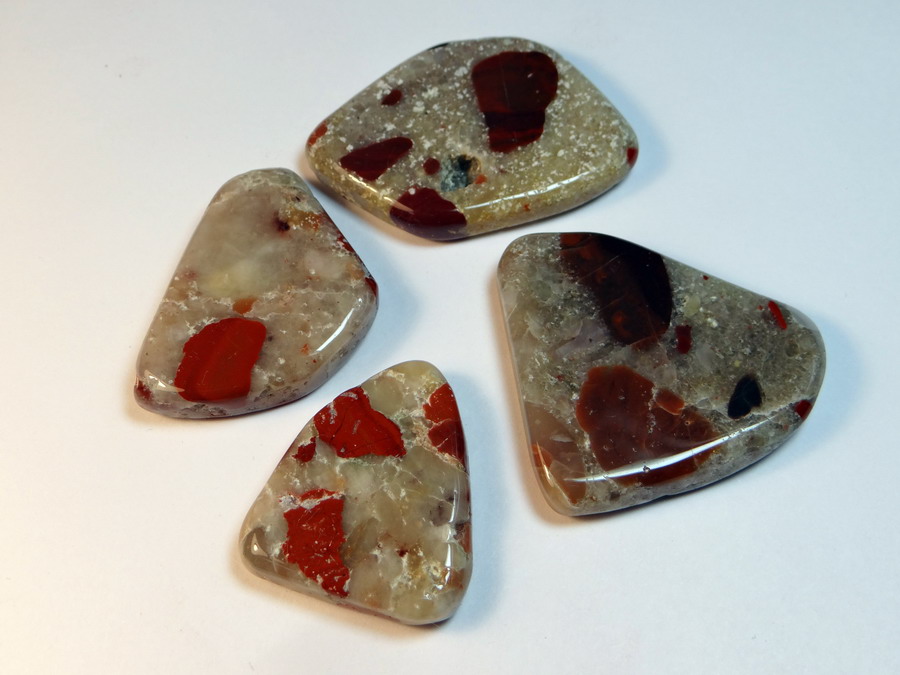
Okay, I give up. What are those two white stones in the bottom left with the black borders in your first picture? That is a great looking batch of tumbled rocks. Nicely done!
|
|
illusionist
starting to spend too much on rocks
Member since August 2017
Posts: 137
|
Post by illusionist on Sept 7, 2019 10:52:36 GMT -5
Impressive!
|
|
|
|
Post by aDave on Sept 7, 2019 12:03:57 GMT -5
Nice looking stuff, Chuck. I think #3 is a fave. gatorflash1, those two pieces are part of the snowflake obsidian batch. The lighting in relationship to the rocks is just causing a different reflection. The white (I believe) is a reflection of his lighting fixture itself. |
|
pizzano
Cave Dweller
Member since February 2018
Posts: 1,390
|
Post by pizzano on Sept 7, 2019 12:14:54 GMT -5
Thanks - I just checked out your post of what you sliced up. I really like the stuff you labeled Faust, UT. Is that a type of flint maybe? It really looks like some Flint Ridge Ohio material I have. Chuck You know, we never have nailed down what exactly that material is. We found large chunks of it encased within a lime stone and very hard brown clay material near an old mine tailing pile of quartz embedded stuff (which we have yet identified as well). It's somewhat lite weight, very dense, does not scratch easily with a knife blade and no reaction to acids. When cut and disc prep'd, it does not splinter or chip like some flints do. It cuts relatively easy and sands down nicely. I'd say it's a 5-6mohs and it will polish with other like mohs hardness and ceramics, but tricky to get a very deep hue........ I'll add a few photo's of the material that came out of that mine with it, as a comparison, since I don't have any more rough of it other than what I've already cut. My son has a couple of large chunks I'll have to steal from him the next time I'm out in Utah visiting. This photo has a rough chunk of that "flint" looking stuff..... very top left corner...:  These photo's are of the other material that came from the same mine......we followed a short vain of it along the entrance wall and dug it out in two pieces about 1.5' long total....:    That black material above is what these ended up looking like after I worked on them......very similar in hardness and density as the "flint" like stuff...:    Tricky to polish, but well worth the effort. |
|
rjbud1
starting to spend too much on rocks
Member since November 2015
Posts: 100
|
Post by rjbud1 on Sept 7, 2019 20:04:45 GMT -5
Those are beautiful! I have to try the magnet idea myself at home now,
|
|
|
|
Post by Drummond Island Rocks on Sept 7, 2019 20:19:01 GMT -5
Those are beautiful! I have to try the magnet idea myself at home now, Thank you. Most of the pudding stone ones I sell to a local gift shop and they go quick. I have magnet board I set up at my gem and mineral shows for the rest. I use really strong 1/2" diameter neodymium magnets so they can be used to hold items. 2 part epoxy to secure them. This batch happens to be all flats but I also make them with natural shaped tumbles by grinding a 1/2" diameter flat spot first. 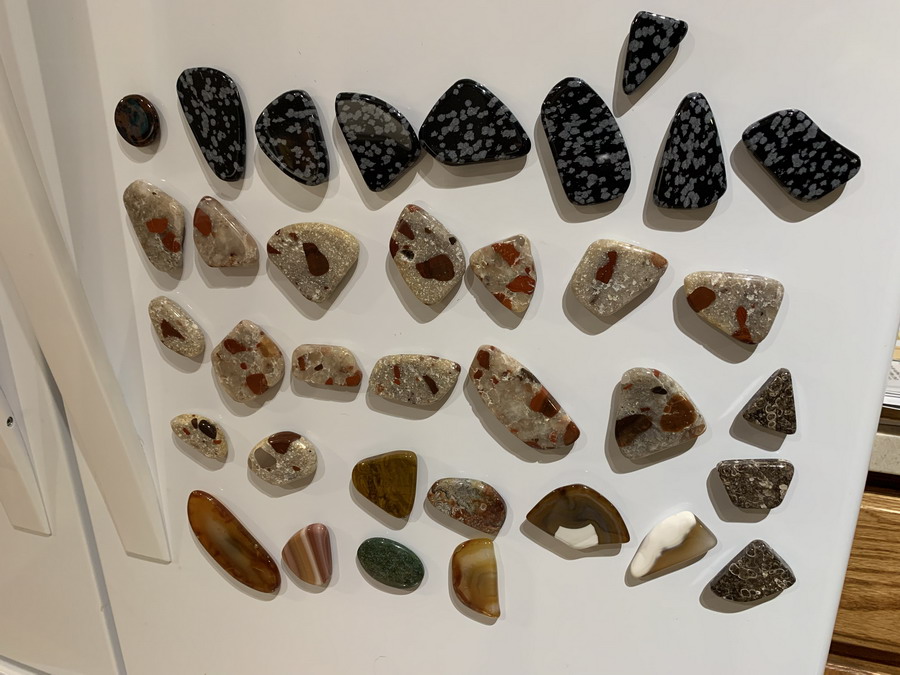 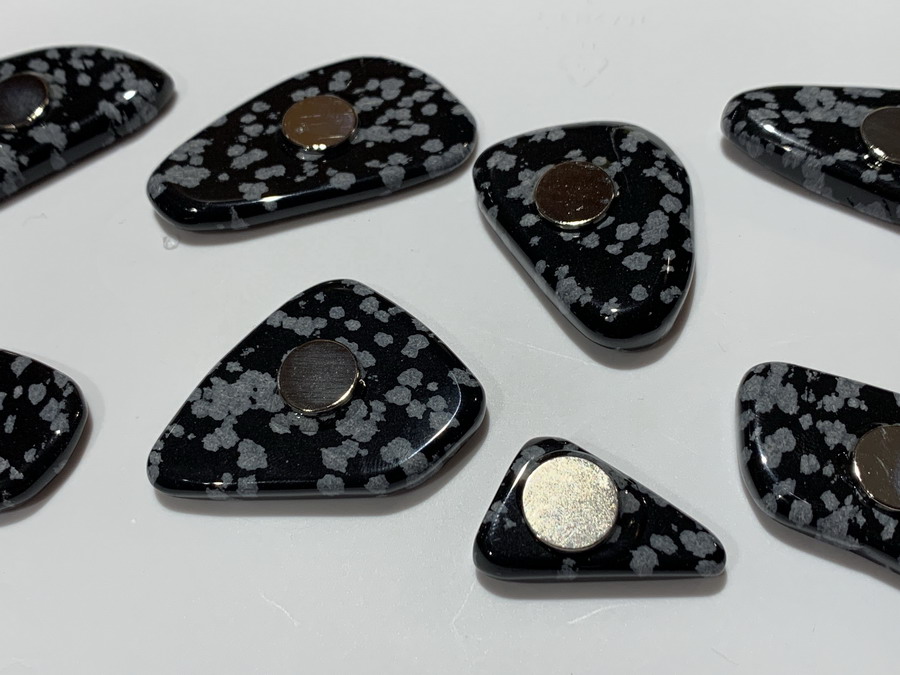 Chuck |
|
rjbud1
starting to spend too much on rocks
Member since November 2015
Posts: 100
|
Post by rjbud1 on Sept 7, 2019 20:52:28 GMT -5
Those are beautiful! I have to try the magnet idea myself at home now, Thank you. Most of the pudding stone ones I sell to a local gift shop and they go quick. I have magnet board I set up at my gem and mineral shows for the rest. I use really strong 1/2" diameter neodymium magnets so they can be used to hold items. 2 part epoxy to secure them. This batch happens to be all flats but I also make them with natural shaped tumbles by grinding a 1/2" diameter flat spot first. Chuck Thanks for that tutorial , Chuck. I have plenty of neodymium magnets, I use them to make rotating turrets for model kit tanks. |
|
|
|
Post by TheRock on Oct 9, 2019 2:14:15 GMT -5
I dont know how I missed this but better late than never. Great pics and Work as always.  |
|
|
|
Post by rockjunquie on Oct 9, 2019 10:55:15 GMT -5
Drummond Island Rocks I have a bunch of agate flats in the second stage. I skipped the first. They have been in for 2.5 days. I was shooting for 3- just in case. I pulled one out last night and it looked pretty good. I hate to jump the gun, but I'm itching to take them out. I know this is a dumb question, but is 2 days enough? I'm thinking yes, but you would know better. Yes, I'm still a newb.
|
|
|
|
Post by Drummond Island Rocks on Oct 9, 2019 11:14:38 GMT -5
Drummond Island Rocks I have a bunch of agate flats in the second stage. I skipped the first. They have been in for 2.5 days. I was shooting for 3- just in case. I pulled one out last night and it looked pretty good. I hate to jump the gun, but I'm itching to take them out. I know this is a dumb question, but is 2 days enough? I'm thinking yes, but you would know better. Yes, I'm still a newb. When you say they are in the second stage I assume you went straight from the saw into the loto with 120/220 or straight 220. That is how all of these were done and these ran 48 hrs in 120/220 S/C, 48 hrs in 500 A/O, 48 hrs in A/O polish. I skipped 1000 A/O because of a show time crunch and I knew that would still turn out good enough for $3.00 magnet stones. Going any longer then 48 hrs in 120/220 will not help remove and flaws such as saw marks. My saw cuts really nice but if I had small saw marks I would probably run them in 120/220 for 24 hrs then do a clean out and recharge with 120/220 again and let that stage run 48 hrs. 48 straight hrs in 120/220 in the loto is not equivalent to two 24 hr runs with a clean out in between due to how quickly the grit breaks down. Chuck |
|
|
|
Post by rockjunquie on Oct 9, 2019 11:18:18 GMT -5
Drummond Island Rocks I have a bunch of agate flats in the second stage. I skipped the first. They have been in for 2.5 days. I was shooting for 3- just in case. I pulled one out last night and it looked pretty good. I hate to jump the gun, but I'm itching to take them out. I know this is a dumb question, but is 2 days enough? I'm thinking yes, but you would know better. Yes, I'm still a newb. When you say they are in the second stage I assume you went straight form the saw into the loto with 120/220 or straight 220. That is how all of these were done and these ran 48 hrs in 120/220 S/C, 48 hrs in 500 A/O, 48 hrs in A/O polish. I skipped 1000 A/O because of a show time crunch and I knew that would still turn out good enough for $3.00 magnet stones. Going any longer then 48 hrs in 120/220 will not help remove and flaws such as saw marks. My saw cuts really nice but if I had small saw marks I would probably run them in 120/220 for 24 hrs then do a clean out and recharge with 120/220 again and let that stage run 48 hrs. 48 straight hrs in 120/220 in the loto is not equivalent to two 24 hr runs with a clean out in between due to how quickly the grit breaks down. Chuck Thanks! Yes, I went straight to 120/220 in the loto. Sorry I wasn't more clear. I'll pull them out now and have a look. Maybe recharge. I didn't slab any of these, but most are fine for saw marks. |
|