|
|
Post by tims on Oct 16, 2019 22:18:53 GMT -5
What's a good guestimate on grit and amount for a 15# 14# vibe for a pre-polish stage? I'm thinking 500+ AO, maybe half a cup? 48 hours or so. Just shooting for ballpark, yell if that sounds disastrous.
I usually run a 3 stage 80sic / 80ao / ao polish in rotary so i don't have any intermediate grit, but i know someone local that might have a cup to lend if i can figure out what i need. Trying to save a botched rotary batch before it snows ...
|
|
agatemaggot
Cave Dweller 
Member since August 2006
Posts: 2,195
|
Post by agatemaggot on Oct 16, 2019 23:08:21 GMT -5
Check with Val Carver at Minnesota Lapidary supply, I use a pre-polish I buy from him. I use a final polish from him called TXP I believe. Not sure of amount of pre-polish, I use 3 small coffee scopes per load, guessing but each scoop holds about 2 teaspoons and use 1 scoop of the TXP final polish as it calls for 1/3 the amount. I run an 18 pound mach so amounts should be about the same or you could back off the amount a little.
Lapidary work don't come cheap, spend the money you need to at the get - go, you will save time AND money if you try to ad lib from the start !
|
|
|
|
Post by tims on Oct 17, 2019 3:38:42 GMT -5
Thanks for the amounts for pre and polish. I need to re-read the tutorials here just been pressed for time.
|
|
|
|
Post by tims on Oct 17, 2019 13:19:32 GMT -5
Just found some leftover AO 500 so i think the correct grit must be AO 500. Will post some pics if all goes well or if it's a trainwreck.
|
|
gatorflash1
spending too much on rocks
 Active in Delaware Mineralogical Society, Cabchon Grinding and Polishing, 2 Thumlers B's and a UV-18
Member since October 2018
Posts: 375
|
Post by gatorflash1 on Oct 17, 2019 15:16:14 GMT -5
I run a second stage of 120-220 SiC for a week or more in my 15# rotary tumbler before moving on to the prepolish stage #3. I have had good results in my 18# TT UV-18 vib tumbler using 9 TBL of 500 or 600 SiC for 1-3 days. I only use this vib tumbler for stages 3 and 4. That is 1/2 TBL per pound which is what you are using. A little thicker slurry is the key in a vib. I continually monitor my tumbling to be sure my slurry isn't getting too thick. If it is I add a little water until it seems the right consistency. After one day I pullout some stones and wash them clean. If they are starting to shine I go a second day. An extra day or two won't hurt anything. I give my rocks and barrel a good super-wash before starting the pre-polishing stage and again before going on to the polishing stage.
I think your AO 500 would work fine but would recommend using the 120-220 grit first in stage 2. Probably 98% of the tumbling work is done in stage 1 with a fine grinding in stage 2. Then I go on to the final stages #3 and #r which are the frosting on the cake, or rock as it were.
Good luck, send some pics.
|
|
|
|
Post by tims on Oct 18, 2019 1:09:06 GMT -5
I run a second state of 120-220 SiC for a couple of days. I have had good results in my UV-18 using 9 TBL of 500 or 600 SiC for 1-3 days for my stage 3. That is 1/2 TBL per pound. I continually monitor to be sure my slurry isn't getting too thick. If it is I add a little water until it seems the right consistency. After one day I pullout some stones and wash them. If they are starting to shine I go a second day. An extra day or two won't hurt anything. I give my rocks and barrel a good super-wash before starting the pre-polishing stage and again before going on to the polishing stage. I think your AO 500 would work fine. So you run all stages in the vibe? I've been doing all stages in rotary and was planning to switch to the vibe just for polish. But leaving my vibe running outside unattended overnight bugs me enough that it's just sat unused for at least a year. Maybe 3. The way this rotary batch fouled kind of forced me to dust it off and give it a try.
Anyway it's running with approx. 11 pounds of rock and filler and i used 1/3 cup of 500 so that should be pretty close to your 1/2 TBL per pound method. I'm taking notes as this progresses so TYVM for specifying your ratio. I'll take a good look at a few pieces tomorrow after 24 hours and go from there.
|
|
gatorflash1
spending too much on rocks
Active in Delaware Mineralogical Society, Cabchon Grinding and Polishing, 2 Thumlers B's and a UV-18
Member since October 2018
Posts: 375
|
Post by gatorflash1 on Oct 18, 2019 7:55:06 GMT -5
As mentioned stages 1 and 2 are done in the rotary tumblers. I think for my tumbling that this is where 98% of the work is done. This also the most time consuming part of my tumbling, usually taking a month or more to get the rocks formed, rounded, and smooth.
Only the polishing stages 3 & 4 are done in my 18# vib. I have two drums for my vib, one for each stage. Because cleanliness is so important I don't want any contamination between the stage 3 and stage 4 polishing stage. These vib stages go fast, tumbling is generally done in a week including a couple hours of burnishing. These #3 and #4 stages take more babysitting though to make sure the slurry is a bit thicker, but too much. I try to check my vib twice a day and leave the slurry a little thinner when running overnight.
I'm an agate man so if you are tumbling other types of rock you might have to adjust this process slightly to account for the difference in mohs values. I hope I have explained this adequately. You are running larger tumblers like I am. I don't know if what I'm saying would apply to a smaller, say 3 lb tumbler.
It sounds like you have all the right tools for the job.
Please let me know how you make out and maybe post a couple of pictures. Good luck!
|
|
|
|
Post by tims on Oct 18, 2019 13:06:30 GMT -5
Thanks again. I hope to get into a routine similar to yours, using rotary for the heavy lifting then vibe to finish. I got the vibe several years ago before i'd ever tumbled, tried running a batch from scratch, and learned the hard way that stage 1 isn't ideal in a vibe. That's when i bought the QT12 rotary and since it's so easy (less babysitting) and i can run it indoors i've been using it exclusively. I'm feeling alot more comfortable with the vibe already after it survived the night ... as you mentioned i spritzed it a bit extra before bed and everything is still churning along nicely today. I'll do a cleanout shortly and move to polish. AO, probably a couple teaspoons?
PS what is that monster in your profile pic?
|
|
|
|
Post by tims on Oct 18, 2019 17:25:41 GMT -5
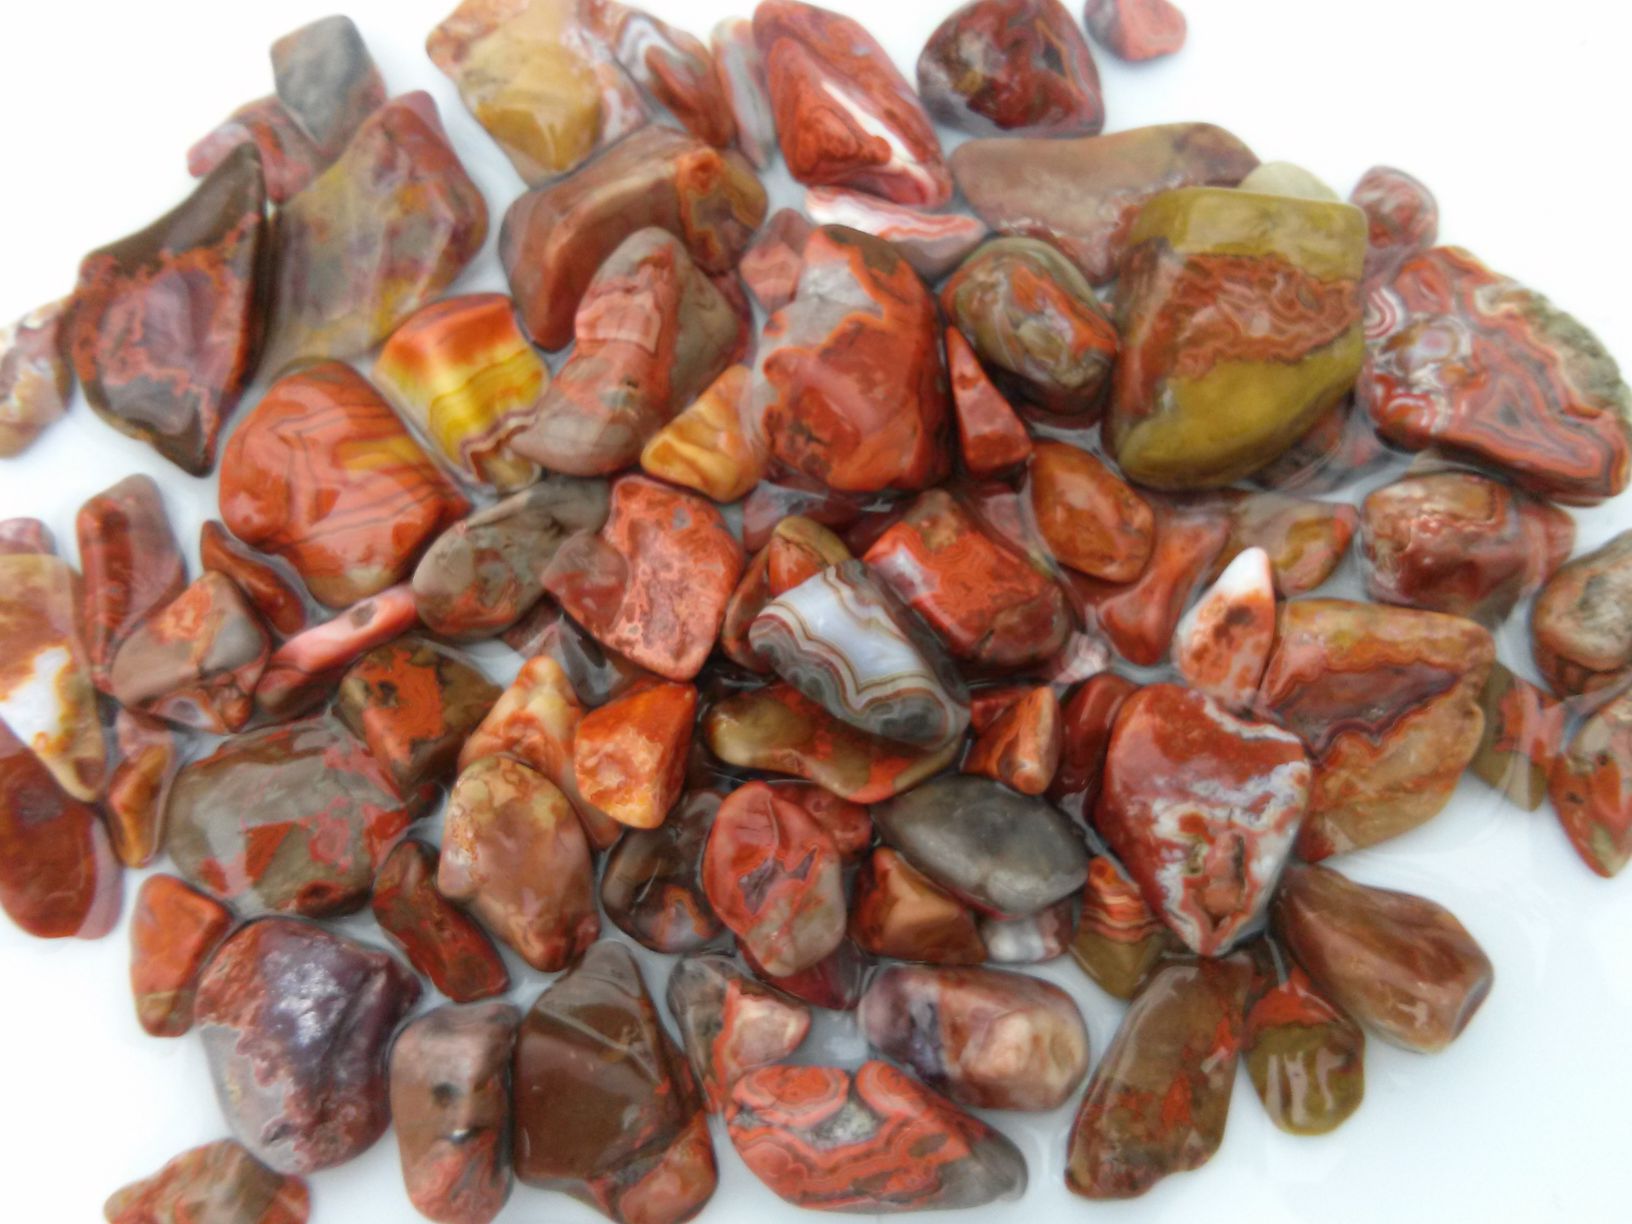
Here are a few dry pieces after pre-polish. Everything looks as good as can be expected with the mix i always end up rolling ... the good stuff looks ok and the bad stuff is a chip and fracture-fest:
If your Harley isn't loud enough buy a Viking.
|
|
gatorflash1
spending too much on rocks
Active in Delaware Mineralogical Society, Cabchon Grinding and Polishing, 2 Thumlers B's and a UV-18
Member since October 2018
Posts: 375
|
Post by gatorflash1 on Oct 18, 2019 20:19:37 GMT -5
It is hard to tell whether the slight finish dullness on the rocks in your picture is caused by the camera focus not being sharp, or the incomplete polish Step #4. If mine I think I'd repeat prepolish stage #3 and then polish stage #4. then a 4 hour burnish. This should be only a couple of days in your vib. This should give you a batch of nice wet shiny rocks. If you wet the rocks do they get a more shiny finish? If so I would really suggest repeating the polish steps. They are nicely shaped. Here is some good info I found that speaks to your problem. rocktumbler.com/blog/phooey-my-stones-didnt-get-a-nice-polish/Good luck. Oh, to answer your question, the rocks in my profile box are Florida Eastern Diamondback Rattlesnake Agates. I think they look very snakey! No, actually they are Madagascar banded agates. I really like the Madagascar and Botswana banded agates for the great colors and patterns. www.bing.com/images/search?q=big+eastern+diamondback+rattlesnake+pictures&qpvt=big+eastern+diamondback+rattlesnake+pictures&FORM=IGRE |
|
|
|
Post by tims on Oct 18, 2019 22:35:41 GMT -5
Rattlesnake agate, new to me but yeah they look cool  PS Pics are after pre-polish, they're in polish now. |
|
|
|
Post by tims on Oct 19, 2019 22:13:25 GMT -5
Well, the decent rocks took a decent polish. I need to find a way to stop rolling junk lol. It's weird doing a cleanout after a day rather than a week, the vibe is really nice for getting things done.
I'll be at this batch with a toothbrush all night. Will get better pics in the tumbling photos page soon i hope, but here are a couple quick pics that kind of show the result:
|
|
|
|
Post by miket on Oct 20, 2019 7:11:23 GMT -5
Nice
|
|
gatorflash1
spending too much on rocks
Active in Delaware Mineralogical Society, Cabchon Grinding and Polishing, 2 Thumlers B's and a UV-18
Member since October 2018
Posts: 375
|
Post by gatorflash1 on Oct 20, 2019 16:01:41 GMT -5
Now you are getting it.
|
|
gatorflash1
spending too much on rocks
Active in Delaware Mineralogical Society, Cabchon Grinding and Polishing, 2 Thumlers B's and a UV-18
Member since October 2018
Posts: 375
|
Post by gatorflash1 on Oct 24, 2019 10:18:04 GMT -5
Tims - Don't be afraid to go an extra day or two for vib polishing. Do you do a burnishing stage after the polishing stage #4? It is easy. Make sure everything is nice and clean. Add a little 2 TBL of Borax Laundry Soap, or 2 TBL of Ivory Snow Bar Soap chips (use cheese grater), or 2 TBL of Deft liquid soap, or a little bit of each. I use the Borax powder and Deft liquid soap because I'm too lazy to mess with the bar soap and cheese grater. As you can see there is no polish used when burnishing. I Vib tumble from about four hours to as long 1-3 days checking the rocks often. Burnishing can make a significant difference in the final brilliance of the sparkle on your rocks. I leave about 25% of my batch being the polished ceramic media from stage 4. rocktumbler.com/tips/burnishing/I like your pictures! Keep them coming. |
|
|
|
Post by tims on Oct 24, 2019 21:22:48 GMT -5
gatorflash1 I wasn't able to run a full burnish on this load, it got really cold and wet really quick. Had to make do with about 1/2 hour burnish with ivory soap then the toothbrush cleanup which i know is inferior (and monotonous and painful lol). Next season that will definitely become a regular addition and thanks for the detailed instructions. Most of this load got beat up badly in the rotary; I rolled a bunch of questionable material and i got the answer to my question  The cut and shaped pieces of good material took a wetter shine that i'm used to. Will try for some better outdoor pics tomorrow but these are most of the survivors out of 12#
|
|
gatorflash1
spending too much on rocks
Active in Delaware Mineralogical Society, Cabchon Grinding and Polishing, 2 Thumlers B's and a UV-18
Member since October 2018
Posts: 375
|
Post by gatorflash1 on Oct 29, 2019 7:53:29 GMT -5
Tims -
I think those have a great polish. Congrats! What ae the white jelly bean size rocks?
|
|
|
|
Post by tims on Nov 2, 2019 13:15:14 GMT -5
Tims - I think those have a great polish. Congrats! What ae the white jelly bean size rocks? Just quartz. I've been wanting to do some Tree of Life wire wraps and thought the monotone white and yellow quartz would be good for them. Not sure what the beans will be good for, i cut them too thick for small cabs then domed both sides ... lots of work and i have no idea why  |
|
jamesp
Cave Dweller
Member since October 2012
Posts: 36,158
|
Post by jamesp on Nov 3, 2019 6:39:02 GMT -5
Thanks for asking this question tims. I had forgotten the AO 500 dose for 14 pound Vibrasonic. Had to go back 50 pages to find answer. 2 tablespoons AO 500 for 14 pound hopper. 1 tablespoon AO 500 for 8 pound hopper. Doesn't sound like much but it has worked fine.  Resulting polish on fine giant snake skins from quartz. Never forgotten, thank you Larry. My wife still has them as center piece on her desk.:    |
|
|
|
Post by tims on Nov 3, 2019 15:23:26 GMT -5
Thanks jamesp so I probably used over double what I needed. One of the reasons I've avoided the vibe is the cost of grit but I always forget that you need so much less of it. At 2 tbsp per load I can run several more batches with the 500 i have left. |
|


 The cut and shaped pieces of good material took a wetter shine that i'm used to. Will try for some better outdoor pics tomorrow but these are most of the survivors out of 12#


 Al Falfa


