|
|
Post by NatureNut on Aug 15, 2009 21:33:56 GMT -5
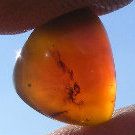
Worked on an intarsia project this week. I wanted to put together different stones to represent the sun, moon and earth. Here are three, with sunstone albite for the sun, olive/silver flash moonstone for the moon, and green microcline moonstone for the earth. All are self-collected. There is one more not shown that I've wrapped. Took the pics in front of my vanity mirror to catch the flash.    This one is only sun and moon.  Thanks for lookin' at 'em! Jo |
|
NDK
Cave Dweller 
Member since January 2009
Posts: 9,440
|
Post by NDK on Aug 15, 2009 21:46:26 GMT -5
These are spectacular Jo! I especially like the 2nd one.
You do a wonderful job photographing these too!
Nate
|
|
highplainsdrifter
fully equipped rock polisher

Member since December 2008
Posts: 1,266
|
Post by highplainsdrifter on Aug 15, 2009 22:13:06 GMT -5
Very cool, I like the idea of mixing three stones like that. I still haven't tried intarsia, but I'm planning to give it a try.
|
|
SteveHolmes
fully equipped rock polisher
Member since July 2009
Posts: 1,900
|
Post by SteveHolmes on Aug 15, 2009 22:45:49 GMT -5
You did Great Jo! And what a super idea! Thanks for sharing your creations.
Steve
|
|
cman
starting to spend too much on rocks

Member since August 2009
Posts: 207 
|
Post by cman on Aug 16, 2009 7:37:06 GMT -5
What are you using to do the Intarsia equipment used?
Are you using a Raytech , Facetron, Ultra Tech or some other unit?
Could you show us appreciate.
Keep up the great work.
|
|
|
|
Post by texaswoodie on Aug 16, 2009 7:57:46 GMT -5
Oooo, very cool Jo!
Curt
|
|
|
|
Post by NatureNut on Aug 16, 2009 8:45:29 GMT -5
Thanks! Well, in a nutshell, I took slabs of similar thickness to my WF and cut off a piece with the color/pattern that I wanted. Then, cut a straight side. Did two pieces like that and checked them. Then took them over to my Ameritool and ran those flat sides (to be glued together) on the 180 disc to make sure they were straight. Then super glued them together, trying to line up (what's going to become the top of the cab), the top side flat to keep the color and pattern I was going for. Let glue dry. Now you have one piece of two rocks stuck together, so it's back to the WF to cut a flat side on it. On some, I crossed that glued line, on one (not shown) it was on an outer edge, sort of parallel to the glued line. (that one will be posted in the wrapping section today). Same thing, took those pieces to the Ameritool (the glued piece with the new cut and the third piece), and flatten the edges to be glued. Now glue those, trying to keep the front flush. Let dry (about 15 minutes). Maybe it's because I'm working with feldspar here, which is layered in structure, but I stabilized it with Super Glue around the outside and reinforced my glued lines. Let it dry as long as it needs. 15-20 mins. It's back to the WF for this crazy thing and then I look at it to see what shape it should be and shaped it. Flatten the back as much as possible using the edge of your WF. I did this VERY carefully, just shaving off material with the edge of my blade. If you get a nick at a seam or on the edge- go back and fill/stabilize with super glue again. Round the edges of the front of the cab to make your preshape carefully. Then I worked it on my Ameritool almost as normal, filling what needed to be filled with Super Glue, grinding off the excess glue, and repeating the glue thing if necessary. Wasn't much at this point. They held up pretty well to the pressure of cabbing, and I was careful to hold the cab across the seams so as not to bust it apart. That's it! Just took my time and didn't rush things. Hope this was clear.  Jo |
|
|
|
Post by moondragon on Aug 16, 2009 10:34:11 GMT -5
Beautiful work, Jo:) and the idea of the name and the colors were perfect for each other:)
Cant wait to see what else you create:)
|
|
GlamRocks
starting to spend too much on rocks
Member since July 2009
Posts: 105
|
Post by GlamRocks on Aug 16, 2009 14:56:29 GMT -5
Wow Jo,
Those are amazing - what a fantastic project and so nicely executed too. I think your combination of materials was extraordinary, I just love projects which show such detailed thought and consideration. The cabs turned out beautifully and the materials compliment each other really well.
You've developed a high degree of finesse in your lapidary, and it's great to see how much fun your having. I think your last word of advice is the best I've heard for anyone wanting to improve their cabbing, - Don't Rush! Stunning job Jo, I really like your style Buddy!
Thanks for sharing such an innovative and inspirational project, you did great!
Cheers,
Harry.
|
|
|
|
Post by stoner on Aug 17, 2009 11:22:53 GMT -5
Very nice work.
|
|


 Jo
Jo


