Tom
fully equipped rock polisher
 My dad Tom suddenly passed away yesterday, Just wanted his "rock" family to know.
Member since January 2013
Posts: 1,557
|
Post by Tom on Feb 15, 2016 20:50:18 GMT -5
Good work Pat! You will soon be raising cups and bottles!
|
|
|
|
Post by Pat on Feb 16, 2016 10:46:14 GMT -5
A tricky thing to do Pat is a bowl shape. Like the bowl in the spoon. You got yours darn good. getting the bowl was not so tricky. I used a wood tear shaped dapping block. |
|
jamesp
Cave Dweller 
Member since October 2012
Posts: 36,155
|
Post by jamesp on Feb 16, 2016 11:56:09 GMT -5
Nice idea Pat. Sure did the trick. Must try wood for an anvil (dap). Easy to shape for special shapes, hmmm. |
|
|
|
Post by toiv0 on Feb 16, 2016 12:41:38 GMT -5
your dapping block is concave? and not like an anvil? I have just carved into a firewood block the shape I need to make sometimes for jewelry.
|
|
|
|
Post by Pat on Feb 16, 2016 21:19:00 GMT -5
your dapping block is concave? and not like an anvil? I have just carved into a firewood block the shape I need to make sometimes for jewelry. Yes, my dapping blocks are concave -- both wood and metal dapping blocks. |
|
|
|
Post by Pat on Feb 18, 2016 14:25:48 GMT -5
Miss Pat, I don't pickle anything, especially copper or brass unless I want to remove the oxidation for further soldering. I use a 4 or 5 inch tight yellow muslim wheel with compound. The tripoli should be fine for pre polish. The brass brush will make a frosted surface, I wouldn't use. First I would use a fine sand paper not lower than a 320 to 400 grit, this will get rid of the major scratches. Then the yellow wheel with compound, don't be afraid to use some pressure (wear gloves it will get hot). Should be moderately polished at this point then use rouge or the zam for a high shine. It took about 20 seconds to shine the end of the brass one I sent. Remember to polish at different angles so there isn't any marks from going one way. Billy, I have a new tight yellow muslin wheel and I loaded it with Tripoli. Tried it again using more pressure. Voila! Shiny! So now I am going to finish shaping it and smoothing it out, then Tripoli it again with a follow up of Zam. Gloves a very good idea. Hot! Thanks! |
|
|
|
Post by toiv0 on Feb 18, 2016 19:32:28 GMT -5
sweet, just waiting patiently to see finished product. Good luck.
|
|
|
|
Post by toiv0 on Mar 13, 2016 19:41:41 GMT -5
I ran across this pic on the internet 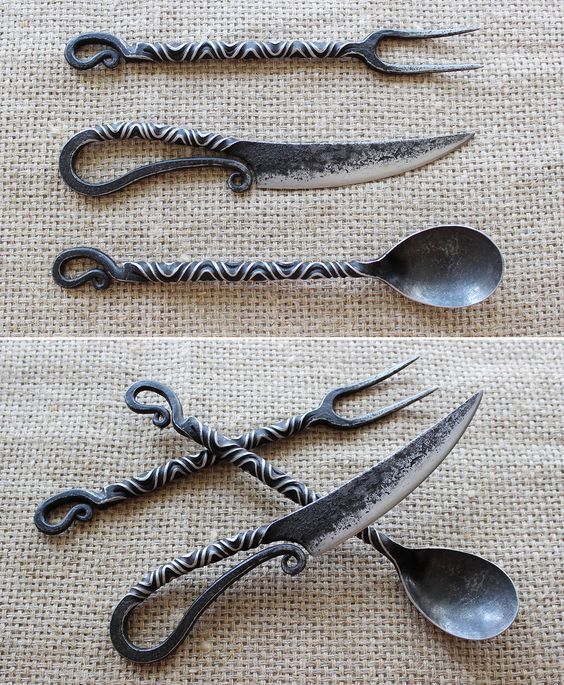 |
|
|
|
Post by Pat on Mar 13, 2016 19:54:52 GMT -5
I was working on them intermittently yesterday. Filing to shape, and polishing with Tripoli. Just ordered more Tripoli. Looking better, but still a ways to go. Eager to finish and use. Your silver spoon is in the sugar bowl . toiv0 |
|
|
|
Post by toiv0 on Mar 13, 2016 20:28:18 GMT -5
I like it, that spoon was sweeeeeet. Just kidding
|
|
|
|
Post by Pat on Jun 17, 2016 12:53:48 GMT -5
I'm done with these four spoons. However, I am not finished with the effort to make a better spoon. Going to start over using a different method. I appreciate the helpful contributions to this thread; they've been most helpful. toiv0 fireforged This photo is the end of my first try at spoons. Yes, I know they look like a three year old did them with her toes! 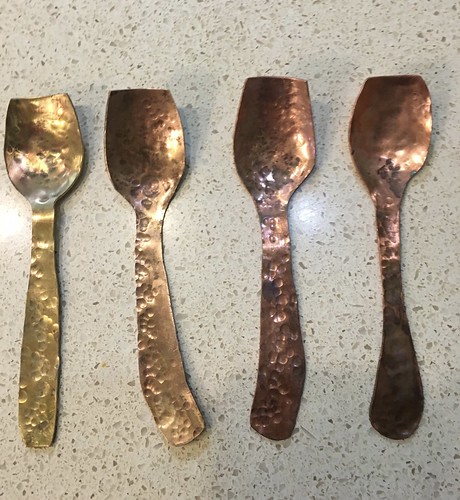 IMG_0528 IMG_0528 by Pat, on Flickr |
|
|
|
Post by toiv0 on Jun 17, 2016 20:45:32 GMT -5
Makes me smile, keep on hammering
|
|
wampidytoo
has rocks in the head
 Add 5016 to my post count.
Member since June 2013
Posts: 709
|
Post by wampidytoo on Jun 18, 2016 1:44:47 GMT -5
Not spoons but same principle. The full circle lily is extremely difficult. All of these were hammered on a flat anvil. The butterflies are balanced and fly around the flower with a little push. 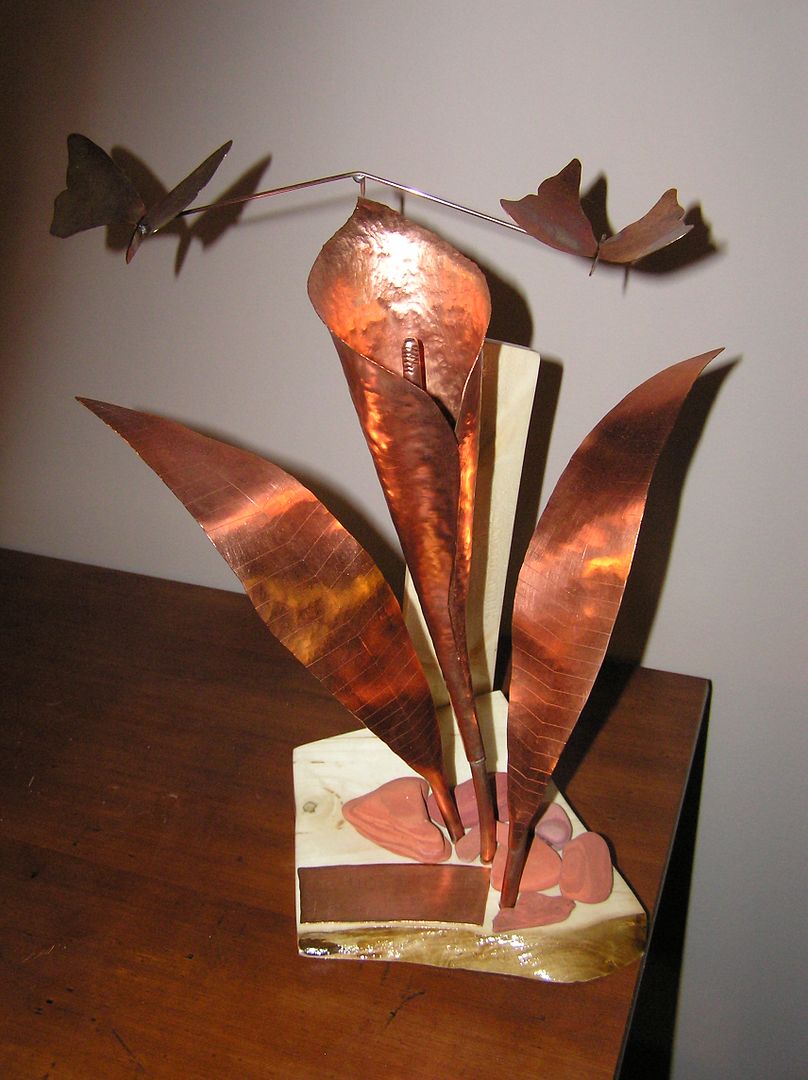 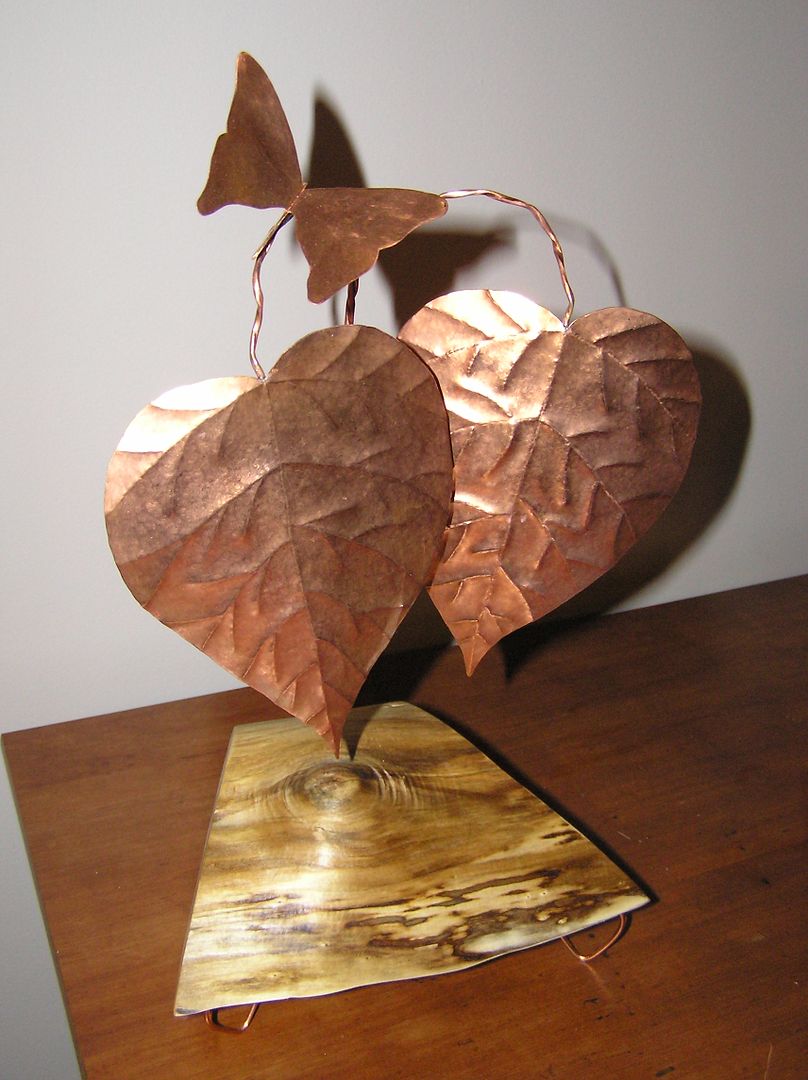 All of the leaves in this fountain are copies of leaves in Missouri. 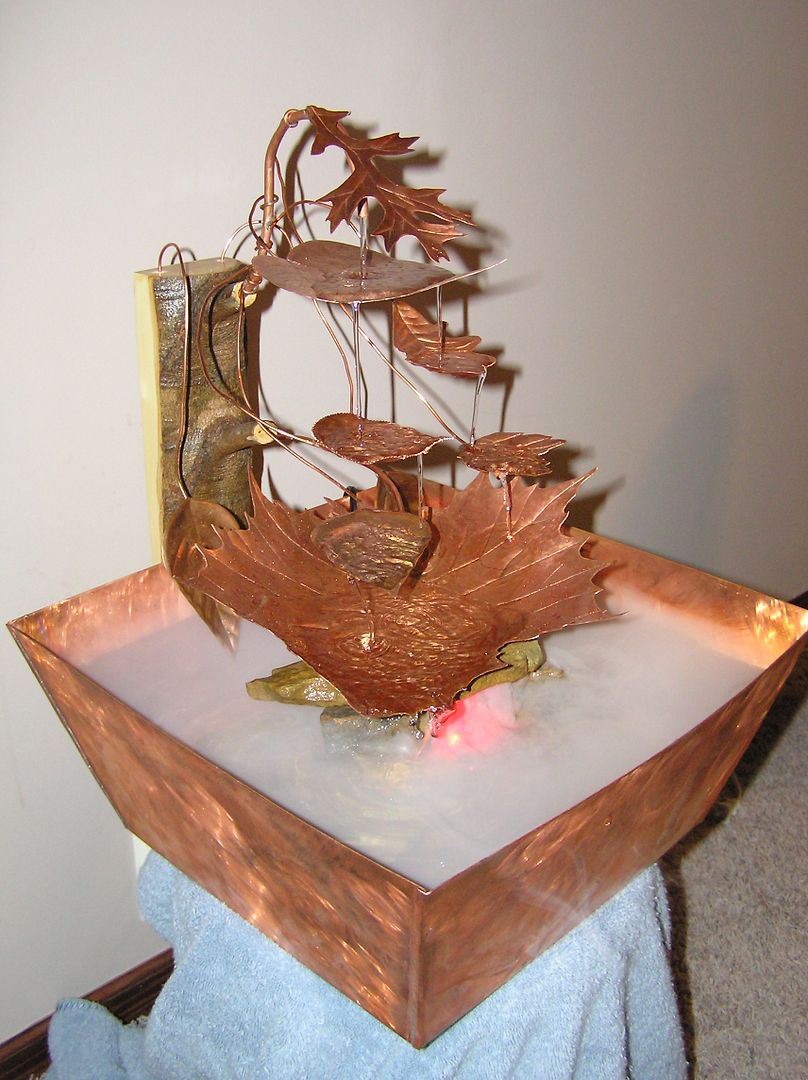 Pat Pat , I think you will have a lot better luck if you strike softer and more often. The handles can be straightened by hammering more on the concave side. If a handle starts to curve move to the other side of the handle. It is just a matter of stretching the metal. By hitting a spot it pushes the metal outward and at the same time makes that point thinner. You can make the bowl of the spoon simply by hammering more in the center and less on the edges. If you have a flat anvil you hammer the inside of the bowl and if you have a ball anvil you hammer on the outside of the bowl. I prefer hammering the visible (top) side because I like the hammer marks more than the anvil marks and I almost always hammer with the round end of a ball peen hammer. When I finish a piece there is no place on it that does not have a hammer mark. I gotta tell ya that for your first try the bowls are great. I am very surprised. Jim BTW if you want to enlarge a piece and keep it flat start from the outside and work in, instead of center out like you do for the bowl. |
|
wampidytoo
has rocks in the head
Add 5016 to my post count.
Member since June 2013
Posts: 709
|
Post by wampidytoo on Jun 18, 2016 1:47:58 GMT -5
Another BTW, I use a 4 oz hammer.
Jim
|
|
|
|
Post by Pat on Jun 18, 2016 10:09:20 GMT -5
wampidytoo Jim, @wampidytoo thanks for the ideas. Will do. A 4 oz hammer sounds very light. I'm surprised that you advise working from the outside to in. I've been inside to out or just random on the handles. Your pieces are lovely!
|
|
wampidytoo
has rocks in the head
Add 5016 to my post count.
Member since June 2013
Posts: 709
|
Post by wampidytoo on Jun 18, 2016 12:03:30 GMT -5
Sometimes I do not explain what is in my brain very good. For a bowl I start at the center and work out. If you want to hammer something (leaves for instance) you start on the outside so there isn't so much cupping. If I was doing the handles I would work back and forth the full length of the handle. It will curl up some but easy to straighten it out. If it starts curling up too much you can either strike it softer or flip it over and work both sides. If they curve to one side just hammer a little more on the concave side.
You have a really good start so it won't be long until you have it all figured out.
Jim
|
|


 Al Falfa