|
|
Post by 1dave on Dec 1, 2018 13:31:23 GMT -5
|
|
|
|
Post by 1dave on Dec 1, 2018 13:46:11 GMT -5
|
|
gemfeller
Cave Dweller 
Member since June 2011
Posts: 3,775 
|
Post by gemfeller on Dec 1, 2018 16:05:18 GMT -5
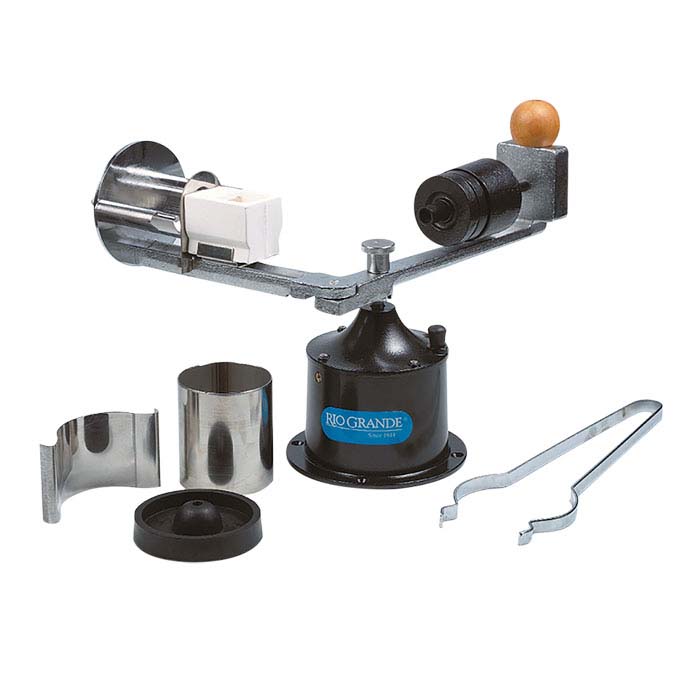
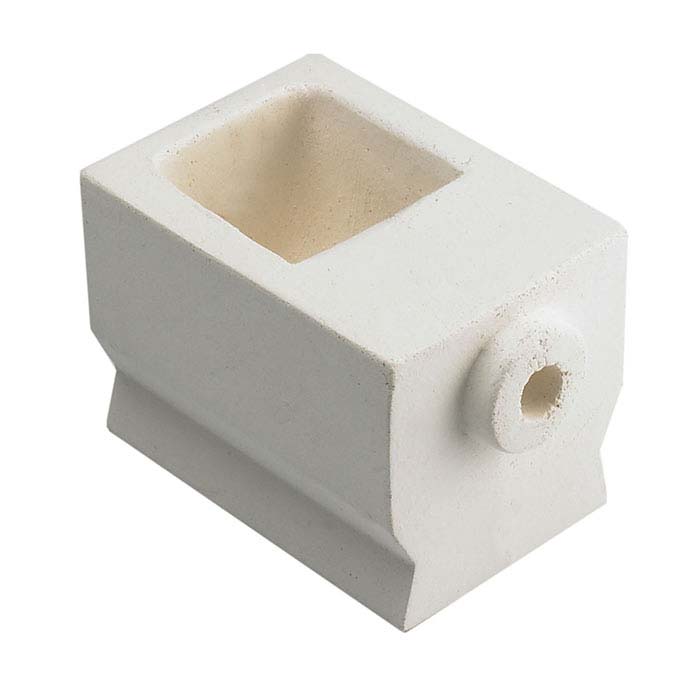
Kerr out of business? No way. They're one of the biggest suppliers to the dental industry. Centrifugal jewelry casting in its present form evolved from Kerr machines though the centrifugal casting concept goes far, far back to manual sling casting -- slings similar to the one David slew Goliath with. That said, I've been more than happy with my Neycraft Spinmaster. It comes with its own safety shield, easy-exchange crucibles for gold, silver or base metals, simple bench mount etc. I don't know how it compares price-wise with Kerr or other machines. It was designed specifically for jewelry casting. I've never used a Kerr-type swing-arm caster and maybe they have advantages I'm not aware of. As an aside, my main guide to learning about centrifugal casting was Murray Bovin's 1972 book "Cenrifugal or Lost Wax Casting." It's still in print and the information it contains is still very helpful. Though some technology has changed, the principles have not. I built two vacuum casting machines and they worked well but I think I get fewer miscasts and denser castings with the centrifugal machine though mileage may vary with other crafstpeople.  |
|
|
|
Post by opalpyrexia on Dec 1, 2018 18:08:59 GMT -5
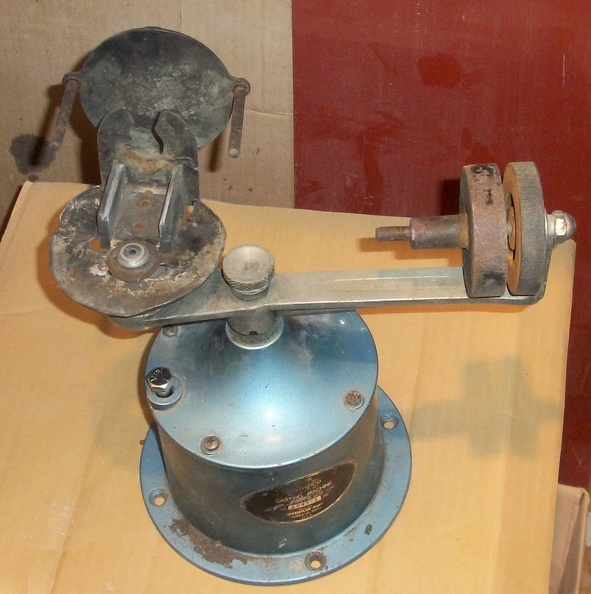
I purchased a Kerr in 2010 from a jeweler was short on cash and unloading tools and supplies. My shop is pretty small, but I had just enough room for the machine, so I built a table that has storage below and a top that functions as a small work surface. The first photo doesn't show the leveling legs that I added later. In the second photo I'm just about to let the arm go. I don't cast very often but it's worked great for me. 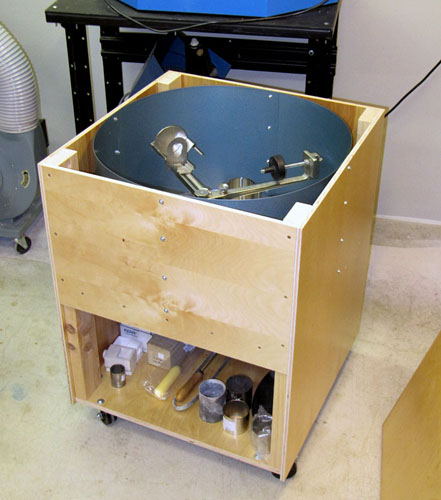 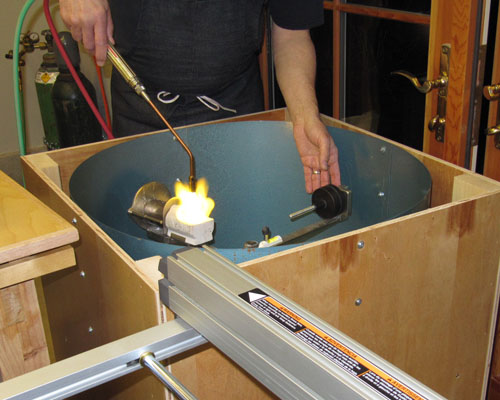 |
|
|
|
Post by 1dave on Dec 1, 2018 19:10:58 GMT -5
gemfeller - Perhaps I should have written 40 years ago. I think that was when they stopped advertising in the Lapidary Journal and appealing to rockhounds.
|
|
gemfeller
Cave Dweller
Member since June 2011
Posts: 3,775
|
Post by gemfeller on Dec 1, 2018 19:14:24 GMT -5
opalpyrexia, that's a very nice set-up. Looks like you're very handy and a lot neater than I am.
|
|
gemfeller
Cave Dweller
Member since June 2011
Posts: 3,775
|
Post by gemfeller on Dec 1, 2018 19:30:10 GMT -5
gemfeller - Perhaps I should have written 40 years ago. I think that was when they stopped advertising in the Lapidary Journal and appealing to rockhounds. It was about 25 years ago that Lapidary Journal itself quit appealing to rockhounds and went into its snobbish "jewelry artist" mode. I quit my subscription and haven't kept up. All I know is that most of the major jewelry supply houses offer Kerr Centrifico machines along with lots of Kerr waxes. There have been lots of new wax offerings, especially those made by Matt products, that perhaps overshadow Kerr with their marketing/branding methods. Should have used a winking smiley emoticon in my previous post to you. |
|
|
|
Post by 1dave on Dec 1, 2018 19:37:04 GMT -5
All is forgiven, but you know that.
Yeah, too bad LJ went south. It once was a great resource.
|
|
|
|
Post by opalpyrexia on Dec 2, 2018 14:11:15 GMT -5
opalpyrexia , that's a very nice set-up. Looks like you're very handy and a lot neater than I am.
Thanks. I should add that my casting cabinet does not have any heavy weight added to make it stable, something that is always recommended for safety for DIY centrifugal casting machine installations. I rely solely on the leveled feet and very careful balancing of the casting machine.
While setting up for casting I place the can with its curing investment in the caster, put the metal in the crucible, and push the crucible up to the can. I have a small bubble level glued onto the weights arm. With the arms straight (not bent), I adjust the weights for as near to a balance as I get. If I'm doing more than one cast I mark the threads with tape so that I can simply move the weights to the marked locations for subsequent casts.
I have never had the slightest indication of imbalance during an actual cast. No vibration whatsoever. The risk of an accident for my setup is effectively zero.
|
|
|
|
Post by 1dave on Dec 2, 2018 14:31:01 GMT -5
Now THAT is a great idea!  |
|
gemfeller
Cave Dweller
Member since June 2011
Posts: 3,775
|
Post by gemfeller on Dec 2, 2018 14:58:27 GMT -5
I agree it's a great idea for that kind of set-up. My Neycraft is bolted to a cabinet which is bolted to wall studs. It's probably overkill but I never have to worry about balance problems. I just wind the thing up, preheat the crucible, transfer the hot flask from the oven to the cradle, add and melt the metal and let her go. The only balance adjustment I ever have to make is adding a heavy metal piece that comes with the unit to equalize weight for large flasks.
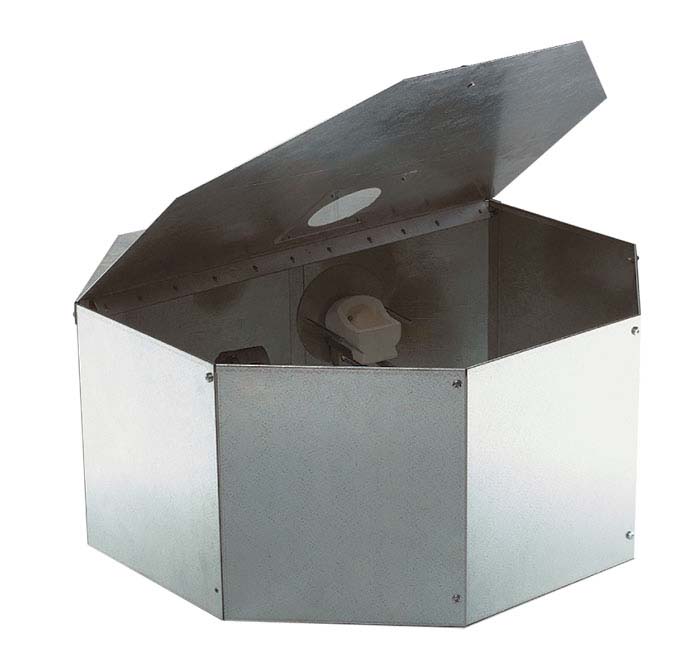
I really like the Neycraft's safety engineering. Not only does it come with an integral circular shield pan but there's a heavy metal base behind the flask to mitigate problems from a blown casting. I've never forgotten a lesson learned years ago when I visited another caster whose wall was "decorated" with silver after a blown flask. He somehow escaped injury. But he was quick to install his unit inside a big wash tub afterward.
|
|
|
|
Post by 1dave on Dec 6, 2018 11:17:14 GMT -5
opalpyrexia , you are just the person I need information from! Back around 2013 I bought a Kerr unit on E-bay that had been abused. I put it away for when I bought a burn-out furnace. That never happened. This past week I dug it out and started looking it over. 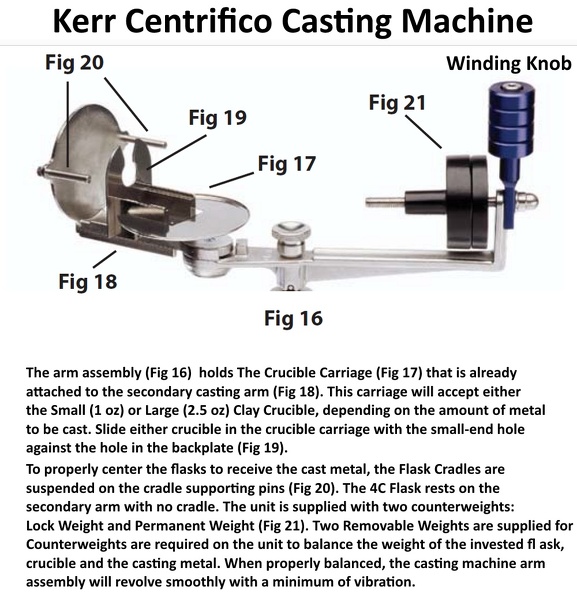 This one looks a little different. The catch pan on the Crucible Carriage has been warm - AND bent. There is a bell washer setting in the crucible holder. My guess is that the washer belongs under the arm attachment point and that an 8/32 bolt and nut are missing that holds the arms together.
 My further guess is that above mentioned bolt was missing when the machine was last operated, that the secondary casting arm (Fig 18) flew off and chased the operator around the room, dinging up the catch pan. I have broken the rusted parts loose and hammered the pan out. The drop pin is missing, but a 3/8" X 5 1/2" hex head bolt works well as a replacement
Deciding this is where the bell washer belongs.

I'm thinking of drilling the hole out and replacing the 8/32 with a 10/32 bolt and double-nutting it with a lock washer.
Finally, my questions: 1. The secondary casting arm (Fig 18) is sloppy with about a 1/4" play up and down and sideways. Is that proper? I plan on making a shim to reduce the amount of play. 2. The cradle supporting pins are not at the same level. I thought they had also been twisted, but now think they are supposed to be that way?
|
|
|
|
Post by opalpyrexia on Dec 6, 2018 14:14:18 GMT -5
I took a good look at mine, 1dave , and its secondary casting arm has the same play as yours.
I think that's intentional and to some degree it may be related to you second question. When I move the arm through its complete arc from right to left, it appears to ride up slightly until both arms are aligned and then back down when breaking in the other direction. That would make the "broken arm" position a resting position. And that makes sense because then the arms simply want to stay broken while inserting a flask and melting metal. Also, when the arms are broken, the cradle pins on mine are not at the same level. Move the casting arm so the arms are aligned and the pins are at the same height. Move it another 90 degrees and now the relative "high" and "low" pins are reversed. I'm sure that the play in the arm is by design.
My arm is connected with a size 8 bolt, too.
|
|
|
|
Post by 1dave on Dec 6, 2018 15:44:58 GMT -5
I took a good look at mine, 1dave , and its secondary casting arm has the same play as yours. I think that's intentional and to some degree it may be related to you second question. When I move the arm through its complete arc from right to left, it appears to ride up slightly until both arms are aligned and then back down when breaking in the other direction. That would make the "broken arm" position a resting position. And that makes sense because then the arms simply want to stay broken while inserting a flask and melting metal. Also, when the arms are broken, the cradle pins on mine are not at the same level. Move the casting arm so the arms are aligned and the pins are at the same height. Move it another 90 degrees and now the relative "high" and "low" pins are reversed. I'm sure that the play in the arm is by design. My arm is connected with a size 8 bolt, too.
Thank you! Just what I needed to know. People like YOU are what makes RTH GREAT! |
|
|
|
Post by 1dave on Dec 7, 2018 15:19:44 GMT -5
Gary also shared with me that the top burred nut needs to be loose enough that the arm can move up and down to properly balance when the carriage arm is in the straight out position. 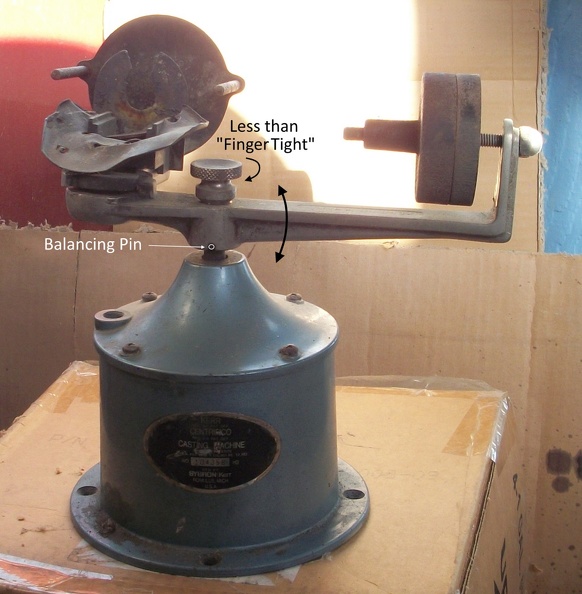 |
|
|
|
Post by 1dave on Dec 7, 2018 19:40:22 GMT -5
Also worth knowing is that the spring only engages when wound in the clock-wise direction, so by turning the arm counter-clock-wise YOU have control on the point at which the winding begins. The spring is strong and my original instructor 60 years ago seldom (mostly casting small items in gold) wound over twice.  |
|
|
|
Post by 1dave on Dec 8, 2018 2:51:31 GMT -5
|
|