|
|
Post by bobby1 on Jan 5, 2023 1:23:53 GMT -5
This cab is from a recent article in Rock and Gem Magazine. It involved making tools from silicon carbide carving blocks and wood burs. It is 3-1/2 inches tall and made from carnelian agate. I also carved a heart shape from the back 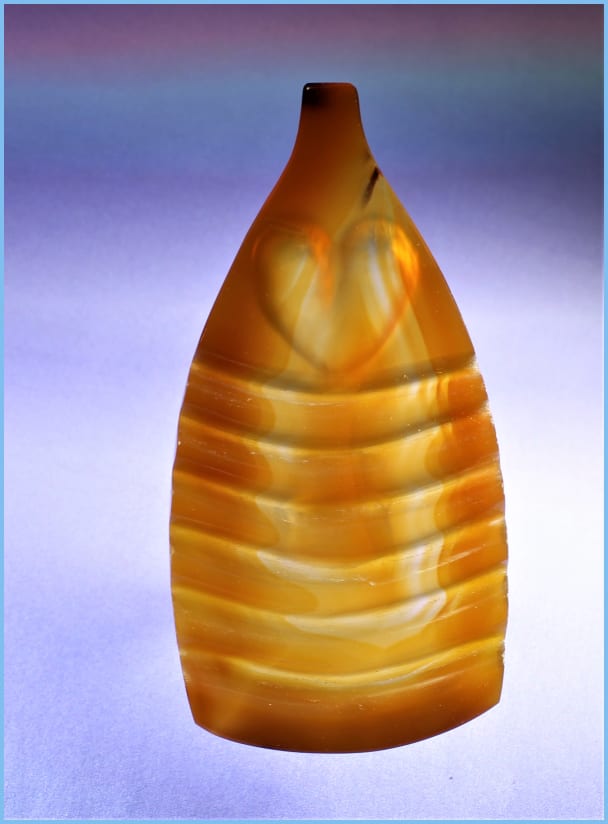 |
|
|
|
Post by Rockoonz on Jan 5, 2023 2:36:20 GMT -5
Very nice, especially the relief carving from the back.
|
|
|
|
Post by rockjunquie on Jan 5, 2023 6:48:47 GMT -5
Beautiful! You never fail to please. Your work is a notch above.  |
|
|
|
Post by hummingbirdstones on Jan 5, 2023 9:53:54 GMT -5
That is beautiful bobby1! Your skills are inspiring. |
|
|
|
Post by liveoak on Jan 5, 2023 11:16:56 GMT -5
Bob, when you carve out the back of the cab, like with that heart.
How far to you find you need to polish it ?
I mean I'm sure it depends on the stone, but do you take it all the way through the grits ?
Or since it's on the back only minimally ?
I'm wondering that if you polished it less, then it would show up more on the back.
Kind of like a frosted effect. But maybe I'm not thinking right.
Also, and again I know it would depend on the stone & how translucent it is-
but any idea how much the carving needs to be below the surface to be nice and visible ?
How deep ?
Thanks for any tips, I'm looking forward to trying your back carving technique.
Patty
|
|
|
|
Post by bobby1 on Jan 5, 2023 13:43:00 GMT -5
I measure how deep the carving is with an outside caliper. The depth of the carving is dependent upon the level of translucency of the material. I usually go to within 1mm of the front surface. I also check the look before I polish the feature. I grind the feature with two grits of bits. 36 grit first and 220 grit next, For sanding and polishing I make wood bits from dowels made from 1/2" dowels. I mount them on a tapered screw mandrel and shape them as it is spinning with a coarse wood file. I wet the bits and rub the silicon carbide onto their surface as well as applying it into the hole. I mix the grit with water in a small condiment cup> I sand with 220 grit and 400 grit. These steps go rather quickly. I make a new wood bit and mix cerium oxide in a condiment cup and do the polishing step. It goes the fastest - a couple of minutes. 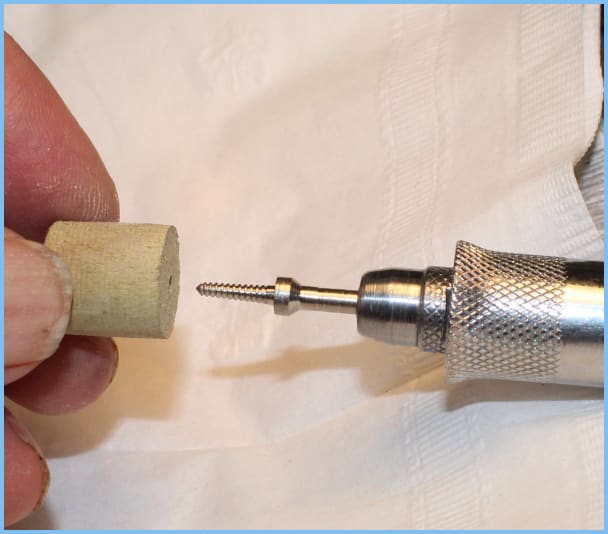 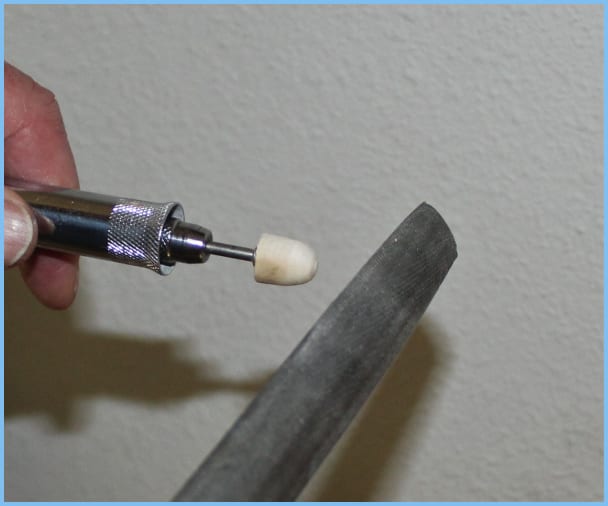 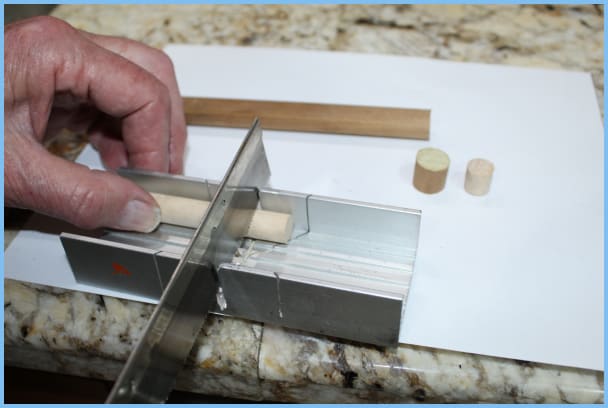 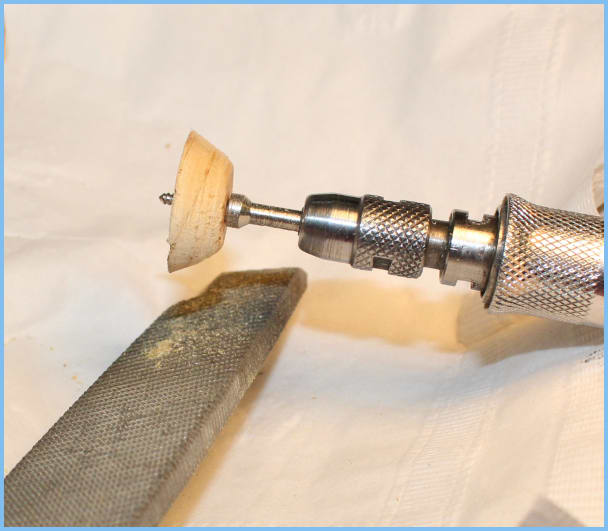 Bob |
|
|
|
Post by liveoak on Jan 5, 2023 14:57:31 GMT -5
I measure how deep the carving is with an outside caliper. The depth of the carving is dependent upon the level of translucency of the material. I usually go to within 1mm of the front surface. I also check the look before I polish the feature. I grind the feature with two grits of bits. 36 grit first and 220 grit next, For sanding and polishing I make wood bits from dowels made from 1/2" dowels. I mount them on a tapered screw mandrel and shape them as it is spinning with a coarse wood file. I wet the bits and rub the silicon carbide onto their surface as well as applying it into the hole. I mix the grit with water in a small condiment cup> I sand with 220 grit and 400 grit. These steps go rather quickly. I make a new wood bit and mix cerium oxide in a condiment cup and do the polishing step. It goes the fastest - a couple of minutes. Bob Thank you Bob, that's helpful.
That is pretty deep , 1mm is pretty close to the top surface. I'm sure it will take practice to get the depth right, but I appreciate the tip for a starting point (GO DEEP AS YOU DARE !)
I thought I read you used silicon carbide for sanding (vs diamond) - which is a cheaper option, thank you for confirming that.
Guess it's time to look through my buckets for some practice cabs.
Thanks again for the help,
Patty
|
|
adrian65
Cave Dweller  Arch to golden memories and to great friends.
Member since February 2007
Posts: 10,790
|
Post by adrian65 on Jan 7, 2023 22:57:46 GMT -5
Excellent work and astonishing results, Mr. Bob!
Thank you for sharing.
Adrian
|
|