chris1956
fully equipped rock polisher

Member since July 2022
Posts: 1,300
|
Post by chris1956 on Feb 4, 2024 21:53:21 GMT -5
I am currently trying to make a bracelet and mobile using smaller Petoskey Stones like the one shown below and smaller. I intend to drill a hole on the "top" of the stones and epoxy in eyepins. Since Petoskey stones are very soft and tend to scratch easily (especially on something like a bracelet), I would like to coat the entire stone (both sides) in epoxy. I made a try yesterday and it ended pretty much in complete failure. I thought I would be clever and add the eyepin ahead of time and then just dip the entire stone in epoxy up to the eyepin and then hang them from a string where I could easily remove any excess epoxy that accumlated at the bottom of the stone. However, I neglected to understand that new epoxy acts pretty much as a solvent for the curred epoxy in the eyepins and the rocks started slipping from the eyepins after just a couple minutes. I was forced to lay them on one side which resulted in unwanted marks on the side that was laying on the matt. I watched a lot of videos today and most all of them ended up laying one side of the stone on a matt. This was ok for most of what they were doing but for what I am doing I want both sides to look as good as possible. I suppose that I could always grind/polish the marks off of the one side but figured someone here might have a better idea. I did see one video where they used toothpicks in styrofoam to hold up the epoxy covered rocks. I was thinking I might be able to do this and support the rocks on the edge between the sides but I think that might still leave marks. 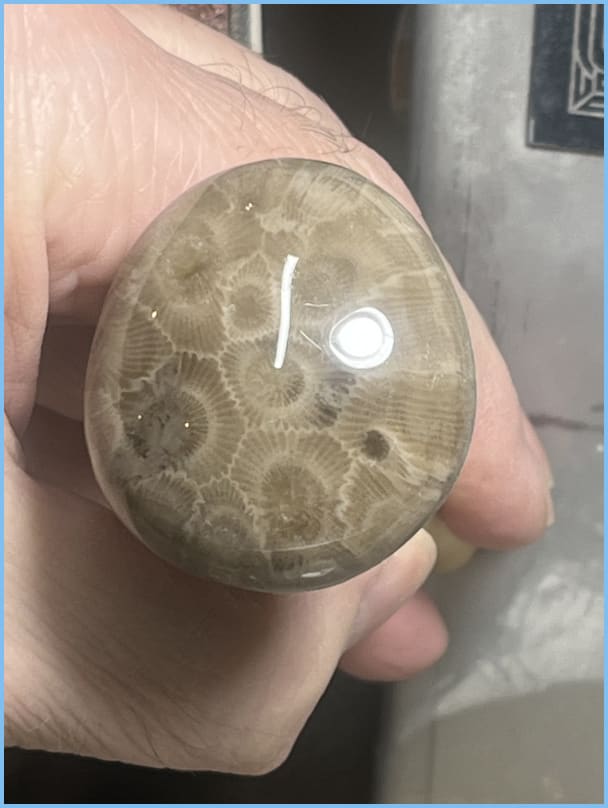 Any ideas are appreciated. Thanks, Chris |
|
|
|
Post by liveoak on Feb 5, 2024 7:56:10 GMT -5
One question - was the epoxy with the eye pin cured ?
You would have to let the first pour set for 24 hours before adding anything on top.
Cured hard epoxy will not interfere in any way with wet epoxy.
For your mobile - How about after you epoxy the eye pin in, you coat the rock with something different. I use Protectaclear on metal, never tried it on polished stones ? But it might work.
Patty
|
|
chris1956
fully equipped rock polisher
Member since July 2022
Posts: 1,300
|
Post by chris1956 on Feb 5, 2024 9:44:30 GMT -5
The eyepins had been set for a couple weeks although it has been pretty cold (50-55) in the basement during part of that time as our furnace died. It was probably around low 60s when it initially cured. Too cold? They were different manufacturers of epoxy. The eyepin was 330 and the coating was Art Resin epoxy.
|
|
|
|
Post by opalpyrexia on Feb 5, 2024 10:13:19 GMT -5
You might also try scoring or deforming the eye pin shaft to add a slight friction fit.
Another product to possibly consider for coating your Petoskey Stones: Amazon has "Rust Bullet - DuraGrade Clear". But it's a bit pricey at $57/quart.
|
|
chris1956
fully equipped rock polisher
Member since July 2022
Posts: 1,300
|
Post by chris1956 on Feb 5, 2024 17:16:52 GMT -5
You might also try scoring or deforming the eye pin shaft to add a slight friction fit. Another product to possibly consider for coating your Petoskey Stones: Amazon has "Rust Bullet - DuraGrade Clear". But it's a bit pricey at $57/quart. I usually deform the shaft. I haven't seem to have had problems with them coming out before. I will look into the Rust Bullet. Thanks. |
|
|
|
Post by jasoninsd on Feb 5, 2024 21:49:01 GMT -5
Just thinking out loud...
What about using some 28/30 gauge wire to dip them, then suspend them up in the air between two points. That way the whole rock gets "dipped" and there's no flat edge. I think you'd still get a "drip" on the bottom which would need to be worked down...
|
|
|
|
Post by velodromed on Feb 8, 2024 8:48:38 GMT -5
Try this. It’s cheap, six or seven bucks when I get it. I use it to put clearcoat with all sorts of things the kid and I my make, including rocks. Not sure how it would work on a porous Petoskey stone though. It’s worth a try. Lay the stone on wax paper and give it a couple very light coats wait 30 min-hour for it to dry (assuming 70°f and 50% humidity, more time if lower), then turn over and hit the other side. May take half a dozen very light coats. And one I mean light coats, practically dusting it each time. The other thing you could try is UV epoxy. The kid I go through a lot of it. You can apply, let it smooth out a bit then put it in the sun for 10 minutes. You could also try super gluing a string to the top to hold it by. Super glue needs about an hour to fully cure. I don’t think putting epoxy on superglue will make it release, but I could be wrong. Still, I think we’ve mixed them before without issue doing the very same thing, gluing a string on something to hold it to brush with epoxy. I just can’t remember fully. Good luck! *oh, standard two part epoxy takes 24 hours to fully cure under optimal conditions. 70°, 50% humidity. If it’s 60°, it can take literally two days. If Higher humidity, even longer. and if the two-part mix is off even a little bit, it can affect curing etc. That’s one reason why we love UV epoxy. No mixing needed. And if there’s no sun out or it’s night, a UV (black) light works very well.  |
|
chris1956
fully equipped rock polisher
Member since July 2022
Posts: 1,300
|
Post by chris1956 on Feb 8, 2024 10:21:08 GMT -5
Just thinking out loud... What about using some 28/30 gauge wire to dip them, then suspend them up in the air between two points. That way the whole rock gets "dipped" and there's no flat edge. I think you'd still get a "drip" on the bottom which would need to be worked down... Thanks. I did try to dip them and string them up but my eyepin came out. I think I messed up the resin/hardner so will try again here in a few days. The drip on the bottom was pretty easy to get rid of if you take the time to keep removing it as it forms. Try this. It’s cheap, six or seven bucks when I get it. I use it to put clearcoat with all sorts of things the kid and I my make, including rocks. Not sure how it would work on a porous Petoskey stone though. It’s worth a try. Lay the stone on wax paper and give it a couple very light coats wait 30 min-hour for it to dry (assuming 70°f and 50% humidity, more time if lower), then turn over and hit the other side. May take half a dozen very light coats. And one I mean light coats, practically dusting it each time. The other thing you could try is UV epoxy. The kid I go through a lot of it. You can apply, let it smooth out a bit then put it in the sun for 10 minutes. You could also try super gluing a string to the top to hold it by. Super glue needs about an hour to fully cure. I don’t think putting epoxy on superglue will make it release, but I could be wrong. Still, I think we’ve mixed them before without issue doing the very same thing, gluing a string on something to hold it to brush with epoxy. I just can’t remember fully. Good luck! *oh, standard two part epoxy takes 24 hours to fully cure under optimal conditions. 70°, 50% humidity. If it’s 60°, it can take literally two days. If Higher humidity, even longer. and if the two-part mix is off even a little bit, it can affect curing etc. That’s one reason why we love UV epoxy. No mixing needed. And if there’s no sun out or it’s night, a UV (black) light works very well. Thanks. I have tried the spray coating before but will have to try again with a lighter touch. Will look into the UV epoxy also. |
|
|
|
Post by velodromed on Feb 8, 2024 10:36:49 GMT -5
Just thinking out loud... What about using some 28/30 gauge wire to dip them, then suspend them up in the air between two points. That way the whole rock gets "dipped" and there's no flat edge. I think you'd still get a "drip" on the bottom which would need to be worked down... Thanks. I did try to dip them and string them up but my eyepin came out. I think I messed up the resin/hardner so will try again here in a few days. The drip on the bottom was pretty easy to get rid of if you take the time to keep removing it as it forms. Try this. It’s cheap, six or seven bucks when I get it. I use it to put clearcoat with all sorts of things the kid and I my make, including rocks. Not sure how it would work on a porous Petoskey stone though. It’s worth a try. Lay the stone on wax paper and give it a couple very light coats wait 30 min-hour for it to dry (assuming 70°f and 50% humidity, more time if lower), then turn over and hit the other side. May take half a dozen very light coats. And one I mean light coats, practically dusting it each time. The other thing you could try is UV epoxy. The kid I go through a lot of it. You can apply, let it smooth out a bit then put it in the sun for 10 minutes. You could also try super gluing a string to the top to hold it by. Super glue needs about an hour to fully cure. I don’t think putting epoxy on superglue will make it release, but I could be wrong. Still, I think we’ve mixed them before without issue doing the very same thing, gluing a string on something to hold it to brush with epoxy. I just can’t remember fully. Good luck! *oh, standard two part epoxy takes 24 hours to fully cure under optimal conditions. 70°, 50% humidity. If it’s 60°, it can take literally two days. If Higher humidity, even longer. and if the two-part mix is off even a little bit, it can affect curing etc. That’s one reason why we love UV epoxy. No mixing needed. And if there’s no sun out or it’s night, a UV (black) light works very well. Thanks. I have tried the spray coating before but will have to try again with a lighter touch. Will look into the UV epoxy also. it’ll make a difference. My other hobby is hobby grade RC cars and I like to paint my own bodies. It is difficult, taking a very light touch and exact methods. I use the same techniques when painting things for my kid and it works well. More than once, though I’ve laid a little bit too heavy, and it always disappoints. We’ve had good luck with this brand UV epoxy. I also am not seeing it yellow overtime (so far after more then a year), which is good. 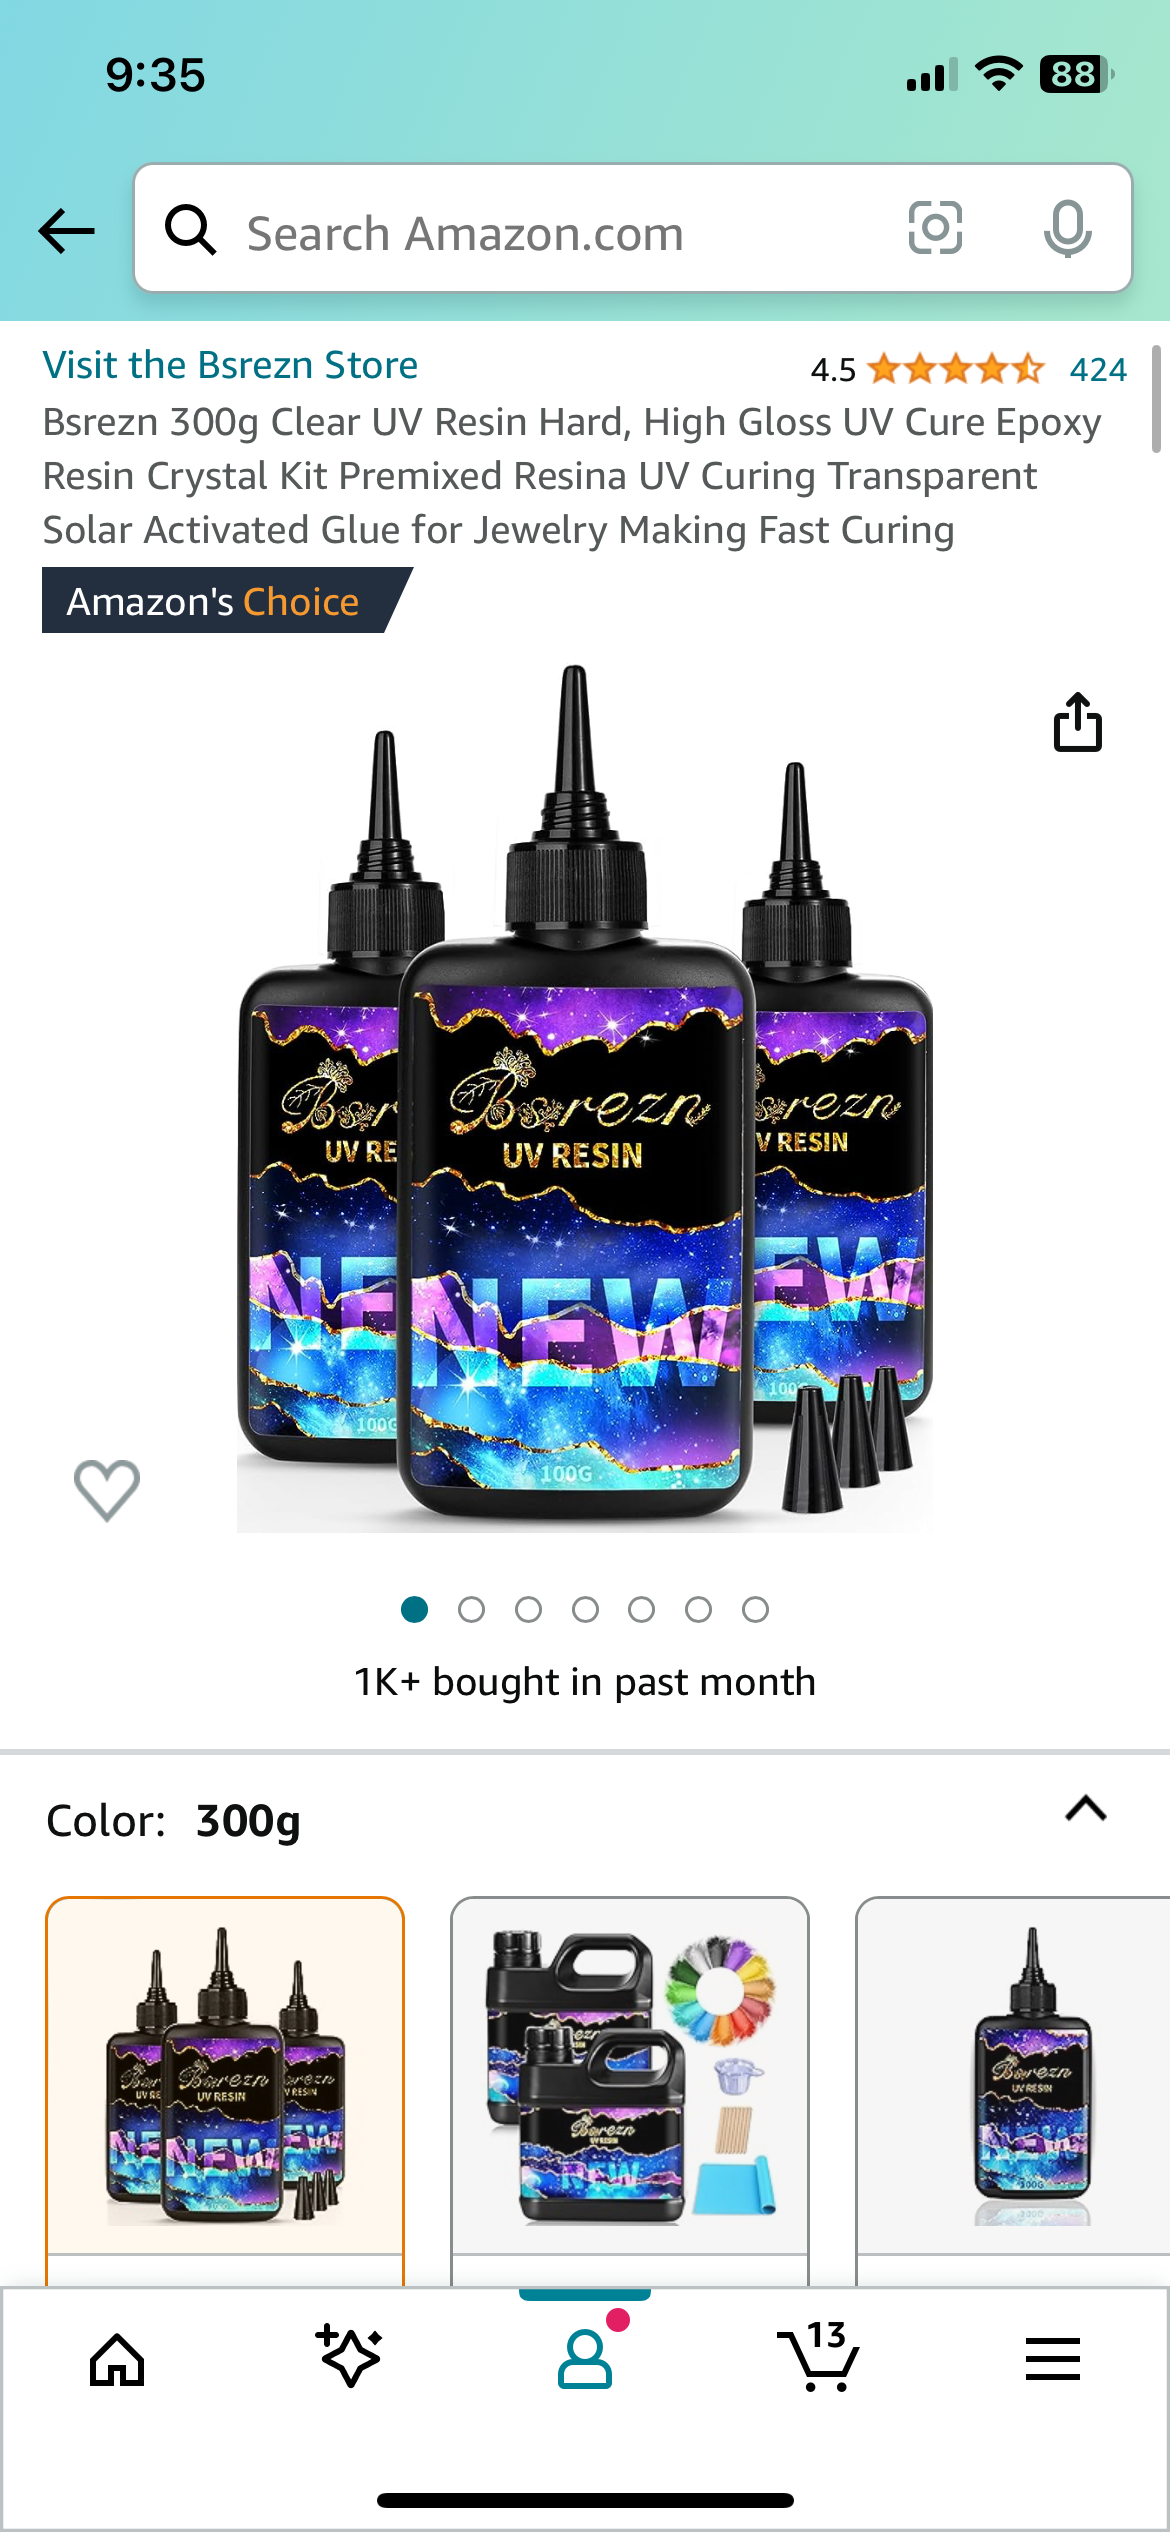 |
|
|
|
Post by jasoninsd on Feb 10, 2024 7:12:21 GMT -5
Just thinking out loud... What about using some 28/30 gauge wire to dip them, then suspend them up in the air between two points. That way the whole rock gets "dipped" and there's no flat edge. I think you'd still get a "drip" on the bottom which would need to be worked down... Thanks. I did try to dip them and string them up but my eyepin came out. I think I messed up the resin/hardner so will try again here in a few days. The drip on the bottom was pretty easy to get rid of if you take the time to keep removing it as it forms. Try this. It’s cheap, six or seven bucks when I get it. I use it to put clearcoat with all sorts of things the kid and I my make, including rocks. Not sure how it would work on a porous Petoskey stone though. It’s worth a try. Lay the stone on wax paper and give it a couple very light coats wait 30 min-hour for it to dry (assuming 70°f and 50% humidity, more time if lower), then turn over and hit the other side. May take half a dozen very light coats. And one I mean light coats, practically dusting it each time. The other thing you could try is UV epoxy. The kid I go through a lot of it. You can apply, let it smooth out a bit then put it in the sun for 10 minutes. You could also try super gluing a string to the top to hold it by. Super glue needs about an hour to fully cure. I don’t think putting epoxy on superglue will make it release, but I could be wrong. Still, I think we’ve mixed them before without issue doing the very same thing, gluing a string on something to hold it to brush with epoxy. I just can’t remember fully. Good luck! *oh, standard two part epoxy takes 24 hours to fully cure under optimal conditions. 70°, 50% humidity. If it’s 60°, it can take literally two days. If Higher humidity, even longer. and if the two-part mix is off even a little bit, it can affect curing etc. That’s one reason why we love UV epoxy. No mixing needed. And if there’s no sun out or it’s night, a UV (black) light works very well. Thanks. I have tried the spray coating before but will have to try again with a lighter touch. Will look into the UV epoxy also. I was a bit of a knucklehead when I suggested that! I don't know why I was thinking they were drilled all the way through...like a "bead". Oops! LOL |
|
chris1956
fully equipped rock polisher
Member since July 2022
Posts: 1,300
|
Post by chris1956 on Apr 1, 2024 14:39:23 GMT -5
I changed the title of this thread because the date wouldn't fit. Anyway, picture of Petoskey stones ready for coating for the bracelet and mobile (I might leave the mobile ones uncoated). Will send a pic once I get the mobile done. Plus I polished this real nice one today. Forgot to add a quarter to the group shot. Biggest one is about two quarters long.  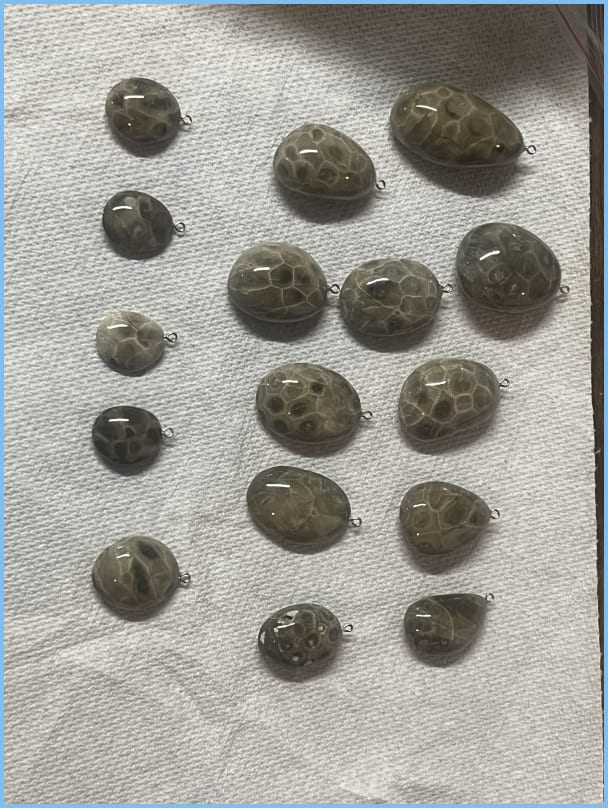 The first pic below is what would have been the bottom of the coral and the second is the top. Normally, the top is better looking. I liked the way the bottom of the coral jumps out at you and also less mud in the eyes like on the top. Usually, the bottom of the coral is flat and the top is rounded. In this case it was opposite so I went with that when polishing. 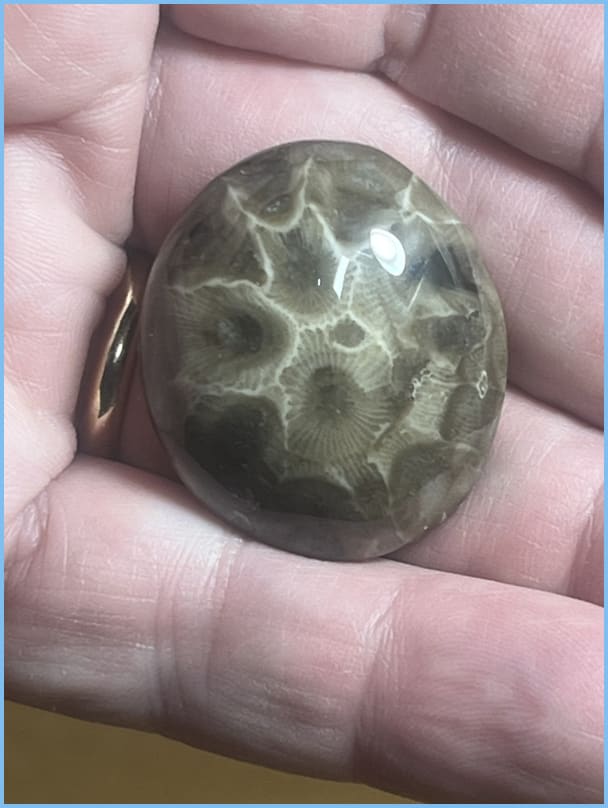 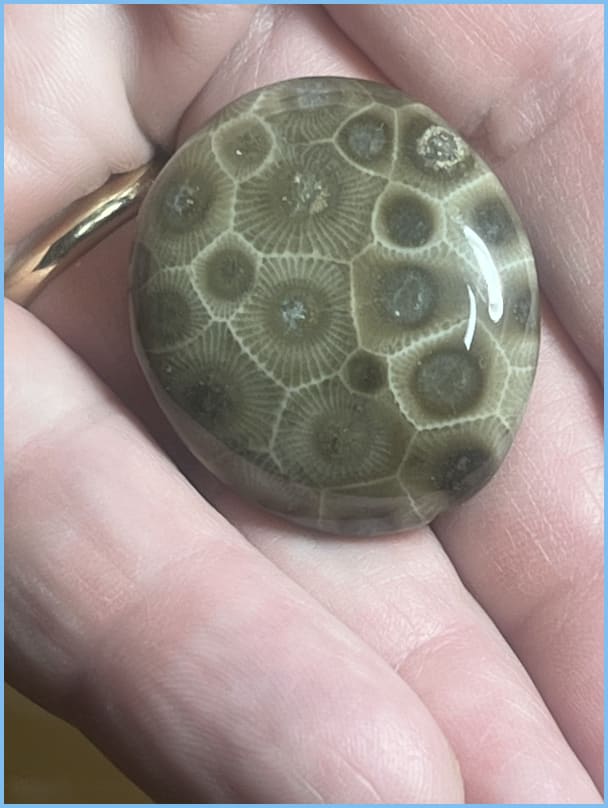 Thanks for looking, Chris |
|
dillonf
fully equipped rock polisher
Hounding and tumbling
Member since February 2022
Posts: 1,601
|
Post by dillonf on Apr 1, 2024 21:33:31 GMT -5
Really cool project - the Petoskey stones look great!
|
|
|
|
Post by rockjunquie on Apr 1, 2024 21:54:07 GMT -5
I agree, they look really nice. |
|
chris1956
fully equipped rock polisher
Member since July 2022
Posts: 1,300
|
Post by chris1956 on Apr 2, 2024 7:33:26 GMT -5
Really cool project - the Petoskey stones look great! Thanks. Will see how hard it is to hang on the mobile. I agree, they look really nice. Thanks. |
|
|
|
Post by jasoninsd on Apr 3, 2024 22:39:06 GMT -5
Chris, you really did those stones justice! I polished a palm-sized Petoskey Stone and have it sitting on the counter above my desk. Customers are ALWAYS seeing it and are fascinated! |
|


