getyourbone
starting to shine!

Member since February 2010
Posts: 44
|
Post by getyourbone on Mar 23, 2012 21:54:04 GMT -5
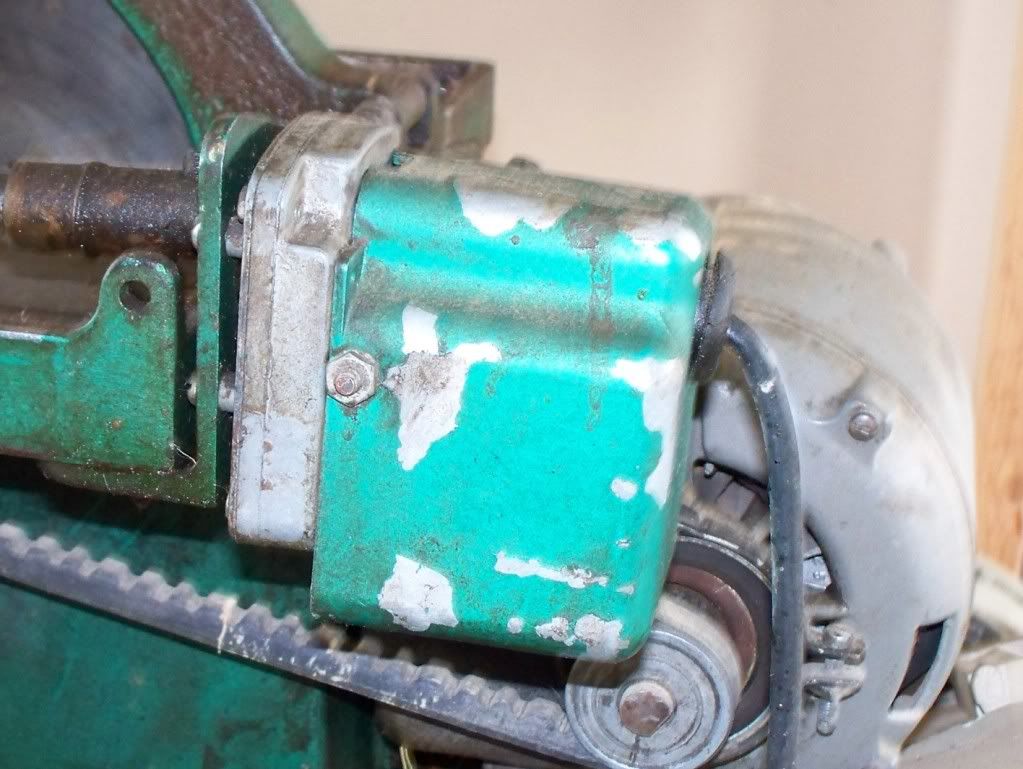
Ok so I picked up a little 10 inch Covington today. It had been sitting so long that it was completely gummed up from the oil and grease hardening and the threaded rod and shafts getting surface rust on it. I got it home and immediately ripped it apart to clean it up. Now I don't know how it goes back together?  I believe it is an older one. When I look at photos of current ones online, It appears a bit different as well as I am wondering if I am missing a couple of pieces? Of course I wasn't smart enough to simply take one photo BEFORE tearing it apart!!! Any and all help greatly appreciated!!! Steve   |
|
|
|
Post by jakesrocks on Mar 23, 2012 23:34:43 GMT -5
Yep, that's an older one. It still has the tall lip on the left side. I have the same saw. Only not that clean looking. I'll take pics in the morning and post them here.
Actually, consider yourself lucky that you found an older machine. I've seen a lot of complaints about the newer Covington 10" saws on here. Especially about the power feed motor, and the lowered lip on the left side. The older machines had a much better power feed motor. Don't know exactly how old mine is, but I bought it second hand in the mid 90's, and it's still going strong.
|
|
getyourbone
starting to shine!
Member since February 2010
Posts: 44
|
Post by getyourbone on Mar 24, 2012 1:06:58 GMT -5
Thanks in advance! I really appreciate it! I don't think this saw has seen more than a couple of rocks run through it. The only marks on the blade nut were the ones I left taking it off. There is no wear on the drain plug nuts. this is the only mark on the shaft from the pulley. And I think this may be the original blade? anyone have an idea what the original blade looked like?   Thanks again! Steve |
|
|
|
Post by paulshiroma on Mar 24, 2012 2:07:25 GMT -5
Great score, Steve. And it looks like it's still in really good condition. Mine required an entirely new table top, blade guard, and vise/vise arm. I ended up buying a new blade through John (johnjsgems), another forum member. Great price on a good blade. I've also emailed the guys at Covington directly and included photos. They gave me a lot of instruction on what went where along with some good advice. They sent the "instruction manual" as well, or at least one that was closest to mine.
Paul
|
|
|
|
Post by jakesrocks on Mar 24, 2012 8:37:16 GMT -5
Yep, that's the original blade. That should be a good one. Made back when Covington still supplied good blades with their saws.
As soon as it gets a little lighter outside I'll get some pics of mine.
For the drains you might want to do what I did. Pick up pieces of pipe at the hardware store long enough to clear the end of the table you bolt your saw to, and put little ball valves on them. Makes it a whole lot cleaner and easier to drain the tank.
|
|
|
|
Post by johnjsgems on Mar 24, 2012 8:44:26 GMT -5
I was going to suggest sending the photos to Covington. They are generally very helpful.
|
|
LarryS
freely admits to licking rocks
 SoCal desert rats
Member since August 2010
Posts: 781
|
Post by LarryS on Mar 24, 2012 8:56:19 GMT -5
Your saw looks hardly used. Give Brian a call at the Covington factory. He's the one who repairs the old and assembles the new saws. Super nice guy. He'll tell you what's missing and how to adjust everything.
When I drain my tank, I don't even mess with the drain plugs because both halves of the tank are packed with dense rock sediment, packed solid 2-3" deep after a week of sawing. Goes from a liquid capacity of 2 quarts down to one pint? I take the table off & scrap it out with a long handle screw driver & hose it clean, laying the saw on it's side. I use Lube Cool, which has pros and cons, not oil.
|
|
|
|
Post by jakesrocks on Mar 24, 2012 11:43:01 GMT -5
|
|
|
|
Post by jakesrocks on Mar 24, 2012 12:13:18 GMT -5
Just a quick note. The Covington doesn't have a crank cross feed. To solve this, I cut a block of hard wood that was 1/4" shy of the blade to drop in place when I want to cut slabs. Just loosen the thumb screw and slide the vice over until the cut face of the rock contacts the stop block. Tighten the thumb screw and remove the stop block before cutting. You can get pretty accurate 1/4" slabs that way. If you want thinner slabs, just cut a little longer stop block. I used hard maple for my blocks.
|
|
LarryS
freely admits to licking rocks
SoCal desert rats
Member since August 2010
Posts: 781
|
Post by LarryS on Mar 24, 2012 12:15:22 GMT -5
It's not that dirty Don. Mine gets much worse than that between cleanings. At least I can just hose mine off with the garden hose.
Covington's top half of the vise is now 1" plywood. Mine is close to breaking.
|
|
|
|
Post by jakesrocks on Mar 24, 2012 12:53:13 GMT -5
Bummer. See if you can find some t-6 aluminum bar stock to replace it with, ar at least a piece of hard maple.
|
|
LarryS
freely admits to licking rocks
SoCal desert rats
Member since August 2010
Posts: 781
|
Post by LarryS on Mar 24, 2012 13:12:17 GMT -5
Will Jake kiss you while you're sawing or does he wait until after you take a bath? Bet you taste funny!
|
|
|
|
Post by jakesrocks on Mar 24, 2012 15:11:23 GMT -5
Jake doesn't like the noise the saws make. He keeps his distance until the saws are shut off.
|
|
getyourbone
starting to shine!
Member since February 2010
Posts: 44
|
Post by getyourbone on Mar 24, 2012 19:23:01 GMT -5
Thanks for the photos!
I can see that I also have a auto shutoff mechanism that I am going to guess is probably more trouble than it is worth. I think I have everything correct on the rest of it. I am missing the clamp nut that pushes the sled/vise. I will have to figure something out until I order one.
I am sure my saw will look just as dirty soon! At least I hope it will. The this saw seems to throw oil around a bit more than the HP 10 inchers at the club (Glendale community center)I visit from time to time. I think I am going to have to fine tune that valve screw wing nut do hickey thingamajig. It is apparently letting too much oil in.
Thanks again
Steve
|
|
LarryS
freely admits to licking rocks
SoCal desert rats
Member since August 2010
Posts: 781
|
Post by LarryS on Mar 24, 2012 20:16:35 GMT -5
Looking at your older model saws, I'm wondering if you could make your own hood? The new models have the cross feed gizmo and brackets hanging over the feed side, causing Covington to leave an opening the whole length of the hood. Think Mel hangs a towel over his. I just leave mine open and stand on the other side, up wind. Lots of mist and splatter flies out that side. If you can live without the auto shut off feature, you could completely seal up your saw from any mist escaping. That's one of the complaints I have with my saw. Glad I'm not using oil otherwise it would be a real mess. Both Raytech & BD have completely sealed up hoods on their 10" and all the moving parts are built inside, not outside the cutting area. Also, on the arbor, Covington uses a thick cork gasket between the arbor and tank. Don't know if that's for vibration or what? Here's pics I took showing the difference between models. Covington added the cross feed feature where all the aluminum cast items are different. Other than that, they basically look the same. Looks like all you are missing for the auto shut off is a washer, spring & that collar thing with a set screw. Plus you'd need that green tab thing that hangs down near the black cross feed knob.  The vise casting is different too. Note the items hanging outside the table. If that wasn't there, like your older models, the hood could be completely sealed up, no mist.  LarryS |
|
getyourbone
starting to shine!
Member since February 2010
Posts: 44
|
Post by getyourbone on Mar 24, 2012 22:21:24 GMT -5
Well, I think I have everything up and running! I was able to clamp down a rock, use the power feed to run it through and the auto shut off worked perfectly! I had a little bracket in the wrong place was the only real problem with putting it back together. the split nut clamp was missing but I was able to just tap a little keyhole plate(as in old fashion door key) and it works perfectly. As you can see in the photo, when it is turned with the smaller tapped end on the threaded rod, it pushes the rock through. When it is turned so that the big untapped part of the keyhole is on the threaded rod, it can be slid back and simply sits without catching on the threads and does not move or push anything. Works great. If I have to make another one I think I would double the thickness so there were a few more threads In the feed or push position  In the free or unlocked position  Just a close up of the threads that when turned the other way catch and feed or move the rock through  Thanks for all the help everyone!!!! Steve |
|
|
|
Post by jakesrocks on Mar 24, 2012 23:42:43 GMT -5
Thanks for the photos! I can see that I also have a auto shutoff mechanism that I am going to guess is probably more trouble than it is worth. I think I have everything correct on the rest of it. I am missing the clamp nut that pushes the sled/vise. I will have to figure something out until I order one. I am sure my saw will look just as dirty soon! At least I hope it will. The this saw seems to throw oil around a bit more than the HP 10 inchers at the club (Glendale community center)I visit from time to time. I think I am going to have to fine tune that valve screw wing nut do hickey thingamajig. It is apparently letting too much oil in. Thanks again Steve Steve, the split clip is essential to the proper working of your power feed. Covington sells a direct replacement. Part # CSC110 for $19.00 plus shipping. Mine didn't have the auto shut off when I bought it, and I've never missed it. It just means having to stay close to the saw to shut it off at the end of the cut. I couldn't find the parts for your shut off that Larry mentioned in their catalog, but I'm sure they have replacements if you ask. Mine came with the hood. It has a large hand hole in each side for hand trimming slabs. I covered both holes with a rubber flap to keep the spray inside. I now have a trim saw, so after I clean the hood real good, I'm going to glue plexiglass over both holes. Did your saw come with a long thumb screw with a wing nut directly behind the blade guard ? If so, it's used to raise or lower the guard to just clear the rock you're cutting. |
|
getyourbone
starting to shine!
Member since February 2010
Posts: 44
|
Post by getyourbone on Mar 25, 2012 0:50:25 GMT -5
I didn't think a hood would be necessary but I can see that it needs it. I think that may be the next project.
Yup...have the wing nut/thumb screw.
At some point I may order that split clip. For now, it is hard for me to rationalize spending $25 on a part I can fabricate my self one way or another. I have made split nuts for other uses before by simply cutting a normal nut in half. It can then simply be welded or brazed onto a spring clamp or mini vice grip both of which I have plenty of laying around. I enjoy making my own parts as well.
I am beginning to understand why some have 3,4,5 saws. Each size has it's purpose. I do have a little 7 inch tile saw that I can use as a trim saw. I also have a 14 inch Hillquist that I am not sure what I will do with it now that I have the Covington. I believe I will be getting a 20 inch fixer upper soon so that will be the big one for larger rocks.
Now I just need to quit my job so I can have some time to use the equipment.
Thanks again.
|
|
|
|
Post by jakesrocks on Mar 25, 2012 8:15:21 GMT -5
Steve, if you make your own split nut clip, go with the spring clamp. They use the spring clamp for a reason. If your blade jambs in the cut, the spring clamp will slip and hopefully save your blade. The vice grips won't slip.
Lol, I'm retired and still have trouble finding time to use my equipment. In this day and age, be happy that you have a job.
|
|
|
|
Post by johnjsgems on Mar 25, 2012 8:26:12 GMT -5
Your home made clip is very similar to the part HP used on their power feed. Their part was L shaped and would engage if cocked one way but slip when returning carriage. Somebody on one of the forums couldn't figure his out (or it was stripped) and used two wooden clothes pins. Doesn't take much to work. Whatever you use it should be softer than the threaded rod. Most larger saws use a brass fitting that will wear out before the threads on the rod.
|
|