Deleted
Deleted Member
Member since January 1970
Posts: 0
|
Post by Deleted on Apr 16, 2012 10:26:11 GMT -5
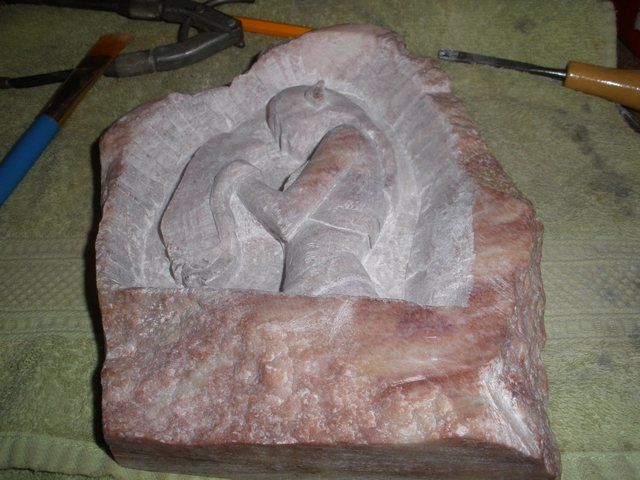
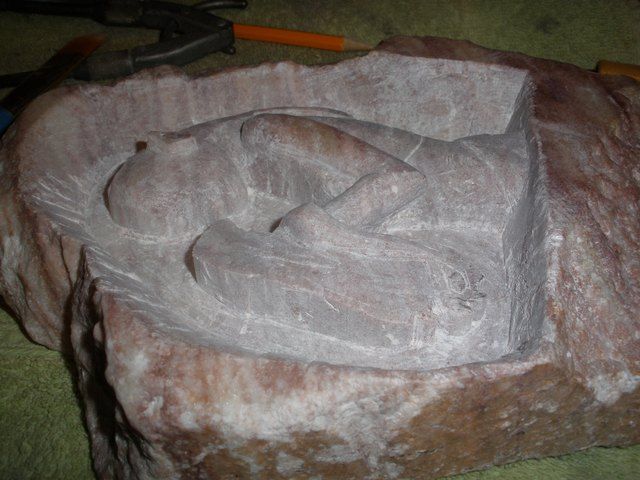
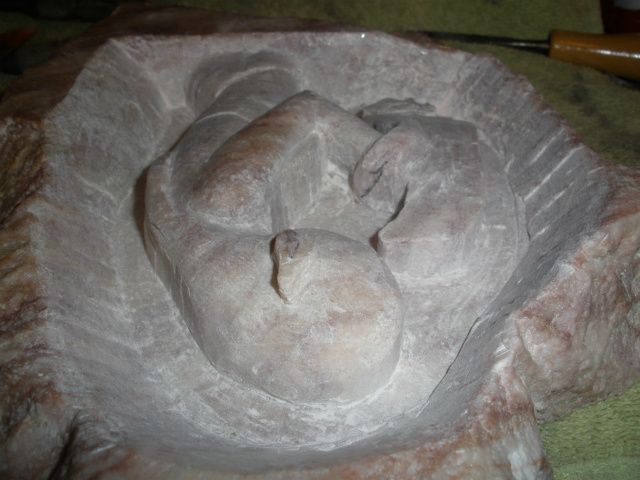
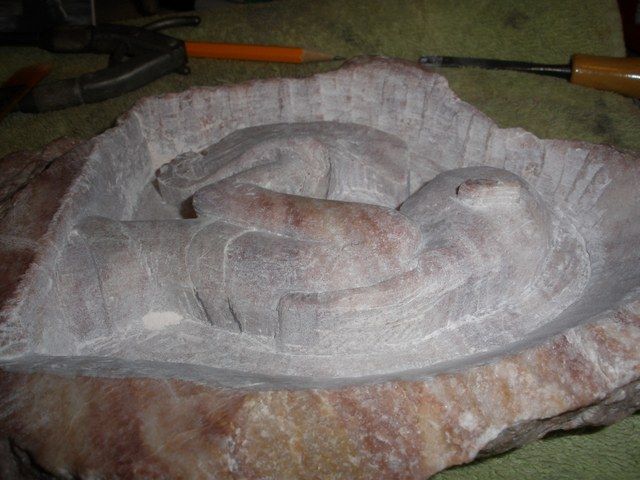
Starting to get into the slow and cautious now. The face and tail are roughed in a little now and a lot of the stone above the dragon has been removed. I have to be more cautious here because I slipped with the chisel and whacked her in the face. And I have a habit of letting the shank of the chisel come in contact with the high areas and gouging a groove which is another big no no. That is why I try to rough everything in before I start any detail so I do not damage the finished parts. I left the ear standing because it is one of the points that I use to triangulate some other points that I have lost.     Thank you for your interest and comments. Jim |
|
|
|
Post by Toad on Apr 16, 2012 11:22:06 GMT -5
So far, so good...
|
|
|
|
Post by gingerkid on Apr 16, 2012 12:23:23 GMT -5
 WoW!!  It's looking great to me, too, Jim!! What kind of material is Dragon 5? How big is it?? (20 questions, lol)
|
|
|
|
Post by FrogAndBearCreations on Apr 16, 2012 13:13:04 GMT -5
Starting to look good, love the step by step details!
|
|
Deleted
Deleted Member
Member since January 1970
Posts: 0
|
Post by Deleted on Apr 16, 2012 13:21:05 GMT -5
gingerkid - The stone is raspberries and cream alabaster and the fairy in the carving is five inches tall. If you came in late on this you can go to the "New project" post then follow with dragon 1, 2, 3, and 4. Because of the interest I am posting photos once in a while when there is something new to show. It went pretty fast to start with but now that I am getting into detail it is going to be very slow going.
Thanks for the compliments
Jim
|
|
|
|
Post by kk on Apr 16, 2012 16:51:17 GMT -5
Looks great. Depending on the angle, I have problems understanding the depth of the piece, but then looking at the other pics it becomes pretty clear as to how serious you are in creating something that eventually will nearly become a carving in the round.
You are going to loose the design on her arm (arm-band)?
|
|
Deleted
Deleted Member
Member since January 1970
Posts: 0
|
Post by Deleted on Apr 16, 2012 18:54:18 GMT -5
The arm band will still be there. It is very thin and I have plenty of arm to take it down that much. I did the same with her top where it goes around her back. My worry is getting the arm band and arm polished without destroying it. Putting the arm band pattern on her arm will be really easy. I will have my son draw it on. lol I will probably polish her arm before I cut it down for the band. That way the band will be polished on top and all I will have to do is polish where I cut the arm down.
Look at it this way. She and the dragon will be split exactly in half, right through the nose just like you see in the picture except for her right arm will be gone. Her left arm and part of the dragon tail will have space under them. I have to drop the end of the tail down to the center line to anchor it so it will not break off. The tattoo will probably have to go unless I can find some way to color it without it bleeding out into the whole area.
Jim
|
|
|
|
Post by helens on Apr 16, 2012 19:43:11 GMT -5
Jim, you're at THE MOST challenging part of that piece it looks like.... starting into the dragon, getting the details in her face. Makes you want to hold your breath looking at the photos of it:)!!!!
I have always been amazed by relief carving... watching it happen is just a priviledge!
|
|
xXxAlisha91xXx
spending too much on rocks
 
Member since February 2012
Posts: 284
|
Post by xXxAlisha91xXx on Apr 17, 2012 10:16:32 GMT -5
Wow! Seems it's come a long way already since your original post. Looking good so far, to me  |
|