|
|
Post by Drummond Island Rocks on Sept 29, 2013 11:57:09 GMT -5
I made a wooden jig awhile ago to hold my slabs at a perfect angle to cut the cleavage in some hearts and just brought it out today to try out some crosses. It looks like its working perfectly. The plan is to cut up 10-20 of these and toss them right in the lot-o starting at 120. Will update when they are done. Here's the cuts right after the saw with no grinding done. 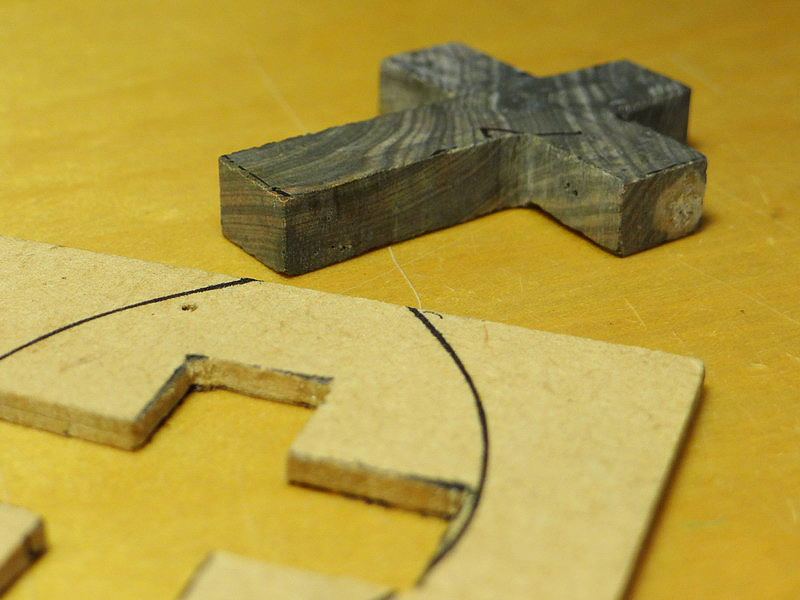 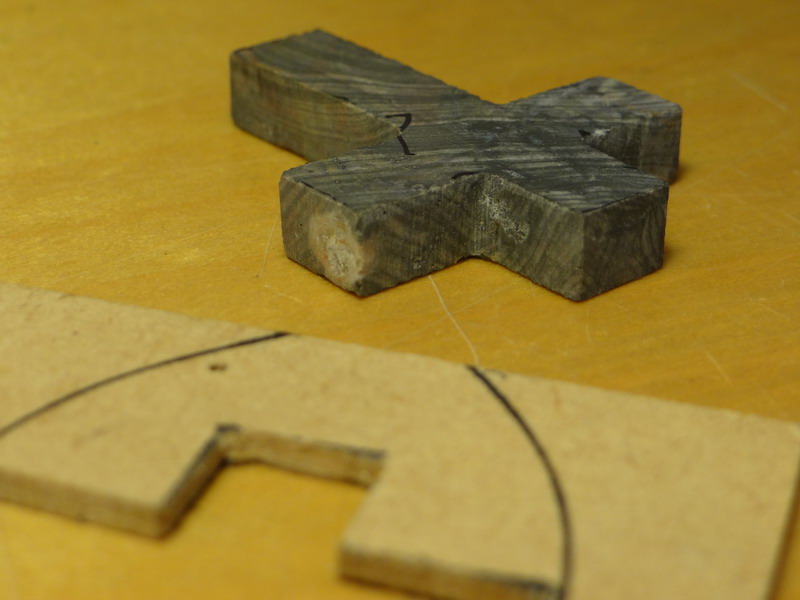 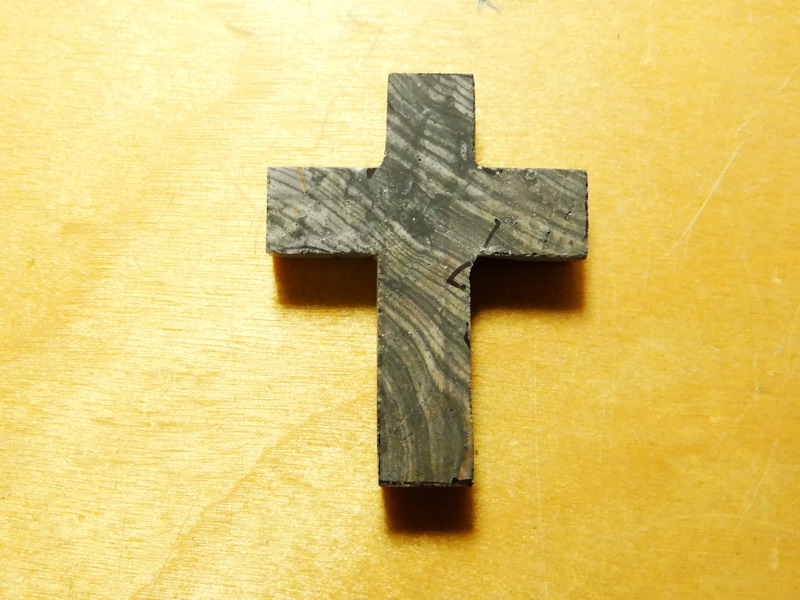 And here's the cross on the jig 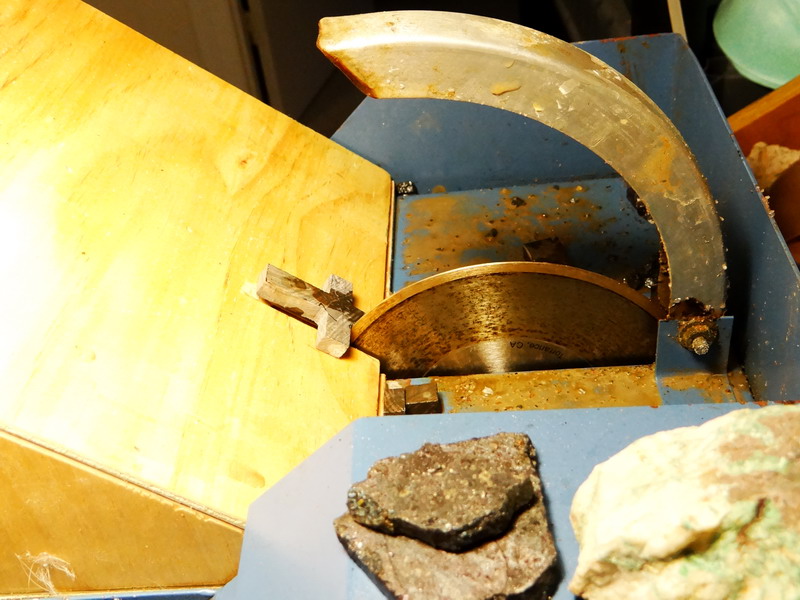 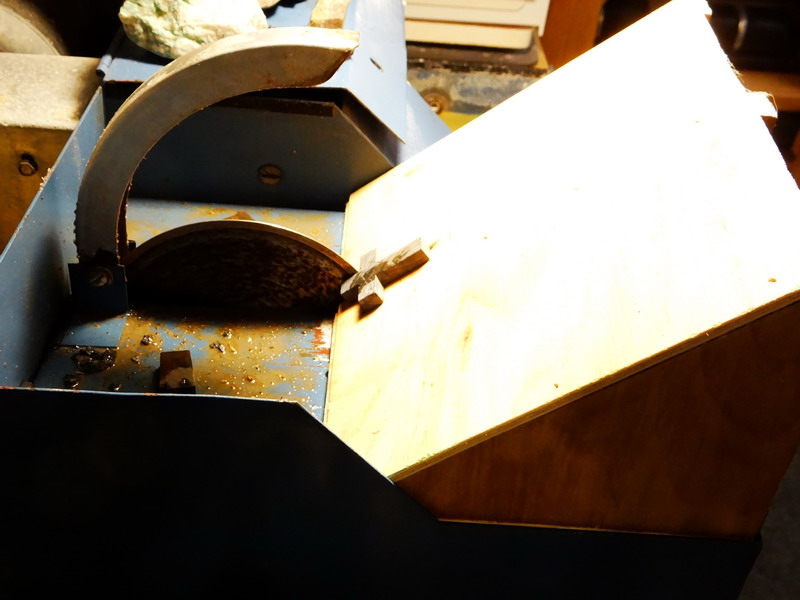 Designed it at work with CAD 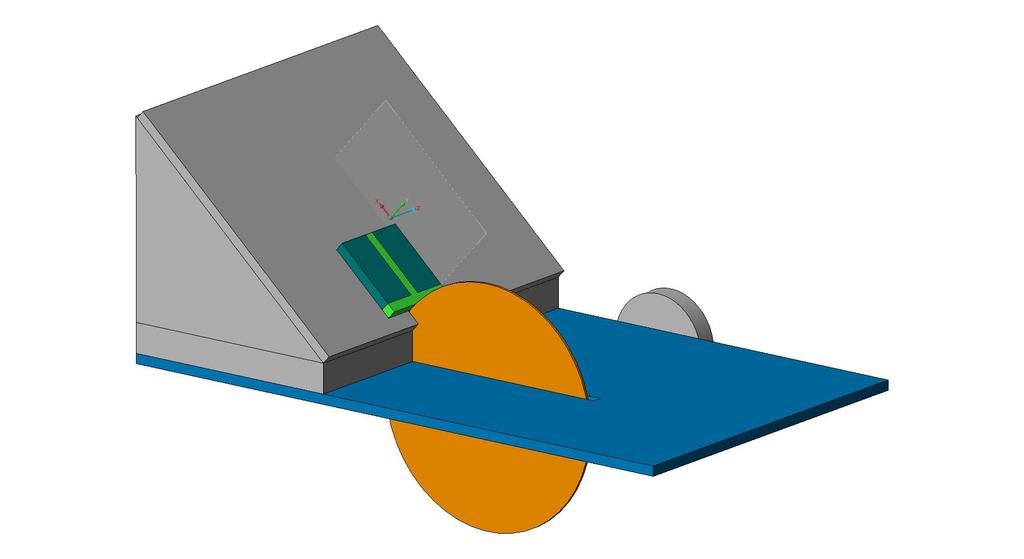 Thanks for looking |
|
Thunder69
Cave Dweller  Thunder 2000-2015
Member since January 2009
Posts: 3,105
|
Post by Thunder69 on Sept 29, 2013 14:11:42 GMT -5
Do you have your Specs for the build? I tried to do some free hand and they looked more like a plus sign than a cross and bad over cut...JOhn
|
|
|
|
Post by Drummond Island Rocks on Sept 29, 2013 14:32:59 GMT -5
John, are you looking for specs on the cross dimensions or for the jig build? The jig would be different for every saw but the same concept would work. On my lortone Lu6 I keep the back of the jig tight against the front lip of the saw to get the same angle cut every time (see last photo). If the jig were moved toward the blade it would change the angle of the cut on the rock. The whole idea of the jig was to eliminate the over cut on the backside for these types of cuts. This photo shows the before without jig on the left and the after with using the jig on the right. 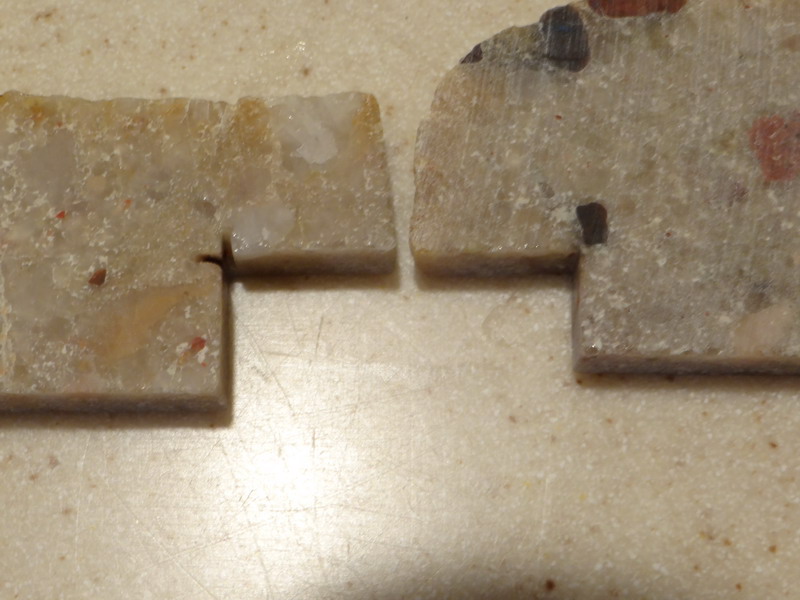 Chuck |
|
|
|
Post by deb193redux on Sept 29, 2013 15:21:58 GMT -5
yes. unless the slab is 90-deg to the edge of the blade you will get overcut. if arbor is above the table, you just need to use a flat piece to lift the slab up to the center of the blade. IF the arbor is below the table, you will need to use a higher angle like shown here.
as for the cross vs plus, there are plenty of cross templates.
|
|
|
|
Post by Jugglerguy on Sept 29, 2013 15:47:47 GMT -5
That looks good Chuck. I like the proportions of your cross. The slab is almost as thick as the width of each arm. It looks sturdy.
|
|
|
|
Post by Drummond Island Rocks on Sept 29, 2013 16:34:00 GMT -5
Thanks Rob. I did not like the proportions on the lapidary template crosses. I printed a bunch of the web and got my wife's opinion and she picked this one. I liked it because it has enough mass to glue a bail on so these should be easy pendants. You can save out this JPEG and scale it when you print it 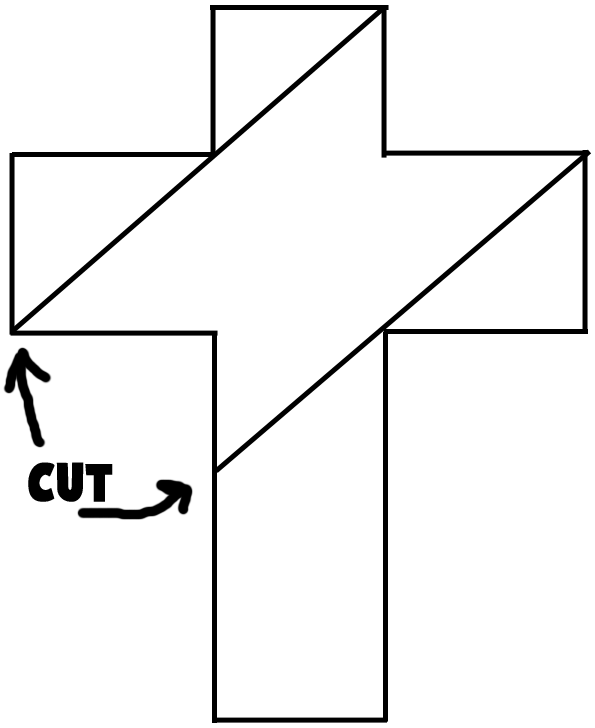 Chuck |
|
Thunder69
Cave Dweller  Thunder 2000-2015
Member since January 2009
Posts: 3,105
|
Post by Thunder69 on Sept 29, 2013 17:17:29 GMT -5
Chuck it was for the jig..You explained it very well..Thank-You...I have a few different template for the crosses...But I will use yours too...John
|
|
|
|
Post by Jugglerguy on Sept 29, 2013 17:55:16 GMT -5
Are the cut marks to make it into a puzzle? Seems like I've seen a puzzle like that before.
I have the template set the Rock Shed sells (Lortone, I think). The cross is way too skinny.
|
|
|
|
Post by Drummond Island Rocks on Sept 29, 2013 18:08:21 GMT -5
yep thats the same set I have Rob. Those ones break too darn easy and glue on bails are to big for them too.
|
|
|
|
Post by Rockoonz on Oct 5, 2013 13:43:39 GMT -5
Elizabeth makes her own templates with a hobby knife and plastic like the lids for margarine or kool whip tubs.
Lee
|
|
Tommy
Administrator 
Member since January 2013
Posts: 12,981
|
Post by Tommy on Apr 20, 2017 20:32:27 GMT -5
I made a wooded jig awhile ago to hold my slabs at a perfect angle to cut the cleavage in some hearts and just brought it out today to try out some crosses. It looks like its working perfectly. The plan is to cut up 10-20 of these and toss them right in the lot-o starting at 120. Will update when they are done. Chuck! Nice write-up. I've moved it into the tutorials section so it can live on  |
|
|
|
Post by TheRock on Apr 4, 2019 3:04:38 GMT -5
yep thats the same set I have Rob. Those ones break too darn easy and glue on bails are to big for them too. Chuck I know you said that all saws are different but what size blade is your saw and what degrees is your Jig set at? Thank ~Duke |
|
Fossilman
Cave Dweller 
Member since January 2009
Posts: 20,722 
|
Post by Fossilman on Apr 4, 2019 12:16:50 GMT -5
A guy on YouTube has the scamatices and drawings, for this angle build.. I'll see if I can find it..
|
|
|
|
Post by Drummond Island Rocks on Apr 4, 2019 12:50:44 GMT -5
TheRock FossilmanAny dimensions for this build would be useless unless someone has the exact same saw. My bottom board rests against the front lip of my saw. If that board is shorter or longer the angle of the jig changes. My saw arbor to the top of my table as about 1.25". If that dimension is more or less the angle of the jig changes. I wanted a max cutting depth of about 1.75" before the slab would actually hit the table. If I needed a 2" cutting depth the angle of the jig changes. The build is extremely easy. I cut my bottom board including the blade slot then placed that on the saw. With that in place I cut a sacrificial top piece about 3" wide and placed it on top of bottom piece with a slab overhanging the edge and resting on the blade. With that in place I just kept rotating the top piece using the front of the bottom board as the pivot point until the slab was perpendicular to the blade and then measured the angle required on the fly. I do not use the jig very often but I did put several coats of urethane on it when I made it and six years later it still works when needed. I have a dedicated 90 degree specialty trim saw but I do not use it enough to keep it out in the shop at all times so for a quick cut I use the jig still. 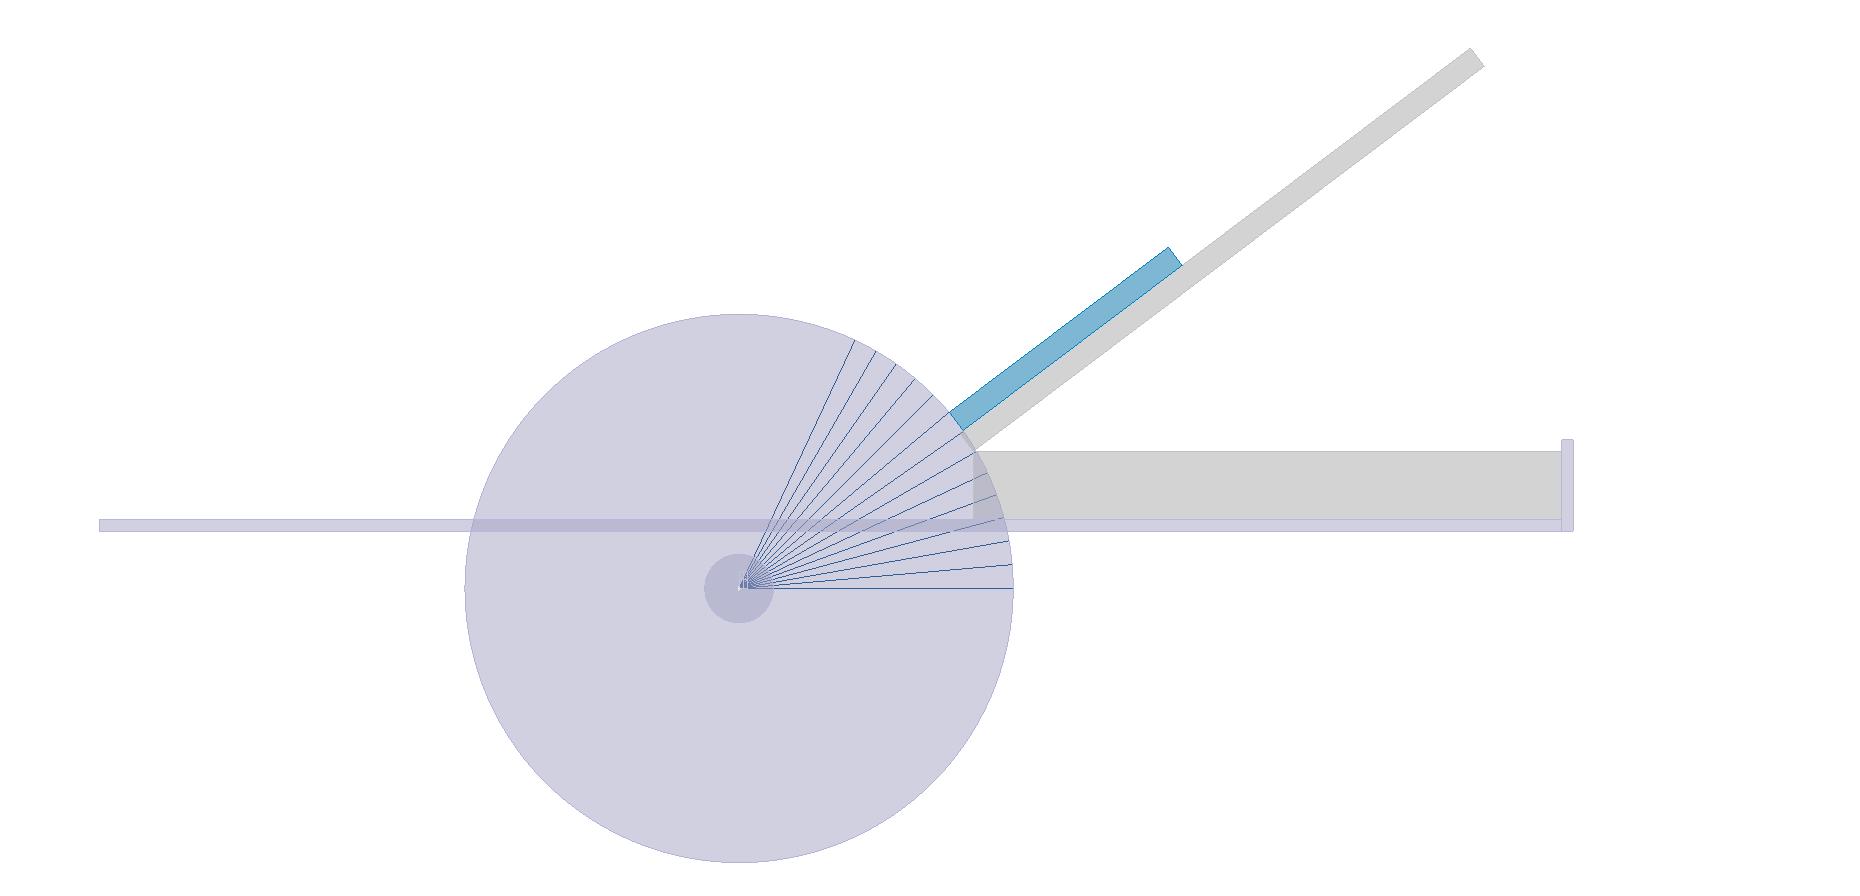 Chuck
|
|
|
|
Post by TheRock on Apr 5, 2019 13:46:36 GMT -5
A guy on YouTube has the scamatices and drawings, for this angle build.. I'll see if I can find it.. That would be great. I am mobile now will reply better when I get home Thanks Chuck for the reply I will hafta try a sacrificial cross for a test and make adjustments on the fly. |
|
Fossilman
Cave Dweller 
Member since January 2009
Posts: 20,722 
|
Post by Fossilman on Apr 6, 2019 10:28:00 GMT -5
Awesome, looks like an easy project!
|
|
|
|
Post by TheRock on Apr 7, 2019 5:01:47 GMT -5
Drummond Island Rocks Chuck The reason I asked for the size of blade your is, because this will only work for larger saws I think. I looked at my Cheapie HF saw yesterday and the depth of the blade (Its a 5" Saw modified) the blade does not have a deep enough cut to get the job done. I cant use my BD 10 cause ill sling Oil all Over My HF 10" is a bridge saw. Ill hafta ck my 7" Home Depot Jobbie to see if that will work. What thickness of wood did you use? From what I can see just eyeballing the whole thing Is the Jig Needs to Be Thin to Win! 
|
|
lapitup
off to a rocking start

Member since May 2021
Posts: 10
|
Post by lapitup on Aug 2, 2021 6:47:10 GMT -5
Great thread this is exactly what I was looking for. Thankyou
|
|
|
|
Post by stephan on Aug 3, 2021 12:50:03 GMT -5
I have made one cross... years ago. I don't have in-process pics, so I'll just explain. The shape for it was one of the shapes available on the standard templates we had in the shop. I did not get as fancy as above. I used a trim saw and no jig. To prevent cutting into the cross I cut a little wider than usual (about 1/4" outside of the lines). Since I was using obsidian, the 80 grit wheel ate through the excess pretty quickly. Harder material might take longer. I basically cut the inside corners, using the edges of the Genie wheel. They aren't super-sharp corners, but I think it worked well enough.  Mahogany obsidian cross Mahogany obsidian cross by Stephan T., on Flickr |
|
lapitup
off to a rocking start

Member since May 2021
Posts: 10
|
Post by lapitup on Sept 3, 2021 8:03:30 GMT -5
 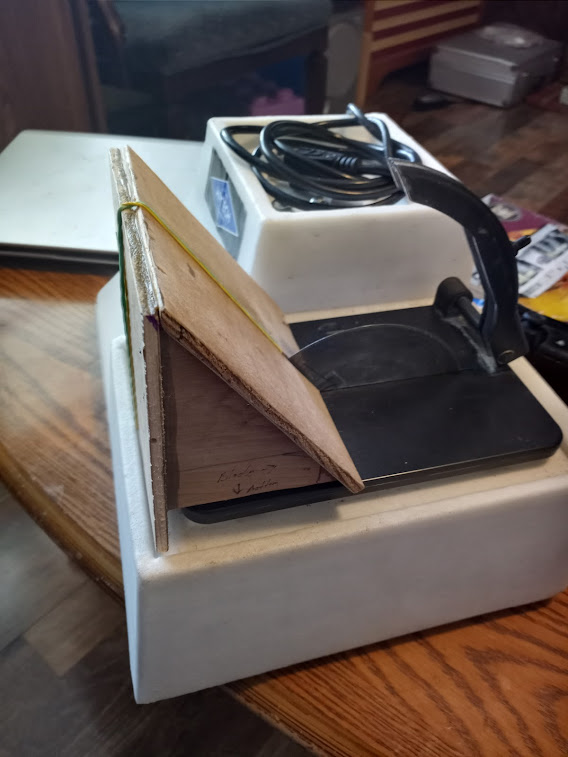 looks a little steep but thats what it worked out to be |
|


