Post by kk on Oct 27, 2013 6:49:12 GMT -5
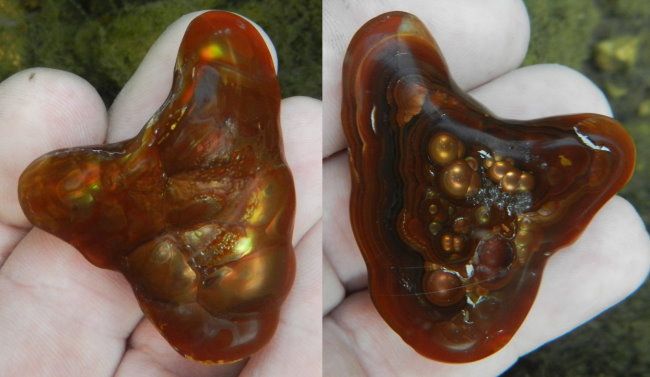
Darker beauty with a mixture of colors. Depending on light-conditions colors change and some are visible at any time. Unfortunately, while the color cover is a 100%, there is no single angle to show it in its entirety. There are orbs in the back and the back needs some more work to iron out the spots where I left the polish-cream. While possibly not considered the best color, I like the look of it. Its visible, but not over the top. There is some subtle-ness to it, that exudes a kind of noble touch, that I prefer over a lot of other pieces. Its definitely a piece that is going to be worn by me personally. Coming in at 130ct, so its not really for a delicate feminine neck. 
Rough provided by Christopher Anthony, so I'm indebted to him yet again for providing exceptional pieces to work on.
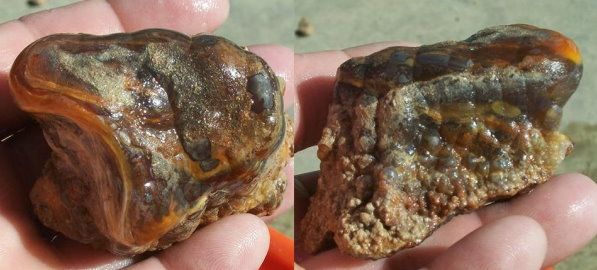
Starting-point
Outdoors finished
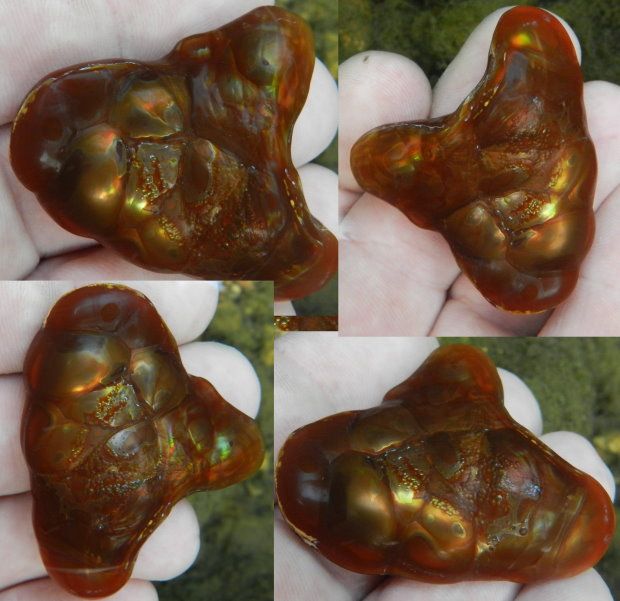
Back and front
50 sec video taken underwater. Video (not sure if that will embed itself). If not please, help. Video is taken in water to allow better light-dispersal for the camera to pick up on. As it happens, those are the colors that I see with my eyes, but the camera simply does not want to pick them up that way. (have done 600+ pics by now).
s1200.photobucket.com/user/kainzerkurt/media/carvings%202012/carving%202013/Autumn%202013/DSCN0629_zps71d96563.mp4.html
<embed width="600" height="361" type="application/x-shockwave-flash" allowFullscreen="true" allowNetworking="all" wmode="transparent" src="http://static.photobucket.com/player.swf" flashvars="file=http%3A%2F%2Fvid1200.photobucket.com%2Falbums%2Fbb340%2Fkainzerkurt%2Fcarvings%25202012%2Fcarving%25202013%2FAutumn%25202013%2FDSCN0629_zps71d96563.mp4">
Five weeks in the works, but definitely worth the effort. Al the while learning new things.
Lesson number one: the brightest colors are quite often the first you hit. So working from the edge (as advised by nearly everyone working that material) means that you are missing out on some sub herb colors. Takes a lot longer, but if you are ready and can preserve it, its definitely worth it. The working from the edge approach is more suited for windowed pieces.
Lesson two: got a good color? Dos not mean that you are even close to the color itself and the color changes on the way down in often unexpected ways even if you did not remove any colored layers. A third of my piece is like that. And because I dont know how deep the color is, I cant use the machine as it looks like I'm working directly on the color. So hand-sanding my way to the color has lead me in one place nearly two mm down and I'm still not there. Then you can imagine why it has taken so long to get thus far.
Lesson three: Letting the stone heat up during polish, when you are directly on the color; intensifies the color somewhat, but also darkens the appearance. Sanding it over makes it a bit brighter again but endangers a change of color.
Lesson four: Blue color is desirable and highly priced because the layers are impossibly thin. You need to be lucky to get them. You either end up with a bluish green (if not enough polish) or drop into a void (if too much polish/sanding).
Lesson five: Six years of practicing means nothing when you come across new material that you know is of good quality and you want to take extra care to get it right.

In addition, I finished a carving blank Montana
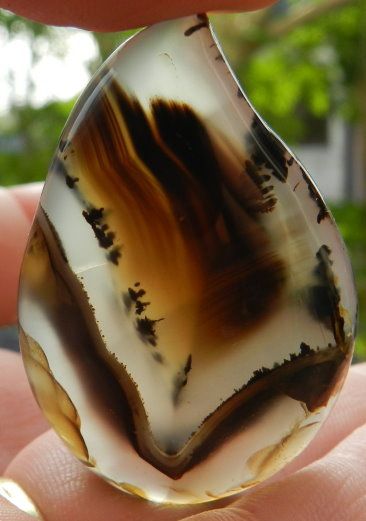
In/Outdoor
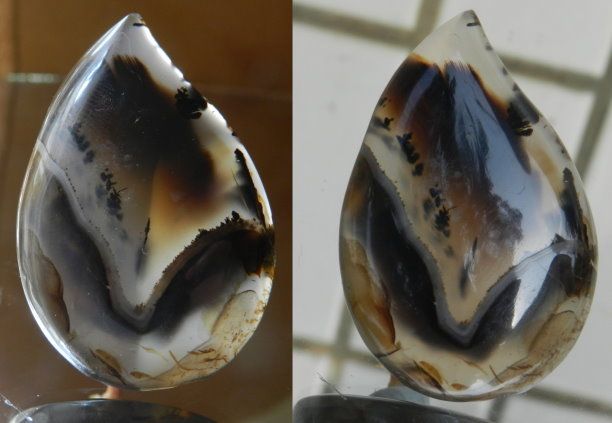
Have a great weekend and week ahead, Kurt

Rough provided by Christopher Anthony, so I'm indebted to him yet again for providing exceptional pieces to work on.
Starting-point

Outdoors finished

Back and front

50 sec video taken underwater. Video (not sure if that will embed itself). If not please, help. Video is taken in water to allow better light-dispersal for the camera to pick up on. As it happens, those are the colors that I see with my eyes, but the camera simply does not want to pick them up that way. (have done 600+ pics by now).
s1200.photobucket.com/user/kainzerkurt/media/carvings%202012/carving%202013/Autumn%202013/DSCN0629_zps71d96563.mp4.html
<embed width="600" height="361" type="application/x-shockwave-flash" allowFullscreen="true" allowNetworking="all" wmode="transparent" src="http://static.photobucket.com/player.swf" flashvars="file=http%3A%2F%2Fvid1200.photobucket.com%2Falbums%2Fbb340%2Fkainzerkurt%2Fcarvings%25202012%2Fcarving%25202013%2FAutumn%25202013%2FDSCN0629_zps71d96563.mp4">
Five weeks in the works, but definitely worth the effort. Al the while learning new things.
Lesson number one: the brightest colors are quite often the first you hit. So working from the edge (as advised by nearly everyone working that material) means that you are missing out on some sub herb colors. Takes a lot longer, but if you are ready and can preserve it, its definitely worth it. The working from the edge approach is more suited for windowed pieces.
Lesson two: got a good color? Dos not mean that you are even close to the color itself and the color changes on the way down in often unexpected ways even if you did not remove any colored layers. A third of my piece is like that. And because I dont know how deep the color is, I cant use the machine as it looks like I'm working directly on the color. So hand-sanding my way to the color has lead me in one place nearly two mm down and I'm still not there. Then you can imagine why it has taken so long to get thus far.
Lesson three: Letting the stone heat up during polish, when you are directly on the color; intensifies the color somewhat, but also darkens the appearance. Sanding it over makes it a bit brighter again but endangers a change of color.
Lesson four: Blue color is desirable and highly priced because the layers are impossibly thin. You need to be lucky to get them. You either end up with a bluish green (if not enough polish) or drop into a void (if too much polish/sanding).
Lesson five: Six years of practicing means nothing when you come across new material that you know is of good quality and you want to take extra care to get it right.


In addition, I finished a carving blank Montana

In/Outdoor

Have a great weekend and week ahead, Kurt


 On the other hand FA is actually a misnomer. Chalcedony with Limonite and a few other things. Just was reminded by someone that "precious/fire sard" would be a more correct term for them.


