Post by 1dave on Nov 22, 2013 10:36:49 GMT -5
An extension of Geology for Rockhounds.
What are you going to do with all those rocks you have hauled home?
I'm getting "long in the tooth," and decided it is time to start disposing of my collection. I asked the principle of our local grade school if they were interested. YEP!
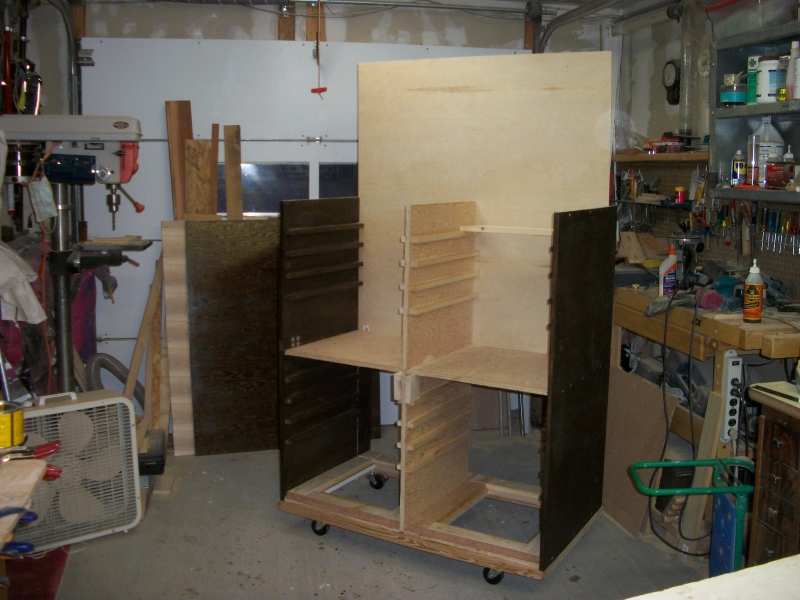
I envisioned what I wanted it to look like. I decided on 48" X 46" X 26" deep so it could be divided into four sections - Special (Teacher Stuff, Crystals, Meteorites, etc.); Igneous; Sedimentary: Metamorphic; and a storage space on the back for large charts.
It had to be "kid proof" and on wheels.
Building the School Rock Case:

I built the base with 2X6's for the width to support the sides that would set on it, held together with pocket drills and Gorilla Glue.
I drilled and bolted the castors on using carriage bolts, then used 2X4's for the sides to screw to, making sure to overlap them the opposite way from the 2X6's for strength. I wanted the largest heavy drawers to set on the base and main divider, and used 1X4 lumber to build the common drawers and 1X6 for the fronts so they could extend down 3/4" and also use the routed in drawer support cleats as a stop. The extra space allowed an extra large drawer for the top of each section.
I drilled a 3/4" hole in the middle of the main dividers and cut 3/4" slots from back to center on the upright divider and vice-versa on the parallel divider, slid them together, then inserted them into the side routed slots and 2X4 center slot. I glued a support splint under the center joint for additional support.

I glued cleats on the inside of the cabinet top to secure it to the sides and hold the upright divider in place, attached the hasp to lock the front sliding door, and 3/4" C-channel for the 1/2" door to slide into on the front and back of the cabinet.

Drawer building time!
I made the drawers 1/8th inch smaller than the space they were to go into for a good snug fit.


Drawer pulls were routed out of the top front of drawers and the bottom back so there was finger room.

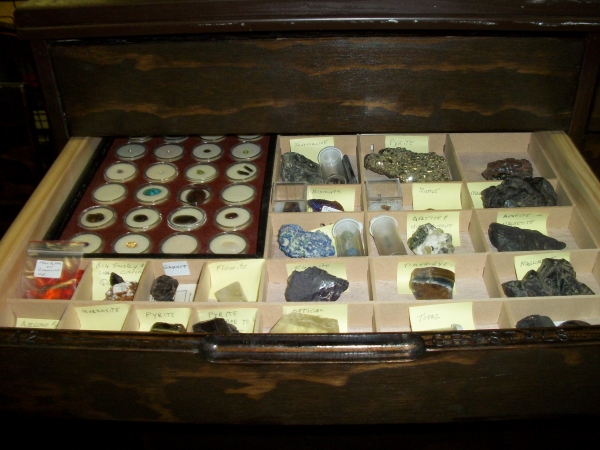
Stuffing the drawers:

I made the large drawers with round routed front and side hand cutouts so they can easily be removed, carried to a classroom, and put back in place.

Note the large drawers have notches to hold charts and slots in the sides to easily handle them.
One mistake I made was to stamp the number (A1 Teacher Supplies, A2 Crystals etc) on the top of each drawer. It can only be seen when pulling the drawer out. I should have stamped it into the front of each drawer.
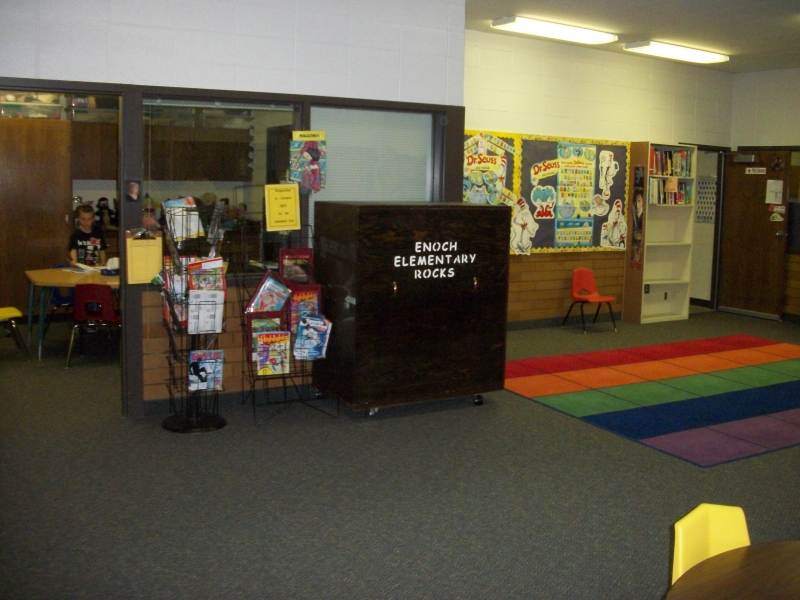
Completed cabinet

8- Finished cabinet front
with the sliding door in place and locked at the school where it is much appreciated and used.
What are you going to do with all those rocks you have hauled home?
I'm getting "long in the tooth," and decided it is time to start disposing of my collection. I asked the principle of our local grade school if they were interested. YEP!
I envisioned what I wanted it to look like. I decided on 48" X 46" X 26" deep so it could be divided into four sections - Special (Teacher Stuff, Crystals, Meteorites, etc.); Igneous; Sedimentary: Metamorphic; and a storage space on the back for large charts.
It had to be "kid proof" and on wheels.
Building the School Rock Case:
I built the base with 2X6's for the width to support the sides that would set on it, held together with pocket drills and Gorilla Glue.
I drilled and bolted the castors on using carriage bolts, then used 2X4's for the sides to screw to, making sure to overlap them the opposite way from the 2X6's for strength. I wanted the largest heavy drawers to set on the base and main divider, and used 1X4 lumber to build the common drawers and 1X6 for the fronts so they could extend down 3/4" and also use the routed in drawer support cleats as a stop. The extra space allowed an extra large drawer for the top of each section.
I drilled a 3/4" hole in the middle of the main dividers and cut 3/4" slots from back to center on the upright divider and vice-versa on the parallel divider, slid them together, then inserted them into the side routed slots and 2X4 center slot. I glued a support splint under the center joint for additional support.

I glued cleats on the inside of the cabinet top to secure it to the sides and hold the upright divider in place, attached the hasp to lock the front sliding door, and 3/4" C-channel for the 1/2" door to slide into on the front and back of the cabinet.

Drawer building time!
I made the drawers 1/8th inch smaller than the space they were to go into for a good snug fit.


Drawer pulls were routed out of the top front of drawers and the bottom back so there was finger room.

Stuffing the drawers:
I made the large drawers with round routed front and side hand cutouts so they can easily be removed, carried to a classroom, and put back in place.

Note the large drawers have notches to hold charts and slots in the sides to easily handle them.
One mistake I made was to stamp the number (A1 Teacher Supplies, A2 Crystals etc) on the top of each drawer. It can only be seen when pulling the drawer out. I should have stamped it into the front of each drawer.
Completed cabinet
8- Finished cabinet front
with the sliding door in place and locked at the school where it is much appreciated and used.


 ... to the New Guys from The ChatBox V.2 Crew