Making of a silver stone set pendant - part I and II
Dec 17, 2013 10:07:11 GMT -5
montanamuskrat, Drummond Island Rocks, and 4 more like this
Post by 1dave on Dec 17, 2013 10:07:11 GMT -5
A Blast from the Past (Sep 11, 2008 at 5:45am) by Zoran of Belgrade, Serbia.
Note the original links no longer work.
Original Thread: forum.rocktumblinghobby.com/post/292402
Thanks to bsky4463 Andy for bringing them to my attention!
Making of a silver stone set pendant - part I
-----------------------------------------
author="Zoran"
I was asked a couple of times (at least) to explain the way I am making my silver jewelry. I answered - I am going to... long ago. Now time has come. ;D
Before the start I need to state that I am a self-taught. I didn't take any classes or looked how anybody else is working. I searched over the Internet for knowledge and examples, bought two books and I used a lot of trial and error method. So basically this is the why I am doing it.
Here are the links that are very useful and they contain basic knowledge of the process and explanation of terms as soldering, pickle etc. Explanation of that broad list of terms would take too much space and time and I think that they explained it in better English than mine is.
users.erols.com/jyavins/solder.htm
www.handyharmancanada.com/hbpm/soldering/gold_and_silver_soldering.htm
www.silverspiderforge.com/silversmithing.html
Also consider safety measures.
www.ganoksin.com/borisat/nenam/safety.htm
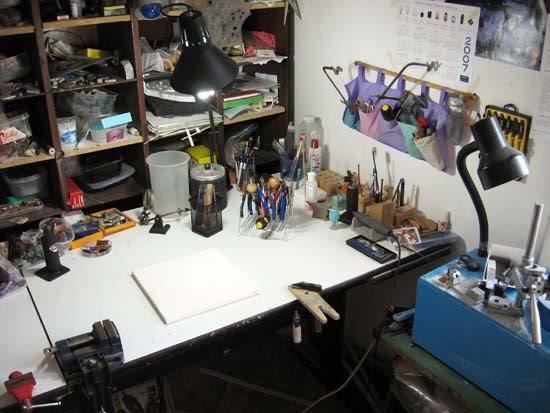
My set up.
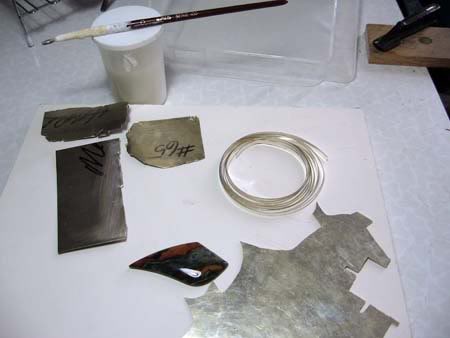
In this picture we can see: Firebrick, Picture Jasper cabochon, silver sheet, bezel wire, three grades of solder (in sheets) - hard, medium, easy and flux (paste) with paint brush (I stole it from my kids) ;D.
Thickness of a silver sheet basically depends on dimensions of the stone and on your personal choice and style. I mainly use 18, 20, 22 and 24 gauge silver sheets. For this pendant I used 22 gauge silver sheet.
As you can see I also use already made bezel wire (made of fine silver) to surround and hold the cabochon. You can also make your own bezel by cutting off strip of sterling silver sheet. I do that as well only this is an easier and quicker way. The thickness of bezel wire also depends on dimensions of stone although there are pretty thinner then backing sheet. If you don't have silver sheets thin enough you can use a small trick and thin the upper part of bezel, which needs to be pushed over the stone, by filing.
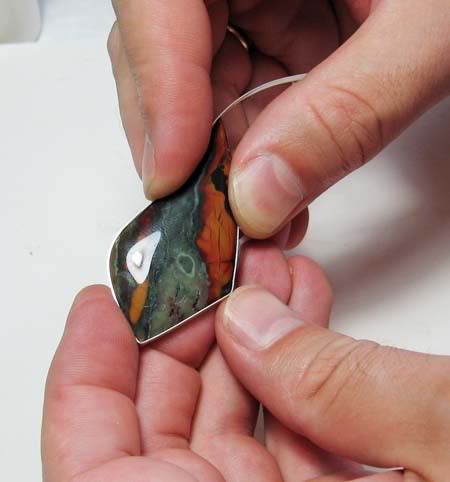
It is needed to shape up the bezel to fit the stone.
In order to do that you can use your fingers,
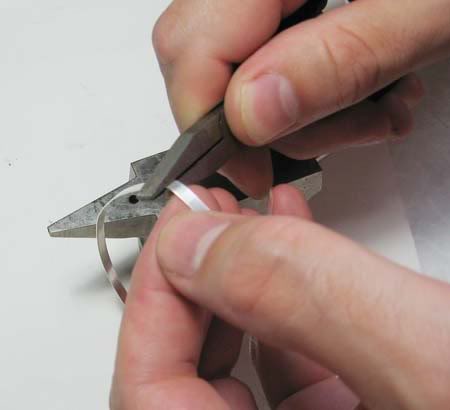
pliers (it is better to roll some tape over your pliers or be very careful not to leave plier marks) and even small anvil.
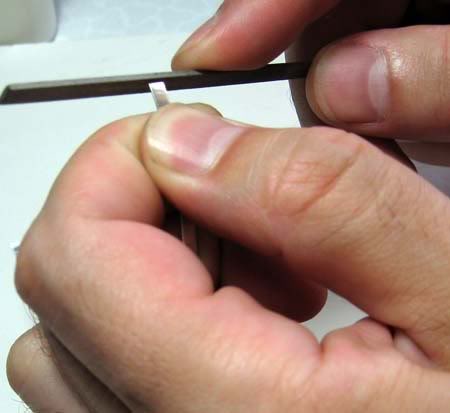
Flattening the ends of bezel wire for better connection and easier soldering.
Now we need to close the ends of the bezel wire by soldering, but, before that recheck if the bezel fits the stone.
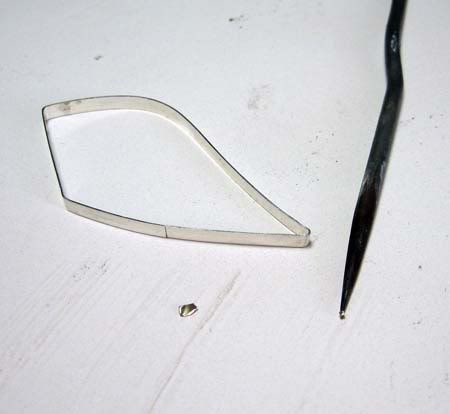
For soldering together the ends of the bezel I use pick soldering method.
Beside that there is also chip soldering, wire soldering and sweat soldering (last method is not adequate for closing bezel wire).
Pick soldering method means that you use soldering pick (sharp end stick) to pick up small piece of solder that you melt with torch. (Titanium soldering pick can be bought at jewelry equipment store or you can make one from a coat hanger which end is tapered on a grinder, like I did.)
Use hard solder to connect ends of bezel (hard solder have highest melting point -1450oF, medium -1360oF and easy 1325oF).
Cut off only small piece of hard solder for closing the bezel.
Small piece of solder that is heated with torch turns into small sphere after reaching melting point.
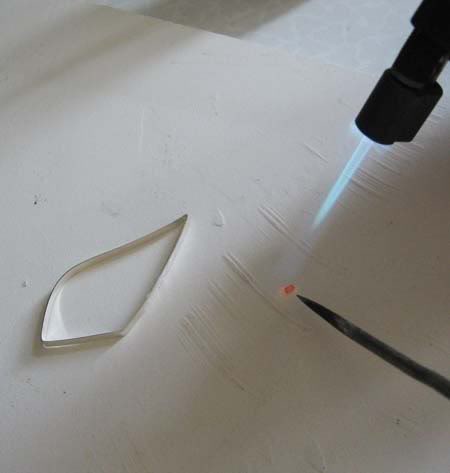
Then you pick it with soldering pick and introduce it to a heated bezel previously fluxed
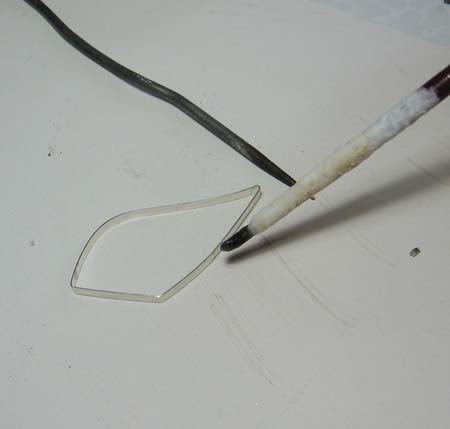
(I smeared over flux paste with the small brush). Magic is to just touch the joint at the moment when both ends reach right temperature - soldering temperature.
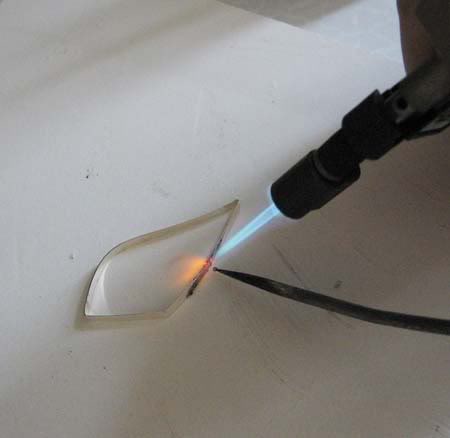
How to know when temperature is right? There is no way to explain it clearly enough (at least I can’t do it). The only right answer is - practice. After several attempts you’ll know when that right moment is.
Anyhow, it is recommended to perform soldering under dim light in order to easily read temperature changes. Also do not point the flame directly at the joint. Move flame around the joint in concentric circles so when two pieces reach soldering temperature you are almost pointing flame to the joint. At that moment you should touch the joint with soldering pick (with molten solder on top).
This looks a bit difficult. At the beginning it is. The other option is to try chip soldering. With this method you place the small chip of solder, on the previously fluxed joint, and heat around the joint (in above mentioned way) until solder flows.
After soldering take the bezel with tweezers or pliers (never forget how hot it is)
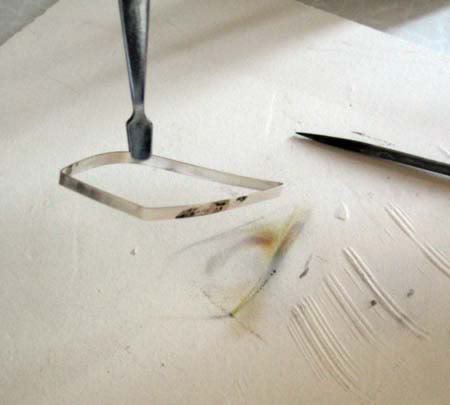
and drop it in the water then in the pickle.

If pickle is warmed up bezel should be in the pickle for only couples of minutes, if not, leave it there 10-15 minutes.
Now we need to prepare backing silver sheet. The easiest way is to put the cabochon on the silver sheet and draw the shape of the cabochon but just a bit bigger.

For cutting off the sheet silver I use jewelers saw but you can also use sharp shears.

To facilitate soldering of bezel to a backing sheet it is good to rub the bezel and backing sheet on sanding paper.
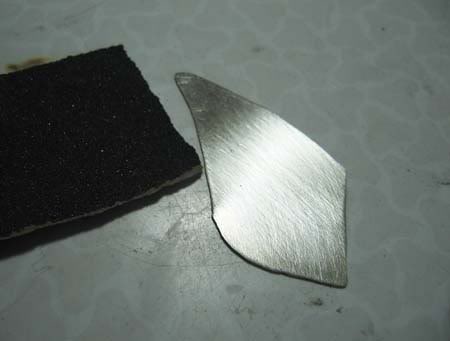
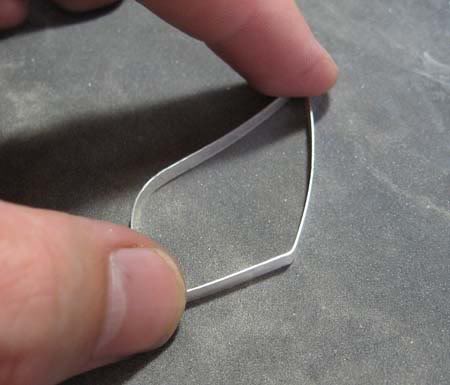
Before starting soldering bezel to the backing it is wise to recheck fitting of the bezel to the cabochon.
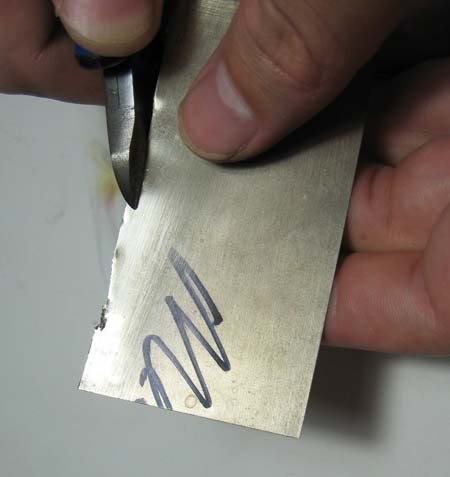
Cut off enough small pieces of medium solder for soldering bezel to the backing sheet.

Because firebrick acts like some kind of heat sink I use small pieces of old soldering block (firebrick) to lift up silver sheet a bit.
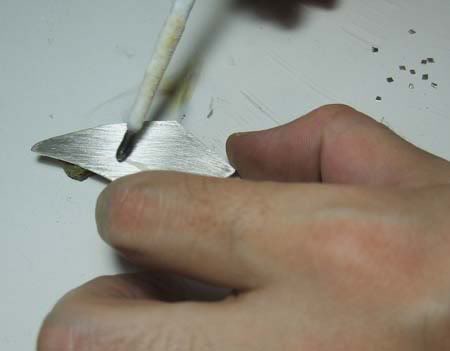
Applying flux.
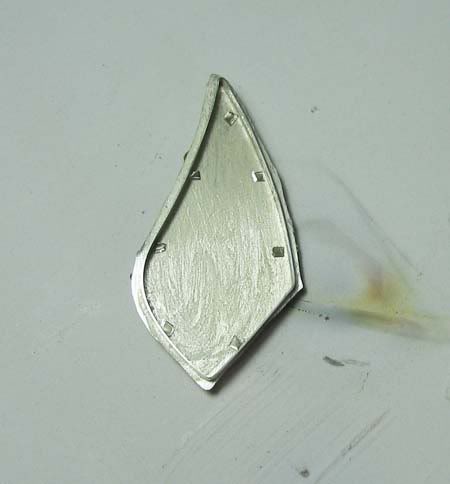
Placing chips of medium solder in the way that they touch the bezel and the backing sheet.
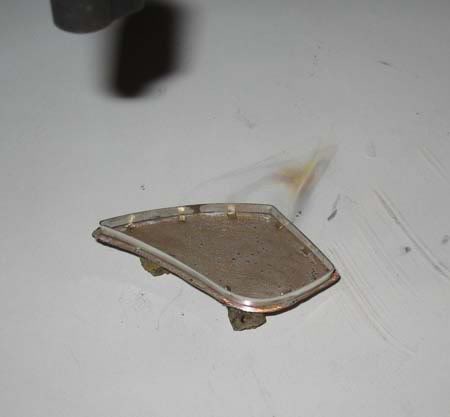
Soldering again. You need to heat the assembly uniformly in order to solder flows simultaneously all the way round. Heat the sheet of silver a bit more then the bezel.
After solder flows remove heat immediately, take the assembly with tweezers, drop in the water and then in the pickle.
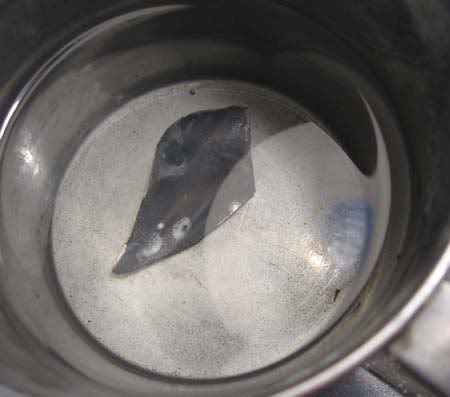
Assembly in pickle just after soldering
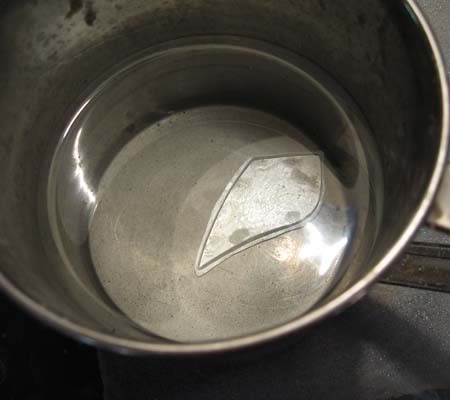
and after 10-15 minutes.
While waiting on pickle to do the job you can prepare the bail.
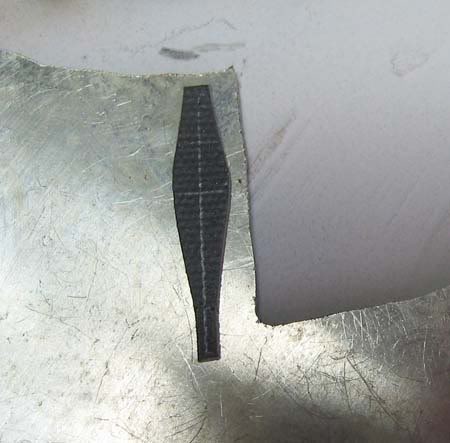
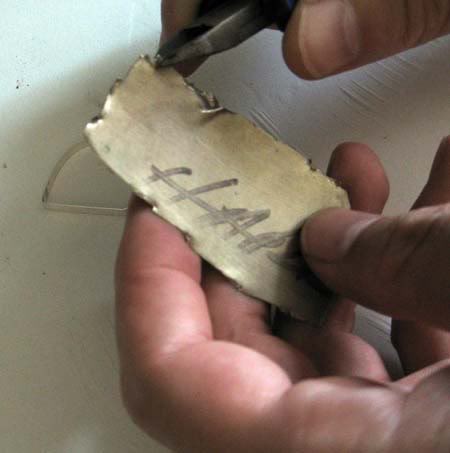
This is a template of the bail I made from thin piece of plastic.
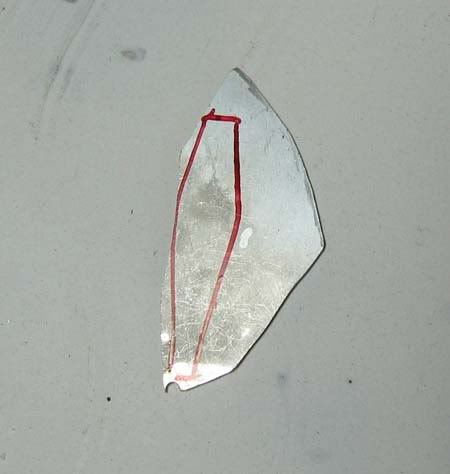
Simply use the template to draw the shape of the bail and cut it off with the jewelers saw.
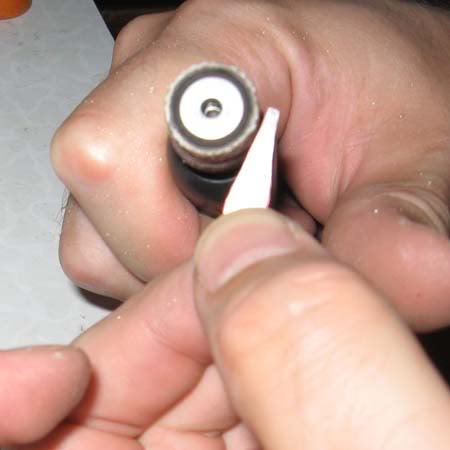
Adjust the shape with rotary tool or with files.
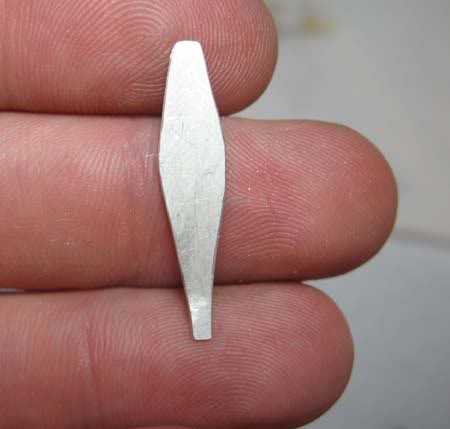
Prepared bail shape for bending.
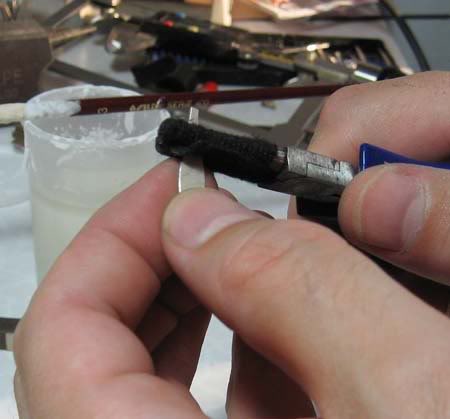
Shape the bail with round nose pliers wrapped with tape.
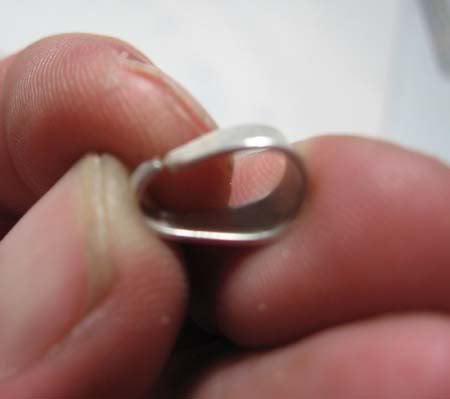
Joint is going to be at the back of the bail when set on pendant.

Front side of the bail.
continues in another thread
Making of a silver stone set pendant - part II
Original Thread: forum.rocktumblinghobby.com/thread/25284
continuation of the thread
After the bail is prepared we can get back to the pickled bezel-silver sheet assembly.
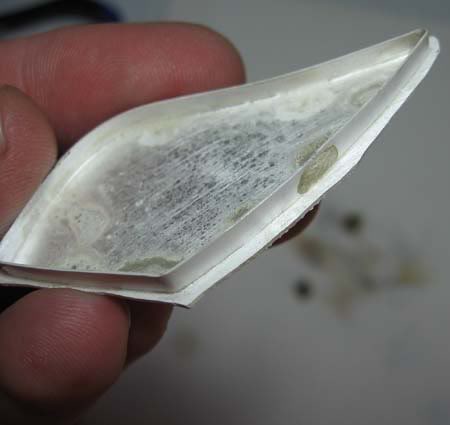
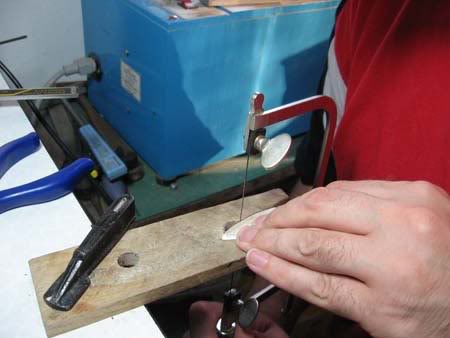
Saw off the extra sheet.
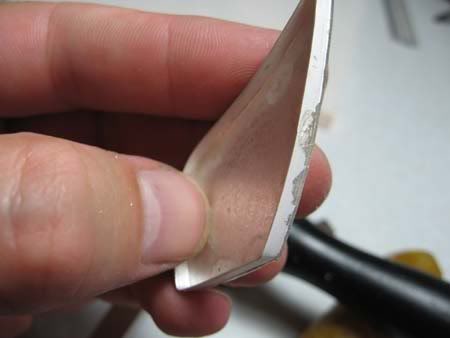
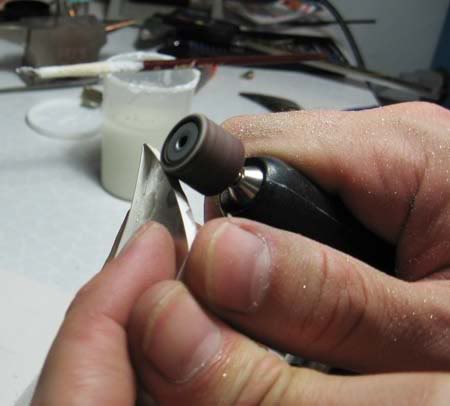
Smooth the edges by sanding with rotary tool
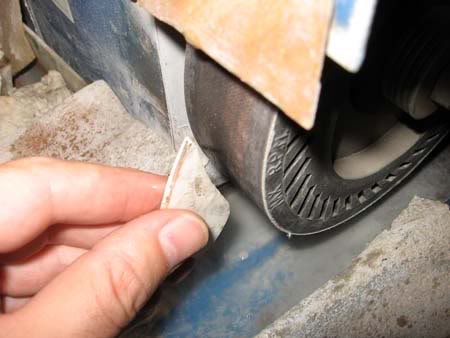
or even on your sander.
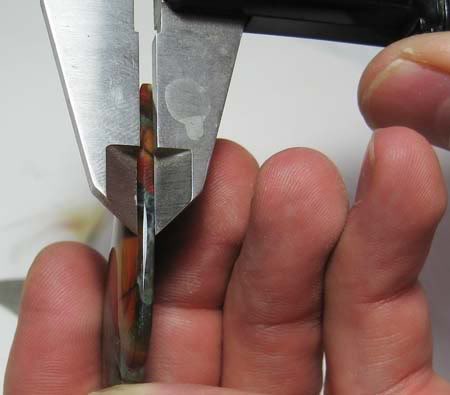
In order to adjust the height of silver bezel you need to measure the height of the cabochon's bezel and then decide how much of the bezel is going to be pushed over the slope of the cabochon.
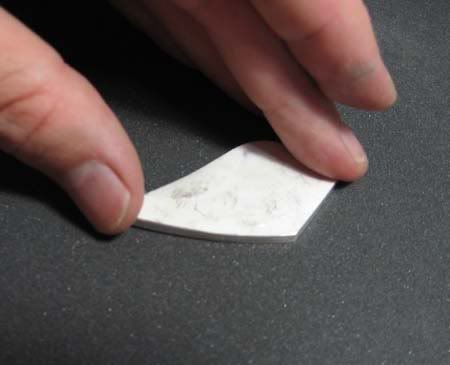
Adjusting the height if the bezel by rubbing it on sanding paper.
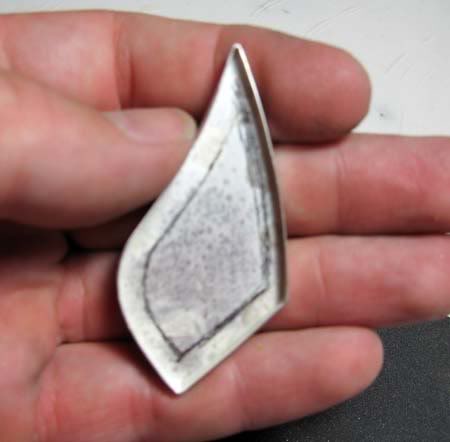
Since I wanted to have opened back on this pendant I draw the shape that I want to cut out.
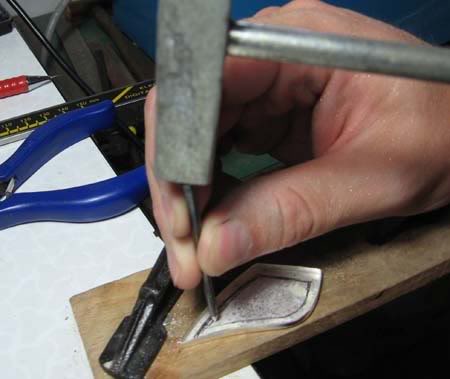
In order to cut off piece on the back we need to drill the hole and then pull the saw blade through.
To avoid slipping of drill bit I mark the spot to be drilled by hammering a sharpened nail.
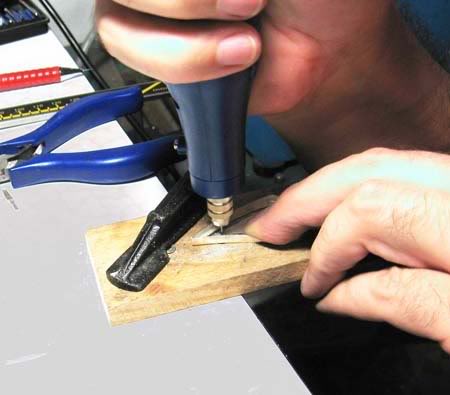
Drilling.
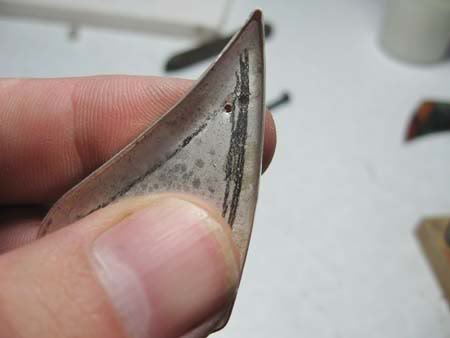
Now, I pull trough the saw blade, by releasing and re-tightening only one end of the saw.
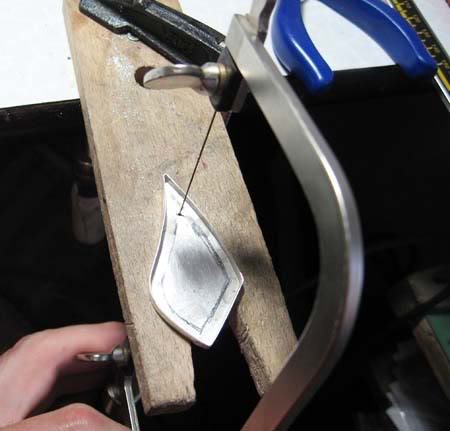
And saw off the shape.
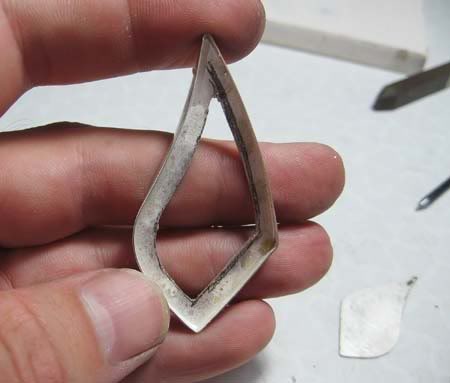
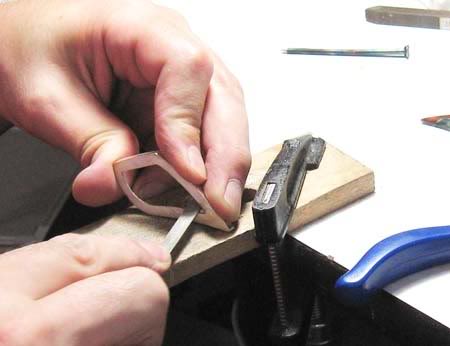
Adjust and smooth the cut off by filling.
Soldering again.
Now it is time to solder jump ring to the back of the pendant.
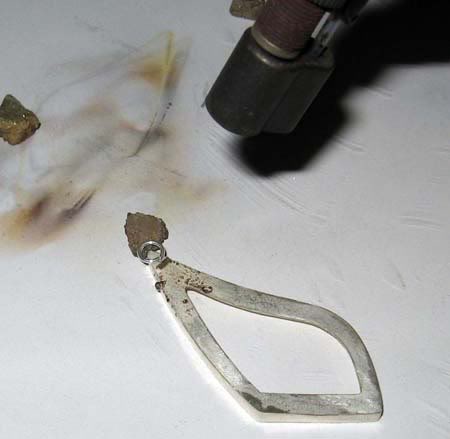
Soldering is performed in the same way as described above. I used chip soldering method this time and used medium solder, but you can also use easy solder.
The only tricky part is avoiding of falling down of jump ring during soldering. I used a small piece of an old firebrick as a supporter.

Put the bail on. Be careful to leave the joint on the back side of the pendant.
Now, you need to solder close the bail. That is the last soldering for this pendant.
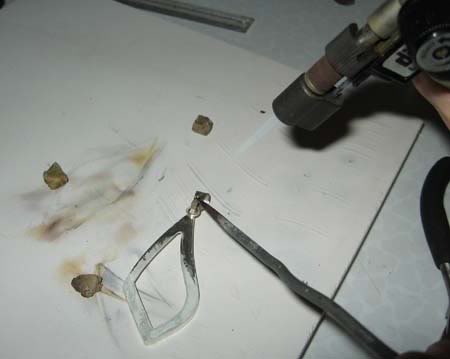
I used soft solder.
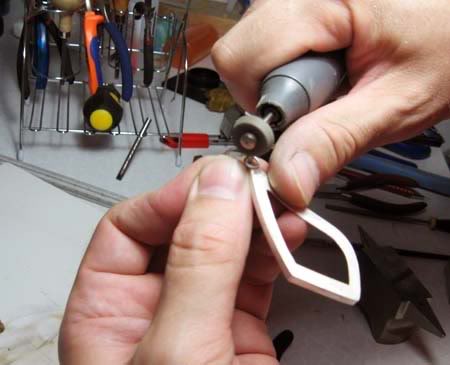
Grind off and sand off the excess of solder on the joint with rotary tool or with files.
It is time to set the cabochon. I use soft wood block as a support.
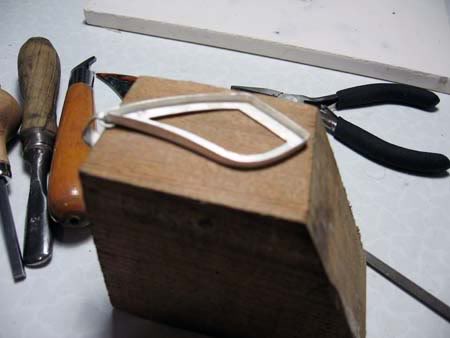
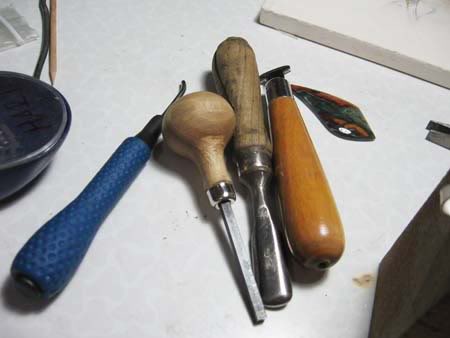
Tools I use for this type of setting. From left to right - burnisher (self-made), bezel pusher, a tool that I also made and can be used both as burnisher or bezel roller and bezel roller (purchased).
Basically, first two are quite enough for this kind of setting.

Firstly, get the cabochon in. You need to make sure that the stone is fitted completely and all the way down on its place.
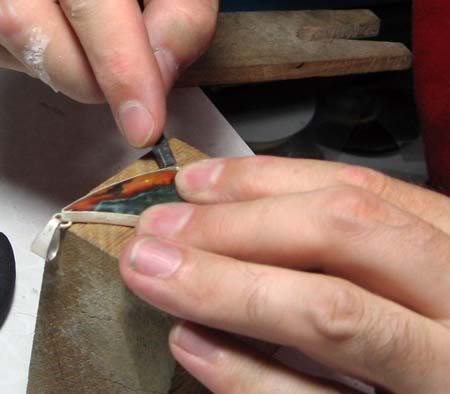
Then start using bezel pusher
![]()
(or bezel roller - it's your choice)
The purpose of the bezel pusher (or roller) is to bend the bezel over the stone.
The only trick is to push the bezel crosswise - 3 o'clock-9 o'clock, 12 o'clock-6o'clock, 1 o'clock-7 o'clock etc.
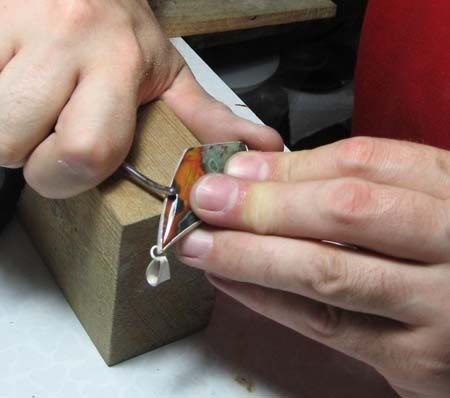
After you pushed the bezel completely over the stone use the burnisher to smooth it.

To further enhance the smoothness of your bezel use a rotary tool with sanding and polishing wheel. Just be careful not to damage the stone, especially if the stone is soft.
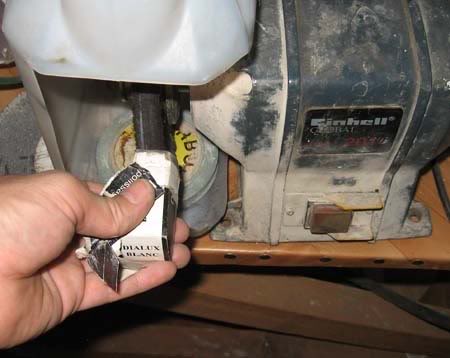
The only thing left to do is - polishing.
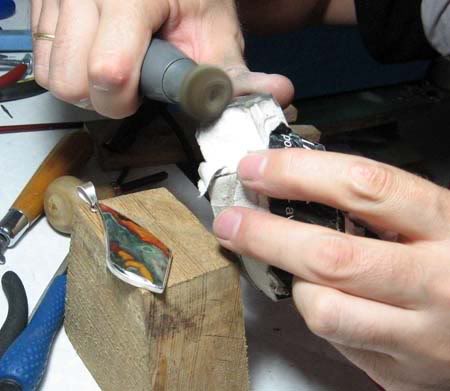
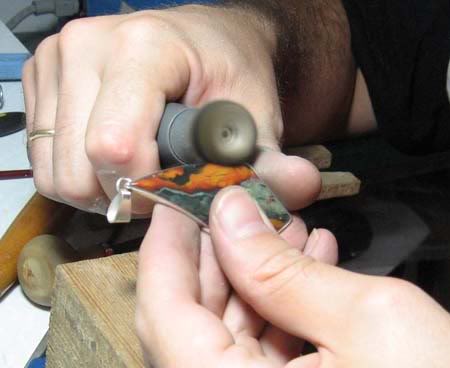
I use muslin buffs on rotary tool or bench polisher.
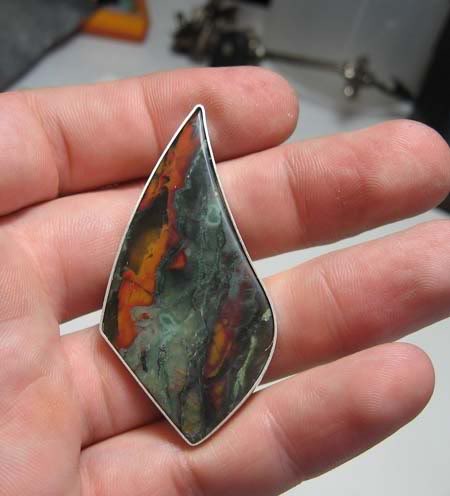
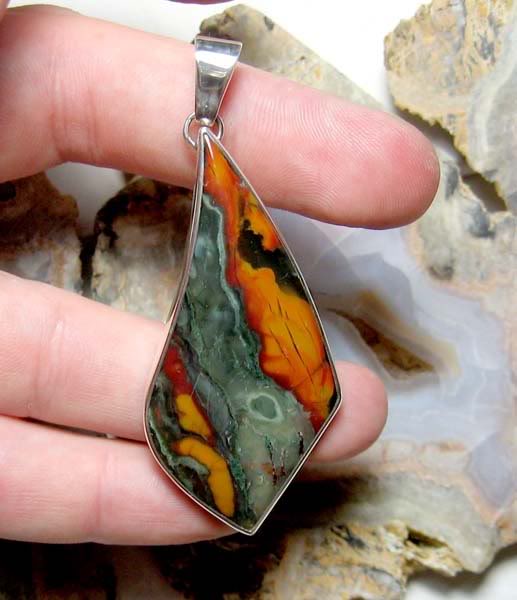
And the pendant is finished.
The end.
Zoran
Note the original links no longer work.
Original Thread: forum.rocktumblinghobby.com/post/292402
Thanks to bsky4463 Andy for bringing them to my attention!
Making of a silver stone set pendant - part I
-----------------------------------------
author="Zoran"
I was asked a couple of times (at least) to explain the way I am making my silver jewelry. I answered - I am going to... long ago. Now time has come. ;D
Before the start I need to state that I am a self-taught. I didn't take any classes or looked how anybody else is working. I searched over the Internet for knowledge and examples, bought two books and I used a lot of trial and error method. So basically this is the why I am doing it.
Here are the links that are very useful and they contain basic knowledge of the process and explanation of terms as soldering, pickle etc. Explanation of that broad list of terms would take too much space and time and I think that they explained it in better English than mine is.
users.erols.com/jyavins/solder.htm
www.handyharmancanada.com/hbpm/soldering/gold_and_silver_soldering.htm
www.silverspiderforge.com/silversmithing.html
Also consider safety measures.
www.ganoksin.com/borisat/nenam/safety.htm

My set up.

In this picture we can see: Firebrick, Picture Jasper cabochon, silver sheet, bezel wire, three grades of solder (in sheets) - hard, medium, easy and flux (paste) with paint brush (I stole it from my kids) ;D.
Thickness of a silver sheet basically depends on dimensions of the stone and on your personal choice and style. I mainly use 18, 20, 22 and 24 gauge silver sheets. For this pendant I used 22 gauge silver sheet.
As you can see I also use already made bezel wire (made of fine silver) to surround and hold the cabochon. You can also make your own bezel by cutting off strip of sterling silver sheet. I do that as well only this is an easier and quicker way. The thickness of bezel wire also depends on dimensions of stone although there are pretty thinner then backing sheet. If you don't have silver sheets thin enough you can use a small trick and thin the upper part of bezel, which needs to be pushed over the stone, by filing.

It is needed to shape up the bezel to fit the stone.
In order to do that you can use your fingers,

pliers (it is better to roll some tape over your pliers or be very careful not to leave plier marks) and even small anvil.

Flattening the ends of bezel wire for better connection and easier soldering.
Now we need to close the ends of the bezel wire by soldering, but, before that recheck if the bezel fits the stone.


For soldering together the ends of the bezel I use pick soldering method.
Beside that there is also chip soldering, wire soldering and sweat soldering (last method is not adequate for closing bezel wire).
Pick soldering method means that you use soldering pick (sharp end stick) to pick up small piece of solder that you melt with torch. (Titanium soldering pick can be bought at jewelry equipment store or you can make one from a coat hanger which end is tapered on a grinder, like I did.)
Use hard solder to connect ends of bezel (hard solder have highest melting point -1450oF, medium -1360oF and easy 1325oF).
Cut off only small piece of hard solder for closing the bezel.

Small piece of solder that is heated with torch turns into small sphere after reaching melting point.

Then you pick it with soldering pick and introduce it to a heated bezel previously fluxed

(I smeared over flux paste with the small brush). Magic is to just touch the joint at the moment when both ends reach right temperature - soldering temperature.

How to know when temperature is right? There is no way to explain it clearly enough (at least I can’t do it). The only right answer is - practice. After several attempts you’ll know when that right moment is.
Anyhow, it is recommended to perform soldering under dim light in order to easily read temperature changes. Also do not point the flame directly at the joint. Move flame around the joint in concentric circles so when two pieces reach soldering temperature you are almost pointing flame to the joint. At that moment you should touch the joint with soldering pick (with molten solder on top).
This looks a bit difficult. At the beginning it is. The other option is to try chip soldering. With this method you place the small chip of solder, on the previously fluxed joint, and heat around the joint (in above mentioned way) until solder flows.
After soldering take the bezel with tweezers or pliers (never forget how hot it is)

and drop it in the water then in the pickle.

If pickle is warmed up bezel should be in the pickle for only couples of minutes, if not, leave it there 10-15 minutes.
Now we need to prepare backing silver sheet. The easiest way is to put the cabochon on the silver sheet and draw the shape of the cabochon but just a bit bigger.

For cutting off the sheet silver I use jewelers saw but you can also use sharp shears.

To facilitate soldering of bezel to a backing sheet it is good to rub the bezel and backing sheet on sanding paper.


Before starting soldering bezel to the backing it is wise to recheck fitting of the bezel to the cabochon.

Cut off enough small pieces of medium solder for soldering bezel to the backing sheet.

Because firebrick acts like some kind of heat sink I use small pieces of old soldering block (firebrick) to lift up silver sheet a bit.

Applying flux.

Placing chips of medium solder in the way that they touch the bezel and the backing sheet.

Soldering again. You need to heat the assembly uniformly in order to solder flows simultaneously all the way round. Heat the sheet of silver a bit more then the bezel.
After solder flows remove heat immediately, take the assembly with tweezers, drop in the water and then in the pickle.

Assembly in pickle just after soldering

and after 10-15 minutes.
While waiting on pickle to do the job you can prepare the bail.

This is a template of the bail I made from thin piece of plastic.

Simply use the template to draw the shape of the bail and cut it off with the jewelers saw.

Adjust the shape with rotary tool or with files.

Prepared bail shape for bending.

Shape the bail with round nose pliers wrapped with tape.

Joint is going to be at the back of the bail when set on pendant.

Front side of the bail.
continues in another thread
Making of a silver stone set pendant - part II
Original Thread: forum.rocktumblinghobby.com/thread/25284
continuation of the thread
After the bail is prepared we can get back to the pickled bezel-silver sheet assembly.


Saw off the extra sheet.


Smooth the edges by sanding with rotary tool

or even on your sander.

In order to adjust the height of silver bezel you need to measure the height of the cabochon's bezel and then decide how much of the bezel is going to be pushed over the slope of the cabochon.

Adjusting the height if the bezel by rubbing it on sanding paper.

Since I wanted to have opened back on this pendant I draw the shape that I want to cut out.

In order to cut off piece on the back we need to drill the hole and then pull the saw blade through.
To avoid slipping of drill bit I mark the spot to be drilled by hammering a sharpened nail.

Drilling.

Now, I pull trough the saw blade, by releasing and re-tightening only one end of the saw.

And saw off the shape.


Adjust and smooth the cut off by filling.
Soldering again.
Now it is time to solder jump ring to the back of the pendant.

Soldering is performed in the same way as described above. I used chip soldering method this time and used medium solder, but you can also use easy solder.
The only tricky part is avoiding of falling down of jump ring during soldering. I used a small piece of an old firebrick as a supporter.

Put the bail on. Be careful to leave the joint on the back side of the pendant.
Now, you need to solder close the bail. That is the last soldering for this pendant.

I used soft solder.

Grind off and sand off the excess of solder on the joint with rotary tool or with files.
It is time to set the cabochon. I use soft wood block as a support.


Tools I use for this type of setting. From left to right - burnisher (self-made), bezel pusher, a tool that I also made and can be used both as burnisher or bezel roller and bezel roller (purchased).
Basically, first two are quite enough for this kind of setting.

Firstly, get the cabochon in. You need to make sure that the stone is fitted completely and all the way down on its place.

Then start using bezel pusher
(or bezel roller - it's your choice)
The purpose of the bezel pusher (or roller) is to bend the bezel over the stone.
The only trick is to push the bezel crosswise - 3 o'clock-9 o'clock, 12 o'clock-6o'clock, 1 o'clock-7 o'clock etc.

After you pushed the bezel completely over the stone use the burnisher to smooth it.

To further enhance the smoothness of your bezel use a rotary tool with sanding and polishing wheel. Just be careful not to damage the stone, especially if the stone is soft.
The only thing left to do is - polishing.


I use muslin buffs on rotary tool or bench polisher.

And the pendant is finished.

The end.
Zoran


 Gawrsh, thanks for all the credit that Andy (


