HOW TO: Photograph Shiny Tinies
Jun 14, 2014 18:11:56 GMT -5
bushmanbilly, gemfeller, and 2 more like this
Post by Deleted on Jun 14, 2014 18:11:56 GMT -5
or is it Tiny Shinies?

I recently posted an image of some small fasteners we sell at the new job. 150FromFundy asked me to show how I get the depth of field and clarity, specifically calling for images of my setup. So here I go.
I'll begin by saying that you must have SOME of the equipment seen here but not all. The required gear to do this stuff is:
Here is my setup for the ring image above. I have a monolight and flashmeter in my kit. This way I can do this work indoors. Outdoors works just as well, maybe better! If you photograph out doors you use the light tent position the sun high and in the direction you like the look of for your object. I like high right lights and always use that. You may be creative here.
The ring above is shot at f20 which is the same as f22 +2/3. I like the look of the softened (but not entirely out of) focus for the back of the ring. If you want less depth of focus, use a smaller number (larger opening) f-stop. If you desire greater depth of field, close it down to the highest number on your lens (usually f32 but could be be even higher.

The setup MUST be on a tripod. If you want f16-32 for a closeup image and want it super sharp your camera must be resting on a stable platform. YOU are NOT a stable platform. The lens may be open for as much as 0.5 second to achieve the depth you desire. It's OK; you have a tripod. This image is proof I am not a stable platform. See how the maker of the tripods mark on the leg is blurry. Hand held phone camera moves a tiny bit when I snapped this pic.

Because of the super long exposures that can/may happen, you should NOT touch your camera. You should have a cable release to trigger the shutter without touching the camera. The less vibration the more sharp your image. Here is what mine looks like. It plugs into the side of the camera body.

Here you can look over my shoulder at what I see when I set up the shot. I focus the lens by hand. No need for a super fast autofocus. Just focus it, step back, grab the cable release and push the button. If you are doing this out doors, the camera will open and close the shutter correctly. I set my camera on AV set the f-number and let the camera choose the duration of the shutter being open.

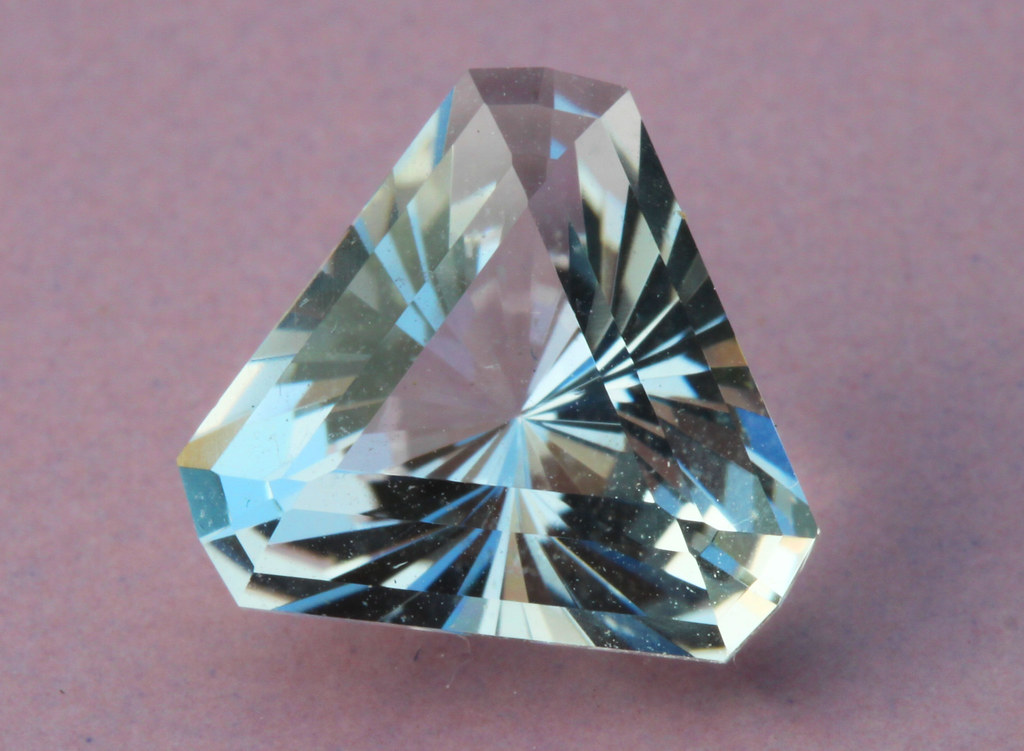
This one was done out of doors without the tent because I like the blue sky in the clear stone. BUT, a more accurate representation of the water white stone will be seen under the tent. It's $20, buy one. If you are clever, you can make one from a box and tissue paper for under $5.
My boss is allowing me to set up my tabletop rig and leave it set up. I am photographing the products for ebay and our website. I'll redo this stone at work next week, along with some more of rockncajun's precision cut Laser Alexandrite.... more to follow.

We have a lot of photographers here. Many are successful using pics to sell their wares. So, if any of you want to add to this thread by sharing your techniques and thoughts, I'd be flattered for you to join me in this thread. rockjunquie jamesp Tommy unclestu Drummond Island Rocks Bikerrandy gemfeller
Jim, if you show your greenhouse rig here you can prove high tech gear is not required. I'd like that. You just need some ingenuity, patience and some quality used gear.

I recently posted an image of some small fasteners we sell at the new job. 150FromFundy asked me to show how I get the depth of field and clarity, specifically calling for images of my setup. So here I go.
I'll begin by saying that you must have SOME of the equipment seen here but not all. The required gear to do this stuff is:
- SLR style camera
- Macro lens for said camera (this is important to have the macro version)
- Tripod
- Cable Release
- Light Tent ($20 on ebay)
- Patience
Here is my setup for the ring image above. I have a monolight and flashmeter in my kit. This way I can do this work indoors. Outdoors works just as well, maybe better! If you photograph out doors you use the light tent position the sun high and in the direction you like the look of for your object. I like high right lights and always use that. You may be creative here.
The ring above is shot at f20 which is the same as f22 +2/3. I like the look of the softened (but not entirely out of) focus for the back of the ring. If you want less depth of focus, use a smaller number (larger opening) f-stop. If you desire greater depth of field, close it down to the highest number on your lens (usually f32 but could be be even higher.

The setup MUST be on a tripod. If you want f16-32 for a closeup image and want it super sharp your camera must be resting on a stable platform. YOU are NOT a stable platform. The lens may be open for as much as 0.5 second to achieve the depth you desire. It's OK; you have a tripod. This image is proof I am not a stable platform. See how the maker of the tripods mark on the leg is blurry. Hand held phone camera moves a tiny bit when I snapped this pic.

Because of the super long exposures that can/may happen, you should NOT touch your camera. You should have a cable release to trigger the shutter without touching the camera. The less vibration the more sharp your image. Here is what mine looks like. It plugs into the side of the camera body.

Here you can look over my shoulder at what I see when I set up the shot. I focus the lens by hand. No need for a super fast autofocus. Just focus it, step back, grab the cable release and push the button. If you are doing this out doors, the camera will open and close the shutter correctly. I set my camera on AV set the f-number and let the camera choose the duration of the shutter being open.

This one was done out of doors without the tent because I like the blue sky in the clear stone. BUT, a more accurate representation of the water white stone will be seen under the tent. It's $20, buy one. If you are clever, you can make one from a box and tissue paper for under $5.
My boss is allowing me to set up my tabletop rig and leave it set up. I am photographing the products for ebay and our website. I'll redo this stone at work next week, along with some more of rockncajun's precision cut Laser Alexandrite.... more to follow.

We have a lot of photographers here. Many are successful using pics to sell their wares. So, if any of you want to add to this thread by sharing your techniques and thoughts, I'd be flattered for you to join me in this thread. rockjunquie jamesp Tommy unclestu Drummond Island Rocks Bikerrandy gemfeller
Jim, if you show your greenhouse rig here you can prove high tech gear is not required. I'd like that. You just need some ingenuity, patience and some quality used gear.


