spiritstone
Cave Dweller 
Member since August 2014
Posts: 2,061 
|
Post by spiritstone on Apr 22, 2015 20:20:53 GMT -5
After mentioning you felt like seeing my slab saw build GK, why not show you how it goes from scratch.  Got most of my parts that I wanted, except still waiting for my linear slide. Covington kit came with only the table top, arbor and bearing plus splash guards, the rest is going to be my doing. Motor from an old saw I have, plus pulleys and blade that I still need to remove in pic. This is the equipment I plan on building it with, except the plastic half inch board that's not in the pic, same stuff I used on my miller table build, I'll be using for my water holding tank or base. Keep u posted as it goes. 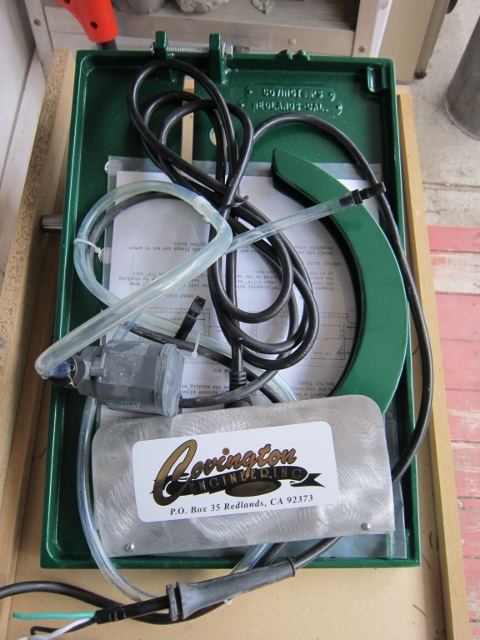   |
|
|
|
Post by gingerkid on Apr 22, 2015 20:52:03 GMT -5
|
|
|
|
Post by jakesrocks on Apr 22, 2015 21:11:15 GMT -5
Going to need lots of pics. It's gonna be interesting watching this build come together.
|
|
Fossilman
Cave Dweller
Member since January 2009
Posts: 20,711
|
Post by Fossilman on Apr 22, 2015 21:53:07 GMT -5
Always like watching a build!!!!!!!!!!!!!
|
|
spiritstone
Cave Dweller
Member since August 2014
Posts: 2,061
|
Post by spiritstone on Jul 25, 2015 8:43:25 GMT -5
Just a little bit behind but I managed to get step 2 done. The four sides are cut and fastened together. A hole was drilled in the back and I inserted a half inch pipe for draining the slurry from the holding tank and it should work also for recycling water back to my bucket when I use the circulating pump. It fit good together but dont go by there measurements sent with the supplies. They were way off after measuring the table top itself??? Arbor hole drilled and spins great. One other problem I noticed was the blade slot wasnt cut straight so its going to need a little filing at one end. Step 3 yet to come. Have to sand down the joints then caulk and cut out the base for the bottom, a clean up then paint. Get my motor mounted and the water feed hooked up. Drill a couple more drain holes in the saw top and figure out how I want to mount my linear slide. Not done yet, but thought I should keep you all posted where I am standing after mentioning it above. Thanks. 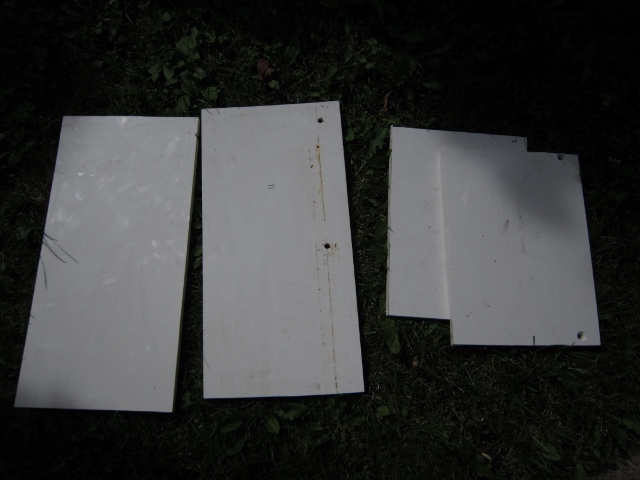 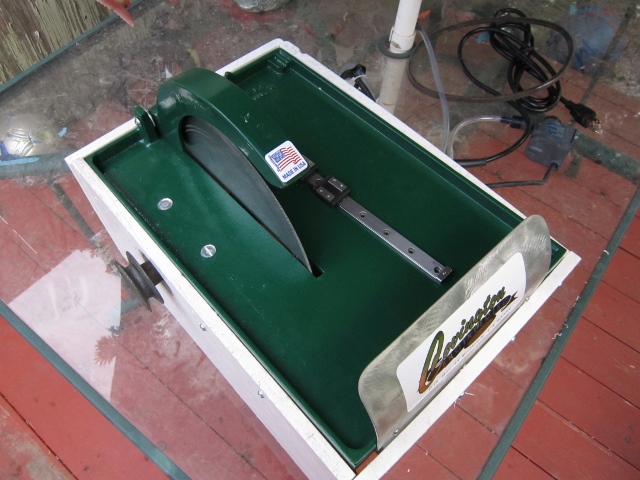 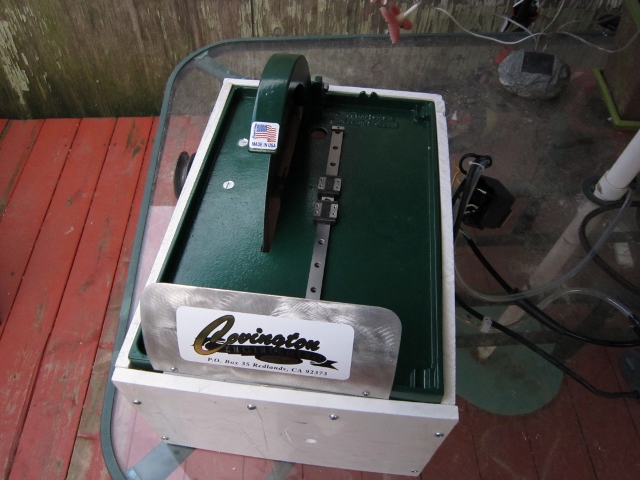 |
|
spiritstone
Cave Dweller
Member since August 2014
Posts: 2,061
|
Post by spiritstone on Jul 25, 2015 17:31:12 GMT -5
Had a short window of opportunity before the rain started up and was able to complete my sanding and caulking of the inside joints and brackets. Skip the paint, looks good enough without it? Thats all for now.  |
|
|
|
Post by stardiamond on Jul 25, 2015 18:49:07 GMT -5
What are you going to use as a guide for slabbing?
When I bought my Genie, there was a deal for the 8" trim saw attachment for $35. I love the saw as a trim saw. It assembles and disassembles easily. The table top sits on top of a plastic box I fill with water and lube cool and when I'm done I dump the contents. For years I also used it for slabbing, but I wasn't happy with my ability to cut even slabs.
I bought a replacement table top and cut some grooves in it and attached a fence made from some angle aluminum and wing nuts so I could adjust the fence. I still wasn't happy with the results.
|
|
spiritstone
Cave Dweller
Member since August 2014
Posts: 2,061
|
Post by spiritstone on Jul 26, 2015 0:56:31 GMT -5
What are you going to use as a guide for slabbing? When I bought my Genie, there was a deal for the 8" trim saw attachment for $35. I love the saw as a trim saw. It assembles and disassembles easily. The table top sits on top of a plastic box I fill with water and lube cool and when I'm done I dump the contents. For years I also used it for slabbing, but I wasn't happy with my ability to cut even slabs. I bought a replacement table top and cut some grooves in it and attached a fence made from some angle aluminum and wing nuts so I could adjust the fence. I still wasn't happy with the results. Patience ... its still in progress.  It's an evolving Frankenstein slab saw lol. I hear what your saying and have something in mind for that problem. The splash shield in front has to go for the extra part to work properly. Also adding on a side and back splash guard with a lighted hood, reinforcing the back plate with 2 corner brackets, due to most of the weight resting there, Hinge plate for the motor to sit on and for belt removal plus a couple other small things I'll see if they work with it or not. Should be close to finished by then. Its more just for the hobby so..... if the cut comes off bad, I can always pop on a 60 grit diamond disk and flatten them out. I appreciate the input, thanks. |
|
|
|
Post by gingerkid on Jul 29, 2015 21:52:09 GMT -5
Patience ... its still in progress. It's an evolving Frankenstein slab saw lol.  spiritstone spiritstone! Looks like it's coming along nicely and won't be long before you'll get to give her a try even though you've had to make a few adjustments and changes. What type of board (?) are the sides made from? |
|
spiritstone
Cave Dweller
Member since August 2014
Posts: 2,061
|
Post by spiritstone on Jul 30, 2015 5:26:02 GMT -5
Patience ... its still in progress. It's an evolving Frankenstein slab saw lol. ! Looks like it's coming along nicely and won't be long before you'll get to give her a try even though you've had to make a few adjustments and changes. What type of board (?) are the sides made from? Its puck board, Plastic....rust free. |
|
|
|
Post by gingerkid on Jul 31, 2015 1:05:41 GMT -5
Thanks, spiritstone! I thought about purchasing one of the Covington DIY saws and look forward to hearing what you think about it's performance. I greatly appreciate you sharing with us. |
|


 It's an evolving Frankenstein slab saw lol. I hear what your saying and have something in mind for that problem. The splash shield in front has to go for the extra part to work properly. Also adding on a side and back splash guard with a lighted hood, reinforcing the back plate with 2 corner brackets, due to most of the weight resting there, Hinge plate for the motor to sit on and for belt removal plus a couple other small things I'll see if they work with it or not.