|
|
Post by roy on Jul 10, 2015 14:22:52 GMT -5
your idea's are always good dave ! im just stating what i use is all will try your's too!!
|
|
|
|
Post by 1dave on Jul 11, 2015 9:44:35 GMT -5
your idea's are always good dave ! im just stating what i use is all will try your's too!! After using this jig for a while I've noticed one minor flaw - the tendency for the egg to roll forward. The problem: The three support points are in a perpendicular plane. The solution: Move the bottom point toward the saw blade, or the side points back. 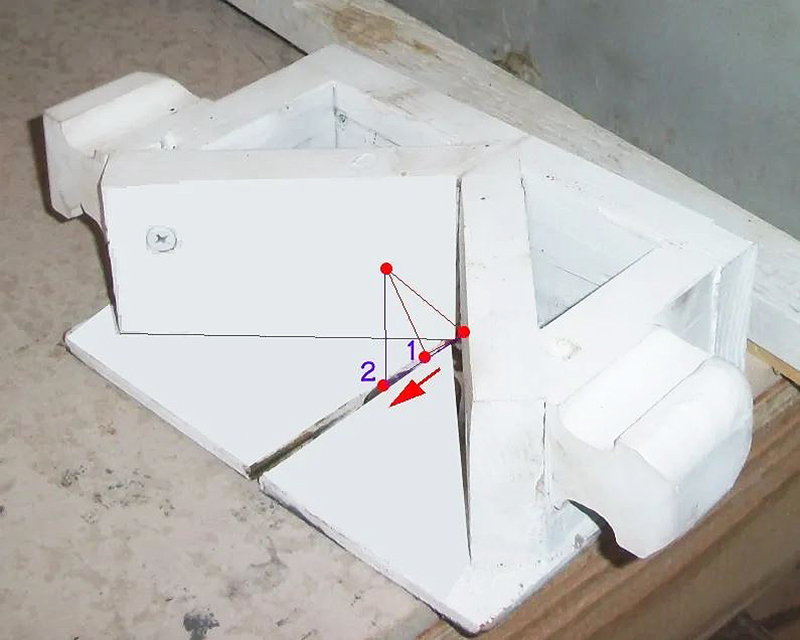 Now the question is HOW, and HOW MUCH? 1. shim up the center of the base. 2. tip up the back of the trim saw. 3. tip the sides 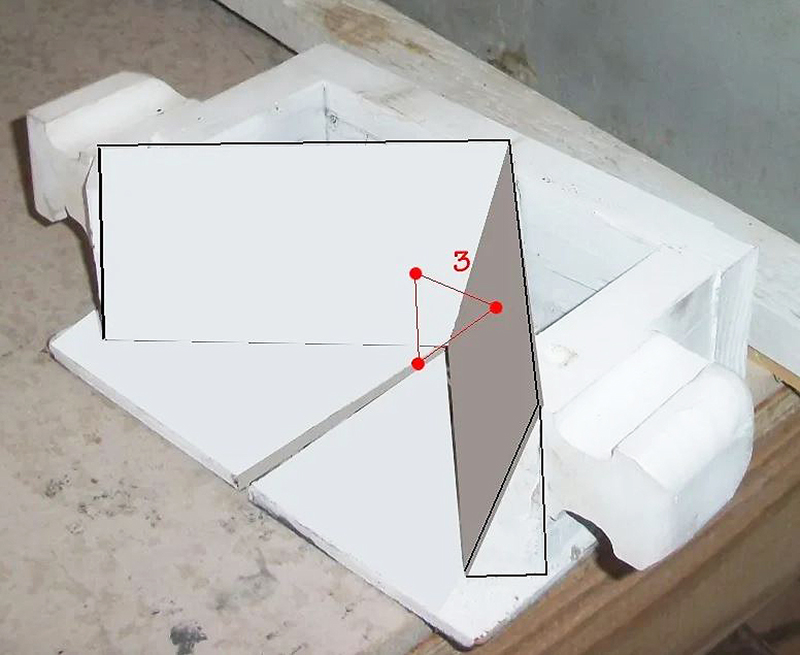 Like a three legged stool, horizontal is best, perpendicular is worst. Would 5 o do it? 10 o ? 15 o I'll have to experiment. |
|
|
|
Post by 1dave on Jul 11, 2015 11:17:18 GMT -5
TOTAL COST: Material (scrap from the shop) $ 0.00 Labor (two hours) $18 Trillion.99 Just enough to retire the national debt. It is now a hundred years past my nap time, So I'll start cutting eggs in the morning. ROFL, 1dave! Haven't tried cutting any t-eggs yet, but your jig makes it look tempting. Thanks for sharing. Isn't there a 'certain' way/method you should use for cutting t-eggs, such for the Pridays? Thanks for asking Jan. Where to cut depends on what you want. A star pattern? The largest possible agate face? A flat plane of possible dendrites? Crystals? The Geode Kid tried to mark the top of the TE's as he dug them out. That allowed him to surmise the probable horizontal fill planes. Some TE's show external fracture lines that can be helpful. Weight gives information on amount of fill. Understanding how they form helps us see valuable hints from the egg exterior. Mineralogy: They only occur in high silica (over 70%) magmas that reach the surface. Obsidian, pitchstone, rhyolite, welded ash flow tuffs. What other minerals are with them? Remember the 8 most common in surface rocks?: 1. Oxygen, 2. Silicon, 3. Aluminum, 4. Iron, 5. Calcium, 6. Sodium, 7. Potassium, 8. Magnesium (2.1% - ALL other elements = 1.4%) Each of these change the nature of the eggs. Example - Calcium in Mexican Coconuts! Instead of breaking, the interior is pressed to the outer shell. 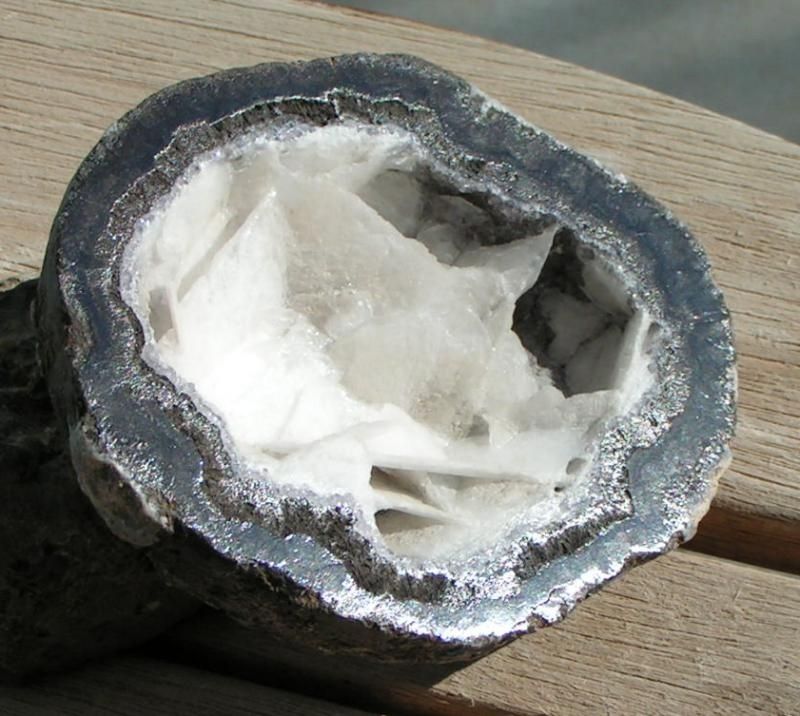 Mexican Coconut 5,6, or 7, will determine which feldspar will coat the eggs in a location, and determine how easily they weather out. Richardson Ranch was blessed with one - I think carbonate soil - that weathers out easily, allowing the eggs to pop out fairly clean. 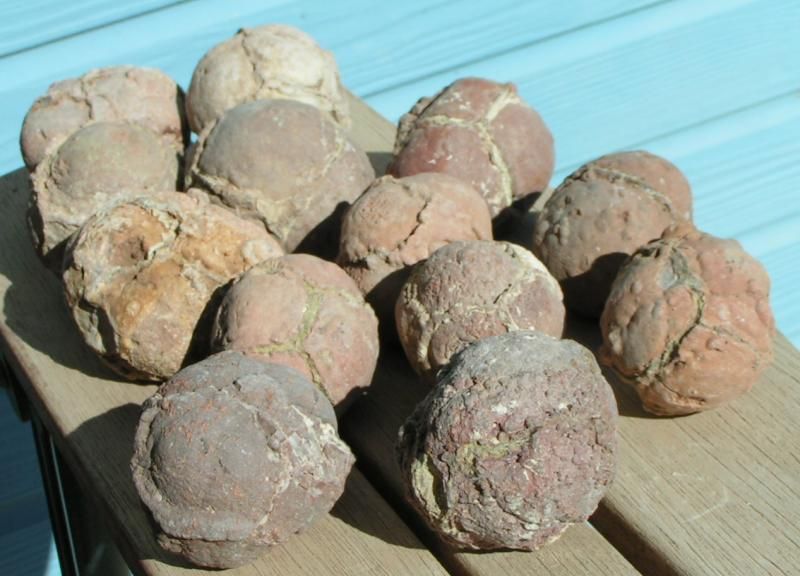 Many are coated with spheroids making it a crap shoot to guess what is inside. 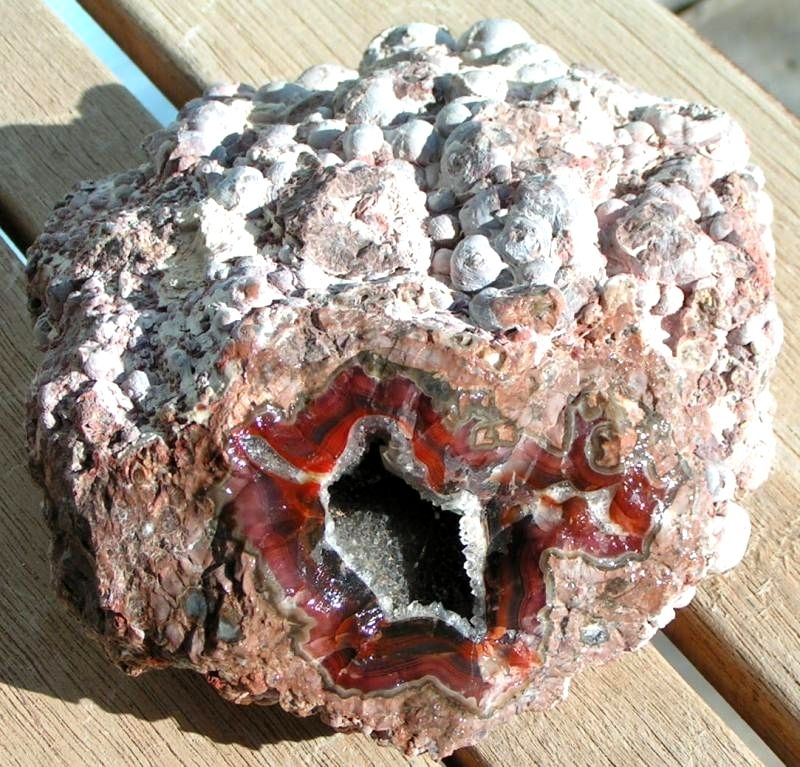 They all begin in the throats of volcanoes at around 1200 oC as magnetic cristobalite needles. The needles are attracted to some "seed" atom and begin forming puff ball spheroids. The molecular movement pushes out other elements and heats up the magma mass. Cristobalite ceases to crystallize and feldspar crystals coat the puff balls, trapping the 1-3% water molecules inside. Magma cools down and cristobalite begins crystallizing again. This occurs millions of times. As the magma reaches the surface, The silica layers are very viscus (thick and slow), while layers of extra water reacts as if the water molecules were ball-bearings, and flow layers develop, allowing more and more cristobalite needles to come in contact. Thundereggs have been found in Colorado up to 12 feet in diameter! 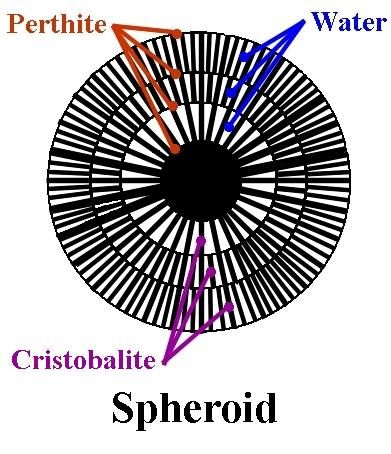 At these temperatures, the water needs to become steam, but the pressure is too great to allow that. As the magma cools and contracts, the pressure slowly decreases allowing the water to slowly become steam, expanding up to 2,000% in volume - a controlled explosion. The Geode Kid made this depth collection available. The deeper the egg the greater the pressure, and the less it was able to expand.  Pressure is different on lavas moving on flat ground and down hillsides. Water collects in different parts of the eggs. Flow movements can stretch the eggs out into torpedo shapes. 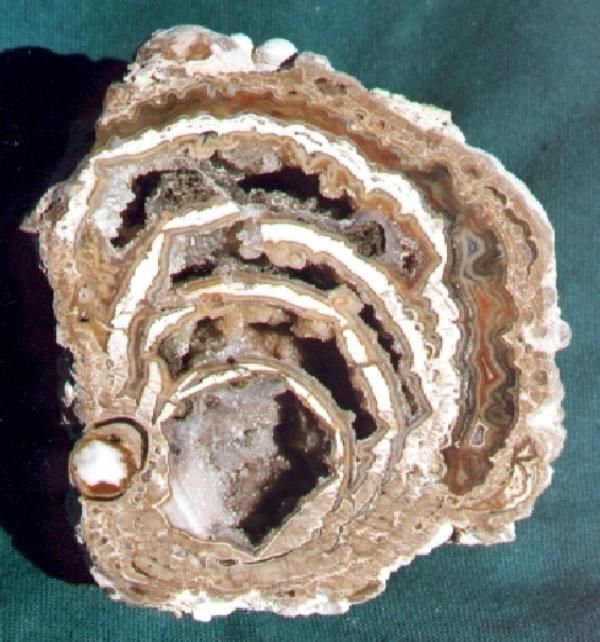 Multiple Breaches from the Geode Kid Collection. 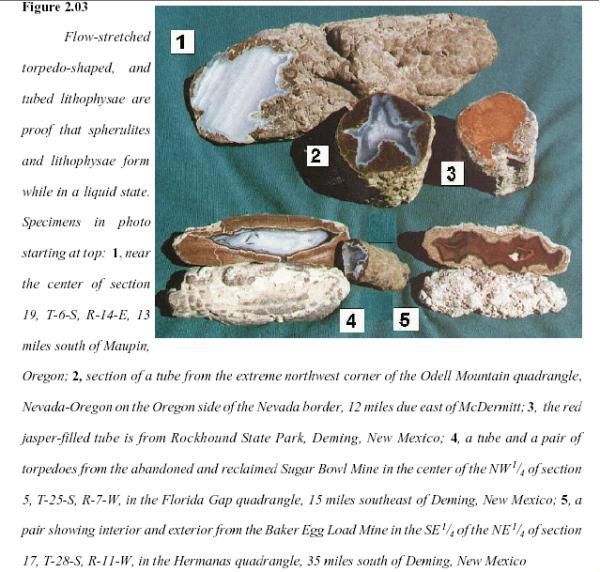 Torpedo 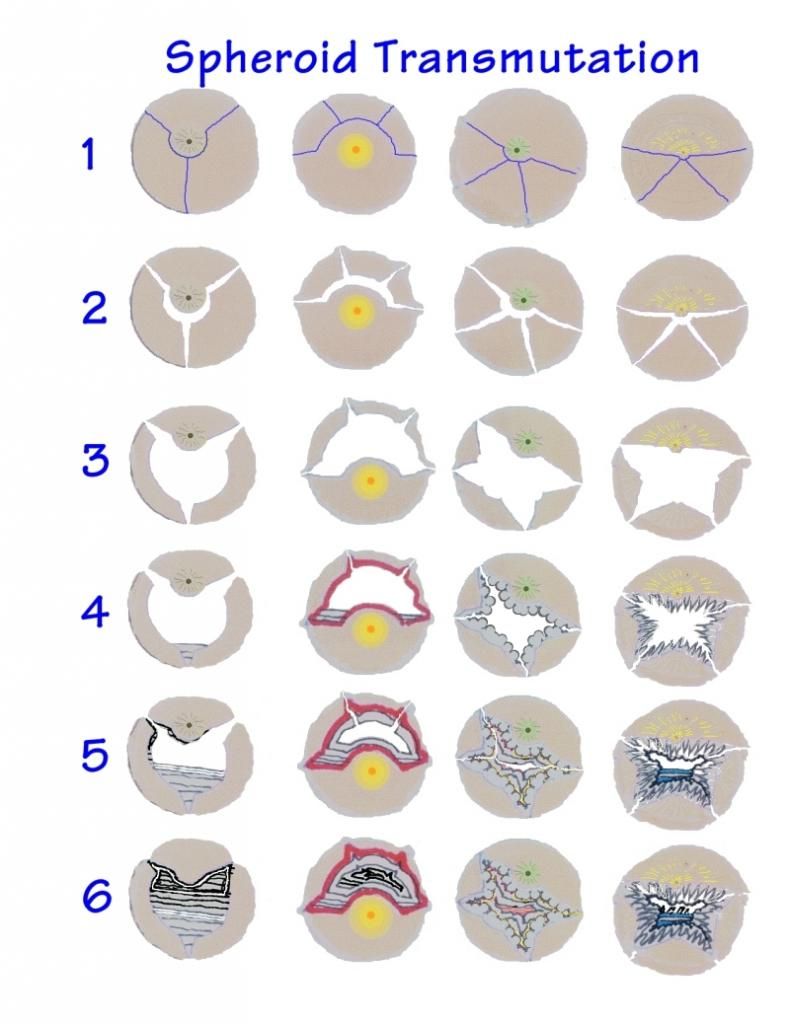 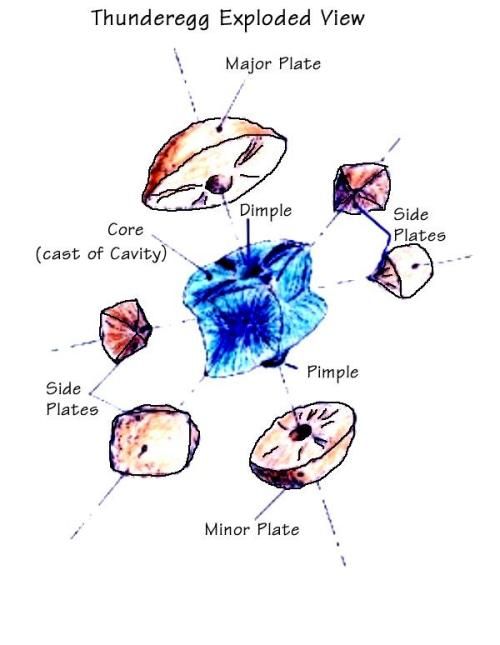 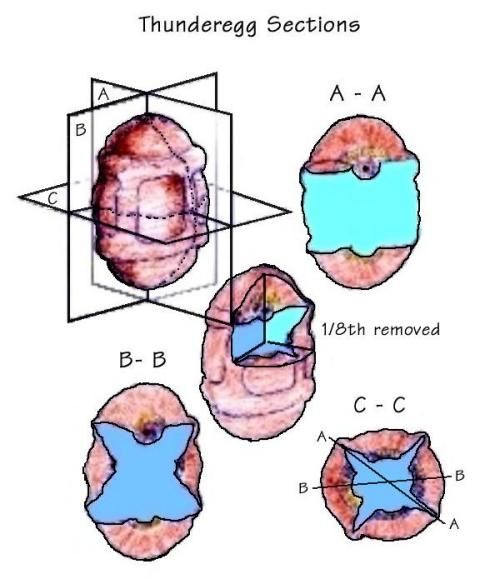 |
|
|
|
Post by 1dave on Jul 12, 2015 6:47:03 GMT -5
Great idea! My question is why is there a floor/bottom in the cutting area? Seems like it doesn't add anything and reduces your available cutting height. My mind wasn't in gear the first time I answered this. The edges of the base keep the egg centered on the blade. Thanks for the thoughts and comment! |
|
|
|
Post by gingerkid on Jul 12, 2015 7:57:20 GMT -5
Many thank you's, 1dave! Have your thread bookmarked for reference, and believe it should be stickied!  |
|
|
|
Post by 1dave on Jul 12, 2015 10:53:00 GMT -5
Many thank you's, 1dave! Have your thread bookmarked for reference, and believe it should be stickied!  Thanks Jan, but that will depend on Original Admin and sandsman1. It is like hand holding the eggs, but with a smooth cut instead of the wiggly saw lines I always got. I can also cut really small eggs I could never attempt before. I still have to build and test the slab saw version. I plan on tipping the sides and base10-15 o to keep the eggs from rolling forward. The Appliance spray enamel didn't work out. Perhaps I can cast my final version in platinum that won't be bothered by the cutting fluid. |
|
|
|
Post by 1dave on Jul 13, 2015 7:50:36 GMT -5
Many thank you's, 1dave! Have your thread bookmarked for reference, and believe it should be stickied!  See what you have done Jan? You got it stickied! Meanwhile, back at the ranch, I took the easiest solution and lifted the back of my trim saw 10 o. That shifted the egg center of balance back off dead center and they now stay just as I place them. I drained my saw into a quart jar and marked the top of the fluid, poured it back into my saw, re-filled the jar with fresh water to the mark, then re-drained the saw (tipping it 10 o helped this too!) and made a new mark at the new top. Now everything settles to the bottom of the jar. On each use, I pour in the top half of the jar and never get down to the sediment. Saw clean-out should never be a problem again. |
|
Deleted
Deleted Member
Member since January 1970
Posts: 0
|
Post by Deleted on Jul 14, 2015 18:39:25 GMT -5
Having never cut a thunder egg, ever, I have no clue what to add. Except, perhaps, thanks Dave for sharing this apparatus with everyone. I like you even finished it with paint. Like a real product!
|
|
|
|
Post by 1dave on Jul 14, 2015 23:39:45 GMT -5
Having never cut a thunder egg, ever, I have no clue what to add. Except, perhaps, thanks Dave for sharing this apparatus with everyone. I like you even finished it with paint. Like a real product! Yeahbut . . . moisture made that paint peal off. I should have gone with the polypropylene. I'm sure you will want to purchase one as soon as I get it cast in platinum. Who needs a saw? It will be a great conversation piece. |
|
Fossilman
Cave Dweller 
Member since January 2009
Posts: 20,724 
Member is Online
|
Post by Fossilman on Jul 15, 2015 8:02:37 GMT -5
Pics please Mr. Fossilman??? Sorry,haven't been on here much! Brother and his wife came out for a visit (from Montana),so we took them sight seeing and coastline whale watching-Now it's time to get back into the groove.. Will get some photos,it's a crude set up,pretty easy and works like a charm.......(Of my 1x4 clamping's ...) |
|
Fossilman
Cave Dweller 
Member since January 2009
Posts: 20,724 
Member is Online
|
Post by Fossilman on Jul 15, 2015 8:07:31 GMT -5
The "old timers" here teach me the correct ways to cut eggs..The RR eggs are pretty easy to cut,because of the formation of their eggs on the outside.....Most others from eastern Oregon get simpler,once you cut a few...
Sometimes I do cut the opposite direction on an egg on purpose (because I can-LOL),just to see what chances on the axises..
Sometimes its a dud,sometimes it turns out great!!
Love cutting eggs and geodes..........
|
|
|
|
Post by johnjsgems on Jul 17, 2015 19:32:48 GMT -5
An old timer told me years ago a simple way to hold geodes (and other rounded rocks. Using scrap 1 x 4's make a three sided frame open on rock end. Put rock in the open end and clamp frame in vise. Make sure it grabs of course. Then cut through rock and wood. It actually works well although I had my doubts. I am always making something so scraps of wood are available.
|
|
|
|
Post by 1dave on Jul 17, 2015 21:44:28 GMT -5
An old timer told me years ago a simple way to hold geodes (and other rounded rocks. Using scrap 1 x 4's make a three sided frame open on rock end. Put rock in the open end and clamp frame in vise. Make sure it grabs of course. Then cut through rock and wood. It actually works well although I had my doubts. I am always making something so scraps of wood are available. Try this and you won't have to cut the wood. It is reusable, and one size fits all. |
|
|
|
Post by roy on Jul 18, 2015 15:41:53 GMT -5
|
|
|
|
Post by orrum on Jul 18, 2015 17:28:01 GMT -5
It's a giant green tegg eating slab grabber!
|
|
|
|
Post by 1dave on Jul 19, 2015 15:23:50 GMT -5
as promised to dave here is what i use to cut thundereggs of all sizes Thanks Roy! Those "Siamese Twin" eggs are intriguing. Especially when the two halves turn out to be totally different - like they formed in different parts of the flow, then slammed into each other. That is what finally convinced me that some of them are quite well formed in the throat of the volcano then blasted out the side in what became a "welded ash flow tuff" several hundred feet thick. I was hoping you had experimented with my jig design by now, but it is the busy time of the year for you. |
|
|
|
Post by roy on Jul 20, 2015 19:29:42 GMT -5
as promised to dave here is what i use to cut thundereggs of all sizes Thanks Roy! Those "Siamese Twin" eggs are intriguing. Especially when the two halves turn out to be totally different - like they formed in different parts of the flow, then slammed into each other. That is what finally convinced me that some of them are quite well formed in the throat of the volcano then blasted out the side in what became a "welded ash flow tuff" several hundred feet thick. I was hoping you had experimented with my jig design by now, but it is the busy time of the year for you. very busy! |
|
|
|
Post by 1dave on Jul 21, 2015 13:57:23 GMT -5
Rain interfered with weed pulling so I got to start on the slab saw version. 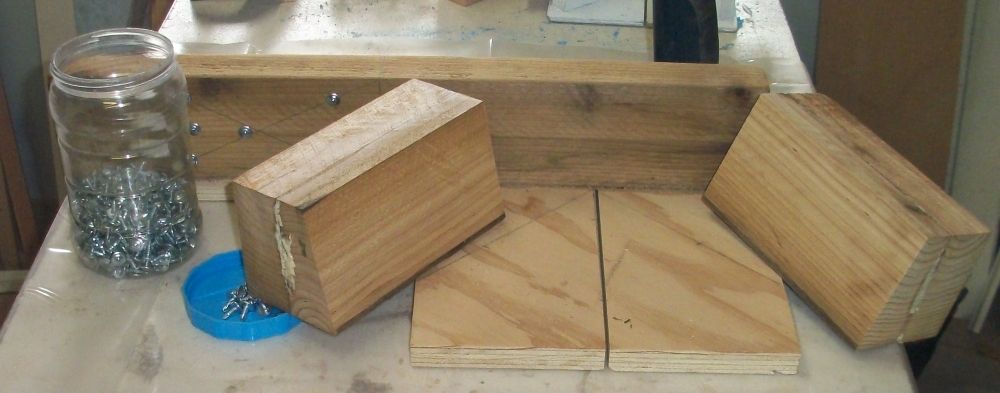 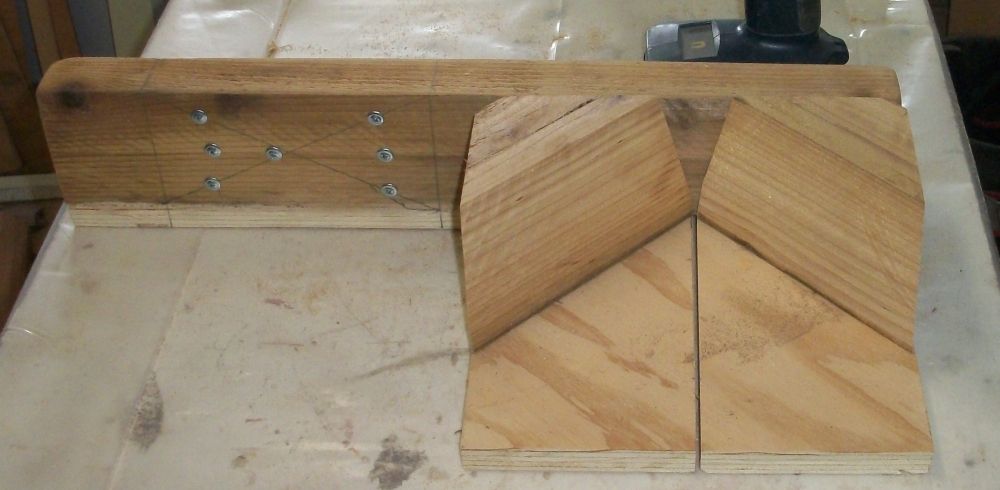 I should be able to get it all screwed together and ready to start cutting tomorrow, but I have to modify my vise (remove extensions) before I can use it. |
|
|
|
Post by 1dave on Jul 22, 2015 8:44:35 GMT -5
The TE Slab jig with 10 o slants is complete. 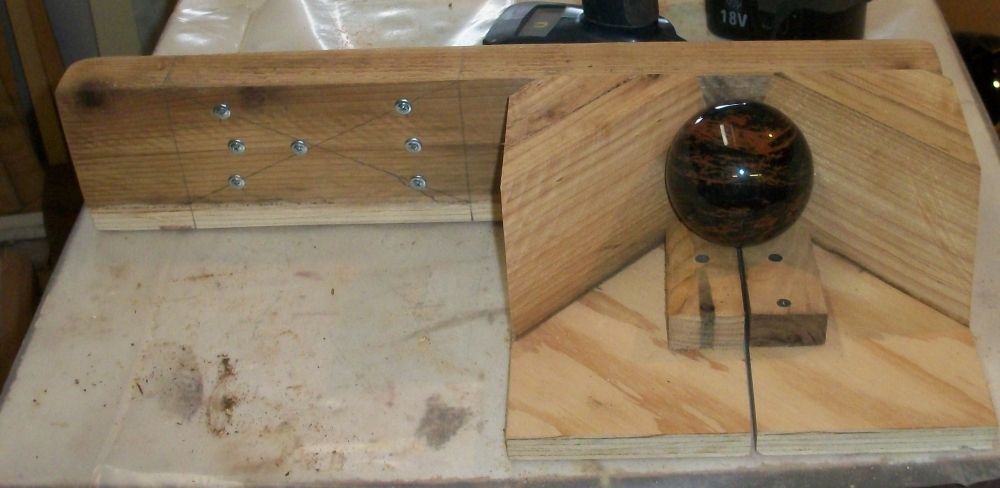 Not even this sphere rolls out now! Unfortunately today is painting day. That is what brought on Zipper Rescue. |
|
jamesp
Cave Dweller 
Member since October 2012
Posts: 36,618
|
Post by jamesp on Jul 22, 2015 8:57:59 GMT -5
So you just set the egg in the 'saddle' where it rests in a stable position and send the blade toward the rock ? Basically 3 points of contact, the base wood and the two vertical walls ? Do you set the rock in with a flat spot facing down ? And the down force of the blade plants the rock on the wood base ? I suppose you have to stop the blade after the rock is cut to avoid blade hitting the wood... I suppose you could make a horseshoe bracket behind the jig to allow the blade to proceed deeper past the rock and depend on the auto-cutoff. or do you just set the auto-cut off when the bade is close to the wood back wall ? Too many questions. You have a tub full of proof that it works. ah, you just posted the sphere in the saddle. So friction of saddle is greater than down force of blade even for a smooth sphere, hmmm. tub full of proof: 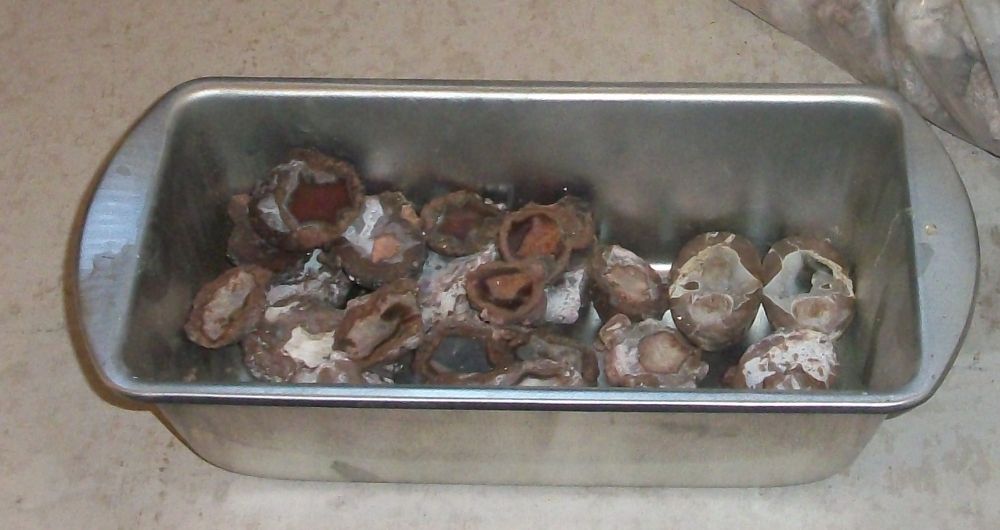 P.S. Not arguing, just asking questions Dave.  |
|