|
|
Post by Rockoonz on Jan 30, 2016 5:27:51 GMT -5
Here's the cover I made for my old HP 6 inch trim saw. Just Acrylic from the scrap bin at Tap Plastics. I cut the pieces with a laser for this one but I have found since that they weld better with the cement if you cut with a table saw. 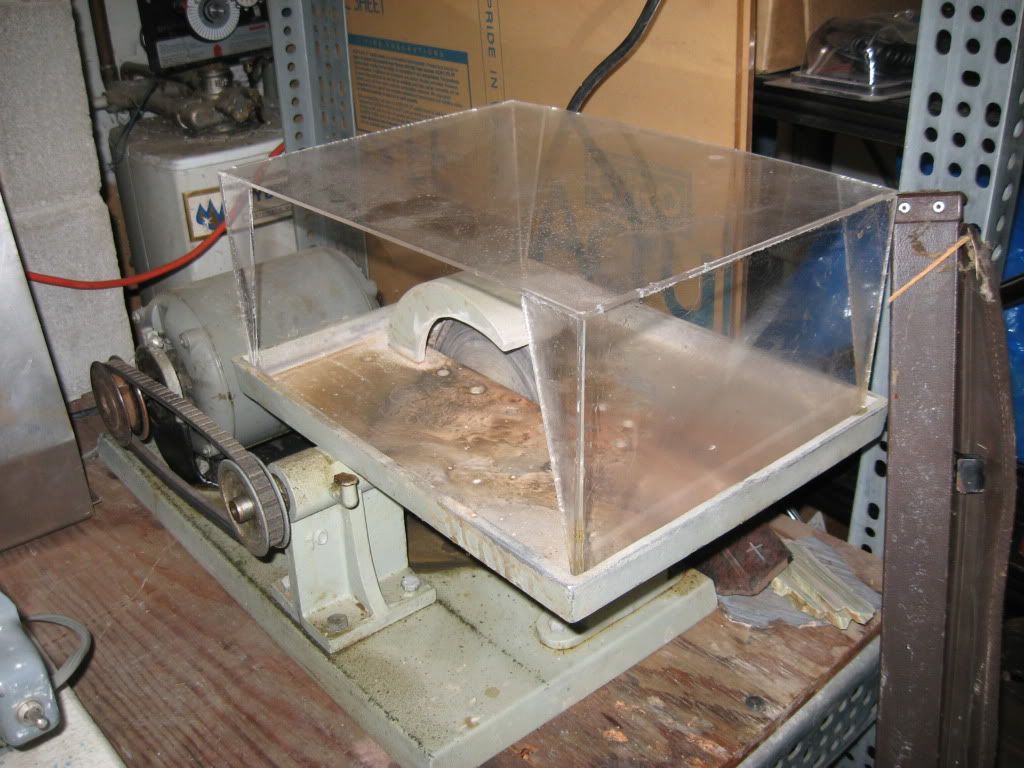 |
|
Intheswamp
Cave Dweller 
Member since September 2015
Posts: 1,910 
|
Post by Intheswamp on Jan 30, 2016 11:22:00 GMT -5
Lee, that looks great!!! Very good job! What type/brand of cement did you use to glue it up with?
|
|
Intheswamp
Cave Dweller
Member since September 2015
Posts: 1,910
|
Post by Intheswamp on Jan 30, 2016 11:23:46 GMT -5
Coleman brand???  PS... It's amazing how thoughts transcend threads.  Figured that would pop up again. Crystal ball dialed in. <grin> Honestly, I saw your comment in the other thread wondering where I was and figured I'd run a lateral on ya. |
|
jamesp
Cave Dweller
Member since October 2012
Posts: 36,547
Member is Online
|
Post by jamesp on Jan 30, 2016 12:00:44 GMT -5
Lateral, up under, from the east, knew Ed was on the prowl.
|
|
Intheswamp
Cave Dweller
Member since September 2015
Posts: 1,910
|
Post by Intheswamp on Jan 30, 2016 12:14:03 GMT -5
Lateral, up under, from the east, knew Ed was on the prowl. |
|
|
|
Post by broseph82 on Jan 30, 2016 13:46:00 GMT -5
Peruano jamesp IntheswampSo here's my setup   I never said I didn't have a splash guard it's just water is messy. I feel when I don't use as much water that the blade and rock heat up too much. Still don't have it down pat the exact amount I guess. I just add more water using a water bottle aaaaaand I don't like to clean it as much as I should.
|
|
Intheswamp
Cave Dweller
Member since September 2015
Posts: 1,910
|
Post by Intheswamp on Jan 30, 2016 17:39:22 GMT -5
Jimi broseph82 I don't know how big your saw is overall, but what if you were to set the saw down inside a large plastic Sterilite tote/storage-box/whatever? Maybe set a few short pieces of 2x4 wood in the bottom with a sheet of plywood on top just to keep the saw from sitting directly on the bottom. Cut holes in the sides for hands to fit in....bottom of holes about level with saw table. Maybe plumb in a drain. You could set a piece of acrylic or plexiglass over the top. OR You could get a plastic container that's about the same size as the table, set it upside down on the table and then carefully mark where to cut the holes for your hands. You would also need to cut a small window in the top (bottom) of the plastic container so you can see the work. Get a piece of clear sheet of acrylic and silcone/ShoeGoo it in the window opening to make seeing possible...or leave it open and don't worry about what spray comes out of the small window. Plastic boxes at Walmart... www.walmart.com/search/?query=plastic+storage+containerJust thinking...  |
|
|
|
Post by Rockoonz on Jan 31, 2016 2:16:16 GMT -5
Lee, that looks great!!! Very good job! What type/brand of cement did you use to glue it up with? I use the IPS weld-on 16 adhesive with the table saw cuts, it's able to fill small gaps. If you get really tight fitting contact between your pieces the water thin adhesive like weld-on 3 or the Tap Plastics cement gives the best results, but is hard to apply without it getting messy. |
|
|
|
Post by Peruano on Jan 31, 2016 8:09:33 GMT -5
Its really a matter of the geometry of the coolant against the rock being cut. With a normal slab being trimmed the coolant hits a flat surface and runs off or bounces as mist, but . . . when you slab small rocks the majority of the coolant can be hitting at angle including curved vertical surfaces causing the water to squirt laterally like a spray hose. There is no solution other than containment and since you need holes for your hands and vision, its a matter of fine tuning them, and tolerating the rest. Daniel used to have saw in a shower stall, and as I recall may have employed the set it down in a tub fix as well. Rockoonz as gone a long way to the best solution in my eyes. Its all a matter of being worth the mess and solving the part you can't stand. Tom
|
|
Intheswamp
Cave Dweller
Member since September 2015
Posts: 1,910
|
Post by Intheswamp on Jan 31, 2016 10:09:32 GMT -5
Lee, that looks great!!! Very good job! What type/brand of cement did you use to glue it up with? I use the IPS weld-on 16 adhesive with the table saw cuts, it's able to fill small gaps. If you get really tight fitting contact between your pieces the water thin adhesive like weld-on 3 or the Tap Plastics cement gives the best results, but is hard to apply without it getting messy. Thanks for the info, Lee. That's got me on the trail of what I need...looks like that's a mail-order item around here.  Ah well, we'll see what we come up with... |
|
|
|
Post by broseph82 on Jan 31, 2016 10:22:05 GMT -5
Thank You all for your helpful tips and comments. I did get my BD 303c in yesterday and finally got around to cleaning out the trim saw and installing blade. Boy has it been the best saw blade I've had. I thought to myself "let me cut some obsidian first since its soft and may dress the blade for the first cut." after the initial couple seconds it almost felt like an auto-feed it was cutting so smoothly and fast. Next stop, black skin agate. Smoothest cuts Ive EVER made, even at my rock club's lab!!! Super smooth, didnt have to force it at all. Im SOOOOOOO excited to cut some harder materials now! Due to my other blades not being so good apparently, I used to have to grind down corners on my wheels due to trim saw not being able to cut them very well. Thank You guys! I did read just about every thread discussing the MK/BD blades on here to before I decided.
edit: I also switched to my light mineral oil and it didnt spray out like the water did. I also had a thick layer of rock-goo at the bottom of the ol Rascal (no wonder the water was so gray). ha ha
|
|
|
|
Post by melhill1659 on Nov 16, 2016 23:24:55 GMT -5
I only use MK303 blades in my Lortone trim saw. I am able to split bahia agate nodules that are like 1.25" tall and 2" long with no problem. I have always used water in my trim saw for two reasons. Number one is that I hate the mess of oil on my hands all the time. Number two is that My cabs go straight form the trim saw to the 100 grit diamond wheel then right to the dop station. I would not want to worry about all the clean up and if any oil residue is left it would not let the wax adhere. I do think I sacrifice blade life with water but the reasons I stated outweigh the cost of needing blades more often. Chuck Thanks Chuck, I typically wear rubber gloves through my whole process of trimming, slabbing, and even grinding on wheels. I don't mind rinsing off some oil first. Maybe I just need a better blade, But I would still like to make a hood for it. I just dont have anything small enough (like plastic tupperware to fit the size) to make it and I'm no engineer. And yes, before anyone asks, I have searched and searched and searched to try and find my answer before asking here. |
|
|
|
Post by melhill1659 on Nov 16, 2016 23:37:17 GMT -5
broseph82, I'm no engineer but I found myself also needing a slash guard for my 6" vintage HP trim saw. So back to Lowe's I went after taking measurements! I bought a sheet of acrylic and had them actually cut it to my measurements for free. I formed it Making sure it was square, taped the sides for hold and then glued it with E6000. That stuff is Heaven Sent!! I'd post pics but no matter how I try I can't get that to work! An I consider myself pretty computer savvy. If it's permitted I can always email them.
|
|
|
|
Post by pauls on Nov 17, 2016 1:53:20 GMT -5
I built a cover for the big saw at the club from polycarbonate, I used "Weld On 16" like rockoonz and it worked perfectly. I just cut the plastic with the table saw applied the glue and it set as solid as a rock. That weld on is the bees knees for plastics. IPS corp. Gardena Ca. www.ipscorp.com |
|
|
|
Post by broseph82 on Nov 17, 2016 17:08:46 GMT -5
broseph82, I'm no engineer but I found myself also needing a slash guard for my 6" vintage HP trim saw. So back to Lowe's I went after taking measurements! I bought a sheet of acrylic and had them actually cut it to my measurements for free. I formed it Making sure it was square, taped the sides for hold and then glued it with E6000. That stuff is Heaven Sent!! I'd post pics but no matter how I try I can't get that to work! An I consider myself pretty computer savvy. If it's permitted I can always email them. Thanks for the tips. Mine still spills over the side some luckily I have kitty litter on the floor where it does.fall. |
|
ziggy
spending too much on rocks

Member since June 2016
Posts: 483 
|
Post by ziggy on Nov 17, 2016 19:03:19 GMT -5
broseph82 , I'd post pics but no matter how I try I can't get that to work! An I consider myself pretty computer savvy. If it's permitted I can always email them. Post your pics to photobucket or some other photo hosting service. Link from that picture to here using the insert image button in the tools at the top of the editor. Make sure you remove the http:// (included by default in the insert image box) either from the box or the address you are linking to. If you don't it won't recognize the addy. |
|
|
|
Post by melhill1659 on Nov 17, 2016 20:49:33 GMT -5
[/quote]Thanks for the tips. Mine still spills over the side some luckily I have kitty litter on the floor where it does.fall. [/quote] I placed mine in a large plastic container top and added a hose with cut off valve that empties into a bucket 😂 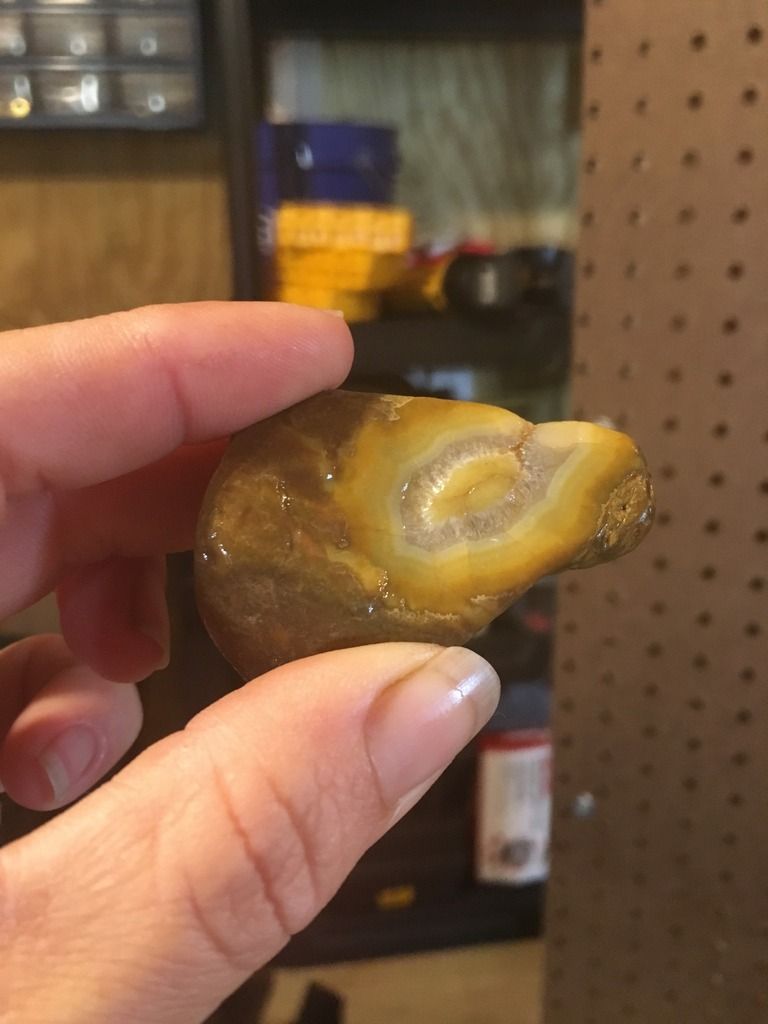 |
|
ziggy
spending too much on rocks
Member since June 2016
Posts: 483
|
Post by ziggy on Nov 17, 2016 22:25:03 GMT -5
OOOOPs, looks like maybe the wrong pic. Nice looking rock there though.
|
|


 Ah well, we'll see what we come up with...


 Serious thought goes into a Chat Box v.2 post. "It Ain’t Easy"


