How I make jump rings BLADE SOURCES ADDED.
Feb 18, 2016 17:24:11 GMT -5
drocknut, jamesp, and 4 more like this
Post by Pat on Feb 18, 2016 17:24:11 GMT -5
tom and @arrowheadave
My coil maker was handmade by a friend.
The blade setup, mandrels and coil holder with top plate were from David Arens. I've never had any trouble with it. Takes special blades. Blades from MALCO SAW COMPANY. Size say 1 1/4 x. 010x3/8 W120T. I've also purchased them from Thurston # 4322 .010.
.
1-Image 172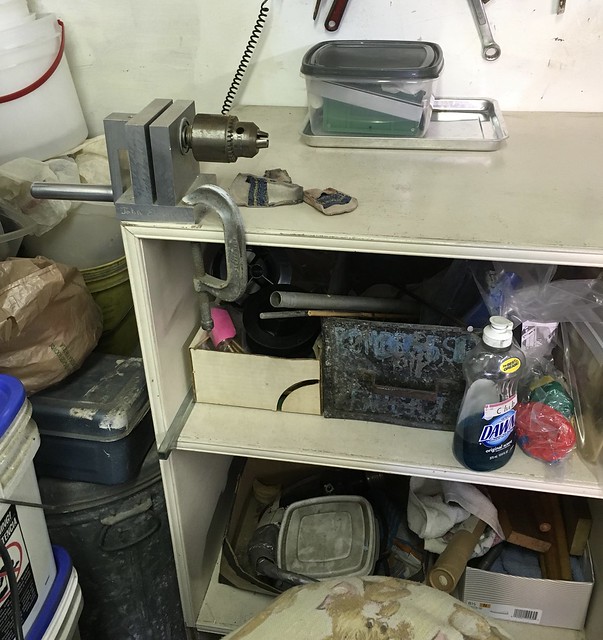 IMG_0167 by Pat, on Flickr
2- Image 173 6.5mm mandrel in chuck. Chuck key opens and closes the chuck.Wire has been inserted about one half inch at right angles. Extra care taken because it is half round. With half round need to make sure the flat side is next to the mandrel. 14 gauge.
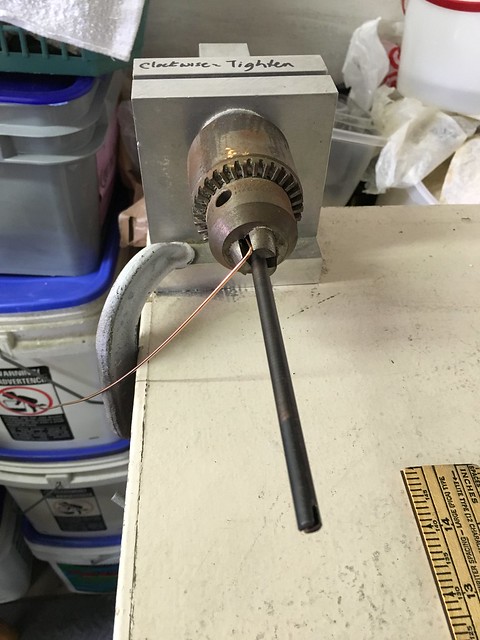 IMG_0173 by Pat, on Flickr
3- Image 174 Shows the angle and pulling it a little bit to the left so all the rings will be next touching the next. Leather fingers are to protect my finger and thumb.
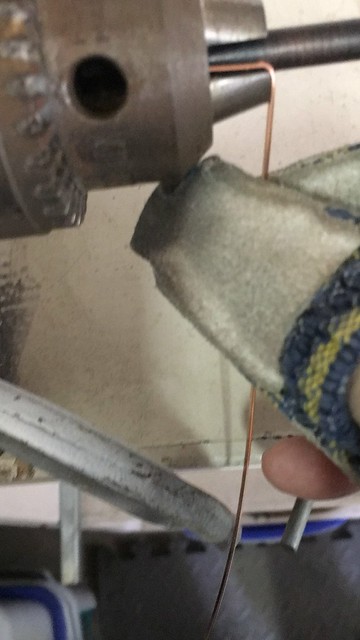 IMG_0174 by Pat, on Flickr
4- Image 177
At the end of the coil. I don't go all the way because I like having room to insert the saw blade.
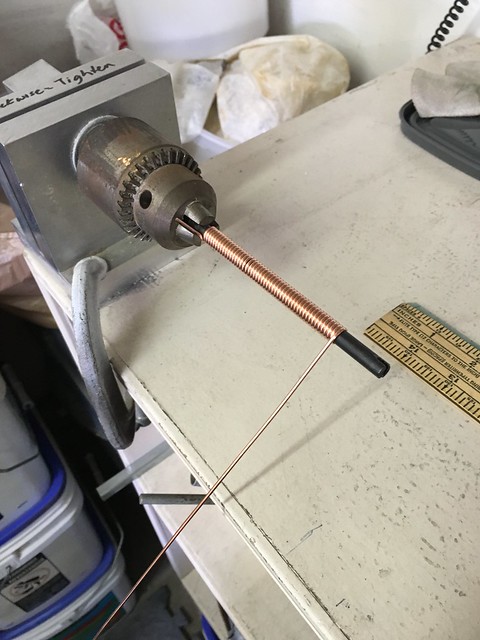 IMG_0177 by Pat, on Flickr
5- Image 178
Shows the cutting holder. It is just a brick of metal with one groove in it. Topped with a plate with a cut groove it in. Two screws hold it down.
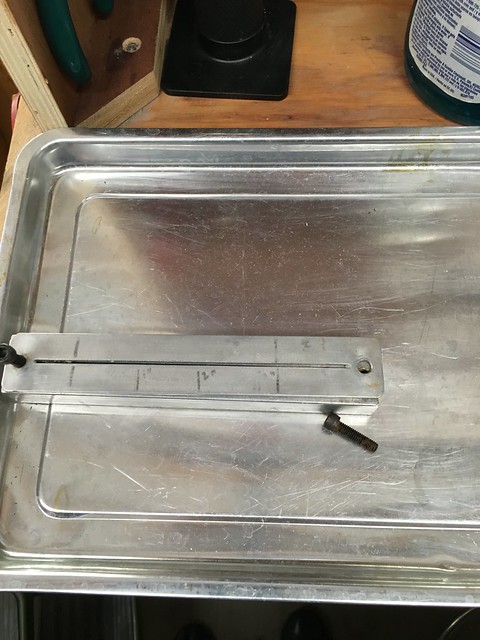 IMG_0178 by Pat, on Flickr
6- Image 179
Shows the coil ready to be placed into the groove. It just sits on top. The underside of the plate shows a stop, so the coil cannot be pushed into the screw. I've outlined the stop in black. Stop is about 2 mm high.
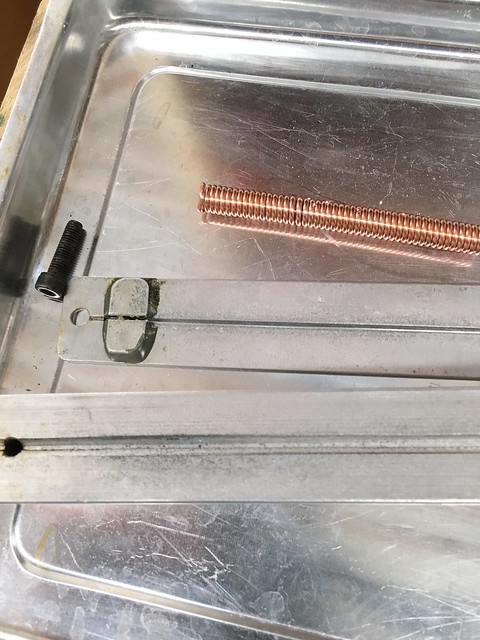 IMG_0179 by Pat, on Flickr
7- Image 180
Show the setup all ready. I slop on the Dawn as a lubricant. Use a cheap watercolor brush. The popsicle stick is used to scootch the coil up to the stop.
ONE MORE THING: WHEN YOU PUT THE LID ON TOP OF THE COIL, MAKE SURE IT IS PARALLEL TO THE COIL AND THE COIL HOLDER. THE TENDENCY IS TO SCREW THE SCREWS TIGHTER BECAUSE THERE IS NOTHING HOLDING THE PLATE UP. EYE BALL THAT IT IS PARALLEL.
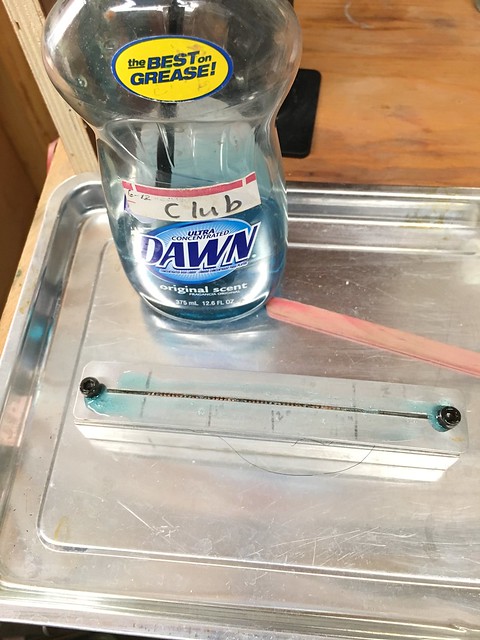 IMG_0180 by Pat, on Flickr
8- Image 184
Shows the underside of the blade set up. It is set up so the blade is exposed just enough to cut through the top of the coil. That Dremel is dedicated to just this task.
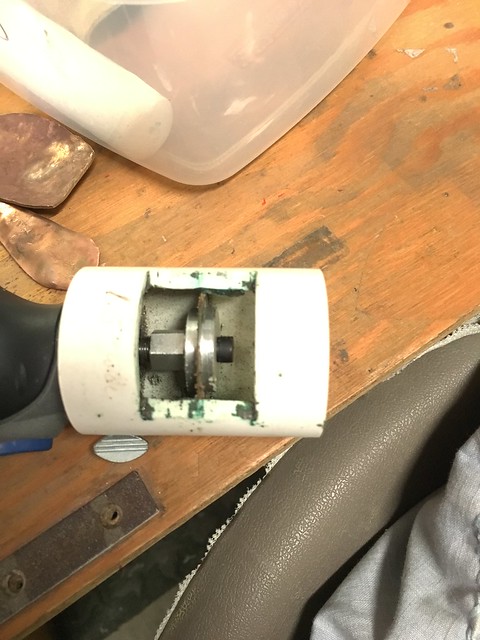 IMG_0184 by Pat, on Flickr
9- Image 185
Shows the placement of the blade housing on the plate. Haven't turned it on yet.
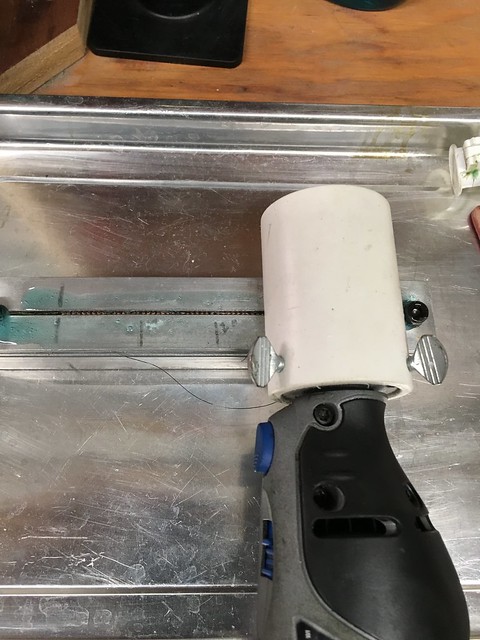 IMG_0185 by Pat, on Flickr
10- Image 186
Shows the the blade housing is perfectly flat with the blade in the groove. Ready to turn on. Use one of the higher speeds; works much better. Takes about 2-3 seconds to zip through the coil. Blade housing must also be held flush with the top plate the entire time. When at the far end, turn off Dremel, then lift straight up.
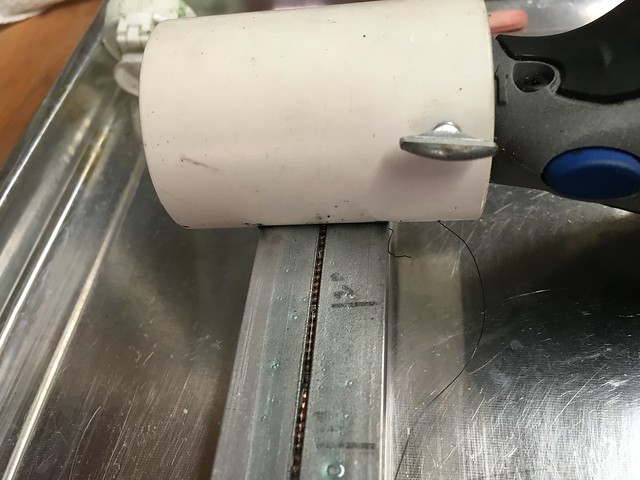 IMG_0186 by Pat, on Flickr
11- Image 187
Shows the coil all cut in about 2-3 seconds. The black hair is a wire going through the coil. It does a pretty good job of holding the rings together after they are cut.
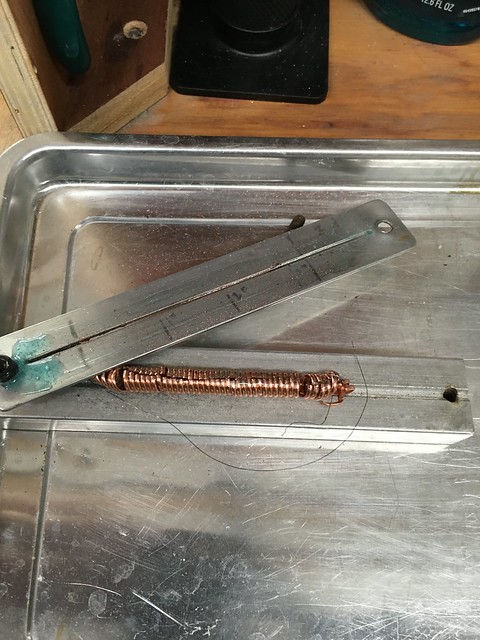 IMG_0187 by Pat, on Flickr
12- Image188
Here they are out of the groove but still holding together pretty well.
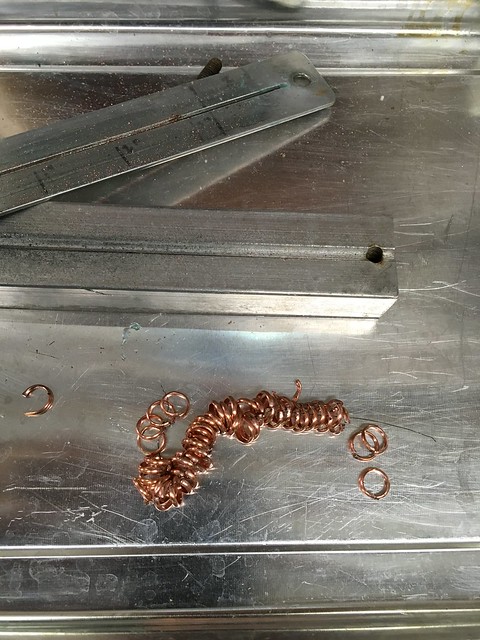 IMG_0188 by Pat, on Flickr
13- Image 189
Shows how they spread when the wire isn't used. I don't normally use the wire. I understand some use a strip of masking tape. I'd just rather hunt them down. : )
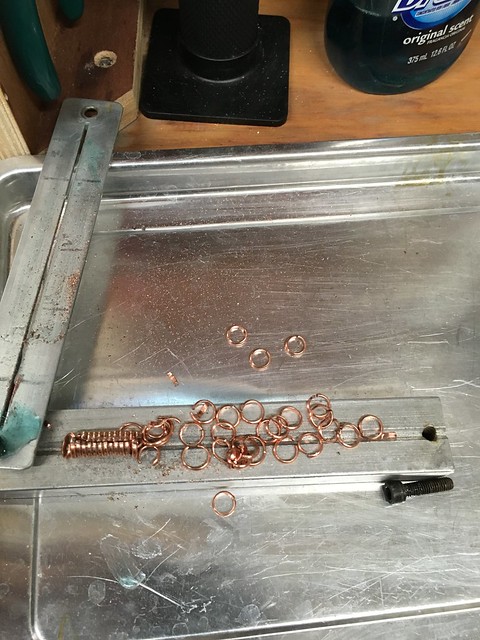 IMG_0189 by Pat, on Flickr
My coil maker was handmade by a friend.
The blade setup, mandrels and coil holder with top plate were from David Arens. I've never had any trouble with it. Takes special blades. Blades from MALCO SAW COMPANY. Size say 1 1/4 x. 010x3/8 W120T. I've also purchased them from Thurston # 4322 .010.
.
1-Image 172
 IMG_0167 by Pat, on Flickr
2- Image 173 6.5mm mandrel in chuck. Chuck key opens and closes the chuck.Wire has been inserted about one half inch at right angles. Extra care taken because it is half round. With half round need to make sure the flat side is next to the mandrel. 14 gauge.
 IMG_0173 by Pat, on Flickr
3- Image 174 Shows the angle and pulling it a little bit to the left so all the rings will be next touching the next. Leather fingers are to protect my finger and thumb.
 IMG_0174 by Pat, on Flickr
4- Image 177
At the end of the coil. I don't go all the way because I like having room to insert the saw blade.
 IMG_0177 by Pat, on Flickr
5- Image 178
Shows the cutting holder. It is just a brick of metal with one groove in it. Topped with a plate with a cut groove it in. Two screws hold it down.
 IMG_0178 by Pat, on Flickr
6- Image 179
Shows the coil ready to be placed into the groove. It just sits on top. The underside of the plate shows a stop, so the coil cannot be pushed into the screw. I've outlined the stop in black. Stop is about 2 mm high.
 IMG_0179 by Pat, on Flickr
7- Image 180
Show the setup all ready. I slop on the Dawn as a lubricant. Use a cheap watercolor brush. The popsicle stick is used to scootch the coil up to the stop.
ONE MORE THING: WHEN YOU PUT THE LID ON TOP OF THE COIL, MAKE SURE IT IS PARALLEL TO THE COIL AND THE COIL HOLDER. THE TENDENCY IS TO SCREW THE SCREWS TIGHTER BECAUSE THERE IS NOTHING HOLDING THE PLATE UP. EYE BALL THAT IT IS PARALLEL.
 IMG_0180 by Pat, on Flickr
8- Image 184
Shows the underside of the blade set up. It is set up so the blade is exposed just enough to cut through the top of the coil. That Dremel is dedicated to just this task.
 IMG_0184 by Pat, on Flickr
9- Image 185
Shows the placement of the blade housing on the plate. Haven't turned it on yet.
 IMG_0185 by Pat, on Flickr
10- Image 186
Shows the the blade housing is perfectly flat with the blade in the groove. Ready to turn on. Use one of the higher speeds; works much better. Takes about 2-3 seconds to zip through the coil. Blade housing must also be held flush with the top plate the entire time. When at the far end, turn off Dremel, then lift straight up.
 IMG_0186 by Pat, on Flickr
11- Image 187
Shows the coil all cut in about 2-3 seconds. The black hair is a wire going through the coil. It does a pretty good job of holding the rings together after they are cut.
 IMG_0187 by Pat, on Flickr
12- Image188
Here they are out of the groove but still holding together pretty well.
 IMG_0188 by Pat, on Flickr
13- Image 189
Shows how they spread when the wire isn't used. I don't normally use the wire. I understand some use a strip of masking tape. I'd just rather hunt them down. : )
 IMG_0189 by Pat, on Flickr


