Bail making with double half round. Pics
Aug 13, 2016 8:22:01 GMT -5
Drummond Island Rocks, Pat, and 3 more like this
Post by radio on Aug 13, 2016 8:22:01 GMT -5
Some of you wanted to see how to make a bail using double half round wire, so here are a few pics of the process. I use half hard wire so it is easier to form without annealing.
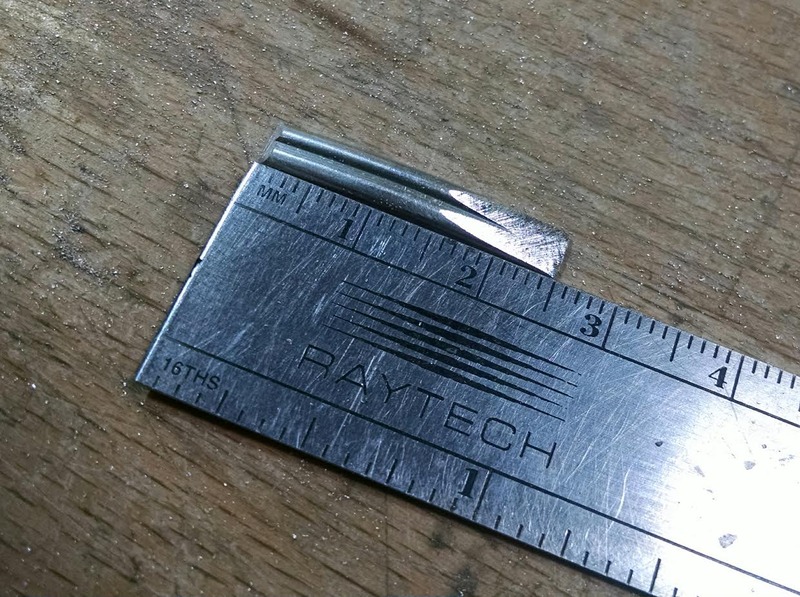
cut a length of wire and file one end at long angle as shown. This will be the end that is soldered on to the back of the pendant. File the other end at roughly a 45 degree angle as this end will butt up against the bezel.
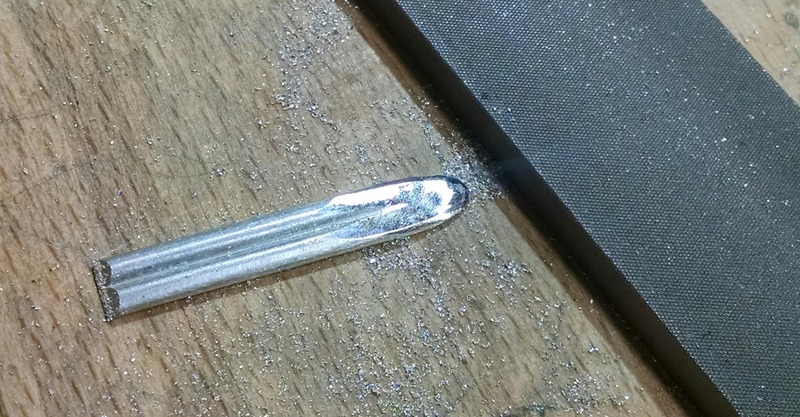
Using a fine cut file, dress the silver a bit to remove the course file marks and round over the edges slightly so there are no sharp edges on the bail
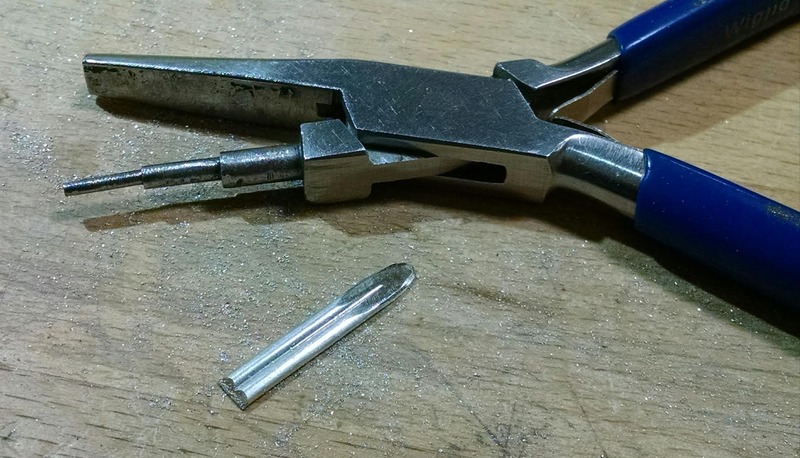
The pliers i use to form the bezel
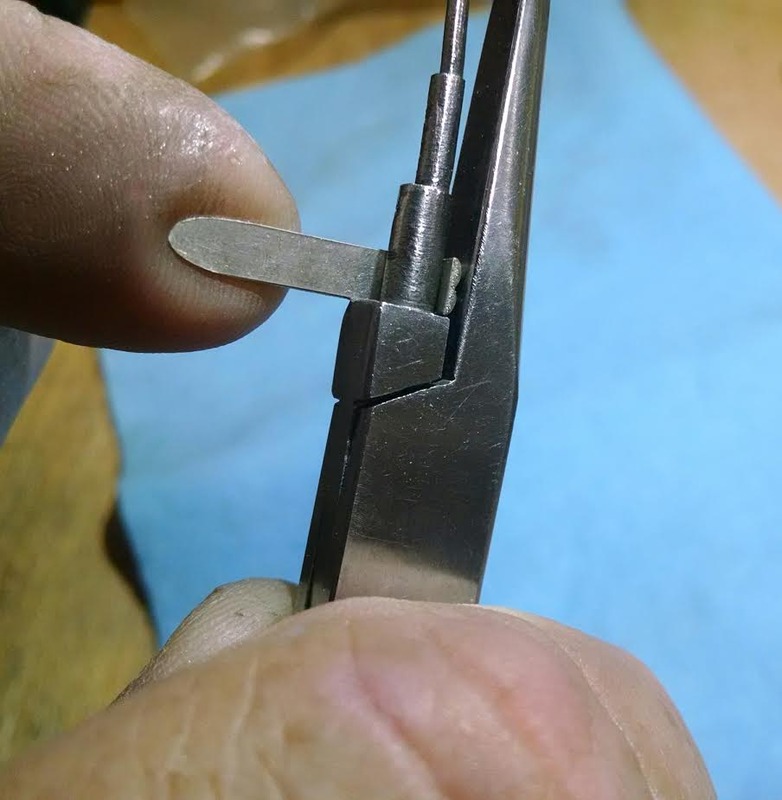
Firmly hold the end of the bail in the pliers and start forming the loop
Work the bail loop around the pliers about 1/2 to 3/4 of the way. At this point you need to decide if you want a completely round loop, or a longer one that is better suited for splitting once it is soldered on the pendant. I show a round one being made, but for most pendants I prefer a longer, tapered loop
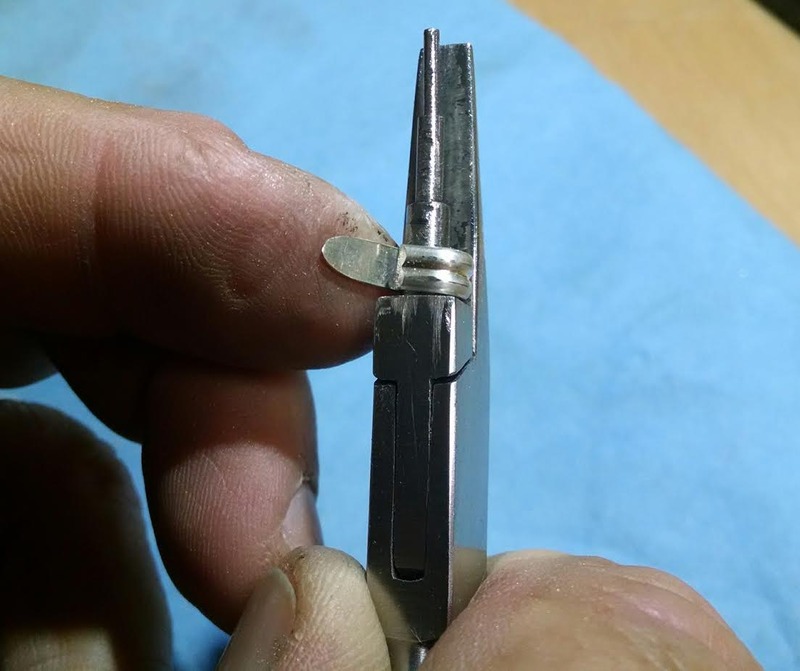
Another view of of how it looks on the pliers
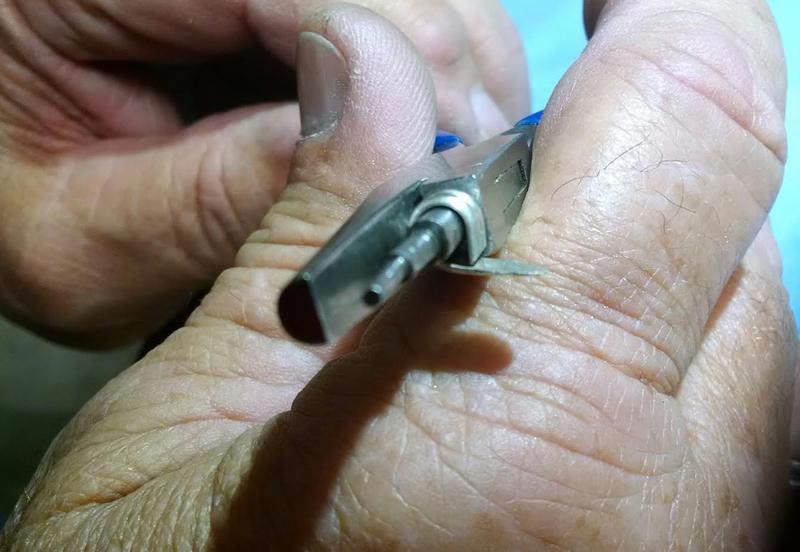
Once formed, this is how it is the easiest to solder on the pendant back using a kiln insulating brick. Once soldered on the back, I use pliers to flip it over and place a solder chip between the bail and the bezel
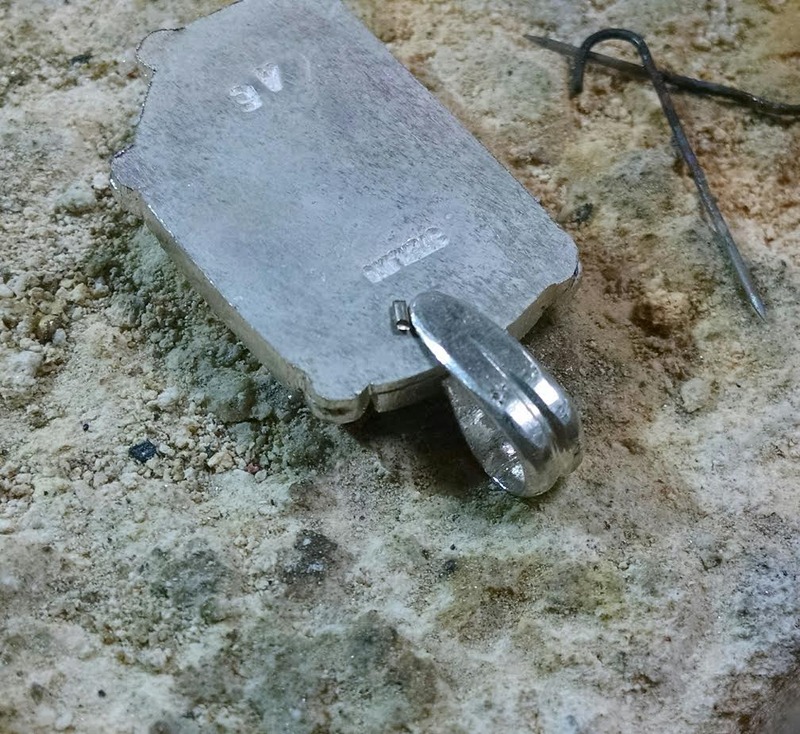
Once soldered and pickled, use a jewelers saw to split the half round and pry them apart. Using a small needle file, clean up the saw marks and remove any sharp edges. If the bail is not soldered to the bezel, it sometimes opens up a bit when prying apart. I've never had an issue with it bending or wrinkling the bezel, but I don't use a ton of solder. Match the size (gauge) of the half round to the size of the pendant so it doesn't look out of proportion. 14 ga works well for smaller pendants and 12 ga for larger. I use a 3/0 blade for smaller wire and up to a #2 for larger stuff. I also prefer a Swiss frame over the German style, but that is individual preference. I use Swiss premium buzz saw blades from Sante Fe Jewelers Supply. They are the highest quality I have found and last longer than most blades. Saw blade selection might be a good subject for another thread.
ADMIN EDIT - repaired broken images, original code below:
cut a length of wire and file one end at long angle as shown. This will be the end that is soldered on to the back of the pendant. File the other end at roughly a 45 degree angle as this end will butt up against the bezel.

Using a fine cut file, dress the silver a bit to remove the course file marks and round over the edges slightly so there are no sharp edges on the bail

The pliers i use to form the bezel

Firmly hold the end of the bail in the pliers and start forming the loop

Work the bail loop around the pliers about 1/2 to 3/4 of the way. At this point you need to decide if you want a completely round loop, or a longer one that is better suited for splitting once it is soldered on the pendant. I show a round one being made, but for most pendants I prefer a longer, tapered loop

Another view of of how it looks on the pliers

Once formed, this is how it is the easiest to solder on the pendant back using a kiln insulating brick. Once soldered on the back, I use pliers to flip it over and place a solder chip between the bail and the bezel

Once soldered and pickled, use a jewelers saw to split the half round and pry them apart. Using a small needle file, clean up the saw marks and remove any sharp edges. If the bail is not soldered to the bezel, it sometimes opens up a bit when prying apart. I've never had an issue with it bending or wrinkling the bezel, but I don't use a ton of solder. Match the size (gauge) of the half round to the size of the pendant so it doesn't look out of proportion. 14 ga works well for smaller pendants and 12 ga for larger. I use a 3/0 blade for smaller wire and up to a #2 for larger stuff. I also prefer a Swiss frame over the German style, but that is individual preference. I use Swiss premium buzz saw blades from Sante Fe Jewelers Supply. They are the highest quality I have found and last longer than most blades. Saw blade selection might be a good subject for another thread.
ADMIN EDIT - repaired broken images, original code below:
[URL=http://s1277.photobucket.com/user/ki6bcc/media/bail1_zpsbt4vbkq7.jpg.html][IMG]http://i1277.photobucket.com/albums/y487/ki6bcc/bail1_zpsbt4vbkq7.jpg[/IMG][/URL]
[URL=http://s1277.photobucket.com/user/ki6bcc/media/bail2_zpsuvgzz38a.jpg.html][IMG]http://i1277.photobucket.com/albums/y487/ki6bcc/bail2_zpsuvgzz38a.jpg[/IMG][/URL]
[URL=http://s1277.photobucket.com/user/ki6bcc/media/bail3_zpshley7qsf.jpg.html][IMG]http://i1277.photobucket.com/albums/y487/ki6bcc/bail3_zpshley7qsf.jpg[/IMG][/URL]
[URL=http://s1277.photobucket.com/user/ki6bcc/media/bail4_zpsk8nin2cp.jpg.html][IMG]http://i1277.photobucket.com/albums/y487/ki6bcc/bail4_zpsk8nin2cp.jpg[/IMG][/URL]
[URL=http://s1277.photobucket.com/user/ki6bcc/media/bail5_zps7a7ktxpf.jpg.html][IMG]http://i1277.photobucket.com/albums/y487/ki6bcc/bail5_zps7a7ktxpf.jpg[/IMG][/URL]
[URL=http://s1277.photobucket.com/user/ki6bcc/media/bail6_zpsvyd0kg7d.jpg.html][IMG]http://i1277.photobucket.com/albums/y487/ki6bcc/bail6_zpsvyd0kg7d.jpg[/IMG][/URL]
[URL=http://s1277.photobucket.com/user/ki6bcc/media/bail7_zpsrzhoofx6.jpg.html][IMG]http://i1277.photobucket.com/albums/y487/ki6bcc/bail7_zpsrzhoofx6.jpg[/IMG][/URL]


