Post by 1dave on Jun 29, 2017 22:51:40 GMT -5
I started a thread on this Jun 29, 2014 and never finished the project, which is just as well as Photobucket caught up with it, AND I needed ziggy 's idea about making splash pans out of jugs! so here goes.
NOTE: Adding photos to "Rock Show" now. May be tomorrow before they will replace the PB image.
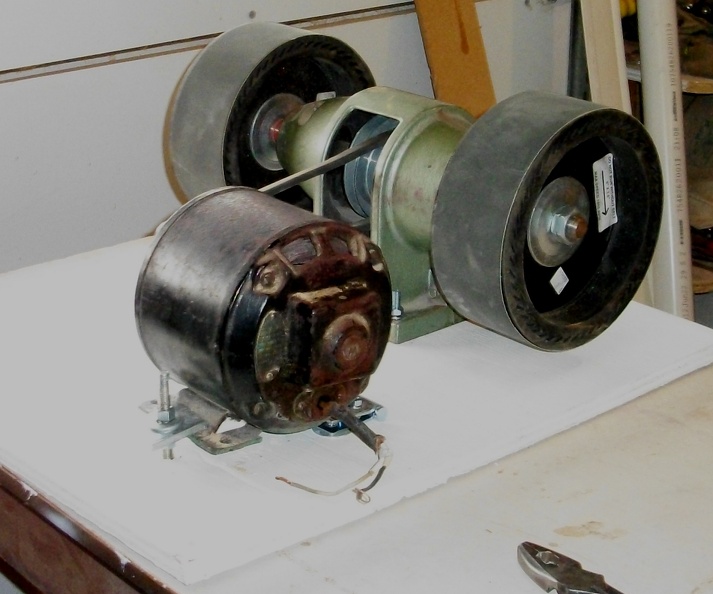
Several years ago I bought a couple of 8" expanding drums from zarguy to add to my lever lock "thump-bumpers."
After rockpowell helped me finally get my weeds beat down I decided it was time to do it to it.
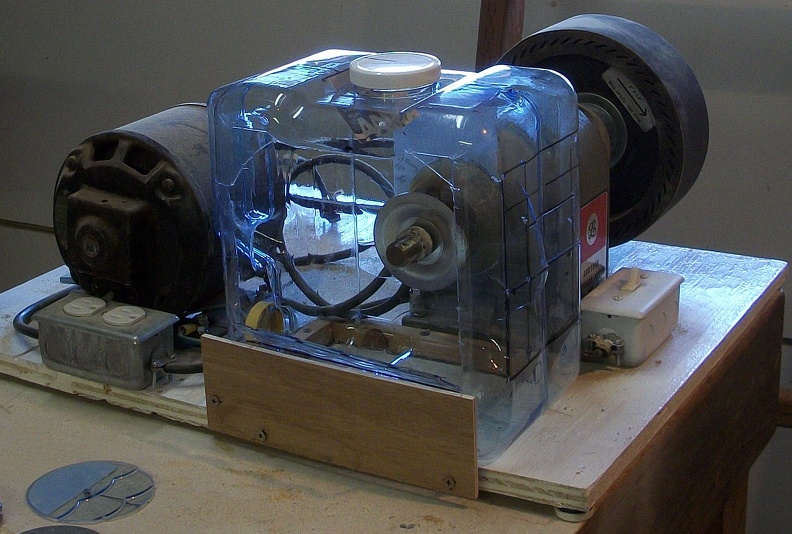
I'm using an old Lortone arbor I've had in storage for 40-50 years and an even older motor
(Name Plate says 1911 - now 106 years old!) I think I got from my grandfather.


I started building a splash pan with galvanized sheet from rockpowell . The drums are 3" wide, a 4" wide splash plan will be plenty . . . until I looked at it up close and personal. Do I want to try to get a lost cab out of there?
NO! Redesign time!
Four carriage bolts secured the arbor, but the motor needs to swing up and down to adjust belt tension, so I drilled out a door hinge to match the front holes of the motor, screwed it in place, then bolted it to the motor.
A 3/8" long carriage bolt allows tilt/height adjustment.
Major components bolted in place, I began wiring . . .
The Sheetrock tabs need to be broken off from switches and outlets IF you are going to be using curved metal handy box covers.
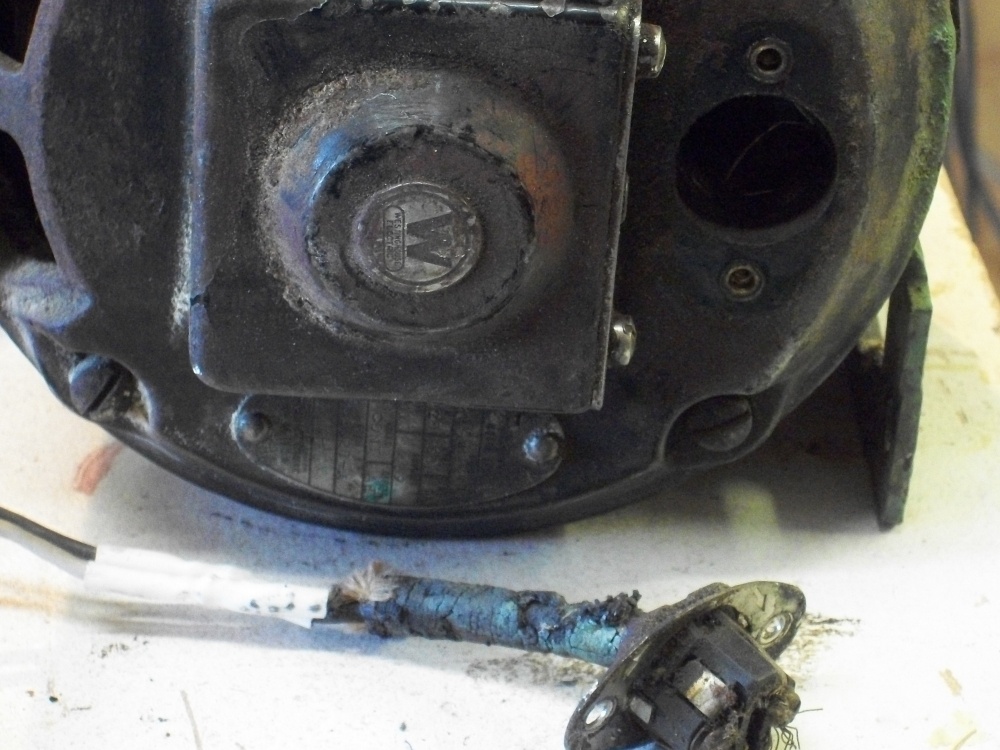
That was when I noticed I had a problem with the ancient cord from the motor.
Crumbling, HAD to be replaced! Nightmare?
I removed the two screws holding the cable in and to my delight those old guys were SMART!
To reverse the motor (which was made to mount upside down!) just take this out and rotate it 180 degrees!
Our modern manufacturers could learn from them!
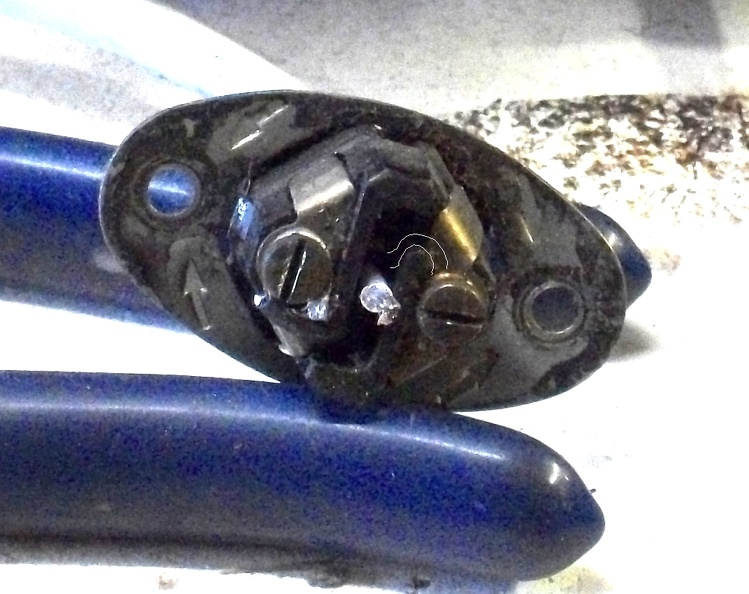
Loosen the two screws and remove the old cable, replace with a new one.
I soldered the stranded wire so it wouldn't spread all over the place like the original had.
FUN! with my shaking hands getting the soldering tip, solder, and wire close to each other at about 88 beats per minute it finally happened!
The round cable entry hole reduces to a slot on the other side so only the two wires can protrude. It is hard to see, so I outlined the new black wire twisted around and into place on the brass screw. The soldered white wire is still sticking straight up. You can see the slot where it is supposed to wrap around and onto the silver screw.
Now to finish wiring and build two splash pans.
So far my only sheet metal tools are a pair of straight snips, a piece of angle iron, a couple of clamps and a hammer.
Some tips from Don, jakesrocks would be appreciated.
EDIT Jun 29, 2017 at 9:59pm
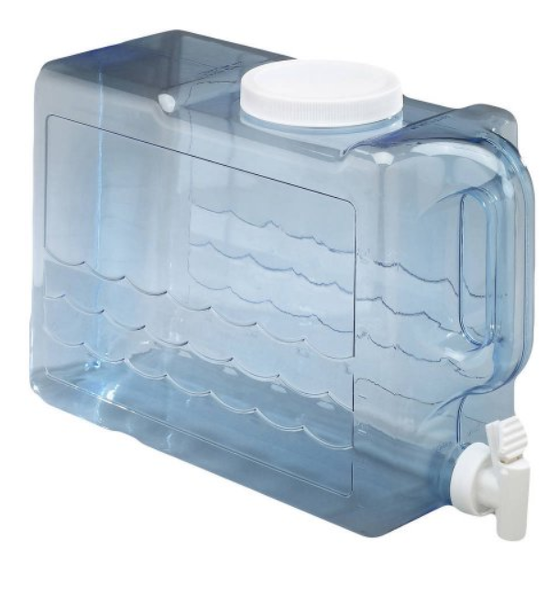
I tossed the sheet metal that I had started, and after researching decided THIS would be perfect for my project. EDIT: Not. Too short. Length of 10-12 inches would be ideal but haven't found it yet.

Walmart didn't have any, but they did have these 2 gallon Primo jugs, small, but might work. I bought one for a test trial.
While thinking about attaching a drain, I remembered something I hadn't used in over 50 years. Buchanon Caps!
I started wiring back when we twisted connections together, then lifted a hot dip pot to solder it.
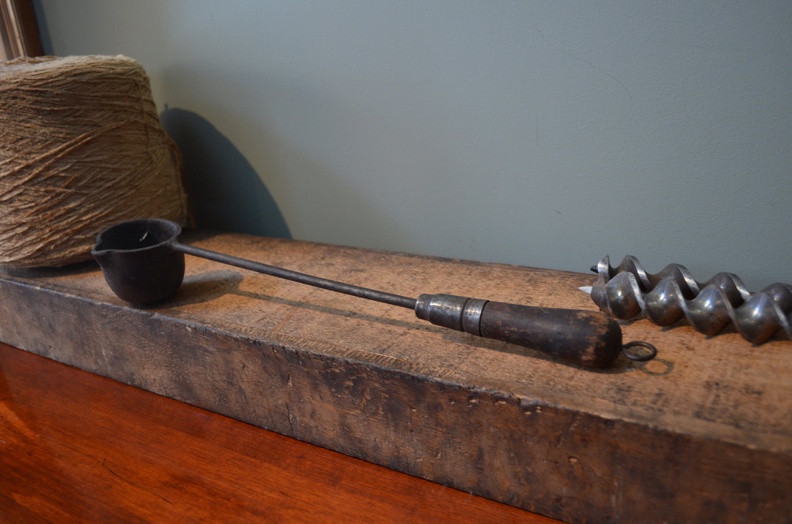
Then we wrapped the connection with friction tape.
Around 1956 The Buchanon caps hit the market. No more soldering! Insert the wires, crimp, and snap on the insulating cap! around 1960 Wirenuts came out and I thought Buchanons were history.
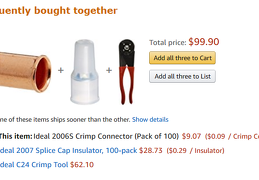
Those caps would be a cheap way to attach drain tubes. Does anyone still make them? YES! Ideal and they are available at amazon with free shipping. I just now ordered a box.

Friday 30 Jun 2017
Primo 2 gallon container dimensions - L = 9", W = 61/2," H = 10"
The spigot was replaced by a medicine bottle cap.
I placed the 1/2"X3/4" backstop at 43/4," leaving 1/4 inch between the drum and front of the shield.
The center of the arbor is up 5". At that point I used a 3" hole saw for the right hand side. I ran it in reverse to keep from tearing the thin plastic to pieces.

I had to cut clear to the back to get the drum inside. Changing belts is going to be a problem.

With the drum in place I marked where the AARP drip spreader would fit against the angle on top, cut. and inserted it from the inside. I began cutting the front, planning to divide it into two parts - the bottom rolling down and out for a hand rest, the top pushed in an a 45o "U" angle around the drum to keep the water inside.
Unfortunately the plastic shattered while being cut. The material is way too thin and brittle.
I learned more about how I want it, so it was worth it.
Now to order the proper heavy duty jugs from Amazon. The project is halted for another week.
Made my choice:
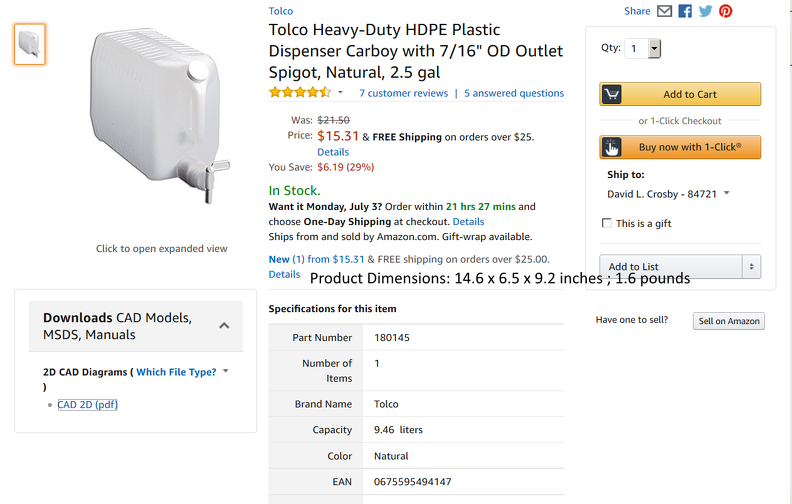
0.2 inches longer and 21/2" taller AND much heavier material.
EDIT August 3/2017
The jugs turned out to be thinner material than I hoped, so after making the cuts i wanted, I screwed, then glued a 1"X3/4"X 9" piece of wood to the outside right front side for strength. That stabilized it and I'm happy with them.
I shrink-tubed the water lines into the spigots to turn the water on and off.
Next I want a Drip Spreader under the incoming water and decided to use the material cut from the side to make them.
I placed the jug on top of the plastic and drew under the jug as far as I could reach, then straight down, and drew 3/4" tabs
to hold them in place.
To make sure water wouldn't spill over the sides, I made a form, clamped the material in it and used heat gun to re-form it. This material doesn't take much heat, the middle setting was plenty. hot water would do the job.


With the holder ready I bent a couple of credit cards and punched holes in the seam.
Wells Fargo cards worked well. Other cards broke when trying to bend them.
A scratch-awl did a good job. with the protruding plastic at each hole, the water will drip
there instead of running along the edge of the card as it would with drilled holes.

Gluing the card to the holder with super glue, and building dams on both sides with E6000
To keep the water from running off the ends.

Installing the holder turned out to be clumsier than anticipated, but I got them in place and glued them with E6000.
Perhaps 1" long tabs would have been easier - or harder?

A look inside at the Drip spreader in place.

Now to fix those rough cut plastic edges.
I have lots of plastic tubing from my breathing problems.
To keep the point of my X-ACTO blade from digging in, I glued some wood splinters
(looking back, flat toothpicks would have been easier) 1/4" longer than the blade made
a good guide through the tubing, with the blade slicing along behind.

Be sure to slice the inside, outside, left or right of the tube coil as best fits your need.

EDIT 8/5/2017
Water time while waiting for Testers glue to arrive.
Super glue worked, BUT the lid glued so tight I broke it off trying to re-open it. GIZMO GZNAZNIK TRINKET
Three sizes of Shrink Tube from Radio Shack attached the water line to the jug spigot.

Now for the drain. The splice caps needed a little adjustment - first with my swaging tool to provide more purchase.

Increasing the internal diameter of another cap so it will fit over the first.

putting the two together.
BTW - I drilled a hole the OD size of my 1/4"ID drain line on a 45o angle, then chiseled a channel to the connecting point to keep the drain line in place and as low as possible.

Drain finished.

NOTE: Adding photos to "Rock Show" now. May be tomorrow before they will replace the PB image.
Several years ago I bought a couple of 8" expanding drums from zarguy to add to my lever lock "thump-bumpers."
After rockpowell helped me finally get my weeds beat down I decided it was time to do it to it.
I'm using an old Lortone arbor I've had in storage for 40-50 years and an even older motor
(Name Plate says 1911 - now 106 years old!) I think I got from my grandfather.
Deciding where to place stuff and things.
I started building a splash pan with galvanized sheet from rockpowell . The drums are 3" wide, a 4" wide splash plan will be plenty . . . until I looked at it up close and personal. Do I want to try to get a lost cab out of there?
NO! Redesign time!
Four carriage bolts secured the arbor, but the motor needs to swing up and down to adjust belt tension, so I drilled out a door hinge to match the front holes of the motor, screwed it in place, then bolted it to the motor.
A 3/8" long carriage bolt allows tilt/height adjustment.
Major components bolted in place, I began wiring . . .
The Sheetrock tabs need to be broken off from switches and outlets IF you are going to be using curved metal handy box covers.
That was when I noticed I had a problem with the ancient cord from the motor.
Crumbling, HAD to be replaced! Nightmare?
I removed the two screws holding the cable in and to my delight those old guys were SMART!
To reverse the motor (which was made to mount upside down!) just take this out and rotate it 180 degrees!
Our modern manufacturers could learn from them!
Loosen the two screws and remove the old cable, replace with a new one.
I soldered the stranded wire so it wouldn't spread all over the place like the original had.
FUN! with my shaking hands getting the soldering tip, solder, and wire close to each other at about 88 beats per minute it finally happened!
The round cable entry hole reduces to a slot on the other side so only the two wires can protrude. It is hard to see, so I outlined the new black wire twisted around and into place on the brass screw. The soldered white wire is still sticking straight up. You can see the slot where it is supposed to wrap around and onto the silver screw.
Now to finish wiring and build two splash pans.
So far my only sheet metal tools are a pair of straight snips, a piece of angle iron, a couple of clamps and a hammer.
Some tips from Don, jakesrocks would be appreciated.
EDIT Jun 29, 2017 at 9:59pm
I tossed the sheet metal that I had started, and after researching decided
Walmart didn't have any, but they did have these 2 gallon Primo jugs, small, but might work. I bought one for a test trial.
While thinking about attaching a drain, I remembered something I hadn't used in over 50 years. Buchanon Caps!
I started wiring back when we twisted connections together, then lifted a hot dip pot to solder it.
Then we wrapped the connection with friction tape.
Around 1956 The Buchanon caps hit the market. No more soldering! Insert the wires, crimp, and snap on the insulating cap! around 1960 Wirenuts came out and I thought Buchanons were history.
Those caps would be a cheap way to attach drain tubes. Does anyone still make them? YES! Ideal and they are available at amazon with free shipping. I just now ordered a box.
Friday 30 Jun 2017
Primo 2 gallon container dimensions - L = 9", W = 61/2," H = 10"
The spigot was replaced by a medicine bottle cap.
I placed the 1/2"X3/4" backstop at 43/4," leaving 1/4 inch between the drum and front of the shield.
The center of the arbor is up 5". At that point I used a 3" hole saw for the right hand side. I ran it in reverse to keep from tearing the thin plastic to pieces.
I had to cut clear to the back to get the drum inside. Changing belts is going to be a problem.
With the drum in place I marked where the AARP drip spreader would fit against the angle on top, cut. and inserted it from the inside. I began cutting the front, planning to divide it into two parts - the bottom rolling down and out for a hand rest, the top pushed in an a 45o "U" angle around the drum to keep the water inside.
Unfortunately the plastic shattered while being cut. The material is way too thin and brittle.
I learned more about how I want it, so it was worth it.
Now to order the proper heavy duty jugs from Amazon. The project is halted for another week.
Made my choice:
0.2 inches longer and 21/2" taller AND much heavier material.
EDIT August 3/2017
The jugs turned out to be thinner material than I hoped, so after making the cuts i wanted, I screwed, then glued a 1"X3/4"X 9" piece of wood to the outside right front side for strength. That stabilized it and I'm happy with them.
I shrink-tubed the water lines into the spigots to turn the water on and off.
Next I want a Drip Spreader under the incoming water and decided to use the material cut from the side to make them.
I placed the jug on top of the plastic and drew under the jug as far as I could reach, then straight down, and drew 3/4" tabs
to hold them in place.
To make sure water wouldn't spill over the sides, I made a form, clamped the material in it and used heat gun to re-form it. This material doesn't take much heat, the middle setting was plenty. hot water would do the job.
With the holder ready I bent a couple of credit cards and punched holes in the seam.
Wells Fargo cards worked well. Other cards broke when trying to bend them.
A scratch-awl did a good job. with the protruding plastic at each hole, the water will drip
there instead of running along the edge of the card as it would with drilled holes.
Gluing the card to the holder with super glue, and building dams on both sides with E6000
To keep the water from running off the ends.
Installing the holder turned out to be clumsier than anticipated, but I got them in place and glued them with E6000.
Perhaps 1" long tabs would have been easier - or harder?
A look inside at the Drip spreader in place.
Now to fix those rough cut plastic edges.
I have lots of plastic tubing from my breathing problems.
To keep the point of my X-ACTO blade from digging in, I glued some wood splinters
(looking back, flat toothpicks would have been easier) 1/4" longer than the blade made
a good guide through the tubing, with the blade slicing along behind.
Be sure to slice the inside, outside, left or right of the tube coil as best fits your need.
EDIT 8/5/2017
Water time while waiting for Testers glue to arrive.
Super glue worked, BUT the lid glued so tight I broke it off trying to re-open it. GIZMO GZNAZNIK TRINKET

Three sizes of Shrink Tube from Radio Shack attached the water line to the jug spigot.
Now for the drain. The splice caps needed a little adjustment - first with my swaging tool to provide more purchase.
Increasing the internal diameter of another cap so it will fit over the first.
putting the two together.
BTW - I drilled a hole the OD size of my 1/4"ID drain line on a 45o angle, then chiseled a channel to the connecting point to keep the drain line in place and as low as possible.
Drain finished.