|
|
Post by orrum on Nov 26, 2017 11:38:10 GMT -5
Ahhh might be a Loto shine in them hoppers Jim!
|
|
|
|
Post by TheRock on Nov 26, 2017 12:19:47 GMT -5
Take a oblong Steel Plate at the bottom so it can be bolted to lid like the contraption shown. And weld a plate on each end. Take a third plate to match and take two Rods threaded on each end at the top through all three plates and around the neck of the containers have nuts on there and tighten the movable 3rd plate to tighten and hold all three containers in place. Make the sides tapered so you can weld a plate on each side to cradle and keep the containers from coming out. tighten it all up and you should be good to go.  |
|
|
|
Post by pauls on Nov 26, 2017 15:42:12 GMT -5
James
If you have the top off that tumbler and happen to point a camera in the direction of the workings inside I would be very interested.
|
|
notjustone
spending too much on rocks

Member since January 2017
Posts: 426 
|
Post by notjustone on Nov 26, 2017 16:01:31 GMT -5
Looked up pipe. It is: 5 inch schedule 5 pipe. Often used in building sprinkler systems. Cheap. .109 wall thickness 5.63 inches in outside diameter Fit too tight before splitting pipe. Fit delightfully tight after splitting pipe and it popping open 3/4" as welded seam pipe often does when split. Beware. Internal seam weld cut out with section removed for unencumbered saddle. Nothing ever goes this easy.     james what if you cut less out of the pipe so it wraps more than halfway around? wth 1 end fixed and the other removable with a couple studs and wingnuts and use the clamping force to hold them in? |
|
|
|
Post by pauls on Nov 26, 2017 18:44:05 GMT -5
Thanks James. Perfect, great pictures. I love your build threads.
Thats more or less what I built and the beast tried to vibrate itself through to China, I gave up in the end.
I might revisit that build some time but at the moment I have a couple of cabbing machines on the go and a million ideas for other things nudging their way to the top of the "build this" pile.
|
|
|
|
Post by 1dave on Nov 26, 2017 20:07:22 GMT -5
When you've got it, FLAUNT IT! Well, you've got lots to flaunt.
|
|
|
|
Post by TheRock on Nov 26, 2017 22:21:00 GMT -5
Okay I like the 5" pipe to cradle the 3 hoppers in but I would still weld end caps and have them come up just about to those red caps on the hoppers, stay the as wide as the outside width of pipe as those will be your bolt hole flanges.. Make a third cap that goes inside that pipe like those hoppers and can slide back and forth. Take two 3/8" Rods that run just past the length of the pipe and drill holes close to the neck on all three plates the end cap and the one that slides on one side will have a couple inches of threads so you can tighten that plate (The one that moves) against all three hoppers and squish them together.   |
|
|
|
Post by TheRock on Nov 26, 2017 22:23:55 GMT -5
If containers will be too close together with lid problems could make spacers to co between them. |
|
|
|
Post by youp50 on Nov 26, 2017 22:54:40 GMT -5
5" sch 5 just laying in the boneyard. Great find. Easy to 'spring' open. Iron pipe size 'IPS' OD is the standard. ID varies with wall thickness.
|
|
|
|
Post by orrum on Nov 27, 2017 6:47:07 GMT -5
Put dividers in the pipe and use it without the lil hoppers?
|
|
jamesp
Cave Dweller 
Member since October 2012
Posts: 36,561
|
Post by jamesp on Nov 27, 2017 7:57:38 GMT -5
5" sch 5 just laying in the boneyard. Great find. Easy to 'spring' open. Iron pipe size 'IPS' OD is the standard. ID varies with wall thickness. There is a reason why I was able to get about 100,000 pounds of steel pipe 4 to 16 inches sch 5 to sch 20 for $1200 back then youp50. I was working for a company that made fabric out of bronze wire (Fourdrinier belts for paper machines). These large heavy fabrics had to be wrapped on to steel poles so they could be picked up on the ends without sagging and damaging the fabric. We changed over to polyester wire and switched to aluminum poles to wrap fabric on. The company was going to get rid of the steel pipes. I told them I would handle it. My neighbor is a logger and had 50 foot log trailers. So the company loaded them on his log trucks via overhead crane and I unloaded them on the farm with a loader. I gave my neighbor about a dozen sch 20 16 inch pipes to put in creeks so they could put temporary log roads in. Most of those pipes were 40 to 45 feet long. I used the 6/8 inch pipes for concrete forms for steel buildings. 6/8/10 pipes for purlins rafters joists posts for steel buildings houses cabins. See 6 inch pipes on ground for final concrete form. The largest of 5 buildings. 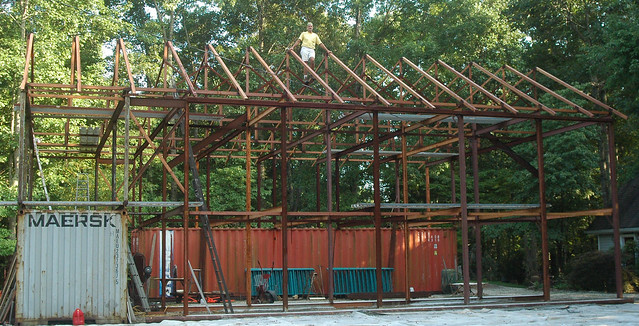 more pipes 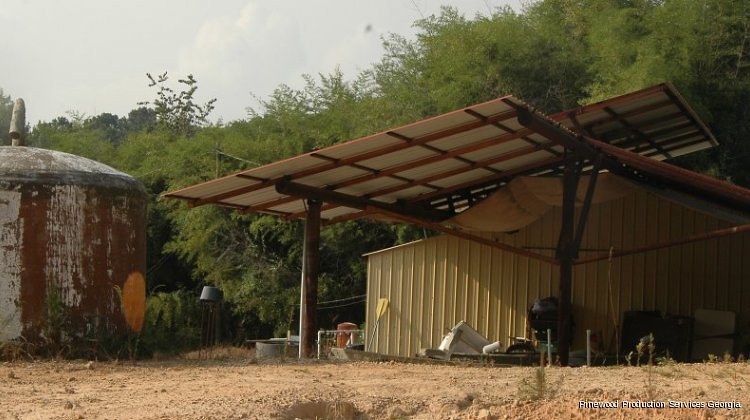  Cheap construction |
|
jamesp
Cave Dweller
Member since October 2012
Posts: 36,561
|
Post by jamesp on Nov 27, 2017 8:02:19 GMT -5
Put dividers in the pipe and use it without the lil hoppers? Yep. Could have built hoppers easily out of steel Bill. Being the hoppers were used for polish I feared metal marks on the stones. Plus hard walls. I am no master of coating steel with plastisol or other coatings i just bought the plastisol vibe hoppers. |
|
|
|
Post by 1dave on Nov 27, 2017 9:05:50 GMT -5
When you've got it, FLAUNT IT! Well, you've got lots to flaunt. Ha, no credit here. I had the perfect sized pipe. Other than that all was basic. Those little vibe jugs will make perfect hoppers for small experimental machines. Looking at making a lower speed vibe with one of them. They are some rugged little buggars. I'm talking more than this project, I'm talking everything you do. You are the Einstein of your world! |
|
jamesp
Cave Dweller
Member since October 2012
Posts: 36,561
|
Post by jamesp on Nov 27, 2017 9:16:50 GMT -5
Common sense goes a long way 1dave. |
|
|
|
Post by captbob on Nov 27, 2017 9:28:31 GMT -5
I wonder if the locals showed up while Noah was building the Ark and told him he was doing it wrong?  Thanks for the entertaining show, looking forward to progress and completion. And I thought I was being ambitious yesterday by getting all the stuff down and putting up the Christmas tree! *sigh* As usual, Jim is playing chess and I'm playing checkers - or making mud pies. wandering off to see what the day brings ... |
|
|
|
Post by amygdule on Nov 27, 2017 10:43:38 GMT -5
Cool project jamespHave you figured out how you're going to mount the hoppers in the cradle? I could post a couple of pictures of how they did it on the Mini Sonic. It looks like Diamond Pacific sells the part. "MT hopper latch and keeper set" part #490-405196 Looking forward to seeing it run. |
|
|
|
Post by amygdule on Nov 27, 2017 11:54:03 GMT -5
Cool project jamesp Have you figured out how you're going to mount the hoppers in the cradle? I could post a couple of pictures of how they did it on the Mini Sonic. It looks like Diamond Pacific sells the part. "MT hopper latch and keeper set" part #490-405196 Looking forward to seeing it run. You kinda inspired me to get this going. The final base plate on the bottom of that whole assembly gets mounted to the vibratory deck of the Vibrasonic. The whole bottom assembly of a Vibrasonic including the motor and countershaft system is referred to as a universal base. Universal in that many different hoppers can be fastened to it. Original factory hoppers were 2 - #4, 12#, 14#, 35#. I may have left some sizes out. I know individuals have made up to 50# hoppers for it. Recently a company made adaptor bases that fit many more variations of hoppers. Mostly using Mini Sonic type hoppers. Main reason I used these smaller hoppers is because the wide 14 pound hopper has separation issues, big rocks to left, small rock to right. Beats the big rocks up. I asked, "Have you figured out how you're going to mount the hoppers in the cradle? I guess you misunderstood my question. Will the hoppers be removable from the new assembly? And how will you secure them? A couple of pictures of how the hopper is secured on the Mini Sonic. Side view of the heavy rubber latch used to clamp the hopper in place.  Back of the hopper, where the nipple on the hopper is set into the assembly.  |
|
|
|
Post by youp50 on Nov 27, 2017 13:30:30 GMT -5
I sincerely appreciate the offer, I will pass. I use the brand X vibe.
|
|
|
|
Post by TheRock on Nov 27, 2017 14:35:57 GMT -5
youp50 TheRock pauls (you would have to help me with shipping to Australia) notjustone I will be glad to send you guys sections of this pipe if you want to build your own. Takes me 5 minutes to saw to length and to cut a section out with the plasma cutter. Y'all can clean them up  . The hoppers were $55. Got a link. Ta Hell with the Pipe! I am looking at that Catfish and thinking that would be awful tasty with some Hush Puppies Cathead Biscuits and Greens and maybe some fried okra and fried green maters. Tell me when And Ill be on the way. On the Pipe I could always use steel no matter what it is. Up here Welding R Us at least it used to be gotta get back on my front end loader build one of these days. Planning on going to Florida for 5 months next year (Someone has to make sure captbob is taking his prosac,) by his deranged writings I can tell he isn't.  Maybe I can swing by and pick up da pipe.  |
|
|
|
Post by pauls on Nov 27, 2017 14:48:23 GMT -5
Thanks for the offer James, shipping would be a reall killer on that deal, so no.
You could haul a whale up into the rafters of that shed and not bend anything, I guess thats what the block and tackle is for, the big fish.
|
|


 .
. Maybe I can swing by and pick up da pipe.


