Deleted
Deleted Member
Member since January 1970
Posts: 0
|
Post by Deleted on Dec 11, 2017 21:50:52 GMT -5
Hello, I am new to this hobby and I am wondering if anyone else has experienced this. I received my National Geographic Professional Rock Polisher as a gift. It came with some stones, the instruction, the whole thing. I followed the instructions to a "T" and the results were very disappointing. The rocks were smooth, but as dull as anything - no shine what so ever. So I did some research and tried another batch. This time I bought some stones of the same hardness (jasper) and ran the process once again. This time I did some additional research and heard about " burnishing" the rocks. After the process was finished, I burnished them........and same results. The rocks were smooth...but dull as anything. Any thoughts, ideas, suggestions?  ?? |
|
|
|
Post by Jugglerguy on Dec 11, 2017 23:13:22 GMT -5
What did the instructions say? Most tell you that the first stage only takes a week. It actually takes way longer.
|
|
Wooferhound
Cave Dweller  Lortone QT66 and 3A
Member since December 2016
Posts: 1,432 
|
Post by Wooferhound on Dec 12, 2017 10:20:25 GMT -5
|
|
|
|
Post by gmitch067 on Dec 12, 2017 10:31:56 GMT -5
Nice tutorial Wooferhound - thank you for posting that. I think the grit quantity per stage listed on Pg-7 is a bit heavy. I have been following other member's recommendations in cutting those in half (or more) and have had no problems. |
|
Fossilman
Cave Dweller
Member since January 2009
Posts: 20,711
|
Post by Fossilman on Dec 12, 2017 10:45:06 GMT -5
Any photos also??
|
|
|
|
Post by gmitch067 on Dec 12, 2017 11:02:57 GMT -5
'Been looking at instruction videos on that tumbler kit (same one I bought my Grandson a year ago)...
How full do you fill the drum with rough?
If you under-fill the drum, the resulting banging around will cause bruising and could cause a polish to fail. Fill the drum 2/3 to 3/4 full of rough. Ensure that you include small as well as larger rough (in that tumbler, try not to exceed 1-1/4 inch diameter). You need the small scrabble pieces there to help the grits and polish to get between the larger stones (you could also use large or small ceramics for this... if you have any).
When you open the drum after a tumble, how thick is your slurry (muddy water)?
If it is very thin, a lot of your grit might not be getting into the mix to abrade the stones. Do not add water so high that you cover the top of the stones. Add about a tablespoon (or 2) of clay kitty litter to help make the slurry thicker (I use Johnny Cat Original because if uses less stink pretty chemicals - which could cause gas buildups... if the drum begins to balloon out, just open the lid to burp it)
Glenn
|
|
|
|
Post by Jugglerguy on Dec 12, 2017 14:11:50 GMT -5
I didn't have time to write much last night. Here's a link to a recent thread with some pictures of what to expect along the way. That first stage takes a little longer than forever. The other stages usually take a week or maybe a little longer. |
|
|
|
Post by youp50 on Dec 12, 2017 14:29:52 GMT -5
Burnishing: if the finished rocks appear cloudy or hazy and rubbing the rock with a cloth improves the shine, you should burnish.
Please take no offense, I do not think you followed the instructions to a 'T'. If one follows instructions shiney rocks come out. Most are not happy with the shape or flaw removal. That's why we coarse tumble for weeks or months.
Venturing a guess, you got the order of the grit out of sequence.
Do not give up. Its a pretty cool hobby. Some people struggle more than others. Stick to it, even people from (insert your favorite nationality or geographic location here) can get it right.
|
|
|
|
Post by pauls on Dec 12, 2017 14:55:19 GMT -5
Photos would help.
What others have said sums it up nicely apart from being absolutely scrupulous with washing between stages, any bit of coarse grit making its way through in a crack or hole or inside your barrel can take all your rocks back to coarse even though you are running finer grit or polish.
The sequence is, Coarse grinds edges off and rounds the stones, leave them in until each stone is ground to the shape you want, this might require several cleanouts and fresh grit being added, for ages.
Next grit, usually something around 220 grit, takes the micro pits from the coarse grit out but leaves its own finer pits and scratches.
Next grit, possibly 600 Grit, removes the 220 pits, leaves its own very fine pits and sratches, by now your rocks should have a dull matt almost shining.
Next grit, finer again, pre polish, same thing.
Polish, nothing gets in here until it already is starting to show good signs of a pre polish.
It needn't be a batch process where everything in first stage gets moved along, pick good stones out from the first stage and put them aside to run through later, top up first stage with fresh rocks.
This is just the basic plan, a lot of different methods, grits times etc. are used to achieve great results but this will get you in the ball park. You can start experimenting after you have a couple of good batches out.
I forgot to add, any rock that breaks will have a rough edge that is as hard as the other rocks and will scratch and rough them up badly, remove badly cracked rocks.
|
|
|
|
Post by rmf on Dec 13, 2017 15:28:05 GMT -5
not seeing what type of rock and the size and mix of rocks used, here is where I would start.
If you got a dull polish that is good news because you are on the right path you just need to tweak something. Normally when we sell rough rock we screen out the -1/2" rock (for Agates and Jaspers) this is because most customers see the fines and they do not want to pay for waste. That said, the fines (less the 1/2 inch) do a lot of grit carring and cushioning. I keep my fines and reuse them as filler and only use plastic pellets for softer stones (sodalite, granite,glass). Make sure you have about 20 to 25% fines (less than 1/2 inch)
The second is that if you start out with a full barrel with just enough room for the rocks to tumble when you get done with coarse grit you have lost about 25% of the vol due to rounding and conversion of rock and grit to mud. So if you start out with the tumbler 90% full it is now about 70% full. For rotary tumblers you should do two batches in coarse then use half of the second batch to make up what was lost in the coarse grind. (Coarse is where you loose most of the rock. The med and fine only are for removing scratches from previous batches and do not remove but 10% of the rock lost during tumbling) A fuller drum keeps the rocks from falling too far. If the drum was not already about 90% full at the start it may be way less that the 70% mentioned. I have had customers that end the coarse run with drums that are 50% full and that is not enough rock to get a good polish. They simply beat themselves to death. this is where fillers or reusing fines are used to cushion the rocks. If you notice crazing around the edges this is an indication the tumbler is not full enough.
Though not necessary to get a polish several have suggested tumbling for longer than a week in coarse. I do this myself because it makes the stones more rounded and more pleasing to my eye. However, the additional grinding reduces the rock volume and you need to add more rock in the next step to get back to the 80%-90% full to avoid the problem listed above.
Hope it helps.
|
|
Deleted
Deleted Member
Member since January 1970
Posts: 0
|
Post by Deleted on Dec 13, 2017 17:55:40 GMT -5
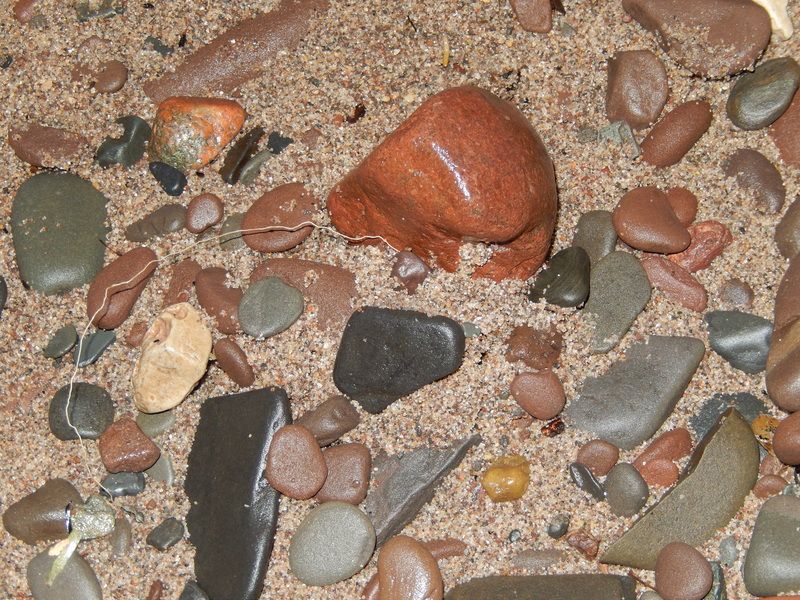
Hello All, Thanks for all the info. Here are the answers to your questions: The slurry is thicker than water, but thinner than say - yogurt. Kind of in the middle between the 2. Is this a good consistency? I followed the instructions to a "T: as per the instructions. The only thing I did not do was add mineral oil as per Tip #5...does that actually work? Attached are some photos that I took, they look shiny, but I think that is just because of the light source. In actuality, they are all quite smooth, but lack any shine at all. I hope the attachments work out. ![]() |
|
lookatthat
Cave Dweller
Whatever there is to be found.
Member since May 2017
Posts: 1,360 
|
Post by lookatthat on Dec 13, 2017 18:34:48 GMT -5
I can't see how good results in a rotary could come from 3-5 days only in rough.
Mineral oil is bogus.
|
|
|
|
Post by grumpybill on Dec 13, 2017 18:53:37 GMT -5
My guess is that some of the previous abrasive carried over into the next stage(s) in the little pits in the stones.
I would run them in the course grit at least one more time before moving on to the other stages.
After each stage, wash the stones well, paying particular attention to any pits/cracks, then tumble them for an hour or so in water and a little squirt of Dawn dish soap and/or Borax. Rinse them well, then proceed to next stage.
|
|
|
|
Post by rmf on Dec 13, 2017 21:04:51 GMT -5
What lookatthat said mineral oil is bogus. The images show stones tumbled well but not any polish to speak of. MY recommendation: #1 start them in fine (anything from 400-600 grit SiC) Run them a week 7 days do not change the speed. Put in a drop or 2 ol liquid soap in the fine grit. (fine grit is like flower and the soap keeps the grit from balling up by reducing surface tension in the water.) (use 3-4 table spoons of grit just this time to see if it works) #2 When you do #1 above make sure you have 1/4 to 1/2" stones even if you just go get some quartz pea (already rounded) gravel for a filler. Make sure the tumbler is 80% full at least #3 When tumbling in fine is done wash out and start polish (Assume aluminum oxide 3-4 tbl spoons) with a couple drops of soap for the same reasons as listed above. tumble for 1 week. you should have a good polish. There is no need to adjust the motor speed |
|
Deleted
Deleted Member
Member since January 1970
Posts: 0
|
Post by Deleted on Dec 14, 2017 20:38:21 GMT -5
rmf........you said no reason to adjust speed.........which speed do you recommend fast, medium or slow?
|
|
|
|
Post by rmf on Dec 14, 2017 21:54:19 GMT -5
I have never used that tumbler. All the rotary tumblers I have made or used are all single rpm. Try the medium and do some tests. If fast works on coarse grit it will probably work on polishing as well. The important part is how full and how cushioned the rocks are.
Keep notes of what you try. the goal is to first get one good batch. Then you know what works then play with the RPMs to see if it matters. I doubt it matters much as far a quality of polish.
|
|
|
|
Post by spiceman on Dec 14, 2017 22:06:46 GMT -5
I would say if your going to redo the cycle, don't redo stage 1. They look well rounded.
Maybe start with stage two or even stage three.
|
|
|
|
Post by youp50 on Dec 15, 2017 9:17:45 GMT -5
Wash everything after every stage. If you think it is clean enough, wash it again. Pay particular attention to the nooks and crannies of the barrel and lid.
|
|
 ??
??