|
|
Post by MsAli on Dec 28, 2017 8:00:53 GMT -5
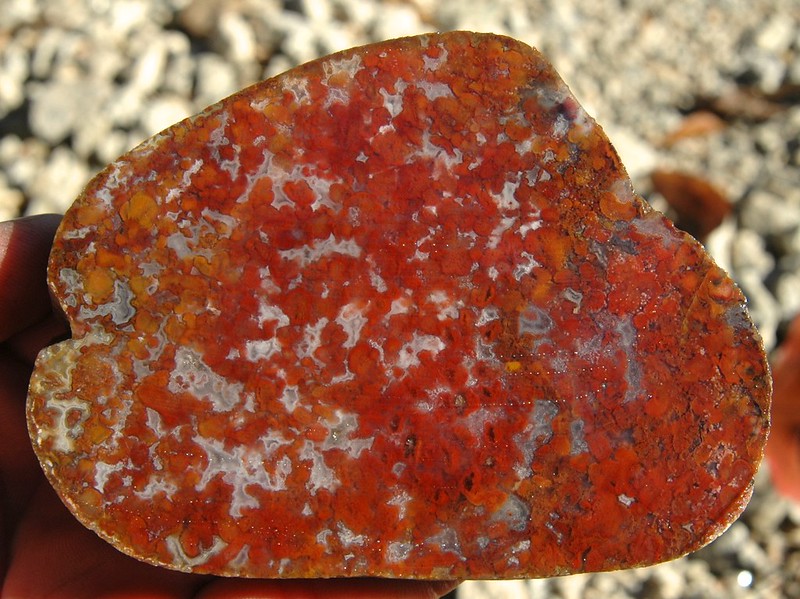
That 8 pound cobble is a nasty grainy agate Alison. Never thought it would polish. Nothing further from the truth. Though totally grainy it ended up being el primo tumbling material. It was a one of a kind, well, I found nothing else like it. It had a lot of white chalcedony fill which lightened it up. Instead of the typical darker moss and plume agates. About had to saw it, the hammer did a poor job breaking it into tumbles. One of my favorite finds on the Rio. It was about one foot long. Some sections orange, some red, some mixed. Nary a fracture cause it was tougher than a 10 cent steak. I sawed it into 1 inch thick slabs so the hammer could reduce the stubborn grainy monster. Notice how it is gemmy right up to the edge, telling how tough of a material it is. It resisted the external torture of the Rio. The condition of a Rio agate at the very edge is telling of how much mechanical abuse it can resist.  I have several family members that want this, but I'm keeping it. It's too pretty and special It took a little time to get the bit thru, but held up like a champ. No chips or cracks. Even when it flew off the bit and across the kitchen..... A piece of obsidian bust as soon as I got the bit thru. Glued it back together and it should be fine. Another one you gave me was even harder to get thru. Started out fine and then hit a spot that. Wasn' t sure i was gonna get past. Turned the water a reddish color. Iron??? I'll post a picture when I get a bail on it I like. It chipped a small piece around the hole where it was softer, but not too bad. I'm gonna need more bits for my dremel..... |
|
jamesp
Cave Dweller 
Member since October 2012
Posts: 36,611
|
Post by jamesp on Dec 28, 2017 8:41:02 GMT -5
|
|
|
|
Post by MsAli on Dec 28, 2017 8:47:27 GMT -5
Thank you😊
|
|
|
|
Post by pghram on Dec 28, 2017 23:46:25 GMT -5
Nicely done, it’s lovely.
Peace,
Rich
|
|
kevin24018
spending too much on rocks
 
Member since February 2012
Posts: 284
|
Post by kevin24018 on Dec 29, 2017 7:56:52 GMT -5
|
|
|
|
Post by MsAli on Dec 29, 2017 9:01:44 GMT -5
|
|
|
|
Post by Jugglerguy on Dec 29, 2017 9:06:45 GMT -5
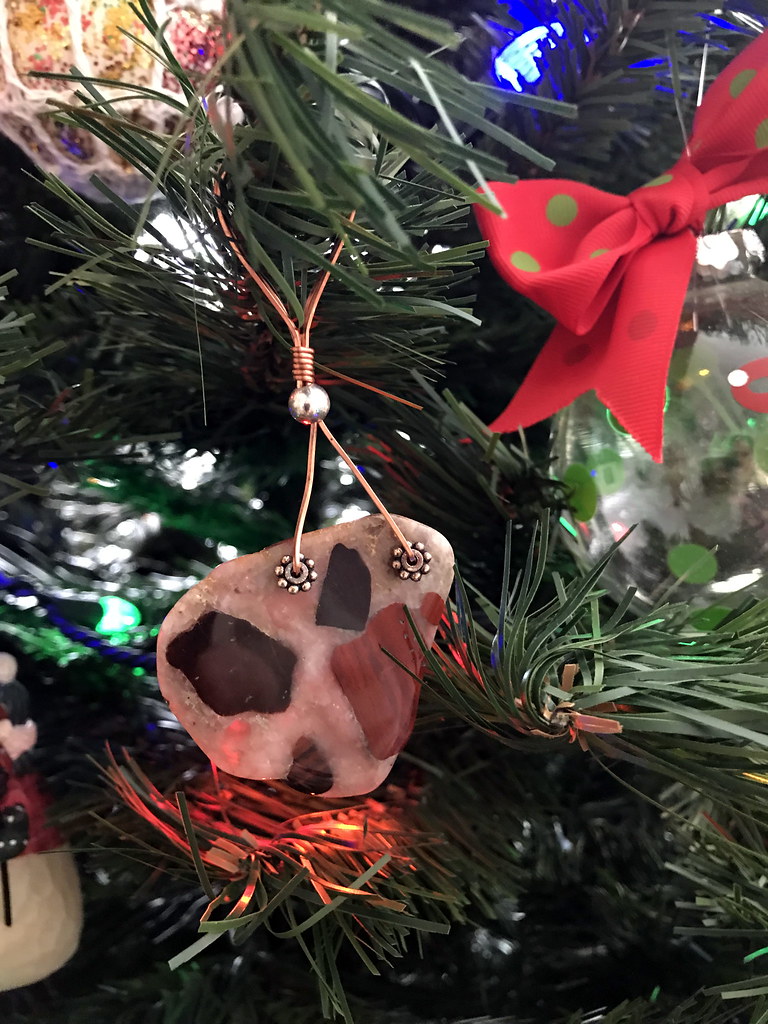
I was going to recommend what Kevin did, but I didn’t glue it on, it’s just on the wire.  |
|
kevin24018
spending too much on rocks
 
Member since February 2012
Posts: 284
|
Post by kevin24018 on Dec 29, 2017 9:30:15 GMT -5
I have, now if the nightmares will just stop.......  another option would be some automotive paint touch up pen thingy if you can get a close match that is. |
|
|
|
Post by Drummond Island Rocks on Dec 29, 2017 10:02:30 GMT -5
I was going to recommend what Kevin did, but I didn’t glue it on, it’s just on the wire.  I just used that exact same style for some pudding stone Christmas ornaments this year. Pretty simple. Chuck |
|
|
|
Post by Jugglerguy on Dec 29, 2017 10:32:00 GMT -5
I was going to recommend what Kevin did, but I didn’t glue it on, it’s just on the wire.  I just used that exact same style for some pudding stone Christmas ornaments this year. Pretty simple. Chuck Did you cut the rocks into Christmas shapes? I hadn’t really thought to display my rocks on the tree. |
|
|
|
Post by MsAli on Dec 29, 2017 10:47:53 GMT -5
I was going to recommend what Kevin did, but I didn’t glue it on, it’s just on the wire.  I like that a lot-what a unique way to display them. |
|
|
|
Post by rockjunquie on Dec 29, 2017 10:49:06 GMT -5
I've done that, too. I really like the look.
I have a beautiful pair of bustimite cabs for earrings that are too small to do this. I've been wondering what to do with them. They have a tiny hole and one is a little off center. I may just wrap them and cover the holes.
|
|
|
|
Post by MsAli on Dec 29, 2017 10:59:54 GMT -5
Making a run to the local craft store tonight to see if they have some of the beads for me to try. I broke a piece of Obsidian that I glued back to together. I did a good job of repairing it, but this might help cover that spot I glued??
|
|
|
|
Post by Drummond Island Rocks on Dec 29, 2017 11:00:01 GMT -5
I just used that exact same style for some pudding stone Christmas ornaments this year. Pretty simple. Chuck Did you cut the rocks into Christmas shapes? I hadn’t really thought to display my rocks on the tree. I just had a couple really nice thin (.100") tumbled shapes that had been on my workbench for a long time. The thought popped in my head to try an ornament. My wife stole my practice one that was pretty crude and I had used copper wire just because it was practice. When we take the tree down I will steal it back and do it right.  Chuck |
|
Tommy
Administrator 
Member since January 2013
Posts: 12,989
|
Post by Tommy on Dec 29, 2017 13:34:53 GMT -5
Hehehehe I'm gonna have so much fun with my new drill Mental note....rock will go flying at a high rate of speed if not held down securely Back to drilling holes..... Very nice! Regarding flying rocks - if you're feeling crafty you can make a little jig to hold them flat while you operate. Pressuring them flat against a flat surface also cuts way down on blown out back holes. I built this little doohicky a while back out of poplar wood top and plywood base and it's been a real game changer. Up till I started using it I couldn't drill a straight hole to save my life. Total cost of parts was about $20. I had the sheetmetal laying around so I bent and built a tray and sealed the corners with JB Weld epoxy - and use a sacrificial flat slab under the item being drilled. There's lots of things you could use instead - like a plastic lid or a shallow rectangle tupperware.  |
|
|
|
Post by MsAli on Dec 29, 2017 13:43:14 GMT -5
Hehehehe I'm gonna have so much fun with my new drill Mental note....rock will go flying at a high rate of speed if not held down securely Back to drilling holes..... Very nice! Regarding flying rocks - if you're feeling crafty you can make a little jig to hold them flat while you operate. Pressuring them flat against a flat surface also cuts way down on blown out back holes. I built this little doohicky a while back and it's been a game changer. Up till I started using it I couldn't drill a straight hole to save my life. Total cost of parts was about $20. I had the sheetmetal laying around so I bent and built a tray and sealed the corners with JB Weld epoxy - but there's lots of things you could use instead - like a plastic lid or a shallow rectangle tupperware. It flung so far it took me forever to find it, my apartment isn't that big and somehow it was in the living room. Good thing it didn't smack the window. Thank you for the idea, I was trying to figure out how to clamp it down flat. |
|
|
|
Post by accidentalrockhound on Dec 29, 2017 17:01:12 GMT -5
Great job. Bet it was fun to watch the progress from rough to finished piece. Be glad the rock did not hit you it would have hurt. Keep up the good work.
|
|
|
|
Post by accidentalrockhound on Dec 29, 2017 17:04:11 GMT -5
Did you cut the rocks into Christmas shapes? I hadn’t really thought to display my rocks on the tree. I just had a couple really nice thin (.100") tumbled shapes that had been on my workbench for a long time. The thought popped in my head to try an ornament. My wife stole my practice one that was pretty crude and I had used copper wire just because it was practice. When we take the tree down I will steal it back and do it right.  Chuck A real rock hanging on a fake tree?  |
|
|
|
Post by Drummond Island Rocks on Dec 29, 2017 20:31:37 GMT -5
That is a nice pendant MsAli. Tumbling after drilling the hole would help. For holding pieces during drilling there is a product called Jett Set. You can mold it to the shape of your rock. It is also reusable many times. contenti.com/jett-sett-basic-tradeChuck |
|
|
|
Post by MsAli on Dec 29, 2017 20:37:06 GMT -5
That is a nice pendant MsAli . Tumbling after drilling the hole would help. For holding pieces during drilling there is a product called Jett Set. You can mold it to the shape of your rock. It is also reusable many times. contenti.com/jett-sett-basic-tradeChuck Thank you Chuck!! That would be so much easier than me attempting to build something. |
|


