Post by barclay on Feb 18, 2018 23:09:35 GMT -5
Back in November I was talking with a good friend and found that she was going through some tough times so I offered to make pendants for her and her daughter. I asked what colors and materials were their favorites. She liked amethyst (her birthstone) and dark blue. Her daughter liked pink. I had a few different materials that fit the bill so I commenced planning. I thought about combining materials and making a composite piece. This is called intarsia. I had never done intarsia before, but heck, I have been doing lapidary for about 20 years now. How hard could it be. (*Ominous music plays*). Thus began the longest running lapidary project I have ever set out to do. I had a nice trapezoid of chevron amethyst already cut. Chevron amethyst is a combination of quartz and amethyst (quartz colored by iron). I thought about grinding it down to a rectangle, but decided to embrace the asymetry. The amethyst also has a lot going on inside (picture #1). I had some good lapis from Afganistan. I think the deep saturated medium blue is much prettier than the dark blue. The iron pyrite (fool's gold) bands also added to the linearity of the overall piece. The lapis would be a rectangular border around the amethyst. Originally i thought about putting lapis on the top, but I decided I wanted a lighter color as a counter point so I used some emerald for the top stone. Picture #2 is the original mock up. My friend said she liked it and away I went.
The flat grinder i have is basically a record player with different sanding grit records and i was grinding everything by hand. I discovered that gravity is very reliable. When I tried to clamp the lapis on the sides it kept sliding towards the top of the stone. If the sides of the stone were not exactly square and flat things started sliding. I learned to clamp by hand. I used 5 minute epoxy so I thought things would go quickly. Wishful thinking. The label said it sets in 1 hour, but sometimes the glue was not sticking. At this point I put my sailor's vocabulary to good use shall we say. 😁 When that did not help I tried reading ALL of the directions on the epoxy. It sets in 1 hour, but it cures in 24 hours. Funny how reading the directions makes things work better. Picture #3 is another shot of the mock up after polishing the center stone. Love that dark purple. I decided just gluing rocks together wasn't giving me the look I wanted so I decided to put strips of brass between the stones. Of course when you cut sheet metal it bends so I used the clamps to flatten it out again. Picture #4 are the parts for the first stage. Since I was doing all of the grinding by hand I had to glue each strip of lapis or emerald on and then grind it flush with the next side. I was able to clamp some of the stages which saved my fingers (pictures #5, #6). I got the lapis glued on the two long sides of the stone and ground it flush with the top and bottom (picture #7, #8). Next it was time to glue the brass on the top and bottom (pictures #9, #10). Next I added the lapis on the bottom and emerald on the top. One piece of lapis cracked so I needed to cut another. I wasn't happy with the one large piece of emerald so I cut two smaller stones and put brass between them. Finally it was all glued together (picture #11) and I could work on grinding the face perfectly flat and polishing it. I had to be careful not to over grind the soft lapis while grinding the harder emerald and amethyst. That took some time and a few finger nails. I took picture #12 before I finished polishing the stone and the final cleaning. Lapis usually does not take a mirror shine, but I wanted to get a really good shine on the amethyst so you can see what his going on inside. To do this I got some diamond polishing compound on a felt bit on a dremel tool and polished the center stone. I backed the whole piece with sheet brass to give the piece more strength and reflect light back through the amethyst. I started this piece in late November and finished in late January. Between the holidays and a family funeral this was a busy time to get anything done. My friend was very happy with the piece and if the customer is satisfied that is all that really matters.
Original fit up
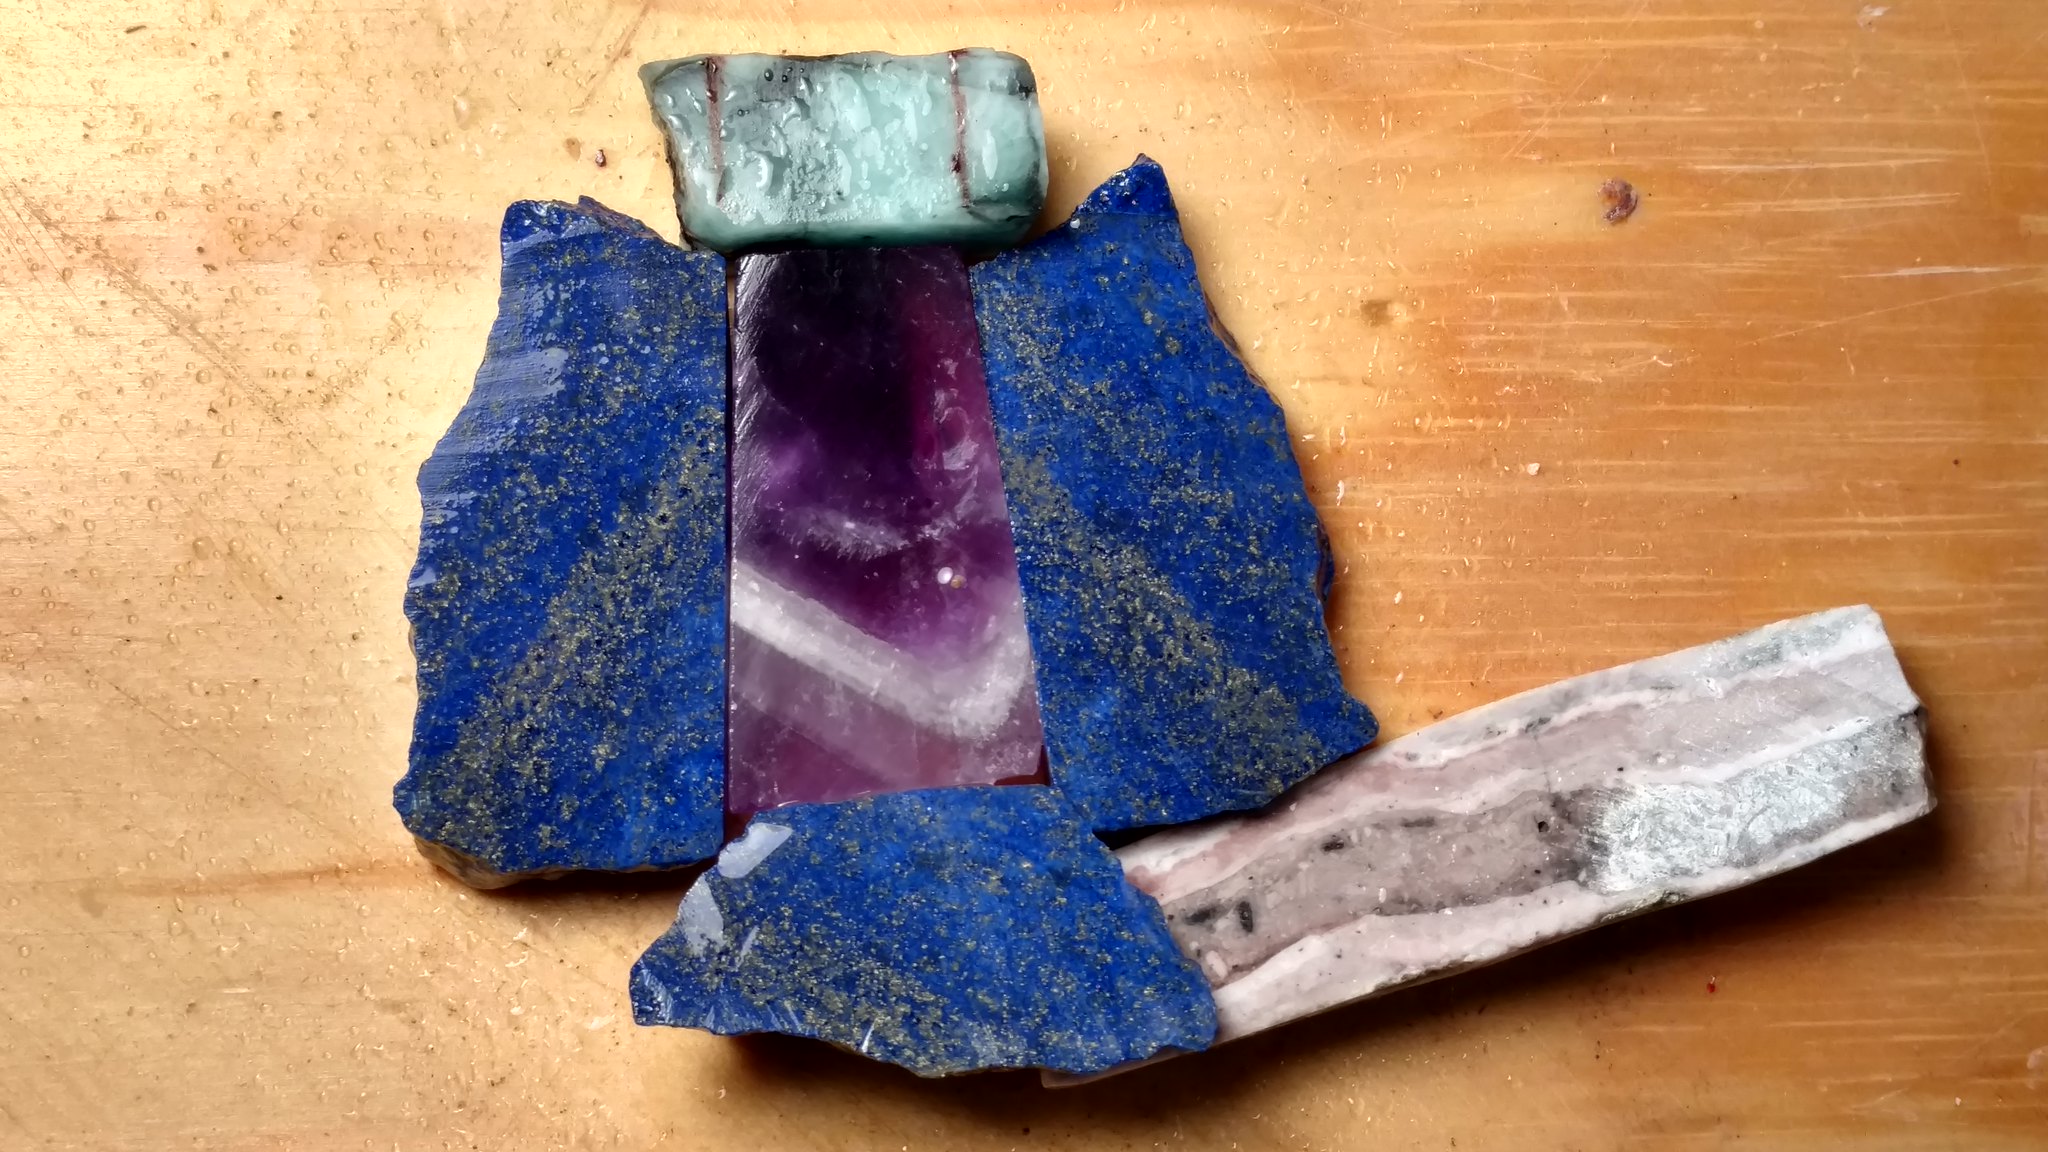 IMG_20171224_122321129_HDR by Paul Clifford, on Flickr
Amethyst center
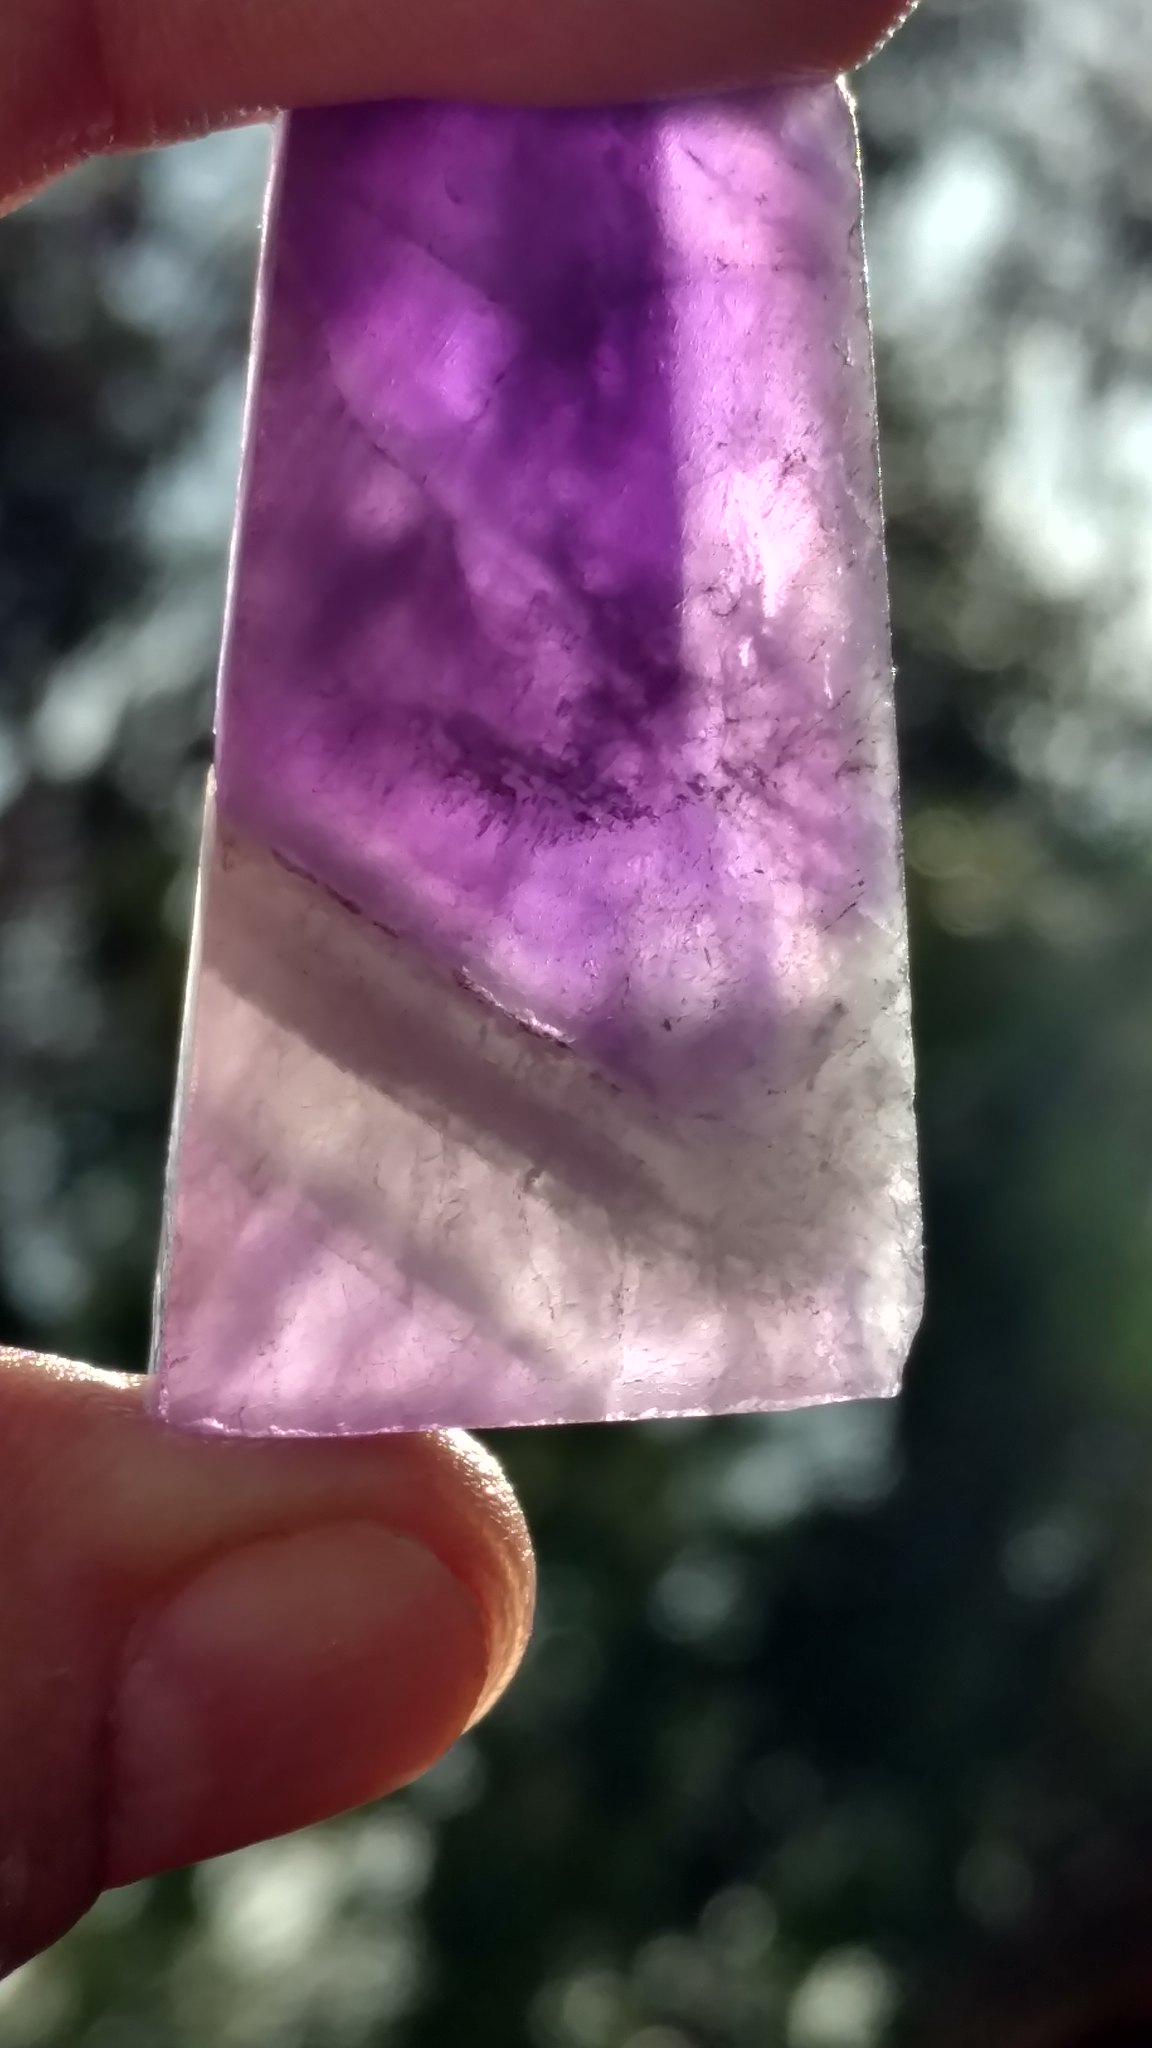 IMG_20171223_130733239_HDR by Paul Clifford, on Flickr
First pieces
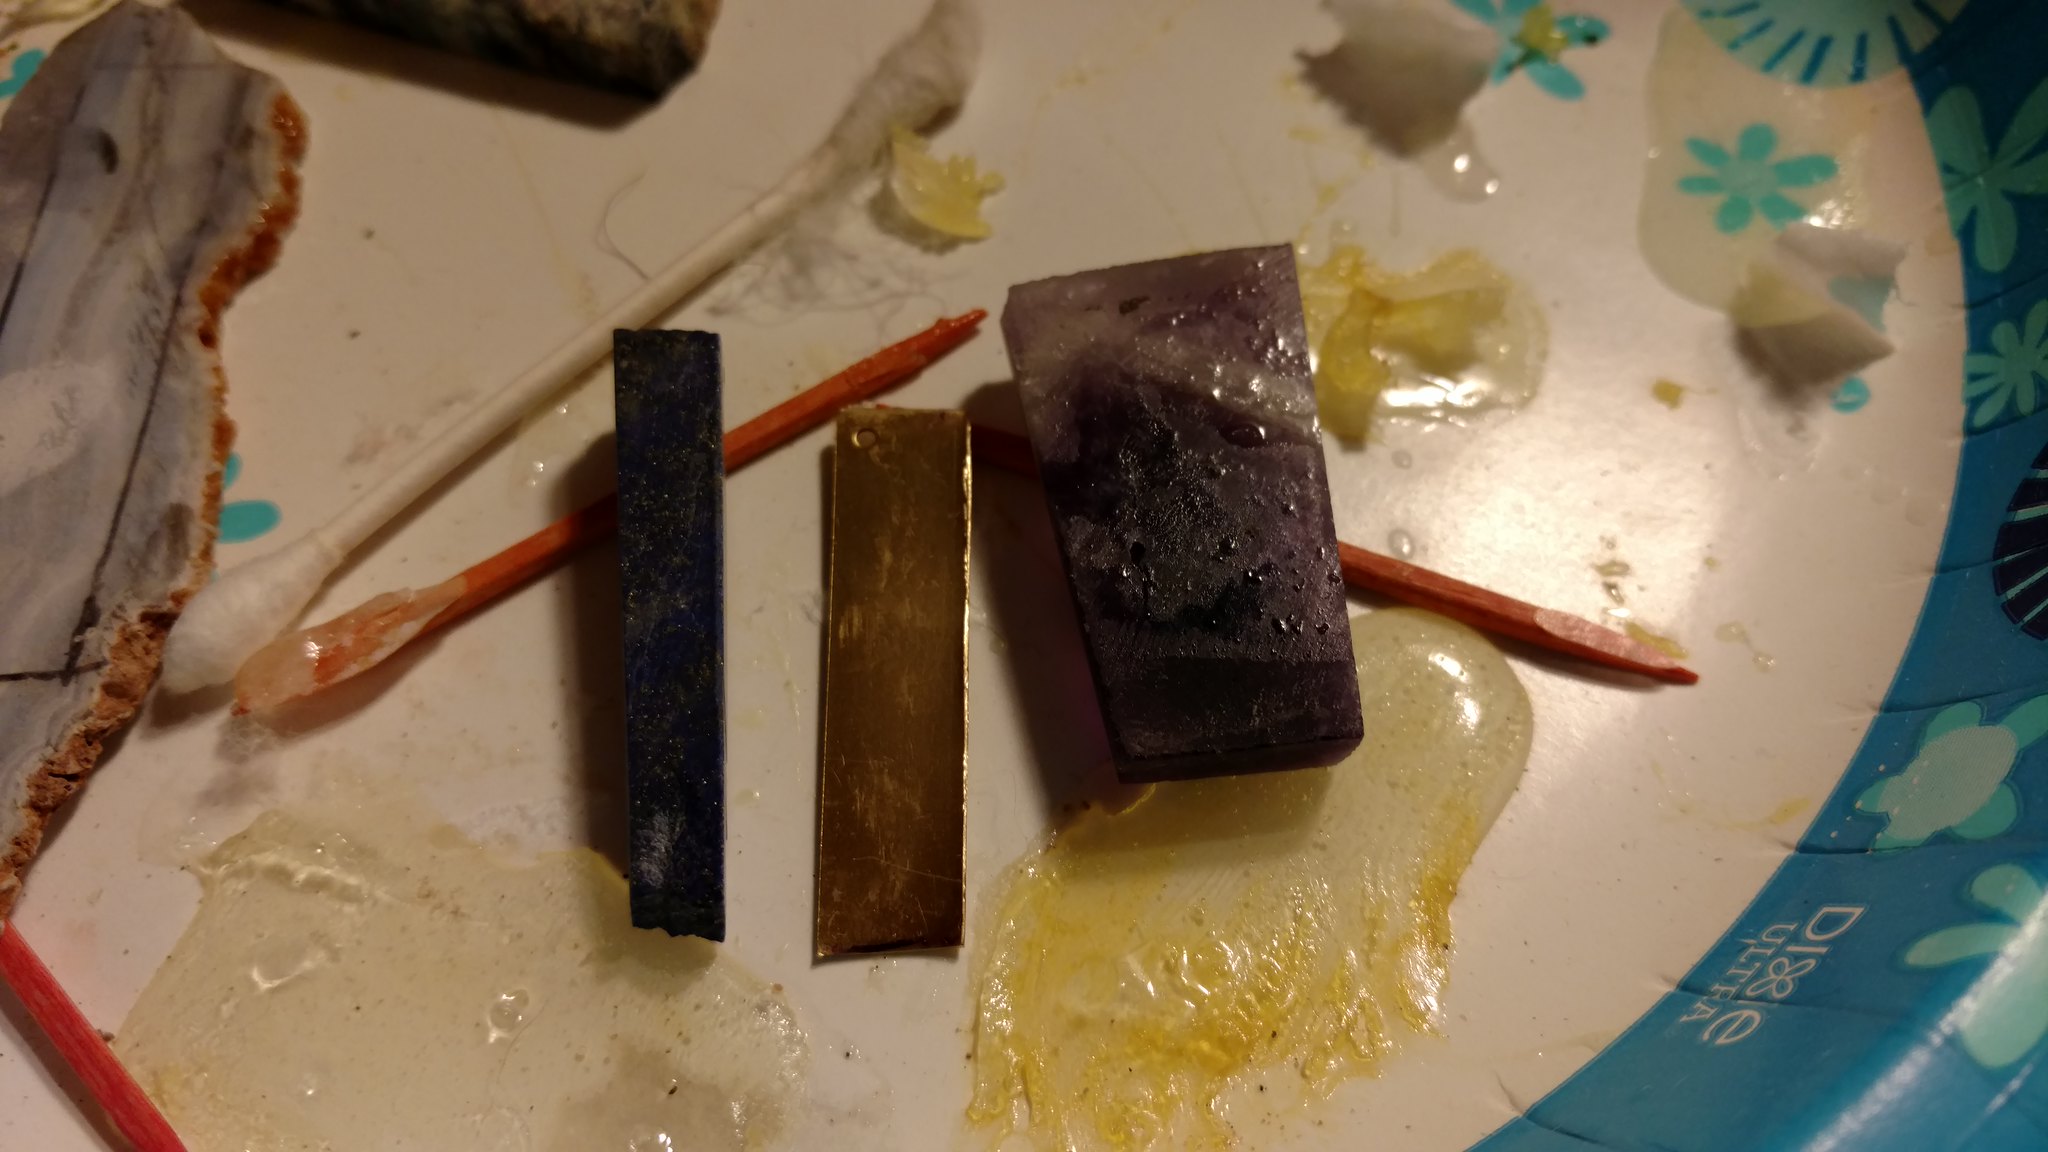 IMG_20171229_204005838 by Paul Clifford, on Flickr
First glue-ups
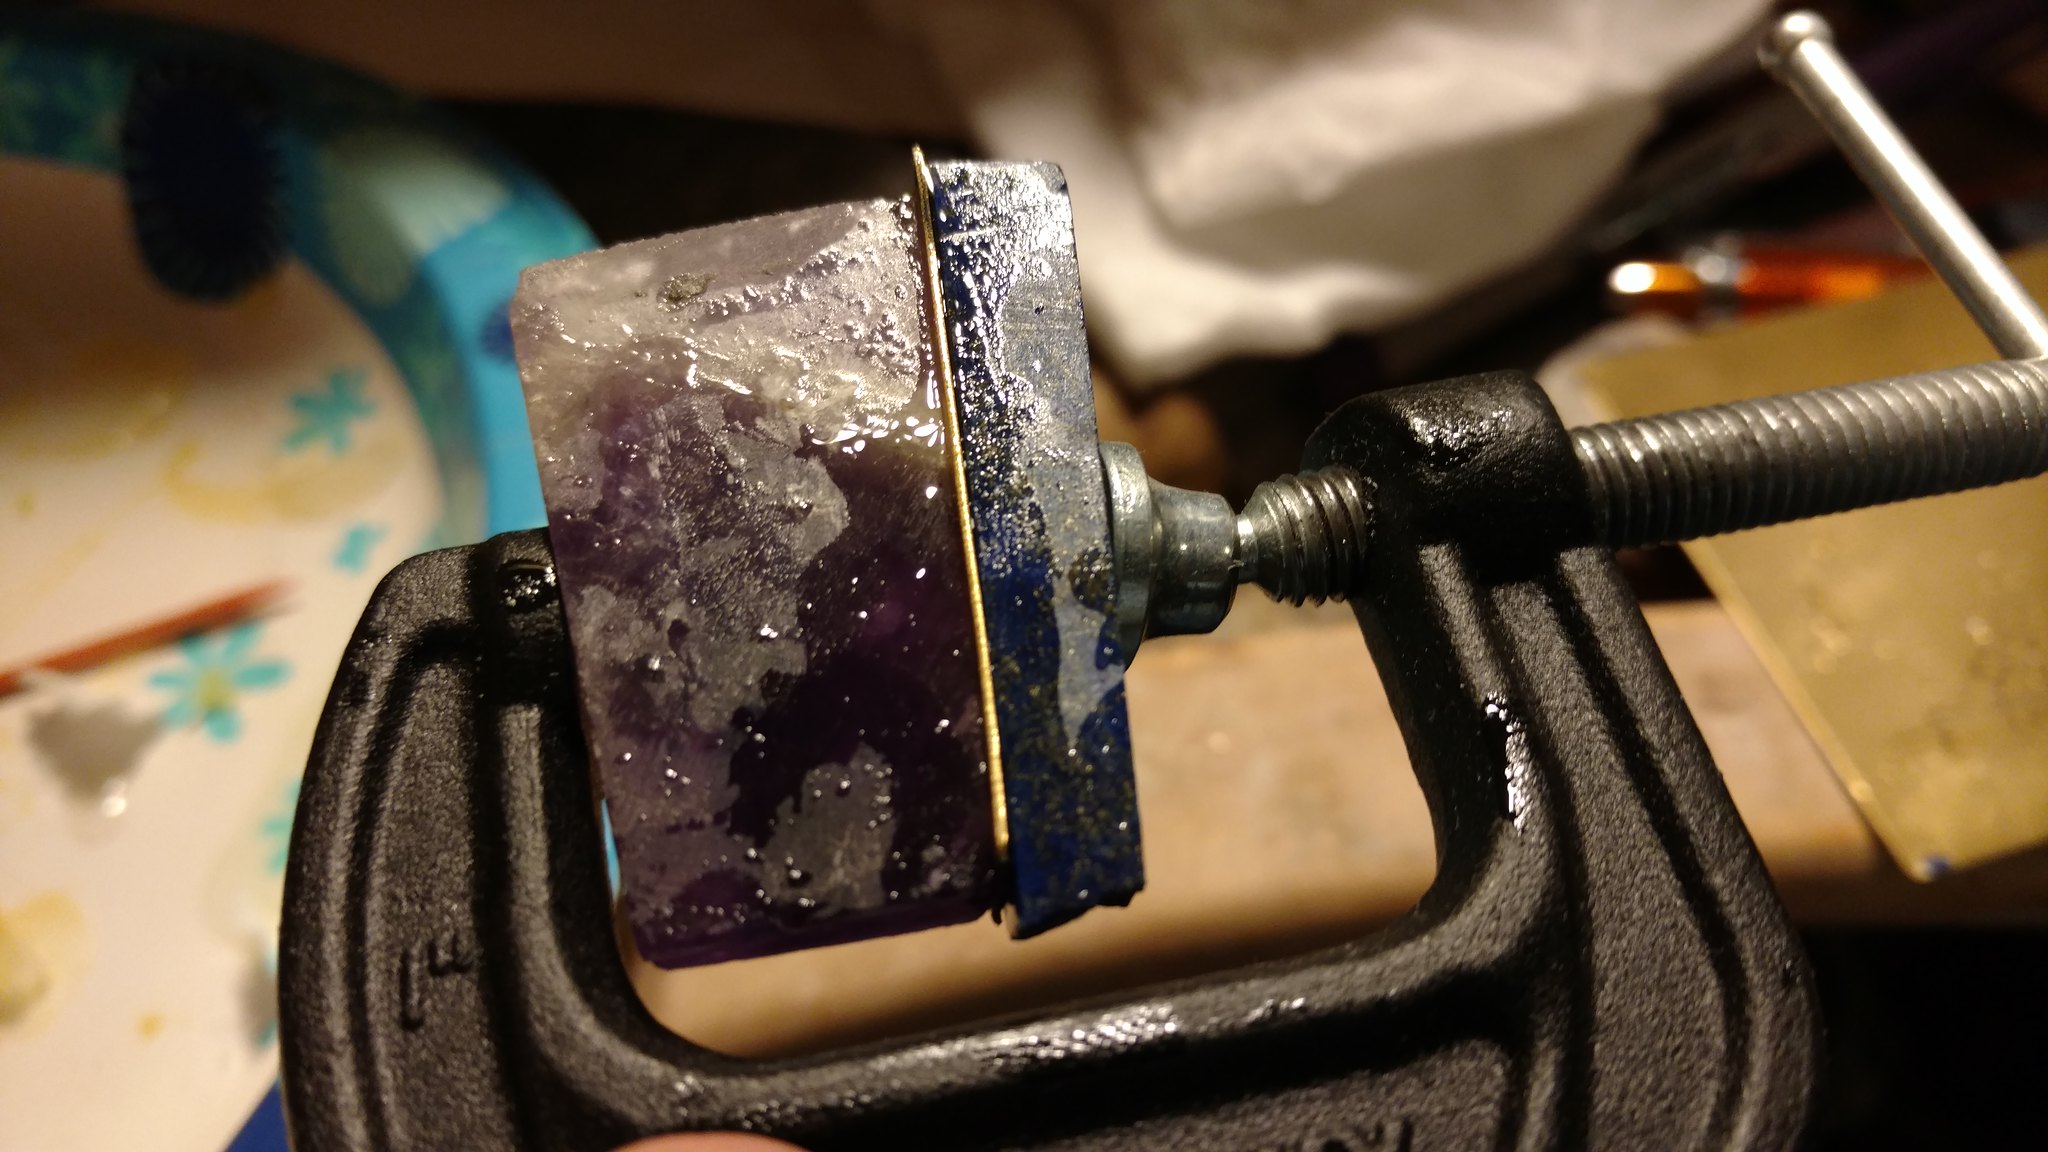 IMG_20171229_205820199 by Paul Clifford, on Flickr
Two lapis sides added
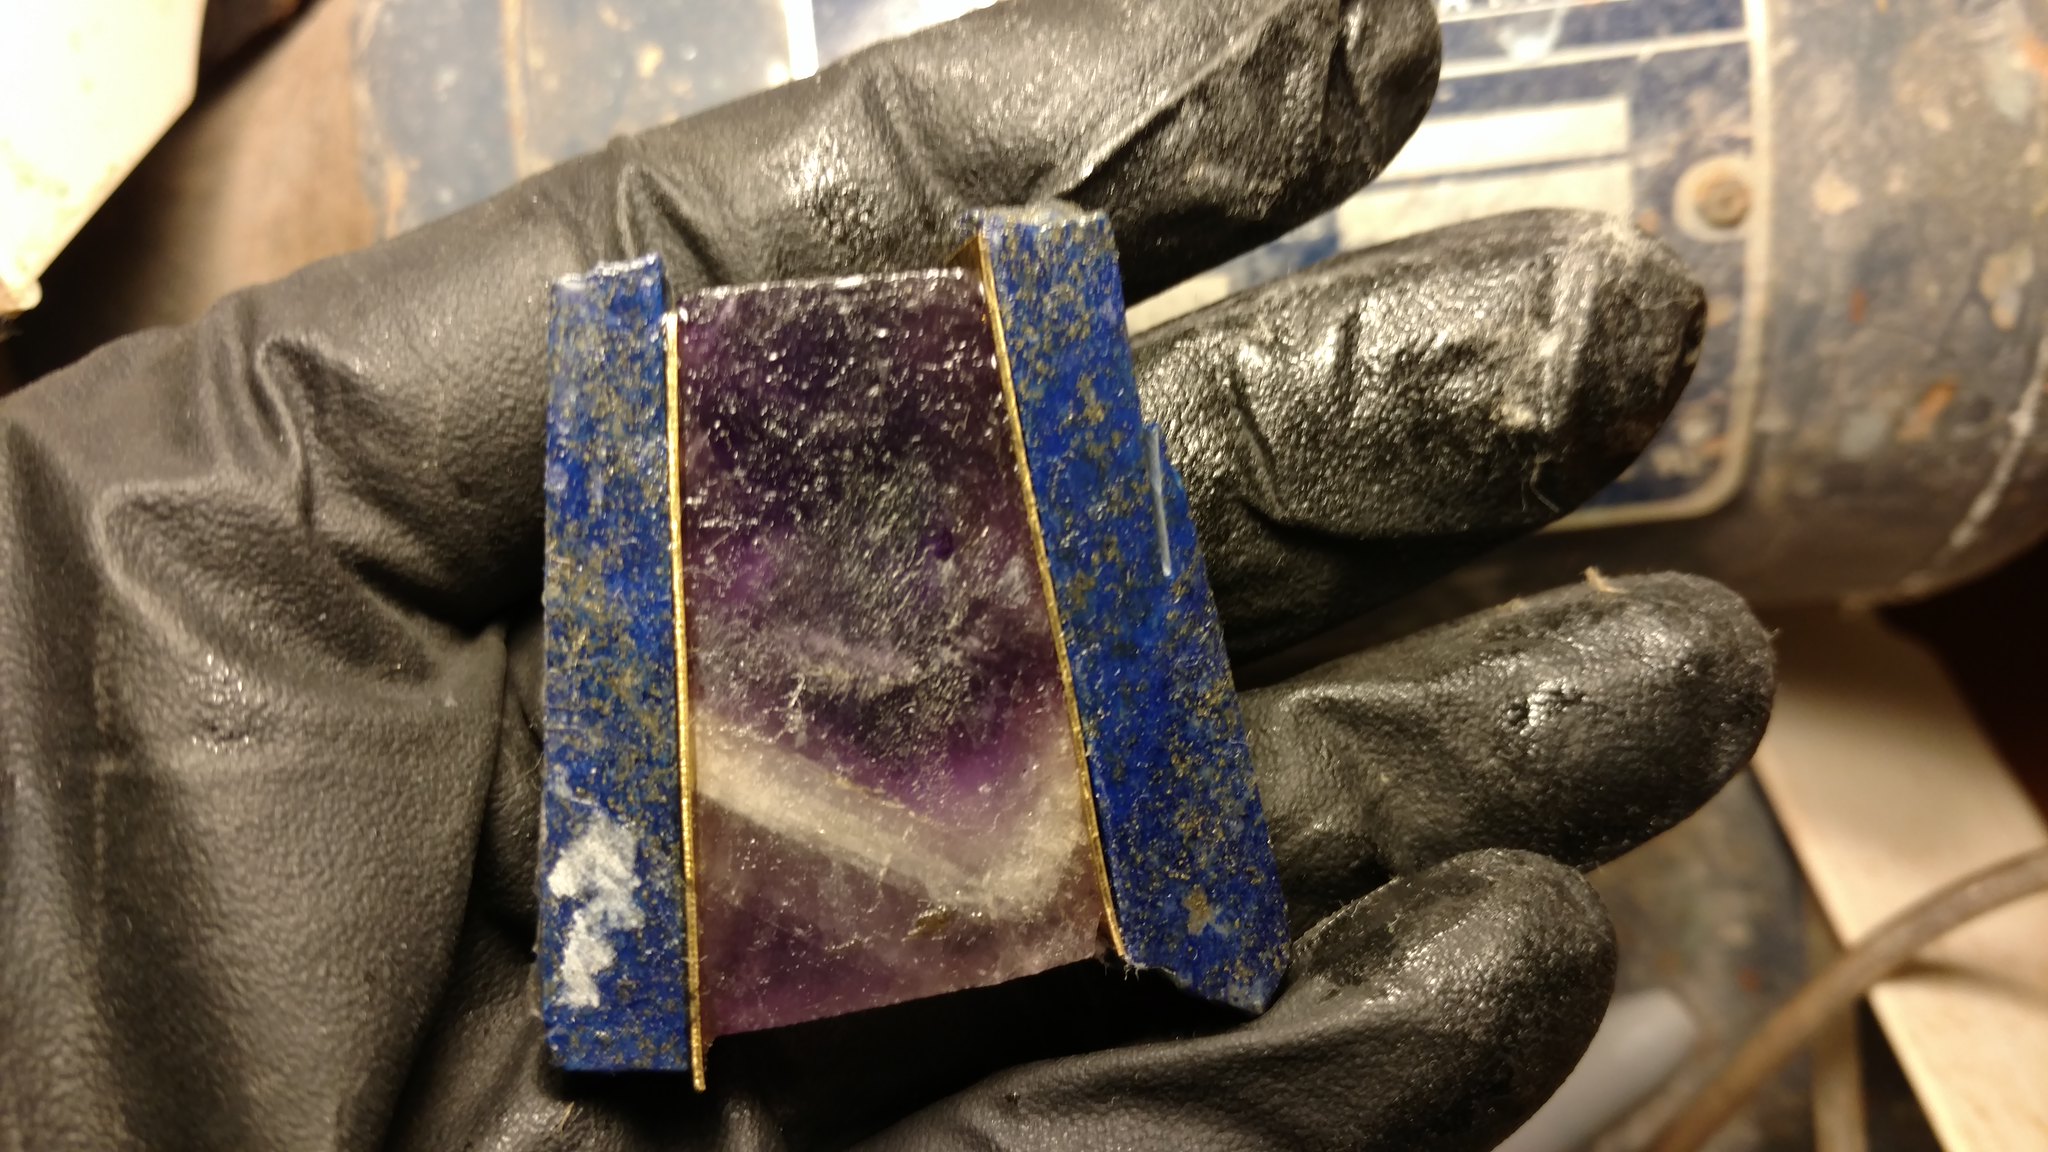 IMG_20171230_175607520 by Paul Clifford, on Flickr
Top and bottom ground flat
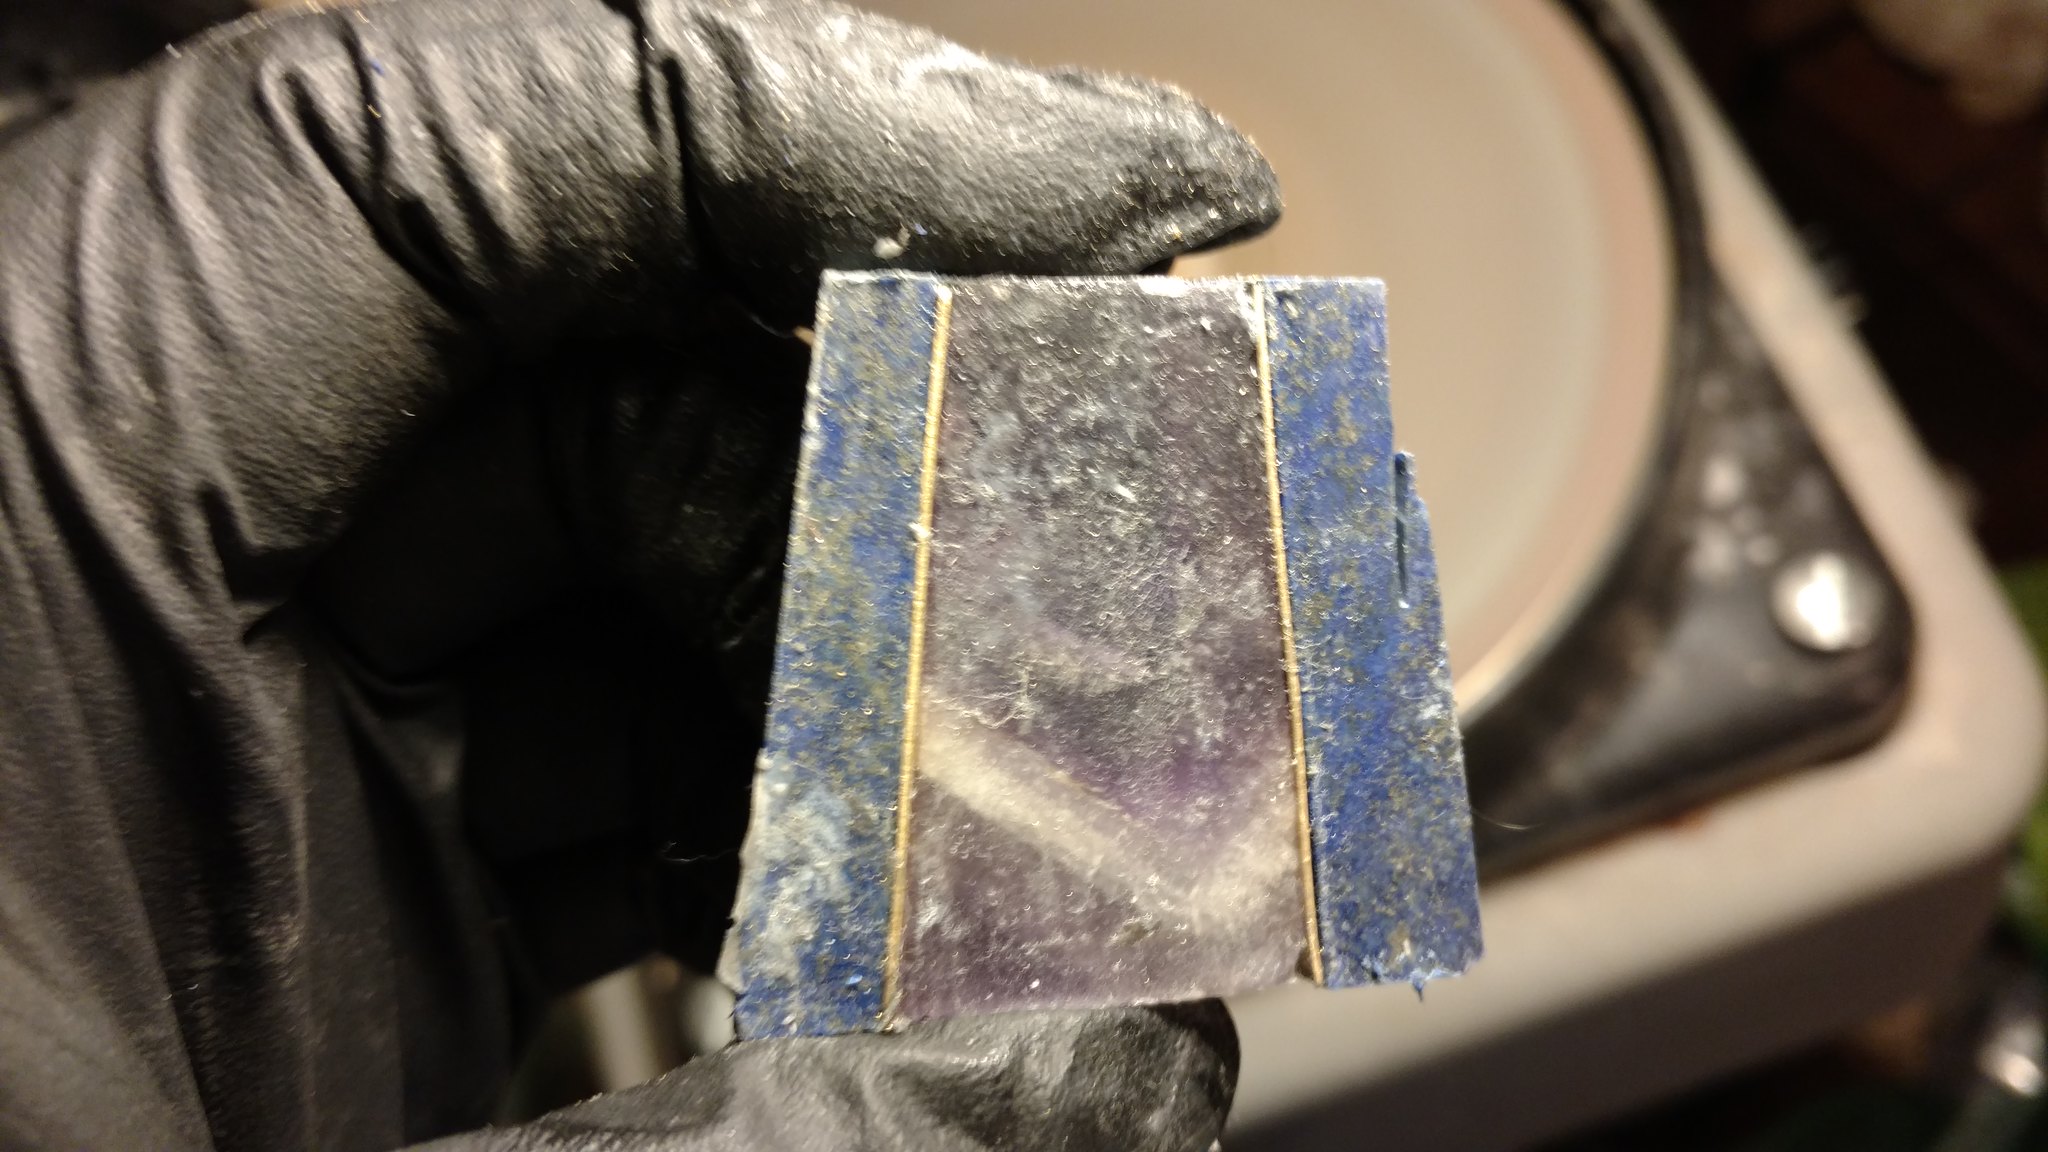 IMG_20171230_181007801 by Paul Clifford, on Flickr
Top and bottom brass strips added
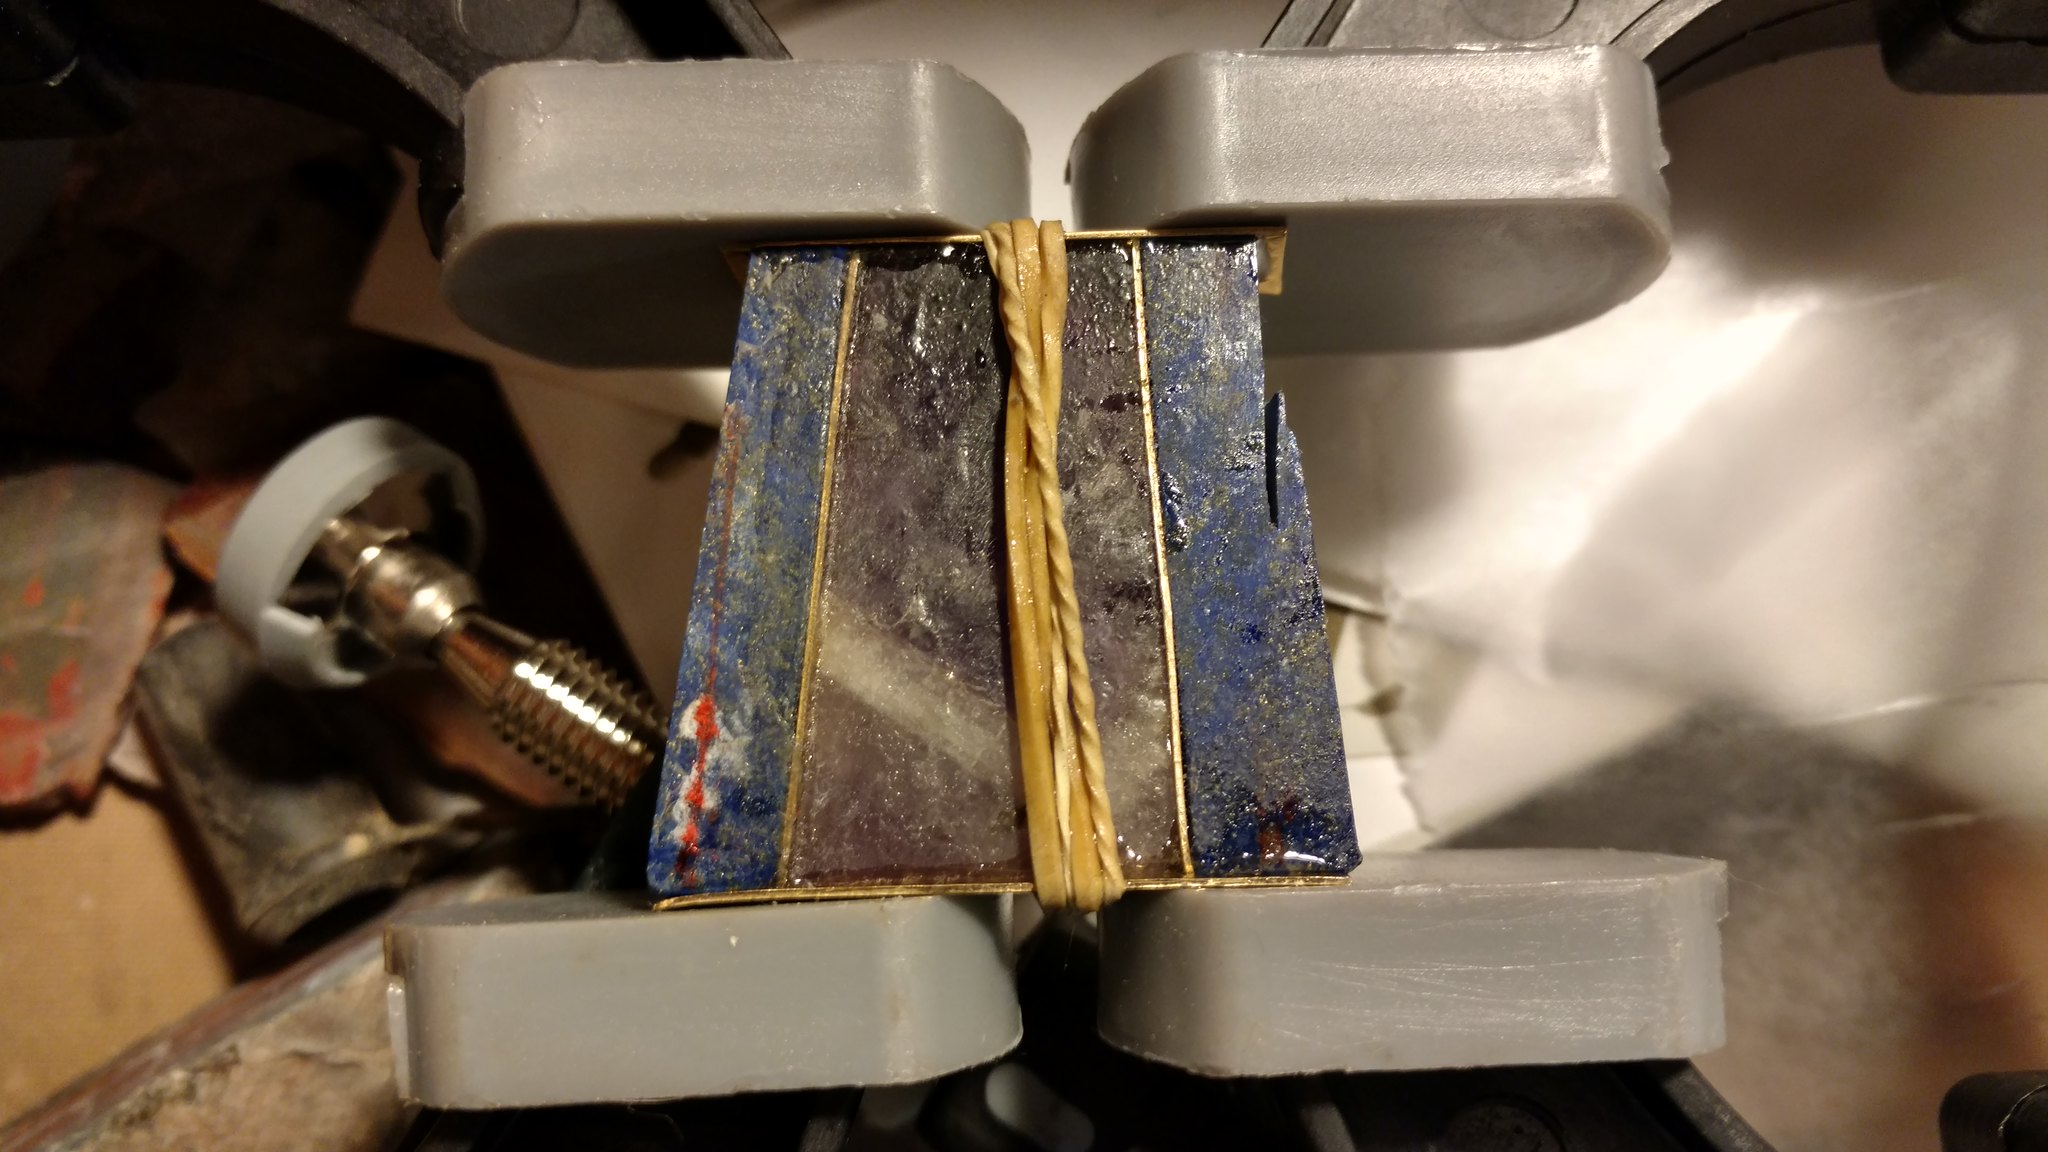 IMG_20171230_184430031_HDR by Paul Clifford, on Flickr
Final piece
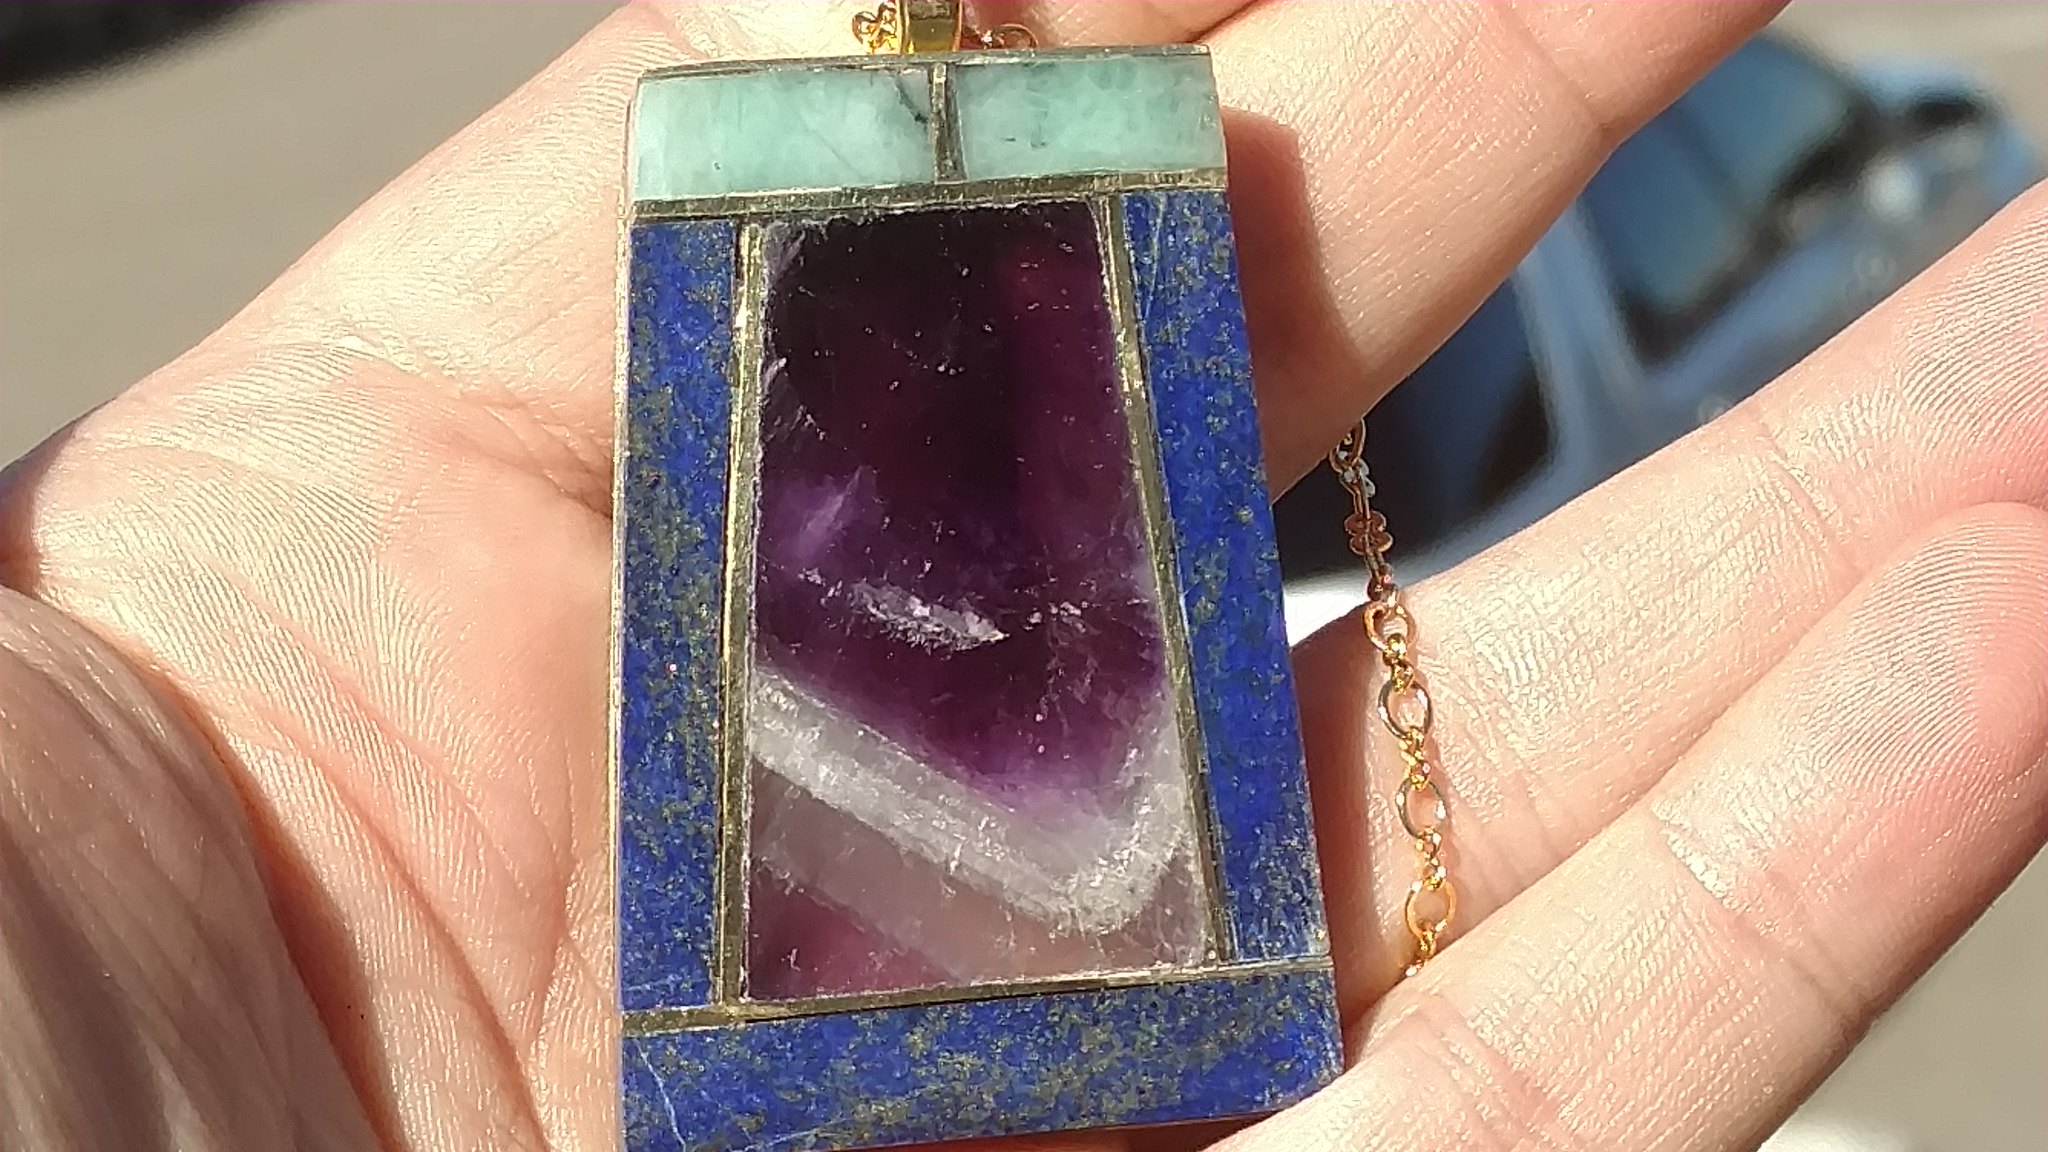 IMG_20180129_110719892 by Paul Clifford, on Flickr
The flat grinder i have is basically a record player with different sanding grit records and i was grinding everything by hand. I discovered that gravity is very reliable. When I tried to clamp the lapis on the sides it kept sliding towards the top of the stone. If the sides of the stone were not exactly square and flat things started sliding. I learned to clamp by hand. I used 5 minute epoxy so I thought things would go quickly. Wishful thinking. The label said it sets in 1 hour, but sometimes the glue was not sticking. At this point I put my sailor's vocabulary to good use shall we say. 😁 When that did not help I tried reading ALL of the directions on the epoxy. It sets in 1 hour, but it cures in 24 hours. Funny how reading the directions makes things work better. Picture #3 is another shot of the mock up after polishing the center stone. Love that dark purple. I decided just gluing rocks together wasn't giving me the look I wanted so I decided to put strips of brass between the stones. Of course when you cut sheet metal it bends so I used the clamps to flatten it out again. Picture #4 are the parts for the first stage. Since I was doing all of the grinding by hand I had to glue each strip of lapis or emerald on and then grind it flush with the next side. I was able to clamp some of the stages which saved my fingers (pictures #5, #6). I got the lapis glued on the two long sides of the stone and ground it flush with the top and bottom (picture #7, #8). Next it was time to glue the brass on the top and bottom (pictures #9, #10). Next I added the lapis on the bottom and emerald on the top. One piece of lapis cracked so I needed to cut another. I wasn't happy with the one large piece of emerald so I cut two smaller stones and put brass between them. Finally it was all glued together (picture #11) and I could work on grinding the face perfectly flat and polishing it. I had to be careful not to over grind the soft lapis while grinding the harder emerald and amethyst. That took some time and a few finger nails. I took picture #12 before I finished polishing the stone and the final cleaning. Lapis usually does not take a mirror shine, but I wanted to get a really good shine on the amethyst so you can see what his going on inside. To do this I got some diamond polishing compound on a felt bit on a dremel tool and polished the center stone. I backed the whole piece with sheet brass to give the piece more strength and reflect light back through the amethyst. I started this piece in late November and finished in late January. Between the holidays and a family funeral this was a busy time to get anything done. My friend was very happy with the piece and if the customer is satisfied that is all that really matters.
Original fit up
 IMG_20171224_122321129_HDR by Paul Clifford, on Flickr
Amethyst center
 IMG_20171223_130733239_HDR by Paul Clifford, on Flickr
First pieces
 IMG_20171229_204005838 by Paul Clifford, on Flickr
First glue-ups
 IMG_20171229_205820199 by Paul Clifford, on Flickr
Two lapis sides added
 IMG_20171230_175607520 by Paul Clifford, on Flickr
Top and bottom ground flat
 IMG_20171230_181007801 by Paul Clifford, on Flickr
Top and bottom brass strips added
 IMG_20171230_184430031_HDR by Paul Clifford, on Flickr
Final piece
 IMG_20180129_110719892 by Paul Clifford, on Flickr


