Tommy
Administrator 
Member since January 2013
Posts: 12,989
|
Post by Tommy on Oct 22, 2018 18:15:54 GMT -5
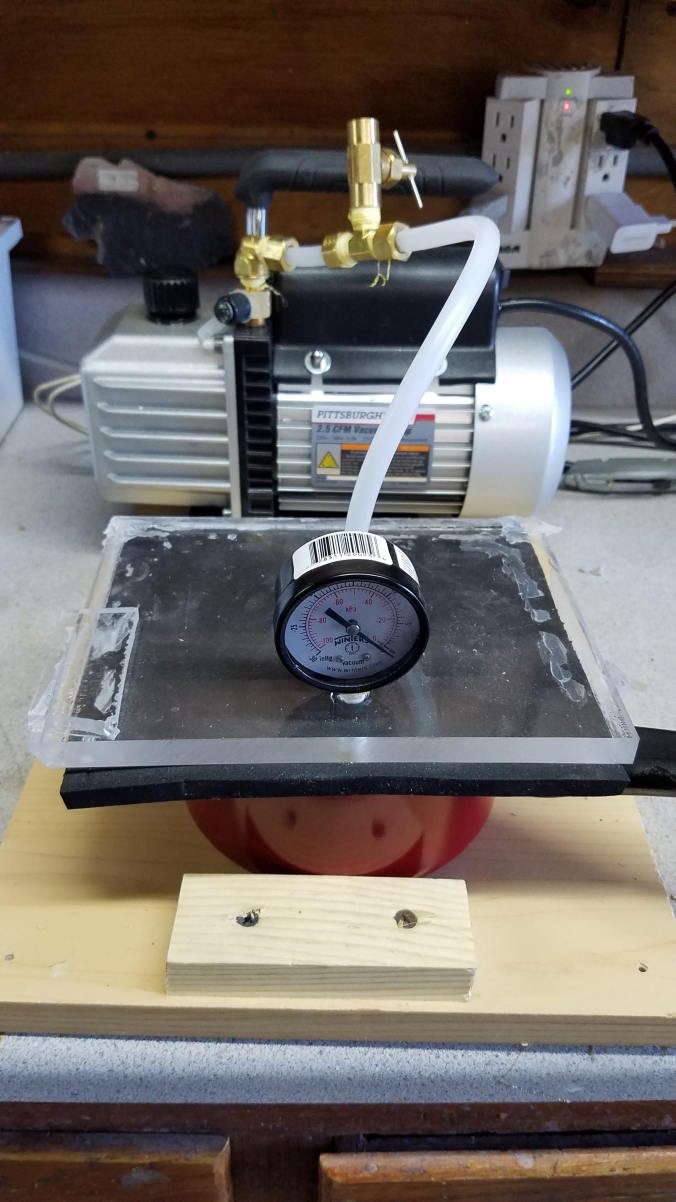
Can you post some pictures? This thread is fine if you don't want to start a new one. I'm curious how your project came out, too. Embarrassingly my project was a train wreck from the start. Typical me I end up spending more money overall than I could have just bought a ready to use pump and chamber off ebay. Two chambers exploded in dramatic fashion and now I'm down to holding down a broken plexiglass lid on top of a sauce pan with a layer of foam in between ... it's not very photogenic but it's working I guess. I'll post some pictures as soon as I can. |
|
|
|
Post by rockjunquie on Oct 22, 2018 18:23:02 GMT -5
Can you post some pictures? This thread is fine if you don't want to start a new one. I'm curious how your project came out, too. Embarrassingly my project was a train wreck from the start. Typical me I end up spending more money overall than I could have just bought a ready to use pump and chamber off ebay. Two chambers exploded in dramatic fashion and now I'm down to holding down a broken plexiglass lid on top of a sauce pan with a layer of foam in between ... it's not very photogenic but it's working I guess. I'll post some pictures as soon as I can. OK. Sorry it was such a PITA. But, at least you got some done.  |
|
Tommy
Administrator 
Member since January 2013
Posts: 12,989
|
Post by Tommy on Oct 22, 2018 20:02:01 GMT -5
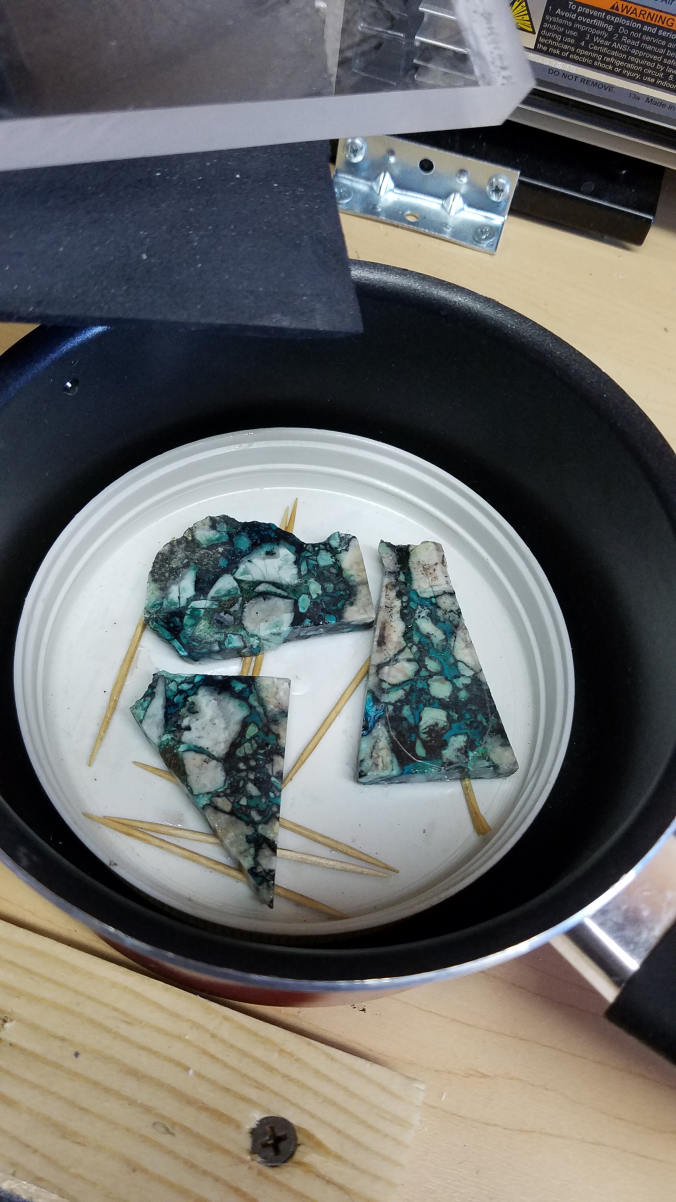
OK. Sorry it was such a PITA. But, at least you got some done.  No worries - fun project and not a PITA but it turned into a series of frightening failures but ultimately resulted in a half-assed working solution so    These are some preforms of chrysocolla in quartz. These were given to me recently by a a cabbing friend who gave up trying to work on it because it was too crumbly. I have hopefully stabilized it and I'm waiting for it to cure.  |
|
Deleted
Deleted Member
Member since January 1970
Posts: 0
|
Post by Deleted on Oct 23, 2018 12:40:41 GMT -5
On another note.... when selling a cab that has been treated this way, is it appropriate to just call it sealed? @rocks2dust ? Anyone else.... Yes, "stabilized" seems to be popular in the rock world, particularly for turquoise. However, in jewelry/gemology terms, this treatment would be called "filling" and/or "impregnation." For your piece "epoxy resin filled" or "epoxy resin impregnated" would suffice to describe the treatment. Specifying epoxy resin as the filler in the treatment notice alerts the buyer of considerations to keep in mind in cleaning, handling, repairing or recutting. In cases of rarer material, the type of filler is also a consideration if they decide to reverse the treatment at some future point due to damage, degradation of the filler, personal preference, yellowing (even "non-yellowing" materials eventually lose UV inhibitor chemical components and will brown or yellow), restoration, etc. I wish there was a standard way of passing on this information with the stone, as it often quickly gets lost. Some nasty/toxic surprises may await an unsuspecting jeweler who applies a torch near of these stones. |
|
|
|
Post by Rockoonz on Oct 23, 2018 17:22:17 GMT -5
With all due respect, anyone who doesn't remove the stone before repairing jewelry, with few exceptions, is not a jeweler.
Anyone working on anything they didn't make themselves, should be taking extra precautions. My friend took a vintage bracelet into his jewelers, only to find that it had been soldered with lead solder, common practice 70-80 years ago.. He puts on a full respirator before he even pries the stones out when doing repairs.
|
|
|
|
Post by barrelcactusaddict on Dec 14, 2021 16:16:01 GMT -5
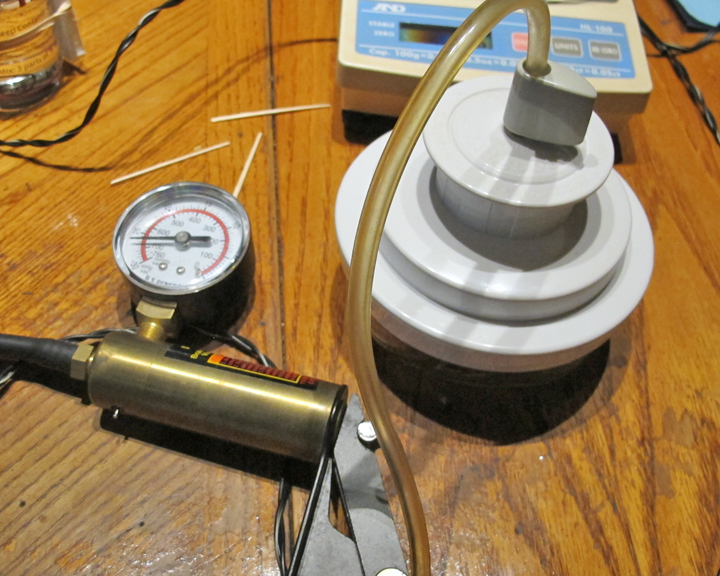
I ordered the 50.00 bottle. I'm sure it will last forever. My first batch, I mixed 2g to .66g and I had plenty to throw away. Word of advice- before I forget- don't throw it out too soon. It doesn't set up quickly. You may find that your stone soaks in all you put on it. You may want to add more after it sits awhile. I remembered to take some pictures. But, I won't have the final results until it is set up in a week or so. First here is what I gathered to do the project. I don't have a vacuum pump. I used a brake bleeder and food saver top for a wide mouth canning jar. This will work for cab or preforms but not slabs. Looking into getting a cheap vacuum set up on amazon. In the meantime, I followed this instructable for the Alvin sealer. www.instructables.com/id/The-Alvin-Vacuum-Sealer/Not in the picture, alcohol for cleaning, gloves and some blue lintless papertowels cut in quarters. The best thing I could find to mix the hxtal in was the top of a medicine bottle. I have since ordered some little 1 oz cups. It was hard to see how well the parts were mixing with the lid.  Here are the test subjects. A beautiful Agua nueva that I overheated on the flat top 50k. I ruined a gorgeous cab! I've been waiting for the right time to try to fix it (for myself, not for sale). I had a nice little piece of bone that had a lot of little cracks and was pretty porous. They are sitting on sticks, waxpaper and a glazed tile for heating under a 60 watt bulb.  After the stones heated for about 45 minutes, I added the hxtal with a pipette. It really soaked into the bone, but not the agate. After they sat for about 15 minutes, I took the bone to the jar and got a pretty good vacuum on it.  When I released the pressure, I noticed there had been tiny bubbles on the top. So, it drew a pretty good vacuum.  Both the stones went back under the light. I cleaned up, then noticed that the bone needed more again. I had to dig the sealed hxtal mixture out of the trash! Doh! I put plenty on the bone this time. I'm not going to wipe it off. I'll grind it off.  I thought that the mixed hxtal would be thinner than it is. Everything I have read compared it to water, but that was not my experience. I'm sure I mixed it well enough, too. One really awesome thing to find out about it- It doesn't smell, at all. This is really important to me as I work in the kitchen. I'll update this when it's cured. I'm not holding my breath for the agate. It doesn't seem to be penetrating the crack. The gem bone, I think will turn out just fine. I probably wouldn't have cabbed it as it was. So, bottom line- it's easy to work with, not smelly, fairly thin and believe it or not - economical. I only used a small amount of what I mixed and wasted the rest. Lesson learned. Hi! I was wondering if you could tell me how deep a vacuum you were able to pull with that manual hand pump, maybe in inHG. I'm hoping to stabilize and embed fossil amber (and to degas the epoxy) in HXTAL with the use of a small vacuum chamber; in order to stabilize amber, I'd need a pump that can draw down to about 50 mbar or draw roughly 28.44 inHG: basically, a 95% vacuum. Embedding in lab-grade epoxy resin is also the best option to preserve amber long-term, and would be essential for some of the rarer included pieces I own (i.e., Haidomyrmex cerberus in Burmite). I am looking at getting an Actron CP7830, which looks like what you were using, but I am unsure of its ability to pull that level of vacuum (no specific data is available from Amazon). I'd get a rotary vane pump, but I have limited space living in the city. Any input you may be willing to provide is much appreciated. Thank you! |
|
|
|
Post by rockjunquie on Dec 14, 2021 16:32:43 GMT -5
I ordered the 50.00 bottle. I'm sure it will last forever. My first batch, I mixed 2g to .66g and I had plenty to throw away. Word of advice- before I forget- don't throw it out too soon. It doesn't set up quickly. You may find that your stone soaks in all you put on it. You may want to add more after it sits awhile. I remembered to take some pictures. But, I won't have the final results until it is set up in a week or so. First here is what I gathered to do the project. I don't have a vacuum pump. I used a brake bleeder and food saver top for a wide mouth canning jar. This will work for cab or preforms but not slabs. Looking into getting a cheap vacuum set up on amazon. In the meantime, I followed this instructable for the Alvin sealer. www.instructables.com/id/The-Alvin-Vacuum-Sealer/Not in the picture, alcohol for cleaning, gloves and some blue lintless papertowels cut in quarters. The best thing I could find to mix the hxtal in was the top of a medicine bottle. I have since ordered some little 1 oz cups. It was hard to see how well the parts were mixing with the lid.  Here are the test subjects. A beautiful Agua nueva that I overheated on the flat top 50k. I ruined a gorgeous cab! I've been waiting for the right time to try to fix it (for myself, not for sale). I had a nice little piece of bone that had a lot of little cracks and was pretty porous. They are sitting on sticks, waxpaper and a glazed tile for heating under a 60 watt bulb.  After the stones heated for about 45 minutes, I added the hxtal with a pipette. It really soaked into the bone, but not the agate. After they sat for about 15 minutes, I took the bone to the jar and got a pretty good vacuum on it.  When I released the pressure, I noticed there had been tiny bubbles on the top. So, it drew a pretty good vacuum.  Both the stones went back under the light. I cleaned up, then noticed that the bone needed more again. I had to dig the sealed hxtal mixture out of the trash! Doh! I put plenty on the bone this time. I'm not going to wipe it off. I'll grind it off.  I thought that the mixed hxtal would be thinner than it is. Everything I have read compared it to water, but that was not my experience. I'm sure I mixed it well enough, too. One really awesome thing to find out about it- It doesn't smell, at all. This is really important to me as I work in the kitchen. I'll update this when it's cured. I'm not holding my breath for the agate. It doesn't seem to be penetrating the crack. The gem bone, I think will turn out just fine. I probably wouldn't have cabbed it as it was. So, bottom line- it's easy to work with, not smelly, fairly thin and believe it or not - economical. I only used a small amount of what I mixed and wasted the rest. Lesson learned. Hi! I was wondering if you could tell me how deep a vacuum you were able to pull with that manual hand pump, maybe in inHG. I'm hoping to stabilize and embed fossil amber (and to degas the epoxy) in HXTAL with the use of a small vacuum chamber; in order to stabilize amber, I'd need a pump that can draw down to about 50 mbar or draw roughly 28.44 inHG: basically, a 95% vacuum. Embedding in lab-grade epoxy resin is also the best option to preserve amber long-term, and would be essential for some of the rarer included pieces I own (i.e., Haidomyrmex cerberus in Burmite). I am looking at getting an Actron CP7830, which looks like what you were using, but I am unsure of its ability to pull that level of vacuum (no specific data is available from Amazon). I'd get a rotary vane pump, but I have limited space living in the city. Any input you may be willing to provide is much appreciated. Thank you! Welcome from Virginia. 
It's been a long time since I used it. I have since ordered a pump and chamber. I needed a bigger chamber. But, as far as I remember, I got close to a perfect vacuum. Maybe 650-670 mmhg. It held a vacuum with no trouble. My brake pump is a cheapy from Harbor Freight. You might can do better. Hope that helps.
|
|
herb
spending too much on rocks
 
Member since November 2011
Posts: 476
|
Post by herb on Dec 15, 2021 12:27:47 GMT -5
Just some thoughts for anyone making a home made vacuum system. Creating a vacuum does indeed lower the boiling point of liquids. Even if the liquid doesnt boil, it will evaporate more readily in a vacuum. This is a concern with flammable liquids like acetone etc that are sometimes used to thin the epoxy or other sealer being used. The vacuum pumps for professional vacuums are "explosion proof" meaning they are designed so that the gas being sucked out of the chamber doesnt come in contact with an ignition source. I dont know if other general purpose pumps used in a home made system would also have that protection.
Also, especially with larger chambers, the amount of force being exerted by the outside atmosphere is quite substantial and could cause the home made chamber to implode. I've seen it happen to a glass jar and although it implodes, glass flys everywhere.
|
|
|
|
Post by rockjunquie on Dec 15, 2021 12:32:29 GMT -5
Just some thoughts for anyone making a home made vacuum system. Creating a vacuum does indeed lower the boiling point of liquids. Even if the liquid doesnt boil, it will evaporate more readily in a vacuum. This is a concern with flammable liquids like acetone etc that are sometimes used to thin the epoxy or other sealer being used. The vacuum pumps for professional vacuums are "explosion proof" meaning they are designed so that the gas being sucked out of the chamber doesnt come in contact with an ignition source. I dont know if other general purpose pumps used in a home made system would also have that protection. Also, especially with larger chambers, the amount of force being exerted by the outside atmosphere is quite substantial and could cause the home made chamber to implode. I've seen it happen to a glass jar and although it implodes, glass flys everywhere. Good to know.  |
|