Post by jm on Jan 10, 2019 3:54:42 GMT -5
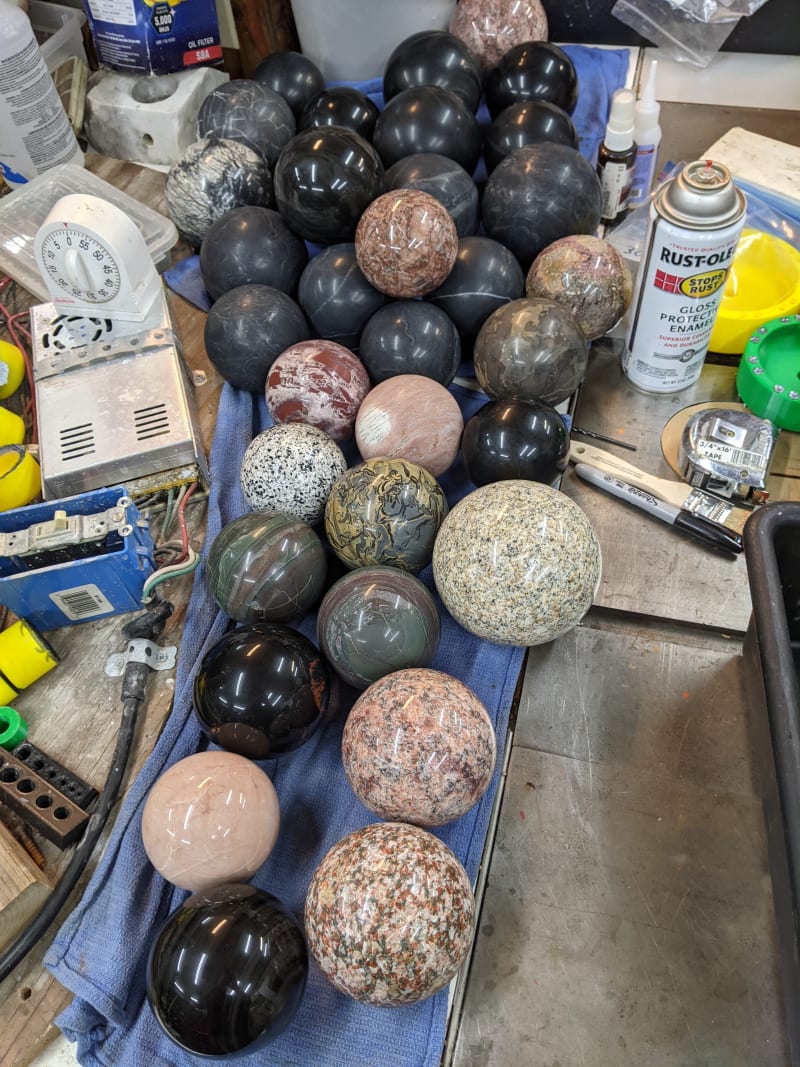
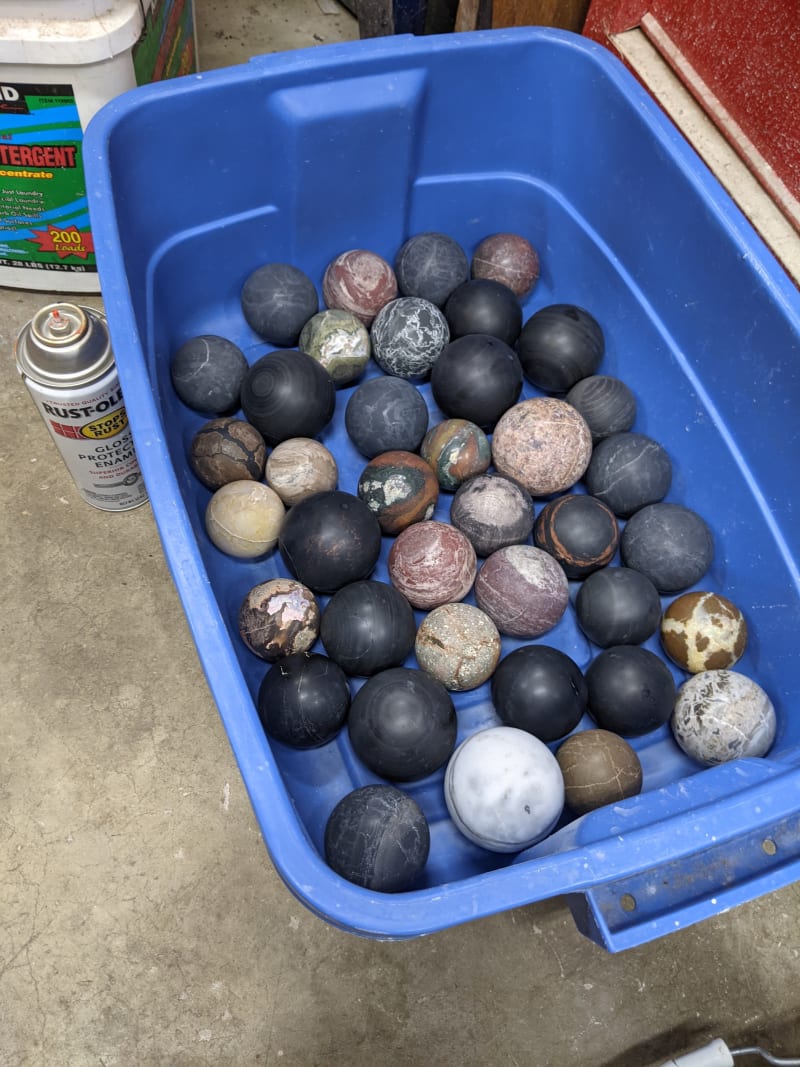
Now that winter has set in here in the Pacific Northwest and I'm stuck inside, I decided to build the next machine on my list. I've been meaning to build a sphere machine for a year or two now, so this seemed like a good time.
The biggest thing that was keeping me from building one up to this point was that I didn't have any good motors and I wanted to spend as little money as possible on it. While digging around in my garage I came across an old Makita cordless drill that I haven't used in years. I looked at it and realized that:
it has sealed bearings which would keep out rock dust
has lots of torque
is made to stand up to a lot of abuse
has excellent thrust bearings in it, since it can handle a grown man leaning on it when in operation.
After a quick trip to ebay to pick up two more of the same model drill, I was ready to start. (old cordless drills that are sold without batteries or chargers are fairly cheap on ebay.)
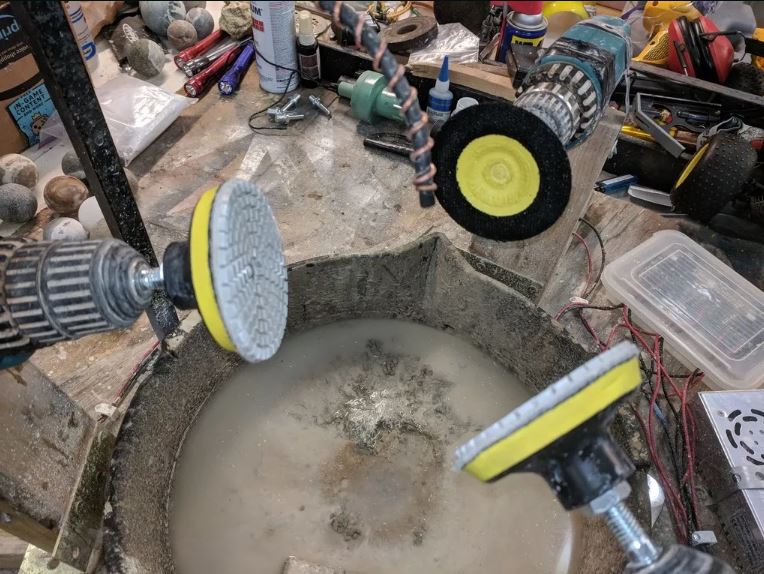
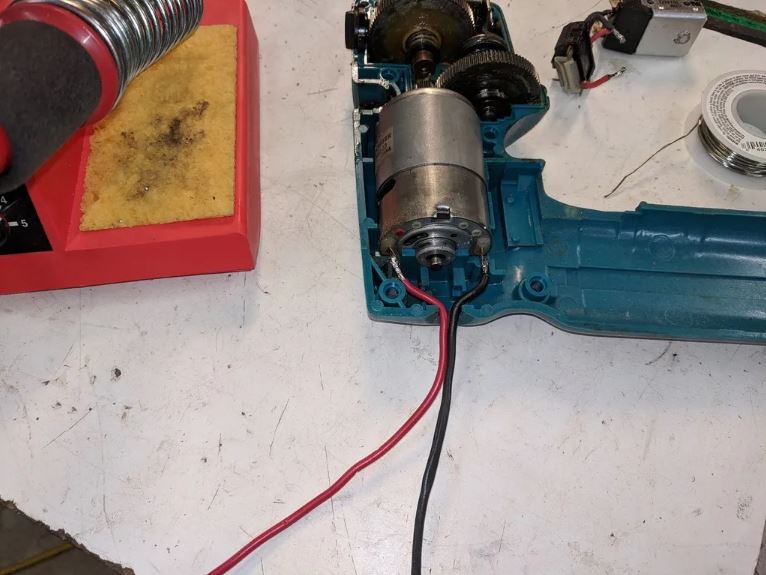
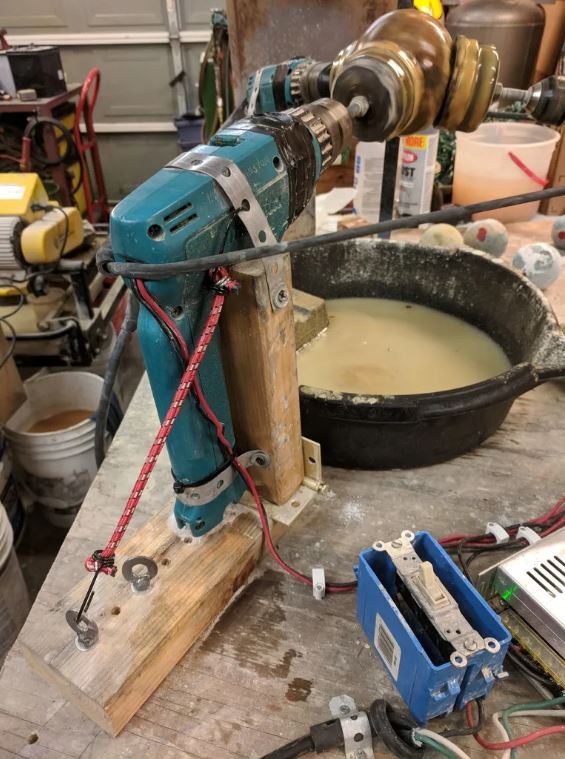
The first thing I did was open the drills up, remove the forward/reverse switch and the trigger, and solder some wires directly onto the motor. The removed switch/trigger assembly can be seen in the top right of the picture.
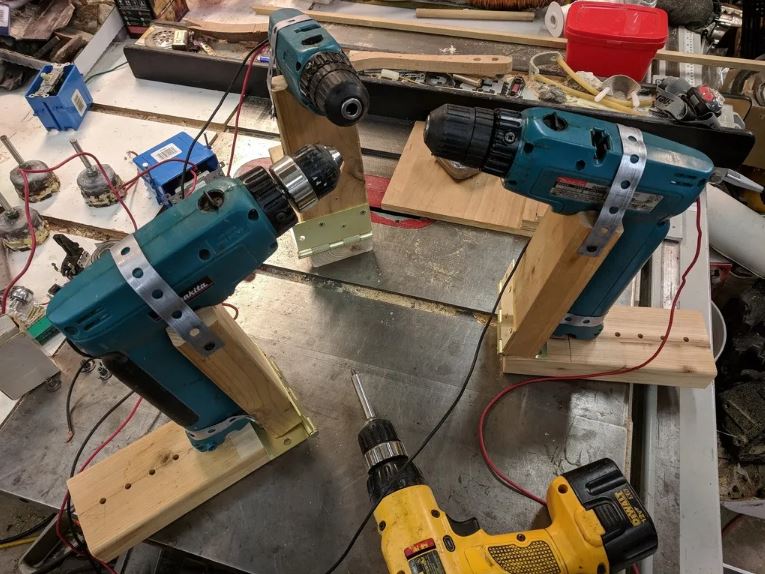
Then I mounted each drill on a hinged framework made from 2x4s and door hinges.
Then I cut a triangular piece of plywood, drilled holes for bolts to go through, and put T-nuts on the bottom for the bolts to hold onto. There are several different holes so the framework holding the drills can be moved in or out to accommodate different sphere sizes.
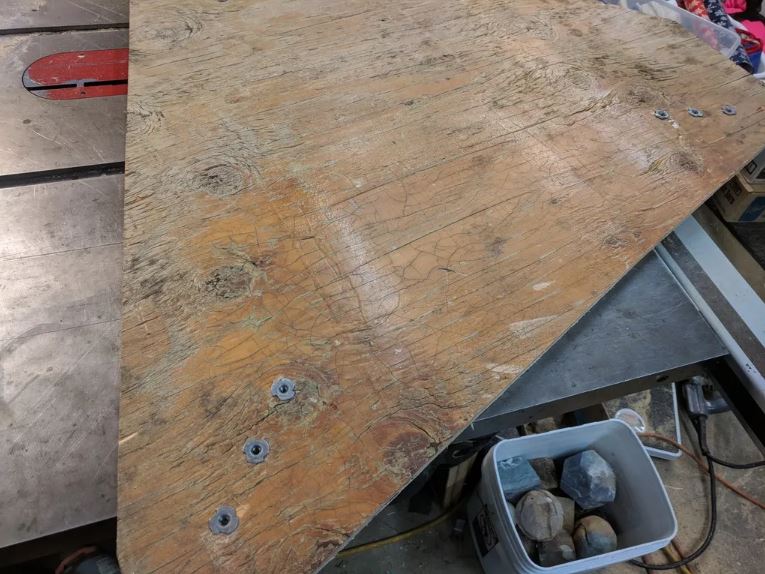
The three frameworks were bolted on from the topside. I welded washers onto the top of some bolts to make them easier to turn by hand. It also make a handy place connect bungee cords.
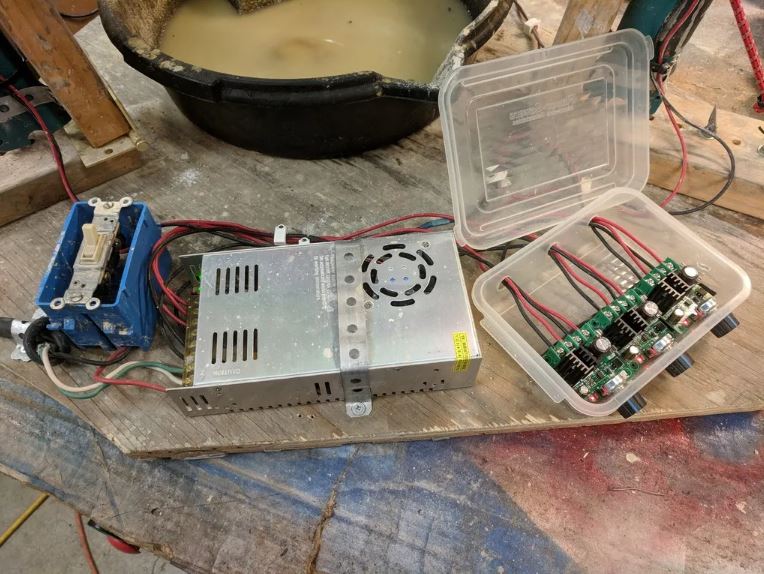
For the power source, I bought a 12V power supply from China. It's supposed to be able to supply 30A. I have my doubts that it will actually supply that much, but it works so I can't complain.
I switched the drills to the low speed setting on the transmission, but running them at 12V instead of the 9.6V that the batteries supplied means that even on the low speed setting they are probably spinning at 4-500 rpm. This was fast enough to splatter mud all over the place when I first tried to grind a preform. To solve this, I got a few cheap DC speed controllers (also from China) and wired one up to each drill. This lets me vary the speed of the drills from a couple rpm all the way up to full speed.
It's set up so the wall power goes through the light switch to turn the entire thing on/off. The light switch feeds AC power into the power supply. The power supply feeds 12V DC power to the three speed controllers, using a separate set of wires for each controller. The power then goes from the speed controllers to the drill.
For a water supply, I got a water jug from the dollar store down the street and bolted a needle valve into the bottom of it. The hose is a piece of small engine fuel line wrapped with some wire I stripped out of a chunk of Romex I had laying around. The needle valve makes it easy to vary the water flow anywhere between a few drips a minute and a steady stream.

The speed controllers come in especially handy when grinding a rough preform. Here's a fairly rough thunderegg just starting out. Running something like this at higher speed makes the rock pop out of the grinding cups, but at low speed it handles it just fine.
Once it starts getting rounded off, I can start bumping the speed up.
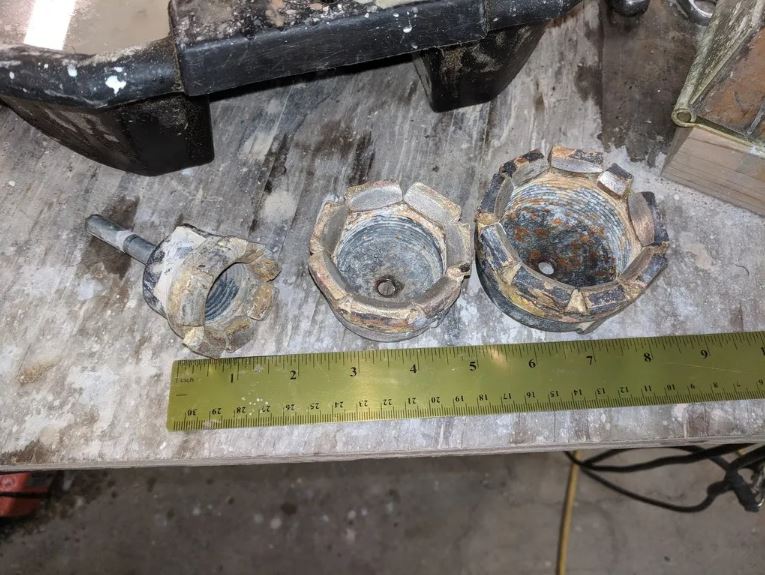
For the rough grinding cups I used some black iron pipe caps, drilled and tapped a hole for a 3/8" bolt in the center, and brazed on some diamond segments I got from China.
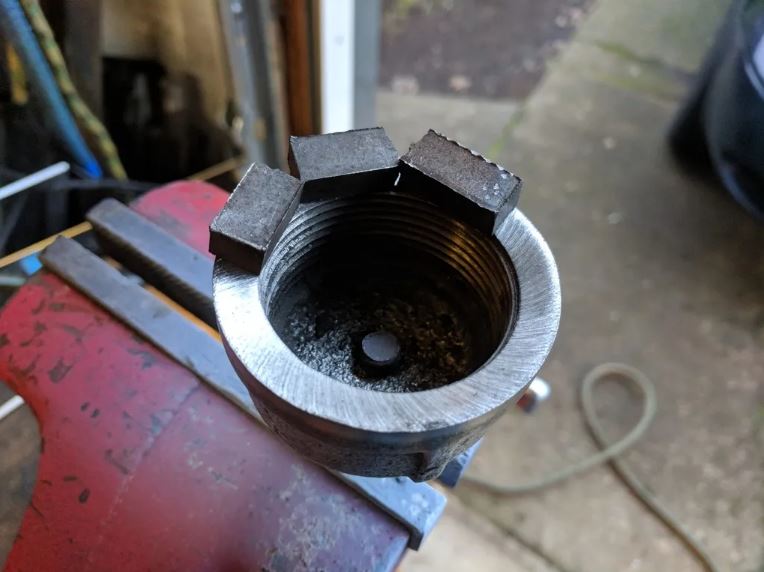
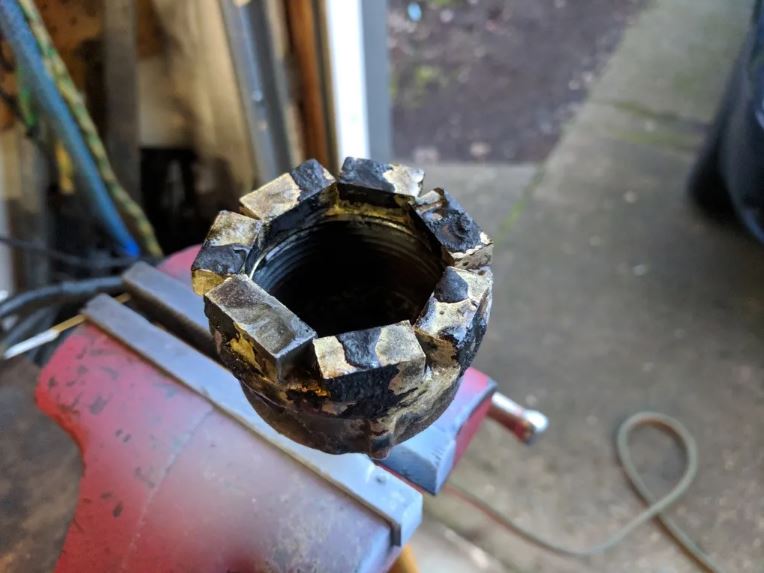
I know, I know, the brazing job looks like it was done by a drunken monkey, but none of the segments have broken off yet so it must not be to bad
I've rough ground a couple dozen spheres so far, and everything seems to work fine. I was initially concerned about the motors possibly overheating, but that hasn't been a problem. I usually keeps the speed controllers below 50% in order to keep the rpms in the right range, and since they are PWM speed controllers this effectively means I'm running the drills at less than a 50% duty cycle. The drills get warm after running for a while, but they don't feel overheated to me even after a couple hours of near continuous operation.
Questions? Comments? Let me know what you think.
The biggest thing that was keeping me from building one up to this point was that I didn't have any good motors and I wanted to spend as little money as possible on it. While digging around in my garage I came across an old Makita cordless drill that I haven't used in years. I looked at it and realized that:
it has sealed bearings which would keep out rock dust
has lots of torque
is made to stand up to a lot of abuse
has excellent thrust bearings in it, since it can handle a grown man leaning on it when in operation.
After a quick trip to ebay to pick up two more of the same model drill, I was ready to start. (old cordless drills that are sold without batteries or chargers are fairly cheap on ebay.)
The first thing I did was open the drills up, remove the forward/reverse switch and the trigger, and solder some wires directly onto the motor. The removed switch/trigger assembly can be seen in the top right of the picture.

Then I mounted each drill on a hinged framework made from 2x4s and door hinges.

Then I cut a triangular piece of plywood, drilled holes for bolts to go through, and put T-nuts on the bottom for the bolts to hold onto. There are several different holes so the framework holding the drills can be moved in or out to accommodate different sphere sizes.

The three frameworks were bolted on from the topside. I welded washers onto the top of some bolts to make them easier to turn by hand. It also make a handy place connect bungee cords.

For the power source, I bought a 12V power supply from China. It's supposed to be able to supply 30A. I have my doubts that it will actually supply that much, but it works so I can't complain.
I switched the drills to the low speed setting on the transmission, but running them at 12V instead of the 9.6V that the batteries supplied means that even on the low speed setting they are probably spinning at 4-500 rpm. This was fast enough to splatter mud all over the place when I first tried to grind a preform. To solve this, I got a few cheap DC speed controllers (also from China) and wired one up to each drill. This lets me vary the speed of the drills from a couple rpm all the way up to full speed.
It's set up so the wall power goes through the light switch to turn the entire thing on/off. The light switch feeds AC power into the power supply. The power supply feeds 12V DC power to the three speed controllers, using a separate set of wires for each controller. The power then goes from the speed controllers to the drill.

For a water supply, I got a water jug from the dollar store down the street and bolted a needle valve into the bottom of it. The hose is a piece of small engine fuel line wrapped with some wire I stripped out of a chunk of Romex I had laying around. The needle valve makes it easy to vary the water flow anywhere between a few drips a minute and a steady stream.

The speed controllers come in especially handy when grinding a rough preform. Here's a fairly rough thunderegg just starting out. Running something like this at higher speed makes the rock pop out of the grinding cups, but at low speed it handles it just fine.
Once it starts getting rounded off, I can start bumping the speed up.
For the rough grinding cups I used some black iron pipe caps, drilled and tapped a hole for a 3/8" bolt in the center, and brazed on some diamond segments I got from China.


I know, I know, the brazing job looks like it was done by a drunken monkey, but none of the segments have broken off yet so it must not be to bad

I've rough ground a couple dozen spheres so far, and everything seems to work fine. I was initially concerned about the motors possibly overheating, but that hasn't been a problem. I usually keeps the speed controllers below 50% in order to keep the rpms in the right range, and since they are PWM speed controllers this effectively means I'm running the drills at less than a 50% duty cycle. The drills get warm after running for a while, but they don't feel overheated to me even after a couple hours of near continuous operation.
Questions? Comments? Let me know what you think.


