|
|
Post by hummingbirdstones on Feb 9, 2019 15:33:10 GMT -5
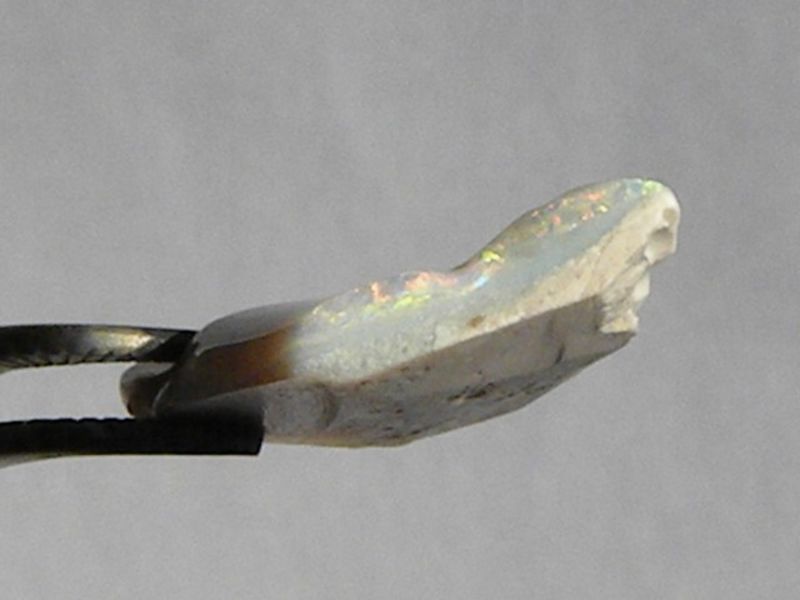
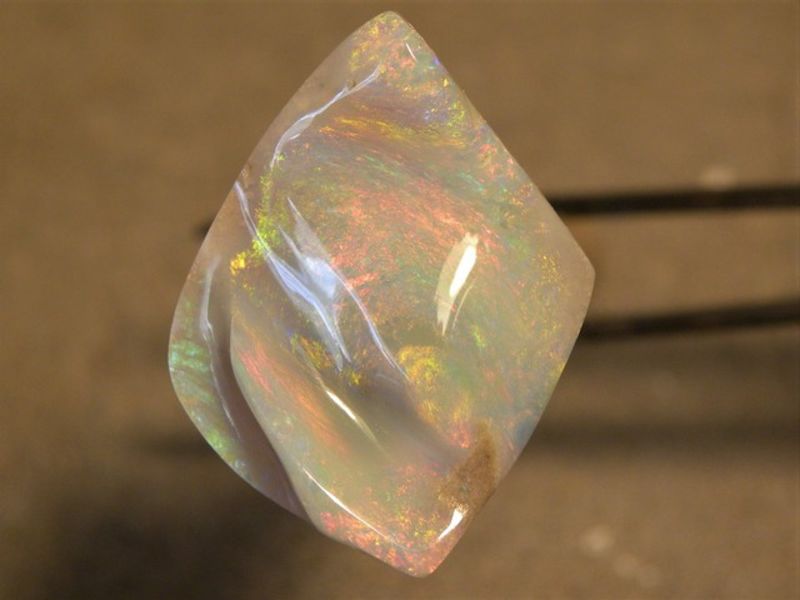
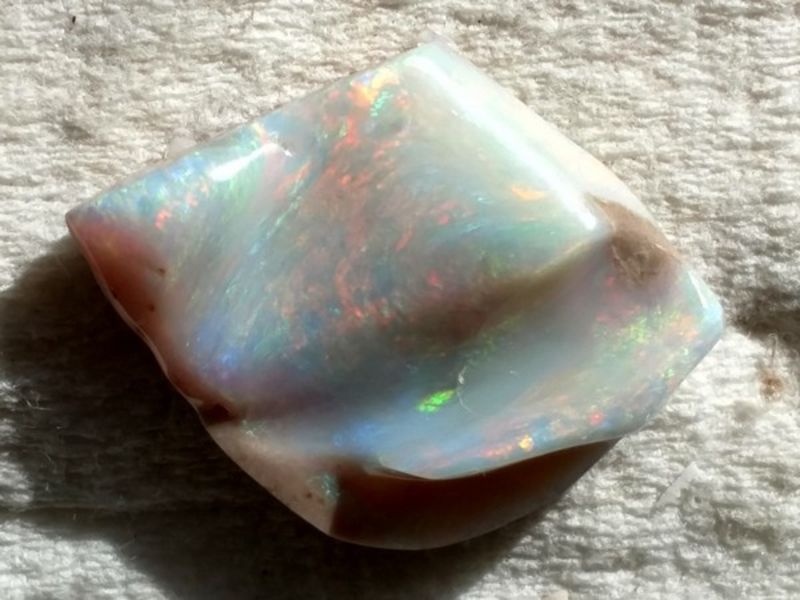
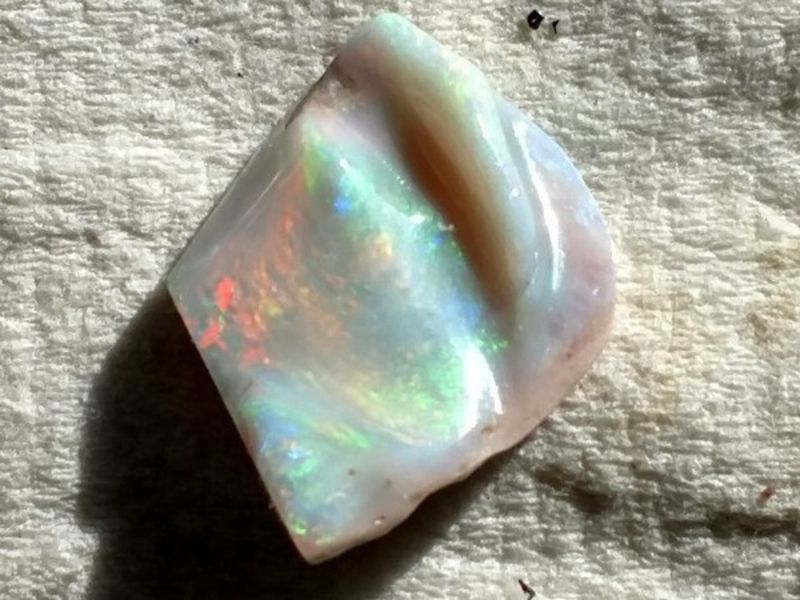
So, this is my first "carved" opal. I was basically just chasing color bars so it's as free form as you get. It's not finished yet. Still need to do a final shaping on it. The sun has not been very cooperative lately, so I jumped on an opening in the clouds to get these pictures a few days ago. Sorry they're cruddy pictures and the shadows from the sun in them.
I'm looking for some guidance on whether or not to try to bring the color up more. It's down there and came up in a few spots, but I chickened out and stopped where i was and just polished what I had. You can still see the white potch on top of the color in certain areas.
Thanks!
|
|
Deleted
Deleted Member
Member since January 1970
Posts: 0
|
Post by Deleted on Feb 9, 2019 15:42:02 GMT -5
Looks great to me (particularly the last photo's orientation). The one edge (bottom-right in the last pic) looks like it could be evened out a bit, though once set it probably won't matter.
|
|
|
|
Post by hummingbirdstones on Feb 9, 2019 15:49:30 GMT -5
Looks great to me (particularly the last photo's orientation). The one edge (bottom-right in the last pic) looks like it could be evened out a bit, though once set it probably won't matter. Yep, that part will get evened out and the little ledge above it may go away entirely. Still trying to decide on that. The little ledge has some awesome green/blue fire in it when the sun hits it right, but it's really directional. There's also a sand line too deep to get rid of right where that ledge meets the "hump". |
|
|
|
Post by opalpyrexia on Feb 9, 2019 16:00:31 GMT -5
That is looking so very cool!
I was working on a few white base opals yesterday. I took them to the finish line but noticed a couple of very tiny scratches in one. And in the others. I might have been working too fast. Anyway, after examining them, two showed areas where I could improve the fire by removing just a little more material. One was similar to yours in that it had a slight layer of white potch over one area that dulled the fire I could see below. So I removed it and now it looks better and more uniform. (The other involves removing some lesser fire that is obscuring the superior primary fire.)
Generally I always keep "digging" if there's a prize to be had and it doesn't increase fragility or reduce value though carat loss. But your piece being a carving is more than just a gemstone. If removing the potch doesn't detract from the very pleasing shape you have, I'd say go for it.
I've tried carving only once. I'd be interested in seeing your setup if you wouldn't mind posting a photo.
|
|
gemfeller
Cave Dweller 
Member since June 2011
Posts: 4,059 
|
Post by gemfeller on Feb 9, 2019 16:35:05 GMT -5
hummingbirdstones, I don't have a strong opinion on your carving. I'd have to see it and study it in 3-D before deciding how to proceed. I tend to be a bit conservative in my opal cutting, perhaps too much so. I figure you can always remove more material but you can't replace what you've already cut away. It seems to be a very nice light opal with an interesting color pattern. To bad about the directionality but those stones often make very nice pendants. Keep us posted on what you do with it.
|
|
|
|
Post by hummingbirdstones on Feb 9, 2019 17:19:55 GMT -5
opalpyrexia - I just used diamond burs for basic shaping and chasing fire and then mini diamond smoothing discs with my Foredom for the larger areas and a tub of water to dunk everything in frequently. Moved on to felt burs with different diamond pastes for the rest of it.
I do have a dental lathe that I bought off Ebay for carving that Vince secured to a piece of scrap countertop for me, but I need to set up a drip for it and some type of barrier to prevent rock splatter all over. I also bought an adjustable jacobs chuck that Alex Horst recommended to me for it. Alex carves some awesome stones: alexhorstjewelry.com/gemstones/# I really need to get that set up. It would be so much more comfortable than holding a small stone in one hand and the Foredom in other. Especially when the arthritis gets cranky.
gemfeller I think I may be in the too conservative camp, too. I may take it down a bit more and see what happens. It does have a chaff pattern in it that is muted under the potch. I'll post an update after I finish crying when I kill it (kidding!).
|
|
gemfeller
Cave Dweller 
Member since June 2011
Posts: 4,059 
|
Post by gemfeller on Feb 9, 2019 17:56:17 GMT -5
hummingbirdstones , Yeah -- chaff pattern. I knew it was a named pattern. I was grasping for it but it didn't pop into my head. I'm also trying to find space to set up a fixed carving arbor. I have all the equipment but no room. I'm sure this has occurred to you but on the off chance it hasn't, I find it easier to manipulate the stone using a Foredom when it's dopped. I'm working on a piece of yellow common opal from Idaho as a practice project but can't seem to get all the scratches out of it to save my life. Eliminating the scratches when transitioning from metal burs to sanding/polishing burs remains a problem for me.
|
|
|
|
Post by hummingbirdstones on Feb 9, 2019 18:26:27 GMT -5
gemfeller I actually didn't even think about dopping the stone first. DUH! Little bugger is not flat on the backside. Bulges out in the middle with the sides going up. It was a pain to hang on to. I do believe I will dop it for the next round of sanding, though. Thanks for that.
Those diamond smoothing discs really helped with getting the scratches out. I used them after the diamond burs to smooth all the roughness and scratches out.
I only have the 325, 600 and 1200 grit discs. I believe I may invest in the smaller sized holders and the whole array of discs from 220 through 3000. They worked very well for me.
|
|
gemfeller
Cave Dweller 
Member since June 2011
Posts: 4,059 
|
Post by gemfeller on Feb 9, 2019 18:46:57 GMT -5
hummingbirdstones , thanks for the info. I've invested in a bunch of carving stuff but it's been so long since I used it I've forgotten what I have. I do have some old Crystalite holders and disks similar to the HiTech products but have difficulty using them in fluted U-shaped spots. They're just not that shape, so I find the DP Nova points better, but still.... It's been a long while sine I did any carving and I'm rusty. Also, my back hurts like blazes after a hunched-over session concentrating on carving small objects. I've just started again after a long layoff and am trying to remember all the stuff I studied when I was heavily into it. Here's a Cocooran piece I plan to finish when I can get the technique down agan: 
|
|
|
|
Post by hummingbirdstones on Feb 9, 2019 19:37:00 GMT -5
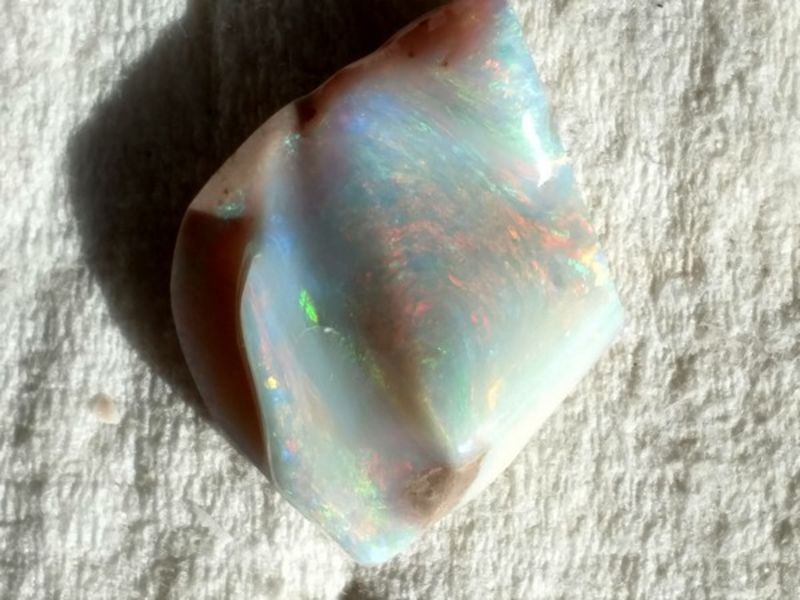
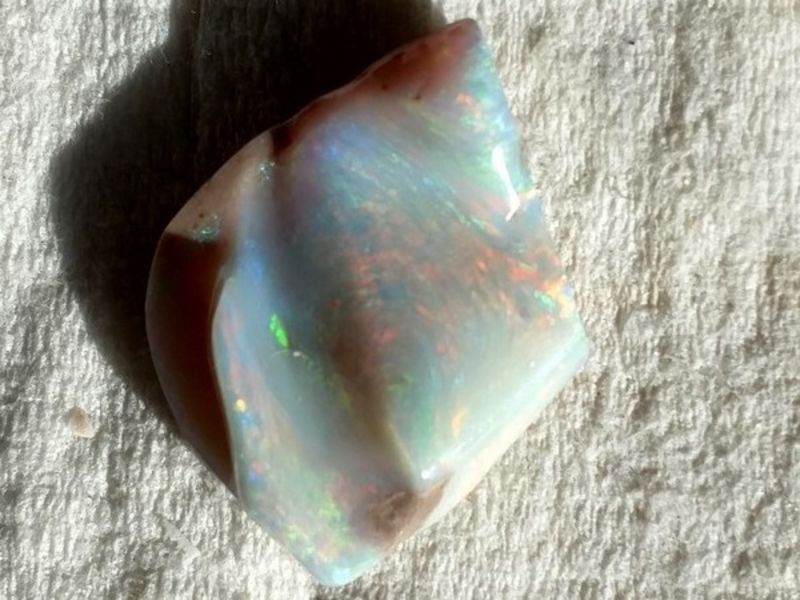
Wow, gemfeller, that is going to be an absolute stunner! Some of the best material came out of Cocooran. Love it! I just remembered that I also used some of that smoothing disc stuff from scraps that Vince had left over from one he cut down to a 6" disc size in a pair of locking hemostats that I bent around the business end and used that manually to get into the grooves. Here they are. They were still laying on my bench.
I'm going to buy the large discs, too instead of those small ones and then have Vince cut me a bunch of different size discs to fit the holders. He has these leather punches in all different sizes and he cut me some out of that scrap because I didn't have any 325's left. That will be way more cost efficient. Let me know if you want some.  Then I can use the scraps in the hemostats to get at those little places. Tiny places will have to be bamboo sticks and paste, I guess. |
|
|
|
Post by opalpyrexia on Feb 9, 2019 20:15:06 GMT -5
Wow, gemfeller , that is going to be an absolute stunner! Some of the best material came out of Cocooran. Love it! I just remembered that I also used some of that smoothing disc stuff from scraps that Vince had left over from one he cut down to a 6" disc size in a pair of locking hemostats that I bent around the business end and used that manually to get into the grooves. Here they are. They were still laying on my bench. I'm going to buy the large discs, too instead of those small ones and then have Vince cut me a bunch of different size discs to fit the holders. He has these leather punches in all different sizes and he cut me some out of that scrap because I didn't have any 325's left. That will be way more cost efficient. Let me know if you want some.  Then I can use the scraps in the hemostats to get at those little places. Tiny places will have to be bamboo sticks and paste, I guess. Haha! I just logged in to suggest using a 1/2" punch on the larger discs to save money —— but you're already on that!  I've never given the Hi-Tech flexible discs a second glance, but your carving thread here has changed my mind. I'm going to get some while their Tucson discount code is still active.
The hemostat is clever, too.
|
|
|
|
Post by hummingbirdstones on Feb 9, 2019 20:31:26 GMT -5
Credit where credit is due, opalpyrexia. Vince actually came up with the scrap and hemostat idea. He's real good at that.  |
|
wampidytoo
has rocks in the head
   Add 5016 to my post count.
Member since June 2013
Posts: 709
|
Post by wampidytoo on Feb 10, 2019 4:38:26 GMT -5
Hello Robin. I haven't been on for a long time and something told me I should come here. If you have that much power handle it very carefully.  I cut a bunch of Welo opal a few years ago and it was nothing like fire agate where the tiny change in depth can ruin everything. The flash in my stones was all the way through no matter the quantity or quality of the flash. The thing that changed the most was the amount of haze but even that wasn't enough to spend a lot of time trying to hit a more clear part.I will admit that most of the stones were quite small but the one larger one pretty much followed the same rules. I worked all of them with just files and hardware store sand paper because I did not have much experience with the rotary tool. The only way I could work such small stones was with bamboo skewers and super glue for dop sticks. I am not sure if I got those photos moved over to here but I will check and post them later. If all else fails I still have the larger stone in a ring and some of the smaller stones loose. Jim |
|
|
|
Post by hummingbirdstones2 on Feb 10, 2019 10:28:50 GMT -5
Hey there Wampidy. I remember your opals, and that they turned out really good. That wasn't too long after Robin and I visited with all of y'all down at Tony's cookout on our first trip to Q.
Good to see you on here - it has been a while... . |
|
|
|
Post by hummingbirdstones on Feb 10, 2019 11:28:24 GMT -5
Hi Jim! It's so good to see you on here. It has been way too long since you've graced us with your presence! The Aussie opals are different from the Welos because most of them do have color bars that don't go all the way through the stone. Here's the side view showing the color bar. It's about 1/8" thick. The stone itself is about 1-1/4" x 7/8".
I still think I'm going to try and make the color come up a bit more, but not too much. 1/8" isn't much to play with. 
I think the hoodoo works both ways. Earlier yesterday I had been looking through posts in the carving area and saw your old post on those Welos. Was thinking about how I hadn't seen you around in a while and wondering how you were doing. Hope everything is good and you pop in every once in a while to say hi. I sure do miss your wit and sense of humor!
|
|
|
|
Post by hummingbirdstones on Feb 10, 2019 19:06:41 GMT -5
I worked some more on the opal. Here's the finished product. The color on the photo is off a bit because of the light. Sorry about all the damn reflections, too!
|
|
gemfeller
Cave Dweller 
Member since June 2011
Posts: 4,059 
|
Post by gemfeller on Feb 10, 2019 19:59:17 GMT -5
Good job! I don' t mind the reflections because they show the dimensionality of the carving. It looks like you found the suspected color plane. It should make a really great pendant. Now I've got to get to work! I have house guests until the middle of the week but plan to do some opal carving ASAP.
|
|
|
|
Post by hummingbirdstones on Feb 10, 2019 20:12:47 GMT -5
Thanks, gemfeller! It looks much better now, I think.
Don't forget to show yours when you're finished.  |
|
|
|
Post by Bluesky78987 on Feb 11, 2019 18:34:30 GMT -5
Hi All. Beautiful job on that Robin! I've had "learn how to carve opals" on my todo list for about a year now, and I'm itching to get started now! Great to hear people's tips and tricks and what works for them. Thanks for the info/ideas about the discs, and the hemostat idea. One holder idea might be to make a base from Jet Set (or other hard plastic molding material), like . . . oh what's his name . . .on Youtube . . . argh . . . uses to push bezels. Hebrew sounding name. Know who I'm talking about? I wonder if the new harder rubber Eve AdvantEdge silicone sanding points would work on opal - they're a nice shape, about the size of a QTIP head. In the picture they look big like the old ones, but they're new(er) and smaller and supposedly more durable rubber. www.riogrande.com/product/eve-advantedge-plus-polisher-blue-coarse/33275210 |
|
|
|
Post by hummingbirdstones on Feb 11, 2019 22:40:31 GMT -5
Soham Harrison - is that the guy you're thinking of?
Carving opal wasn't as difficult as I anticipated because I was just chasing the color bars. I just used what I had on hand and it seemed to work ok. I dopped it up for the second round and that worked pretty good, too. I'm pretty sure I'll never be able to carve a figure. I just can't "see" a figure in the stone like some of the talented folks here can. I'm good with freeform.
I haven't tried the AdvantEdge points, but I need to get some for metal, so I will try it and see. I was also considering getting some of those Diaflex and Diathin wheels. I think Don said he uses them on fire agate and that's one of my next challenges. If they work on fire agate, they'll work on opal for sure. The only thing I don't like is that you can't use them with water, so there's dust flying everywhere. Definitely need to use a respirator with those.
You should really give it a go. If I can do it, you can.  |
|



 Then I can use the scraps in the hemostats to get at those little places. Tiny places will have to be bamboo sticks and paste, I guess.
 I've never given the Hi-Tech flexible discs a second glance, but your carving thread here has changed my mind. I'm going to get some while their Tucson discount code is still active.


