jmwhosh
off to a rocking start

Member since November 2019
Posts: 4
|
Post by jmwhosh on Nov 15, 2019 13:50:02 GMT -5
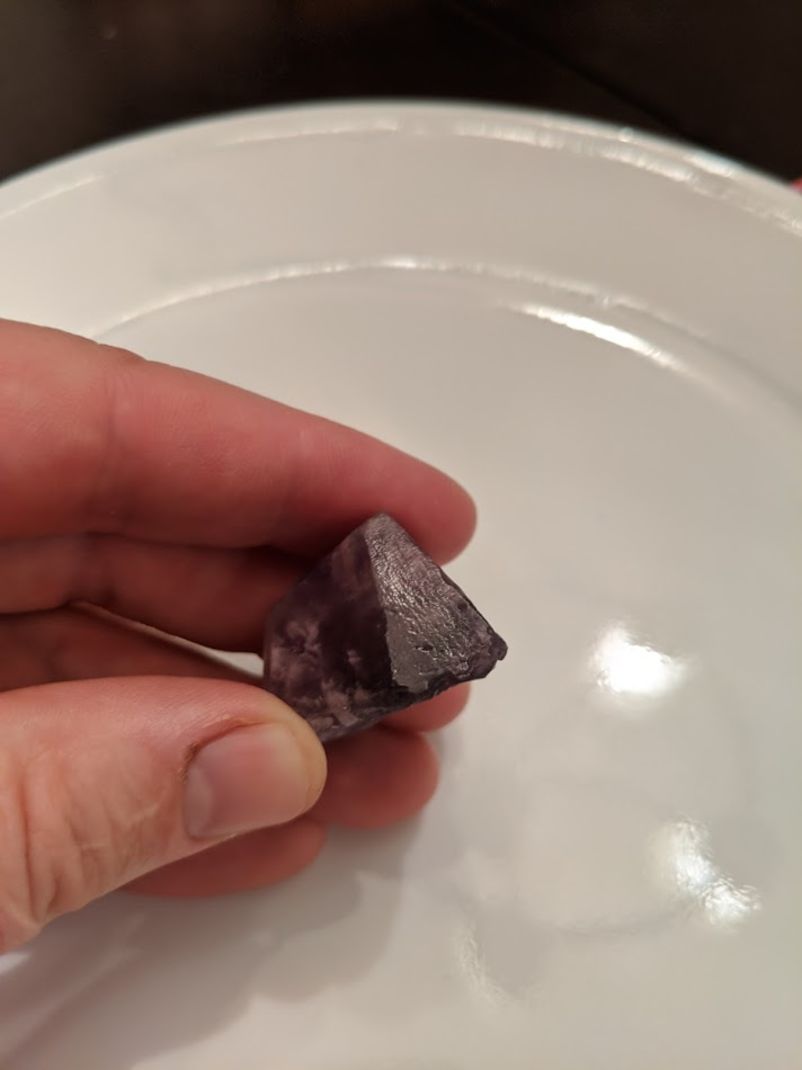
Not sure if this is the right board to put this but here goes. Family went to a 'gem mine' where we got a bunch of different rocks. below is I think an amethyst that I wanted to just practice on and play with so I cut off the really rough edges and I guess kind of ground them down with my dads cheap tile saw. That left a bunch of grooves (from the filing down I suppose). So I ordered some abrasive wheels on amazon (https://www.amazon.com/gp/product/B01KFPO4BK/ref=ppx_yo_dt_b_asin_title_o05_s00?ie=UTF8&psc=1) and tried to use those to kind of work the grooves out and it worked a little but not smooth. So then I bought some felt pads and some cheap lapping paste (a set of 7) that went from 10 microns down to 0.5 and I worked each but still don't have a smooth finish. Is it possible to get a smooth finish without a tumbler or even close to a smooth finish without a tumbler? Any recommendations? I know the tools I use were on the cheaper side so maybe it's just that but I'm unwilling to invest any more until I can see if this will actually work.   |
|
|
|
Post by victor1941 on Nov 15, 2019 15:47:31 GMT -5
Jmwhosh, there are several artisans on this site that use the dremel exclusively for their work and can help. I do not shape with the dremel but believe that you need to use a disc to remove the scratches before trying to polish. I do use the dremel to do the final polish on some softer material with good results.
|
|
|
|
Post by miket on Nov 15, 2019 16:24:05 GMT -5
I use a dremel with diamond bits and by the time I get done I usually run it for a week in course grit, then through the following stages. I'm guessing that if you got a set of bits like these jadecarver.com/product/50pc-large-burr-set/ you could use them to remove the scratches, then use your felt pads to polish them. There are cheaper sets on Amazon ($13) if you wanted to go that route to see how you like them first. Keep in mind, I've never done it this way- but it should work. Others may chime in with better advice.  |
|
NDK
Cave Dweller 
Member since January 2009
Posts: 9,440
|
Post by NDK on Nov 15, 2019 17:54:17 GMT -5
The main reason you didn't get a polish is because you didn't get out all the scratches. You need successively finer grits to smooth out the last step. With a smallish piece like that you could use wet dry sandpaper and smooth it by hand. The process is simple but it can be difficult.
|
|
jmwhosh
off to a rocking start

Member since November 2019
Posts: 4
|
Post by jmwhosh on Nov 16, 2019 11:26:42 GMT -5
Do you all feel like the abrasive wheel buffing step isn't really necessary if I get the diamond burr set and smooth out with that? Is it feasible to go from the 36 grit to the polishing with the felt and lapping paste?
HYCC 40Pcs 1" (25mm) Abrasive Wheel Buffing Polishing Wheel Set For Dremel Rotary Tool
|
|
|
|
Post by hummingbirdstones on Nov 16, 2019 12:22:19 GMT -5
I cut my first stone (a boulder opal) using a dremel. Started with diamond bits (180 grit I think) to shape it and then used mini smoothing discs to sand it down and a tech 10 polishing pad with 14,000 diamond paste to polish. Worked pretty dang good for just using a dremel.
|
|
Fossilman
Cave Dweller 
Member since January 2009
Posts: 20,722 
|
Post by Fossilman on Nov 20, 2019 11:33:07 GMT -5
I polish fossils with a Dremel tool....
|
|
wampidytoo
has rocks in the head
   Add 5016 to my post count.
Member since June 2013
Posts: 709
|
Post by wampidytoo on Dec 7, 2019 7:29:03 GMT -5
Use a heavy gauge aluminum wire to scratch the surface of the stone then do not move to a finer grit until all of the aluminum is gone. The aluminum marks the bottom of the scratches but does not soak into the stone. Do this with each grit and if the aluminum won't go away the jump in grit size is too much.
A glass cutting blade for the tile saw will give a much smoother surface to start on.
Jim
|
|


