New project - questions for the pros
Jan 2, 2020 15:46:38 GMT -5
rockjunquie, fernwood, and 1 more like this
Post by jasperfanatic on Jan 2, 2020 15:46:38 GMT -5
Originally this started as a pendant project for my daughter, because she loves elephants. Right or wrong, the way I typically learn anything is to see something that interests me and then try to replicate it, or more accurately I'll get inspired with a similar idea of my own that would require me to learn the same skills/processes used to create the piece that inspired me. This is one of those cases. It has morphed a few times, and I'm likely just going to punt on the project and melt the mess down for the rolling mill, but it has generated a few question I'd like to get some input on. It's actually been a great learning experience all the way around, and I think I've answered a few of my own questions, but I'm hoping to get some input on a few things. This project gave me a lot of practice time with the saw (which I don't love) and also helped to develop a strong dislike of hard solder 
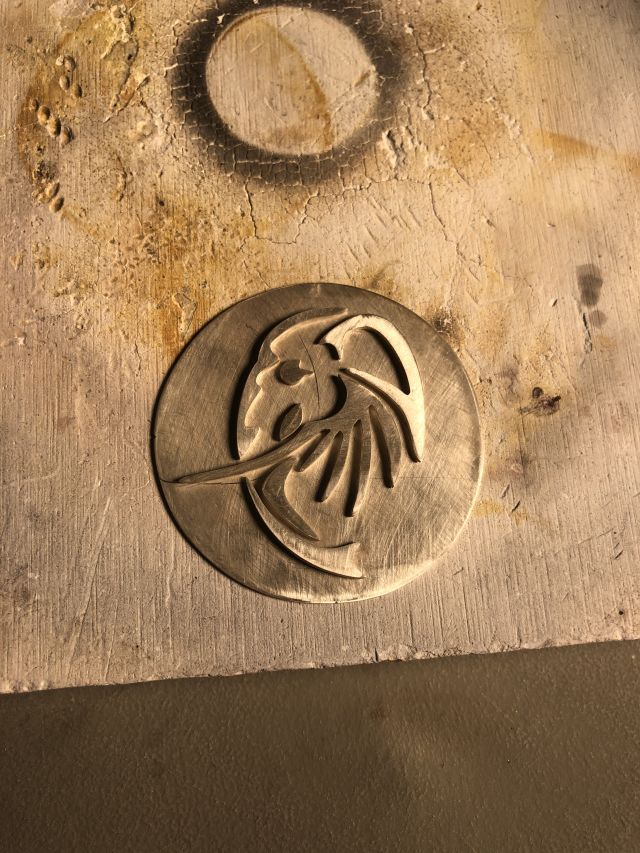
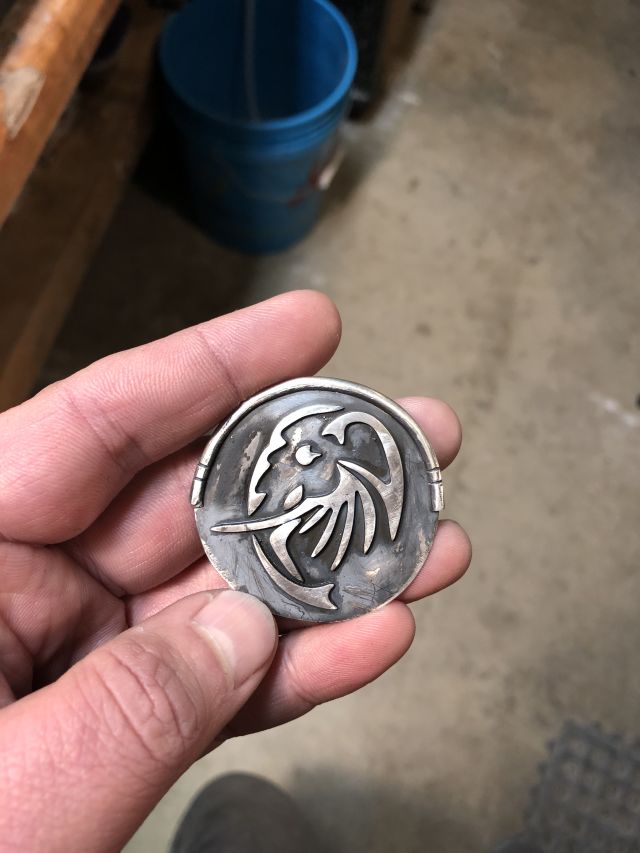
The first picture is pre-solder, when I had everything cut and rough sanded, and laid out on the backing. The second picture was after some things had been soldered, then I realized there were some things about it that I wasn't going to be able to fix without starting over, so I incorporated some of the final steps to test things out in order to learn as much as I could before I rendered the whole thing back into a blob. Here are my questions:
1. How would you approach soldering all of the pieces to the back? There are several small, intricate individual pieces in tight proximity here. The end result was to have the back be almost entirely black with patina, so I wanted to minimize any solder pooling cleanup necessary and my intent was to start with hard solder for these pieces. My first thought was to try and melt solder on the back of each piece, then flux the backing in the right area, place the pieces and then heat it up to re-melt the solder so the piece would attach to the backing. I tested this on the solo ear piece which is where I began swearing...mostly about the hard solder. I coated the back of the piece with flux, placed the solder and started heating it up. That high melting point was a pain, and things didn't flow like I'd hoped, and it ended up mostly a black, crusty mess. I threw it in the pickle for a bit and it was still a bit crusty when I pulled it out, but not black. I started to sand it down and realized my second question...
2. That crusted solder-like mess had actually eaten away at the base silver...like corrosion, down into the original metal. What would cause that? The pieces were already getting thinner than I wanted thanks to another lesson learned, so I had to re-cut and sand a replacement. Ultimately, I ended up cutting a bunch of pieces of hard solder, then I pounded the pieces flat and very thin, and placed them under each piece until the whole thing was laid out the way I wanted. My thought was that it would keep the solder flow strictly between the two pieces and minimize clean up. This mostly worked, except again the hard solder was a real pain. Luckily the failure was easy to recover from with only minimal recovery work needed, so I repeated the whole thing but this time I used medium solder. I also thought this approach would mitigate the risk of something shifting as the flux bubbled up since the weight of the piece would be pressing down, but alas a couple pieces did shift and I couldn't undo it, which became the point of no return for this attempt.
3. Is hard solder really necessary every time? It seems to me that as long as spacing of the soldered pieces for different stages isn't an issue, and you can control how you heat other areas, then starting with medium most times would be OK - yes?
4. Hopefully it's visible in the photo, but when I pulled it from the liver of sulfur solution there are some splotches of pink-ish / light copper color here in there in the open areas - what might cause that? Those areas never had any solder on them. I had also sanded, washed it off, dipped it in the pickle (and washed it off again), then made sure it was dry before I tossed it in the LoS. It seems like there must have been something there reacting, but I can't think of what it might be. Actually, typing this I think I just figured it out...to get a thicker sheet for these individual pieces I ran a blob of silver I'd melted down from other failed projects through the rolling mill - I bet those discolorations are from solder that included in that blob, so maybe some of the alloy metals from the solder exposed themselves? Nevermind - the splotches are on the backing piece, which was a new sheet from Rio, so the splotch mystery remains.
If you made it through my novella, thanks for taking the time! If you have answers/input, then even more thanks to you! Any other tips, tricks, ideas, etc. that veterans would like to add are much appreciated!
Thanks!


