

How We Do It #1: Using a Tile Saw Indoors
Mar 28, 2021 10:12:38 GMT -5
manofglass, quartz, and 10 more like this
Post by Rockindad on Mar 28, 2021 10:12:38 GMT -5
***This post could fit into a couple of different places, I'm putting it here because a lot of people end up buying a tile saw to improve/expedite their tumbling. Mods: please move if you see fit.
This is the first thread in a series that I hope can help others out. We all have our different space constraints and situations so not everything will apply to everyone. This is literally just "How We Do It". Let the conversation begin.
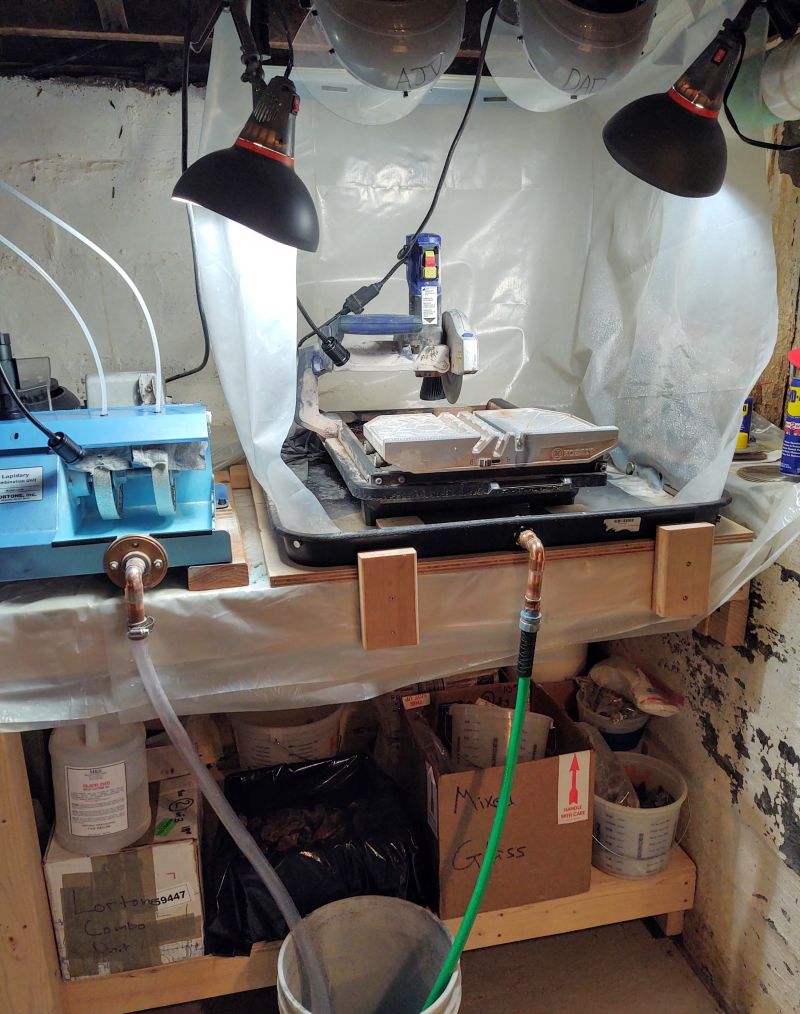
The two biggest problems with using a tile saw indoors are the noise and mess. I am only addressing the mess as our work area is in a basement with a door that can be closed so as not to disrupt the entire household. The mess: we (my son and I) use our saw for cutting and grinding of tumble rough and cutting small slabs occasionally. It is a great tool that can cause a great mess. We live in an area where it is not possible to use the outdoor option year round and frankly want to have the saw close to our indoor setup anyway. A couple of general pics of what we came up with:
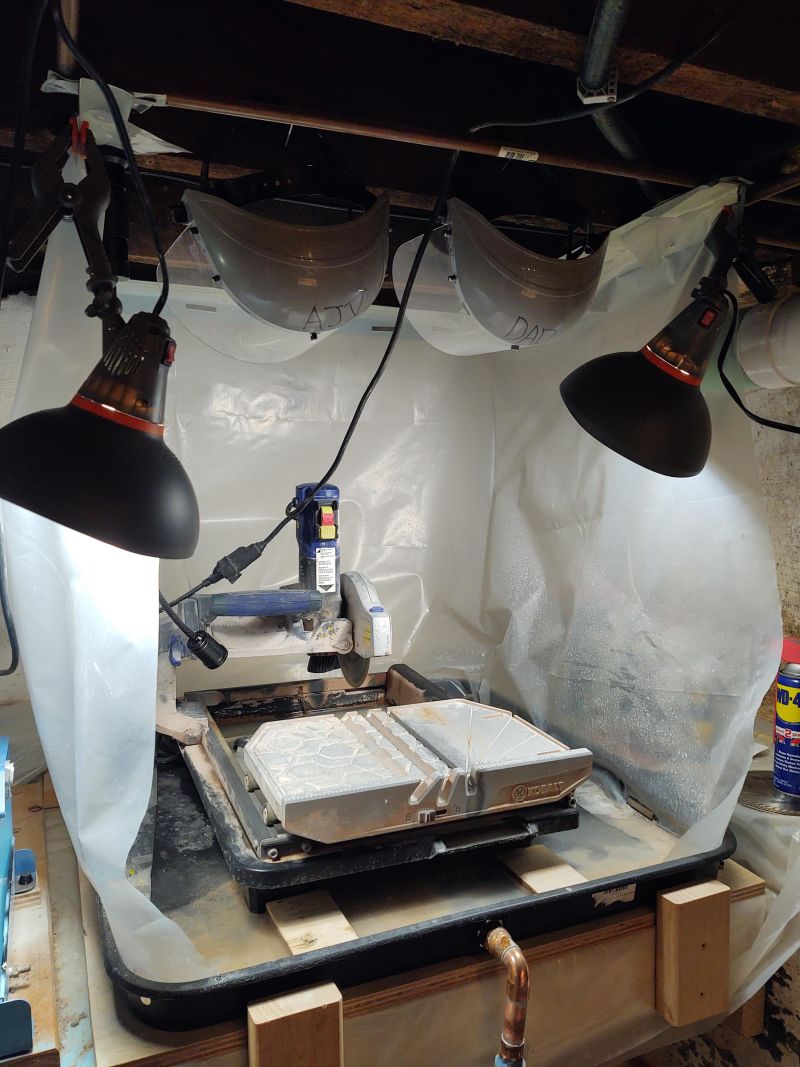
The materials used include an HVAC condensate/drip pan, scrap plywood, cutoff 2x4, old garden hose, silicone, sheet plastic, magnets, sheet metal angle and some screws. The only thing we specifically bought for this was the pan, everything else was leftovers from previous projects. The pans are available in many sizes so it is likely you can find one to fit your own situation, they most often come with provisions for a drain also.
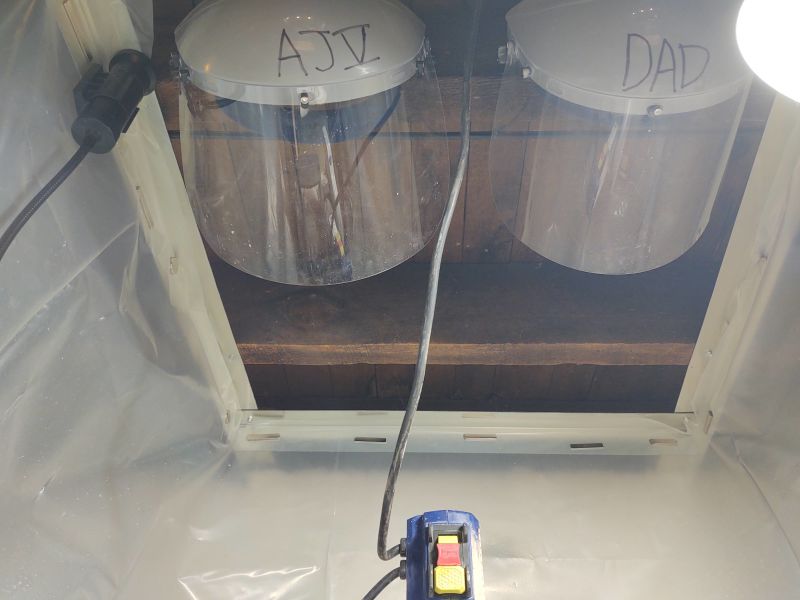
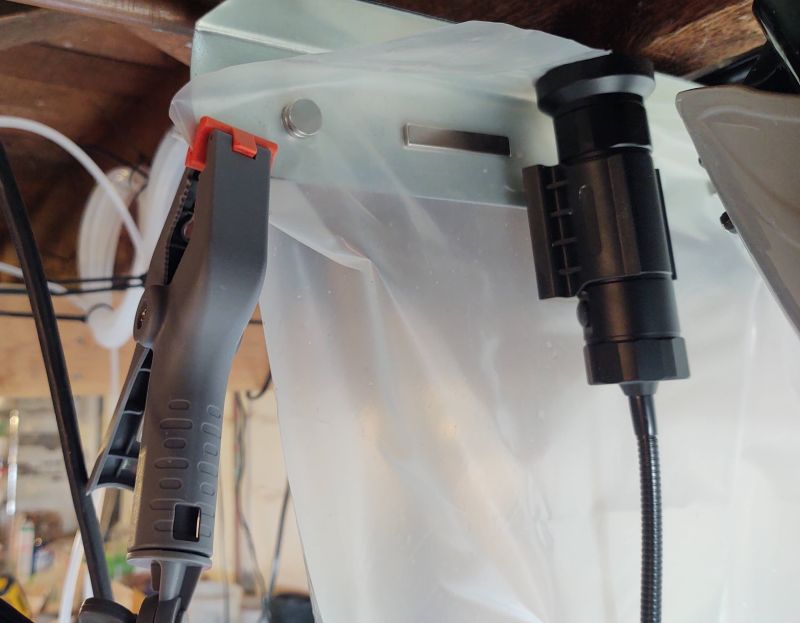
We made a three sided frame from the angle and screwed it into the joists above our work area. The use of the angles and magnets allow for a very fast replacement of the plastic if/when necessary.
Plastic sheeting secured at the pan:
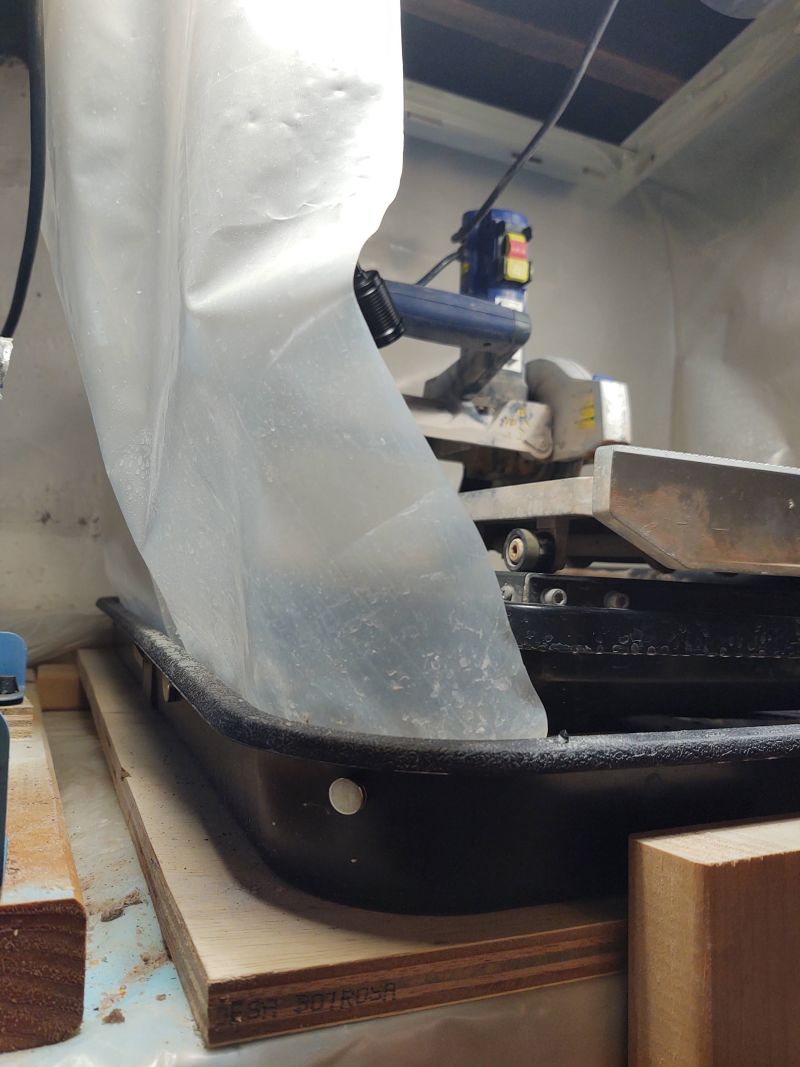
In the second picture you can see the plywood the pan is sitting on and the 2x4 that was placed under it in the back to create an aggressive pitch for drainage. Note: the splatter you see on the pan is actually form our grinder to the left of the tile saw, need to make a water shield for it.
Notes on some of the materials:
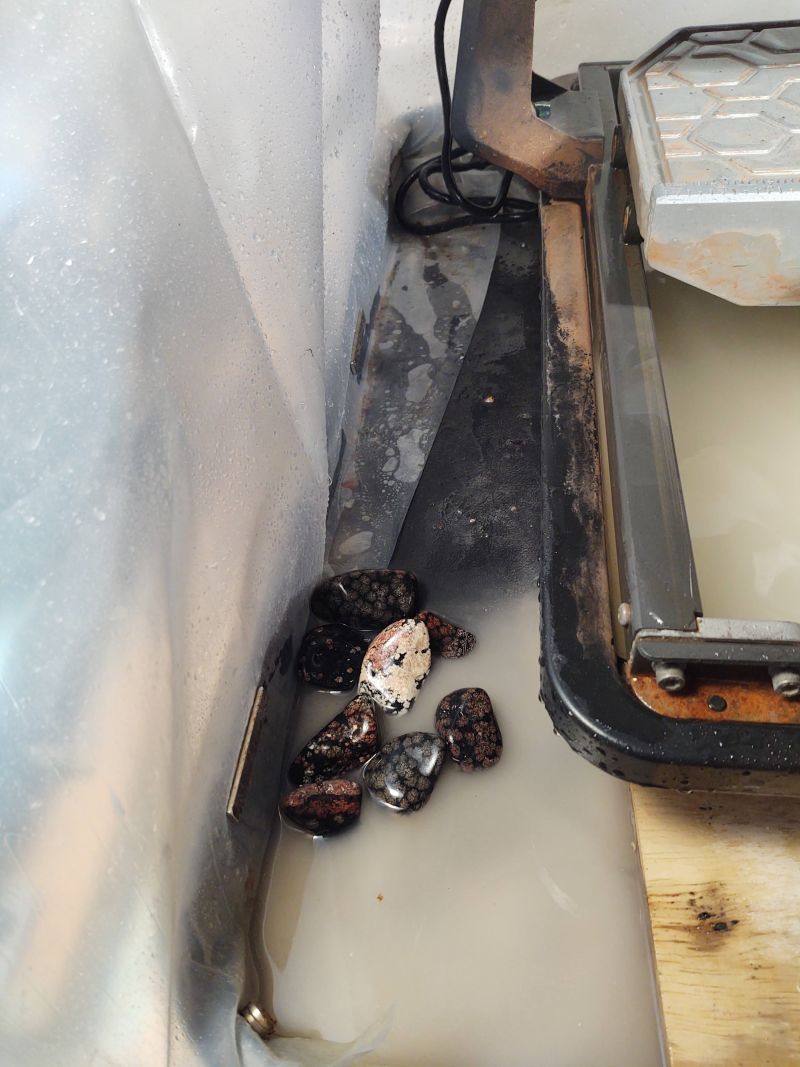
Condensate/Drip Pan: These are typically not the sturdiest, thus the plywood backing. I am not addressing the drain too much as it will depend on what comes with your pan. The silicone that was mentioned earlier was used when assembling the provided drain kit as they only included a gasket for the inside of the pan. We decided to use a little bit of copper piping and an old hose to drain into a bucket that our grinder also drains into. The pan also provides a handy place to put the rocks you need to work on, eliminating the temptation to put them on the table and have them rattle into the blade.
Angles: available at most home improvement stores. If you live near a sheet metal shop you may even be able to pick them up for free. Aluminum and most stainless steels will not work if you want to use the magnets. Angles also provide a convenient place to clamp a light or use one with a magnetic base.
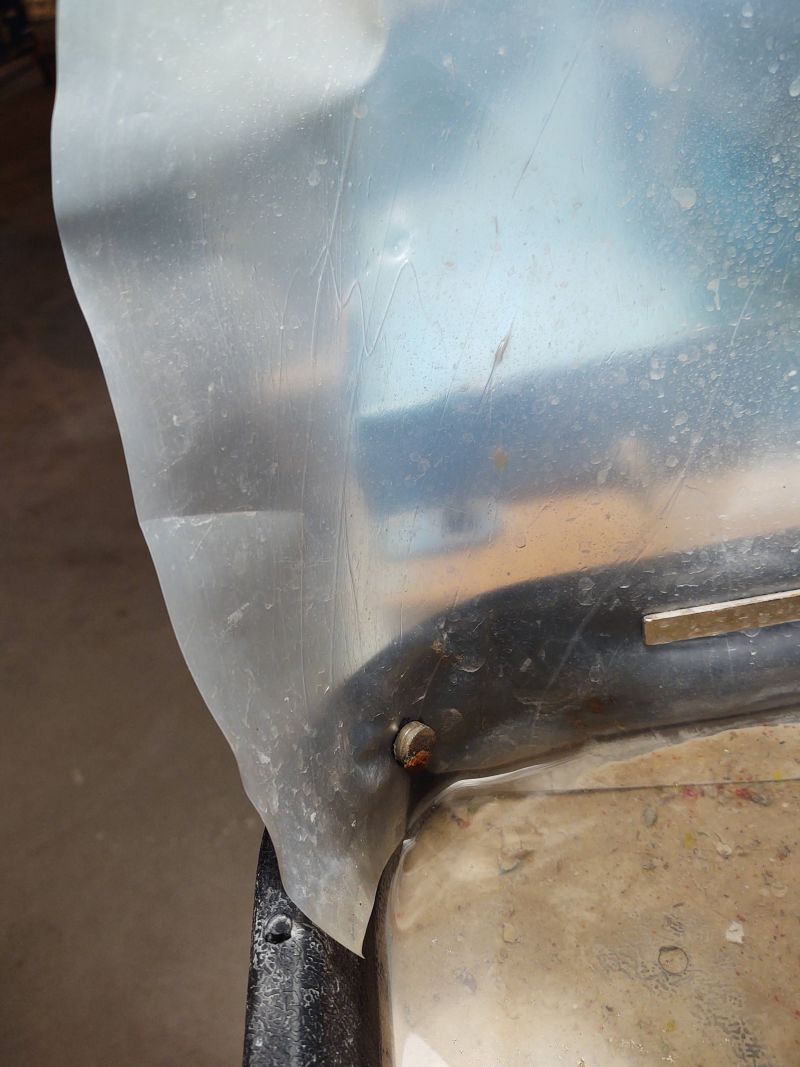
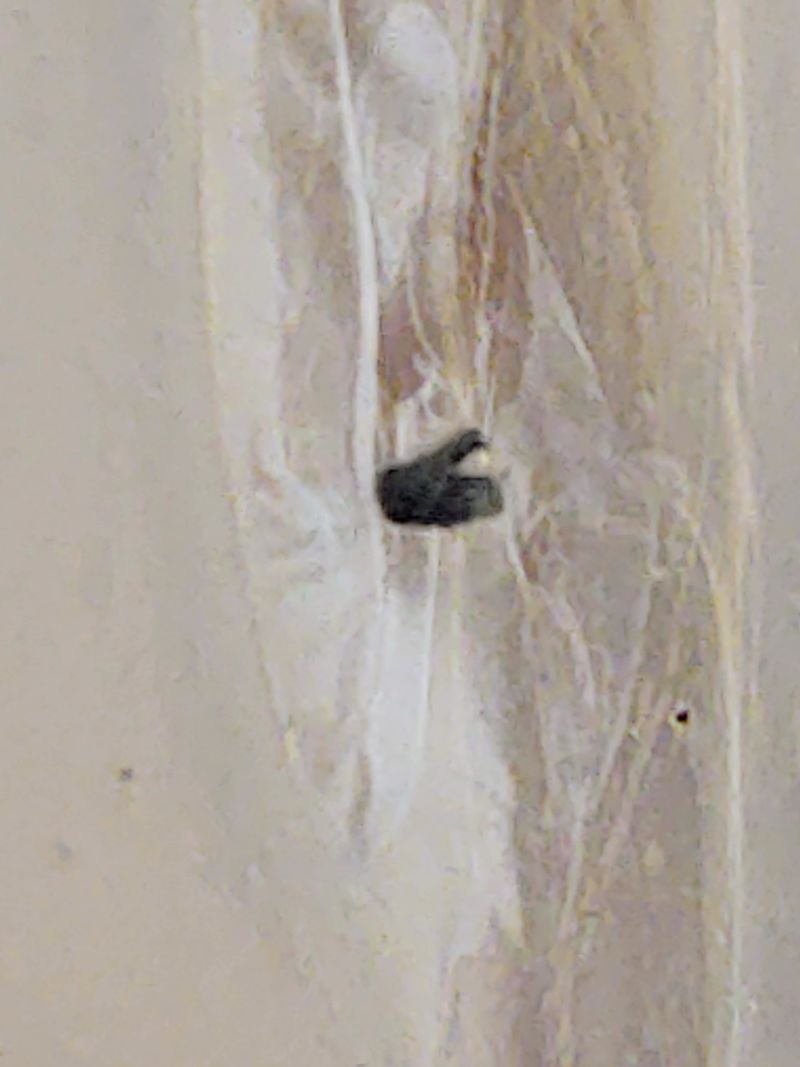
Sheet Plastic: I recommend this over tarps, etc. We used an old blue tarp in our first attempt and while it worked fine it was very dark. Much of this come in a light grey (not quite clear) which lets some light through and is reflective as well. An added bonus to containing the water and mess is it offers a level of protection to others who may be nearby. Check out the projectile in the picture below, while less than 1/16" in the vertical orientation it sure wouldn't feel good in the eye.
A few pics of the containment being put to good use:
Cutting:

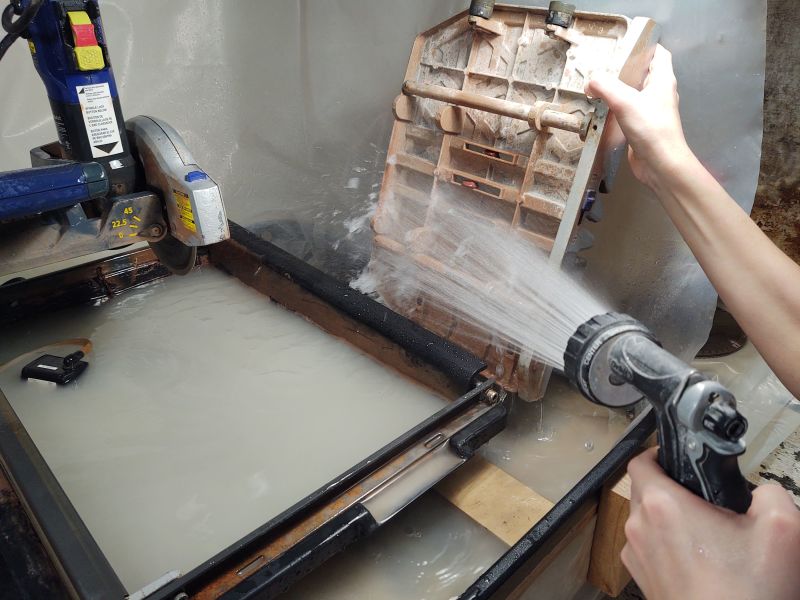
Hosing off the table:
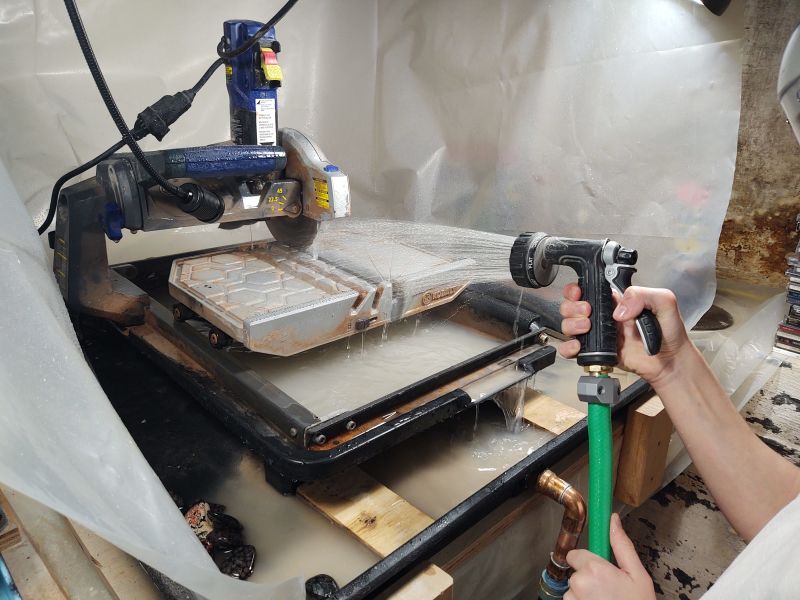
Hosing off the table and rail:
As you can tell from the pics the saw gets a lot of love. Before we made the containment, cleaning was a lot more of a hassle. Little bits of rock and glass would find their way everywhere, we couldn't even slide the table at one point due to the crud buildup on the rail. It's kind of hard to take the saw outside and hose it off when the temp is in the single digits so this has really worked out well. The best part of this design is that it could easily be adapted for many different situations and pieces of equipment. Hopes this helps someone.
Al
This is the first thread in a series that I hope can help others out. We all have our different space constraints and situations so not everything will apply to everyone. This is literally just "How We Do It". Let the conversation begin.
The two biggest problems with using a tile saw indoors are the noise and mess. I am only addressing the mess as our work area is in a basement with a door that can be closed so as not to disrupt the entire household. The mess: we (my son and I) use our saw for cutting and grinding of tumble rough and cutting small slabs occasionally. It is a great tool that can cause a great mess. We live in an area where it is not possible to use the outdoor option year round and frankly want to have the saw close to our indoor setup anyway. A couple of general pics of what we came up with:
The materials used include an HVAC condensate/drip pan, scrap plywood, cutoff 2x4, old garden hose, silicone, sheet plastic, magnets, sheet metal angle and some screws. The only thing we specifically bought for this was the pan, everything else was leftovers from previous projects. The pans are available in many sizes so it is likely you can find one to fit your own situation, they most often come with provisions for a drain also.
We made a three sided frame from the angle and screwed it into the joists above our work area. The use of the angles and magnets allow for a very fast replacement of the plastic if/when necessary.
Plastic sheeting secured at the pan:
In the second picture you can see the plywood the pan is sitting on and the 2x4 that was placed under it in the back to create an aggressive pitch for drainage. Note: the splatter you see on the pan is actually form our grinder to the left of the tile saw, need to make a water shield for it.
Notes on some of the materials:
Condensate/Drip Pan: These are typically not the sturdiest, thus the plywood backing. I am not addressing the drain too much as it will depend on what comes with your pan. The silicone that was mentioned earlier was used when assembling the provided drain kit as they only included a gasket for the inside of the pan. We decided to use a little bit of copper piping and an old hose to drain into a bucket that our grinder also drains into. The pan also provides a handy place to put the rocks you need to work on, eliminating the temptation to put them on the table and have them rattle into the blade.
Angles: available at most home improvement stores. If you live near a sheet metal shop you may even be able to pick them up for free. Aluminum and most stainless steels will not work if you want to use the magnets. Angles also provide a convenient place to clamp a light or use one with a magnetic base.
Sheet Plastic: I recommend this over tarps, etc. We used an old blue tarp in our first attempt and while it worked fine it was very dark. Much of this come in a light grey (not quite clear) which lets some light through and is reflective as well. An added bonus to containing the water and mess is it offers a level of protection to others who may be nearby. Check out the projectile in the picture below, while less than 1/16" in the vertical orientation it sure wouldn't feel good in the eye.
A few pics of the containment being put to good use:
Cutting:
Hosing off the table:
Hosing off the table and rail:
As you can tell from the pics the saw gets a lot of love. Before we made the containment, cleaning was a lot more of a hassle. Little bits of rock and glass would find their way everywhere, we couldn't even slide the table at one point due to the crud buildup on the rail. It's kind of hard to take the saw outside and hose it off when the temp is in the single digits so this has really worked out well. The best part of this design is that it could easily be adapted for many different situations and pieces of equipment. Hopes this helps someone.
Al


 . He does typically sort all of the tumbles as his eyes are better than mine. Everything else is pretty much 50/50 except for water removal, that's mostly his gig, gotta get some work out of him!


 . Dad sounds like he is going to have a sweet space to enjoy retirement.


