FINISHED - Super-Duper 4-wheel grinder
Jul 30, 2017 18:07:46 GMT -5
Drummond Island Rocks, kevin24018, and 6 more like this
Post by Tommy on Jul 30, 2017 18:07:46 GMT -5
I started on my 4-wheel super grinder PLUS unit today. I went as far as I could because I don't have the shaft yet - it's on order. It will be a 24" long, 1" cold-rolled suitable for polisher, threaded both ends, turned to 5/8 for 2" on ends.
All of the wood (except the piece of 2x8 under the motor) is re-purposed from a homemade bed frame made by a friend 25 years ago. Kids are grown, the thing was getting loose so we decided to scrap it.


I decided to over-build the frame for ergonomics mainly I really needed to build a wood rail in front to rest my old arms/wrists on and hopefully cut down on some of the fatigue and carpal tunnel/tendonitis I've been experiencing. I also wanted it to be portable and easy to take off the workbench for a variety of reasons.


That's it for today. Shaft should get here early this week then I'll finish off the incoming water, drains, and lighting.
Update 8/1
Got almost everything done today that I can do without having received the shaft yet.
Rubber mounted the motor

Plumbed the individual water feed needle valves. Most of the stuff I had on hand except for two needle valves I had to buy. I will drill the top of the jugs and install the valves after final alignment of the wheels is decided.

Installed shims to tilt the jugs for slightly better vision of the wheels, and draining purposes.
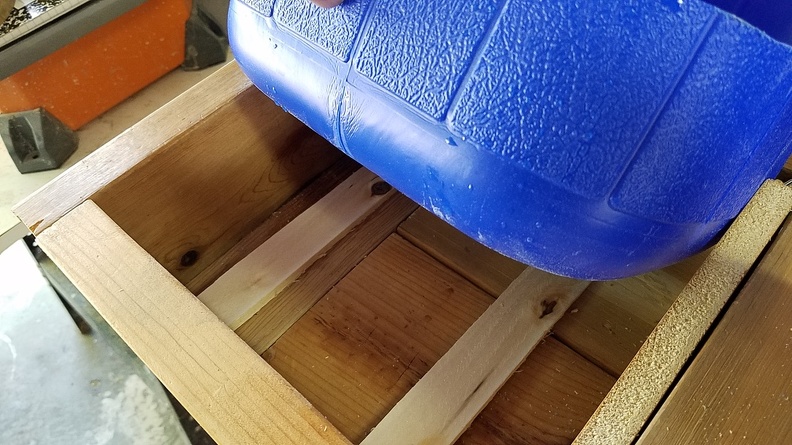
With the jugs now tilted I had to draw a new line and recut the bottom edge of the opening.

Drilled the jugs with a 3/4" hole and installed nylon hose barb. The threaded ends screwed into the holes very tight but I may have to come back at some point and fortify this if it leaks. I don't think it will.

Drain at the back - as I said above the jug is now tilted so water will run towards the back.
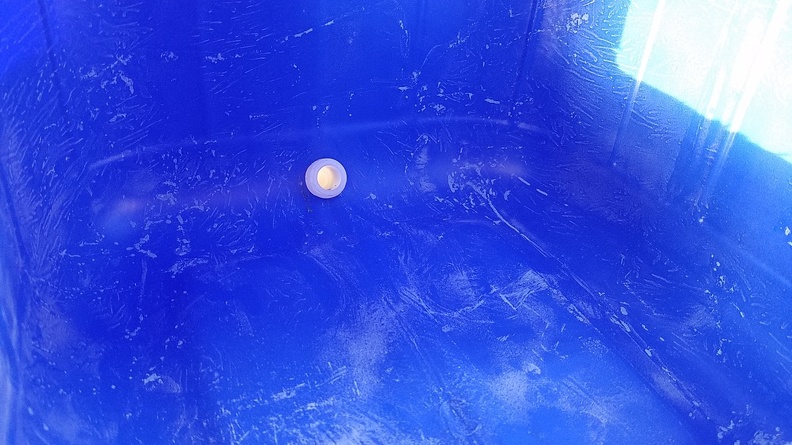
Drain tubes dumping into the solids separator end of the water recirculation tank.

Lastly, I installed spacer boards beside the jugs - this wasn't really necessary AND I could have made it fit better when building the initial frame, but I like the idea of as much stability as I can give the jugs. Before I install the bearing blocks I am going to try to cover the middle area with a piece of sheet metal or plastic just to help keep water out.

Update 8/4
Almost finished - it's spinning smooth as silk and quieter than I anticipated.
I left as much space between the super-grinder and the 60-grit for reasons that should be obvious ... that SOB scares me. I can almost here it growling "feed me!"
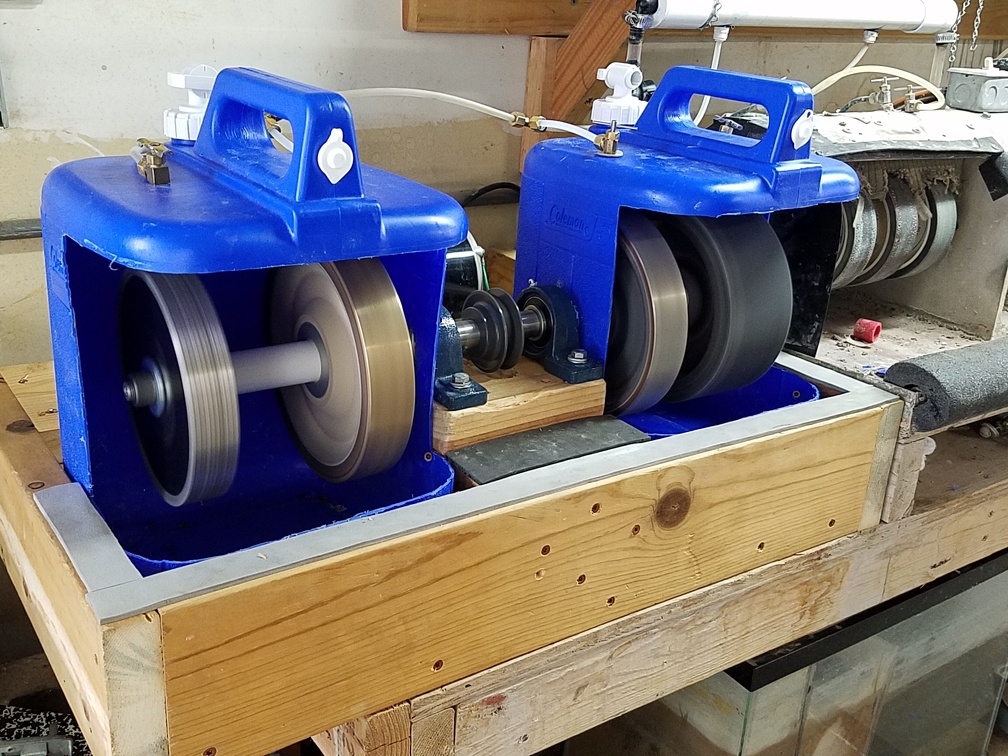
I ended up going closer to the center for the right side wheels because the expando wheel needs more space on the side to change out the belt.

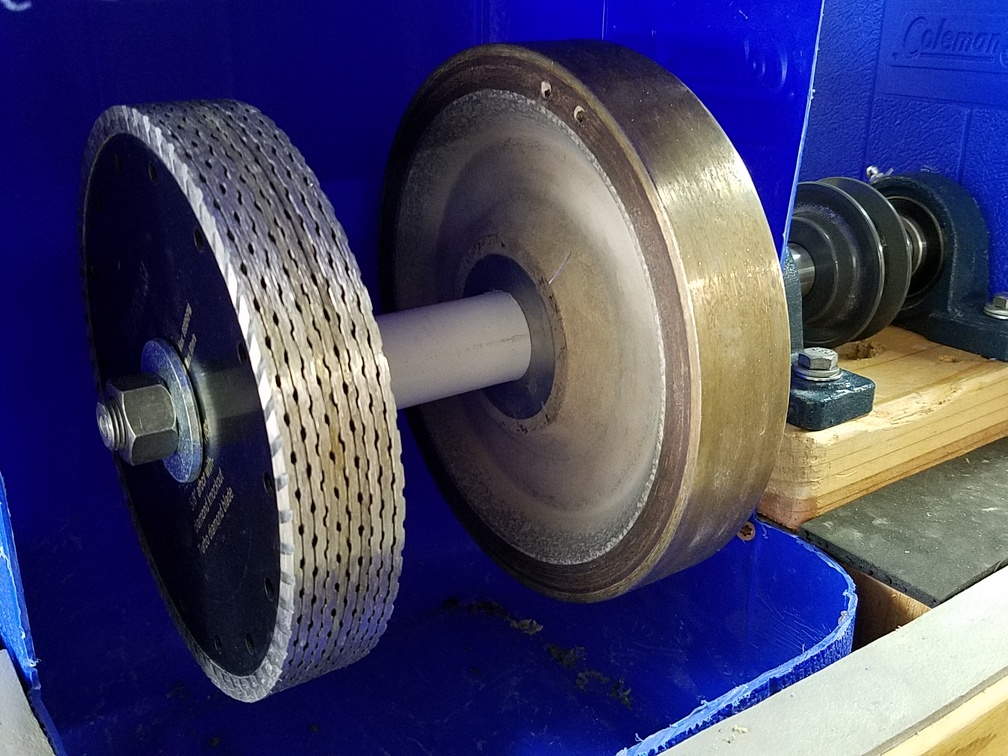
I used a stack of heavy washers on the right side to help offset the weight difference with the left.

2nd Update - 8/4
After using it a little bit I quickly realized that the setup was not going to be friendly on my wrists at all so I added an additional board to the face and one side. This gives me a wide platform and feels a LOT better ergonomically.

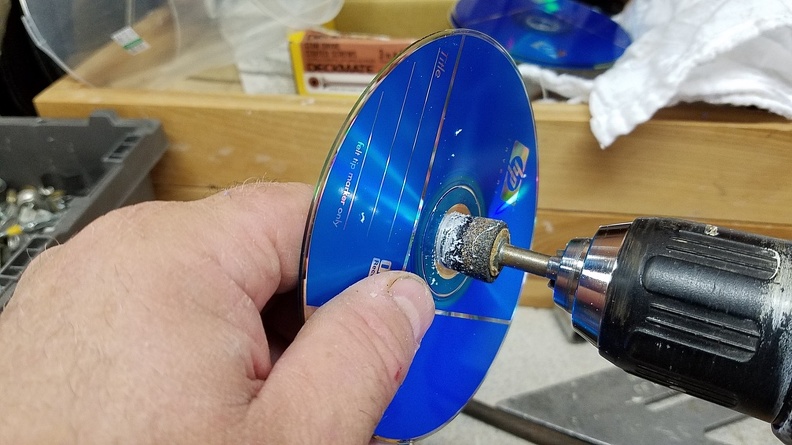
BTW, when stacking the super-grinder blades I used DVD's as most people do - but I ran into trouble with them not slipping on to the 5/8" shaft. I solved this with an old cone shaped grinding bit in the drill.
FINISHED! well kind of. Still have some minor things to do - need to redo the drip spreaders with some stiffer material - and some water proofing on the front edges will help.
All of the wood (except the piece of 2x8 under the motor) is re-purposed from a homemade bed frame made by a friend 25 years ago. Kids are grown, the thing was getting loose so we decided to scrap it.


I decided to over-build the frame for ergonomics mainly I really needed to build a wood rail in front to rest my old arms/wrists on and hopefully cut down on some of the fatigue and carpal tunnel/tendonitis I've been experiencing. I also wanted it to be portable and easy to take off the workbench for a variety of reasons.


That's it for today. Shaft should get here early this week then I'll finish off the incoming water, drains, and lighting.
Update 8/1
Got almost everything done today that I can do without having received the shaft yet.
Rubber mounted the motor

Plumbed the individual water feed needle valves. Most of the stuff I had on hand except for two needle valves I had to buy. I will drill the top of the jugs and install the valves after final alignment of the wheels is decided.

Installed shims to tilt the jugs for slightly better vision of the wheels, and draining purposes.

With the jugs now tilted I had to draw a new line and recut the bottom edge of the opening.

Drilled the jugs with a 3/4" hole and installed nylon hose barb. The threaded ends screwed into the holes very tight but I may have to come back at some point and fortify this if it leaks. I don't think it will.

Drain at the back - as I said above the jug is now tilted so water will run towards the back.

Drain tubes dumping into the solids separator end of the water recirculation tank.

Lastly, I installed spacer boards beside the jugs - this wasn't really necessary AND I could have made it fit better when building the initial frame, but I like the idea of as much stability as I can give the jugs. Before I install the bearing blocks I am going to try to cover the middle area with a piece of sheet metal or plastic just to help keep water out.

Update 8/4
Almost finished - it's spinning smooth as silk and quieter than I anticipated.
I left as much space between the super-grinder and the 60-grit for reasons that should be obvious
 ... that SOB scares me. I can almost here it growling "feed me!"
I ended up going closer to the center for the right side wheels because the expando wheel needs more space on the side to change out the belt.


I used a stack of heavy washers on the right side to help offset the weight difference with the left.

2nd Update - 8/4
After using it a little bit I quickly realized that the setup was not going to be friendly on my wrists at all so I added an additional board to the face and one side. This gives me a wide platform and feels a LOT better ergonomically.

BTW, when stacking the super-grinder blades I used DVD's as most people do - but I ran into trouble with them not slipping on to the 5/8" shaft. I solved this with an old cone shaped grinding bit in the drill.

FINISHED! well kind of. Still have some minor things to do - need to redo the drip spreaders with some stiffer material - and some water proofing on the front edges will help.


