jm
having dreams about rocks

Member since October 2015
Posts: 56 
|
Post by jm on Dec 24, 2022 23:20:19 GMT -5
Hi everyone, I decided to document the process I use for making spheres. I realize that there are many ways to make spheres, this just happens to be the one I use based on the equipment, space, and time that I have. Here I'm working with a chunk of obsidian that I picked up at Glass Buttes, OR. Hopefully the videos are clear enough. First is cutting a cube using a 14" masonry saw I picked up recently. Then I use a jig to cut the preform. I got the idea for the jig from wader . He shows how it works on forum.rocktumblinghobby.com/post/966338/thread. The jig is adjustable for cutting different size preforms. Then I throw the preform into my sphere machine to grind it into a sphere. I painted it orange to show the grinding process better. Then I swap out the grinding cups for the polishing cups. I rinse off the sphere and polishing cups between grits to reduce the chances of cross contamination. After running through the various grits, it's done! (Edit) In case it's not clear, I sped up the video during the polishing segments. I ran the 50 grit for 7 minutes and all the rest of the grits for 4 minutes each. Sometimes I use a polishing compound after using the 10,000 grit pads, but I didn't in this case because it already had a mirror finish. Anyway, that's my current sphere making process. Hope you enjoy. |
|
jm
having dreams about rocks
Member since October 2015
Posts: 56
|
Post by jm on Apr 2, 2022 23:51:02 GMT -5
What type of glue does one use to glue the velcro to the cups ? Thanks in Advance Wayne For the 3d printed cups I'm currently using I tried a couple different things. I found that a 2 part epoxy that's formulated for plastic worked the best.  |
|
jm
having dreams about rocks
Member since October 2015
Posts: 56
|
Post by jm on Mar 30, 2022 23:34:50 GMT -5
Amazing spheres. This material you found in a Montana river is psycho cool. I would have had to clean out the entire vein ! The largest shpere and the large yellow one are my favorites. I wish I had found a vein of those, it would have been a easier. I was finding them scattered in the riverbed where they had obviously washed down from somewhere upstream. My family thought I was slightly nuts because I spent a lot of time wandering up and down gravel bars, but by this point I think they're resigned to the fact that everywhere I go I'm always looking for more cool rocks to drag home.  The yellow sphere is from only rock I found in that color. I'm definitely going to look for more of them next time I'm out there. Here's what the dark spheres looked like in their rough state. During the initial steps of grinding and polishing the spheres, the white streaks were very unremarkable. They were less bright and pronounced than on the rough rock. It wasn't till the very end of the polishing phase when I used 10,000 grit polishing pads and then some polishing compound that those white streaks suddenly turned jet black and became reflective. I thought it was quite a remarkable transformation.  |
|
jm
having dreams about rocks
Member since October 2015
Posts: 56
|
Post by jm on Jan 20, 2022 1:09:35 GMT -5
|
|
jm
having dreams about rocks
Member since October 2015
Posts: 56
|
Post by jm on Jan 18, 2022 23:32:52 GMT -5
Not being very informed , i have some Questions . First , can you add diamond to the material making the cups ? 2nd what is the cost to make a cup , say 1.25 inch's ? 3rd would'nt some of the different plastics one can buy in bar stock be just as good ? 1. Not easily. There might be some 3D printers that could print with diamond embedded in the plastic, but I don't know of any offhand. It would probably require having a extruder nozzle made of diamond to keep from being worn away by the diamonds being printed, which would probably be quite expensive. Sprinkling diamond powder between the layers as they're being printed might be possible, but I really don't want to be sprinkling extremely abrasive powder onto my 3d printer. One other option that I thought about (which has been discussed here in other threads) was mixing diamond powder into epoxy and molding segments or rings to fit on top of the grinding cups. I may give that a try sometime, but for the moment I'm sticking with the hard diamond segments. 2. Here's the approximate price breakdown for the 100mm grinding cups in the pictures above. - PLA filament for printing the cups ~ $8
- 48 4mm flat head machine screws ~ $10.5
- 48 4mm nylock nuts ~ $5.5
- 12 diamond segments ~ $13 (the original segments were to long to use effectively, so I broke 12 of them in half to get 24 short segments)
So it came to about $37 total for a set 3 grinding cups. I think I could cut the cost of the nuts and bolts by about half by getting them online instead of at the local hardware store, but at the time I was in a hurry to get these built and didn't want to wait for shipping
3. Plastic bar stock should work fine. I just like the 3D printed option because: 1 - I already have a 3D printer, 2 - I don't currently have any plastic bar stock, and 3 - I can make the cups any size I want without having to keep a bunch of different size bar stock on hand. Now that I think of it, the cups could even be made of several layers of plywood fastened together and the grinding segments glued or bolted onto it. Or made from pvc pipe. Or injection molded. Seems like there's a lot of different ways it could be done that would work equally well, it just depends on what materials and tools people have access to and what they're comfortable working with. |
|
jm
having dreams about rocks
Member since October 2015
Posts: 56
|
Post by jm on Jan 11, 2022 15:22:13 GMT -5
May i ask where you buy the segments from ? I got them from AliExpress. www.aliexpress.comFor whatever reason the link directly to the product doesn't work, but you can search on their site for "50 grit diamond segments". I was buying the 12 pack of segments for around $13. |
|
jm
having dreams about rocks
Member since October 2015
Posts: 56
|
Post by jm on Jan 10, 2022 23:17:26 GMT -5
I've been making spheres for a few years now and I was never very satisfied with the grinding and polishing cups I had. I made several dozen spheres with them and most of them turned out pretty good, but there was room for improvement. My old grinding cups were made from plumbing pipe caps with diamond segments brazed on. They worked ok, but I was never able to get the segments brazed on in a very good circle. This tended to introduce a lot of wobble into the sphere machine when running them.  For polishing I was using diamond polishing pads with foam backing disks. I cut a cone out of the middle and slit the polishing pads partway through from the inside so the spheres would fit into them better. It worked ok, but on rocks that had softer spots in them this setup tends to undercut a lot and make the spheres out of round.  I wanted to make something that worked better and that would be easier and/or cheaper to make. After giving it a lot of thought I decided to try making some 3D printed cups with interchangeable grinding segments. Here's what I came up with.  The hole in the middle has 3d printed threads in it for screwing in a mandrel. The holes around the rim are not threaded and are set in pairs of two so that the grinding segments are interchangeable. You can see from the wear patterns on the diamond segments that they are in a decent circle.  The diamond segments have flat head machine screws brazed onto the back of them so they can be bolted onto the grinding cups. I made a jig to hold the screws and diamond segments while I brazed them so they would all be uniform. They turned out fairly good, once I got the hang of brazing the smaller screws onto the larger diamond segments. It takes a lot more heat on the larger piece to get it up to the correct temperature. The loose screws in the picture are the wrong size, I didn't have any of the right size handy when I was taking pictures.  I've only made the one set of grinding cups so far but they seem to work very well. I'm planning on printing some bigger cups for making larger spheres. It should be much cheaper than making them out of metal. At first I was a little concerned that the machine screws would break out the side of the grinding cup, but so far I haven't seen any sign of them cracking. If they do break I'll just reprint them with thicker walls. For polishing I decided to go with 3D printed cups with velcro epoxied onto them so I can swap different polishing pads onto them. They work much better than the foam backer pads I was using before. I've been using 4" diamond polishing pads that I cut up into different sizes for different size polishing cups. I sized the cups to fit the different circles I cut out of the pads.   Both the grinding cups and polishing cups seem to work really well. I'm sure I'll come up with some improvements for them, but they're not bad for version 1.0. |
|
jm
having dreams about rocks
Member since October 2015
Posts: 56
|
Post by jm on Jan 9, 2022 23:46:33 GMT -5
That’s quite a large collection! Besides admiring them like the rest of us, what are you going to do with them ? My family and I picked out a few of our favorites to keep (my wife insisted the one from the garage sale that looks like dinosaur skin was 'hers' ). I took the rest with me when our extended families got together around Christmas and let everyone to pick their favorite one. I've been giving some away to friends, too. I've been considering trading some of them to people for interesting rocks that I could make into more spheres, but I haven't done anything in that regards yet. |
|
jm
having dreams about rocks
Member since October 2015
Posts: 56
|
Post by jm on Jan 9, 2022 19:02:56 GMT -5
It's wintertime again, so I'm working on rocks again. This is my latest batch of spheres. Instead of doing one or two at a time I decided to try more of an assembly line type of production and made a whole pile of preforms, then ground them all round, then polished them. It ended up taking a lot more time than I thought it would (months), so I don't think I'll do batches this big anymore. Maybe a dozen or two at a time after this... 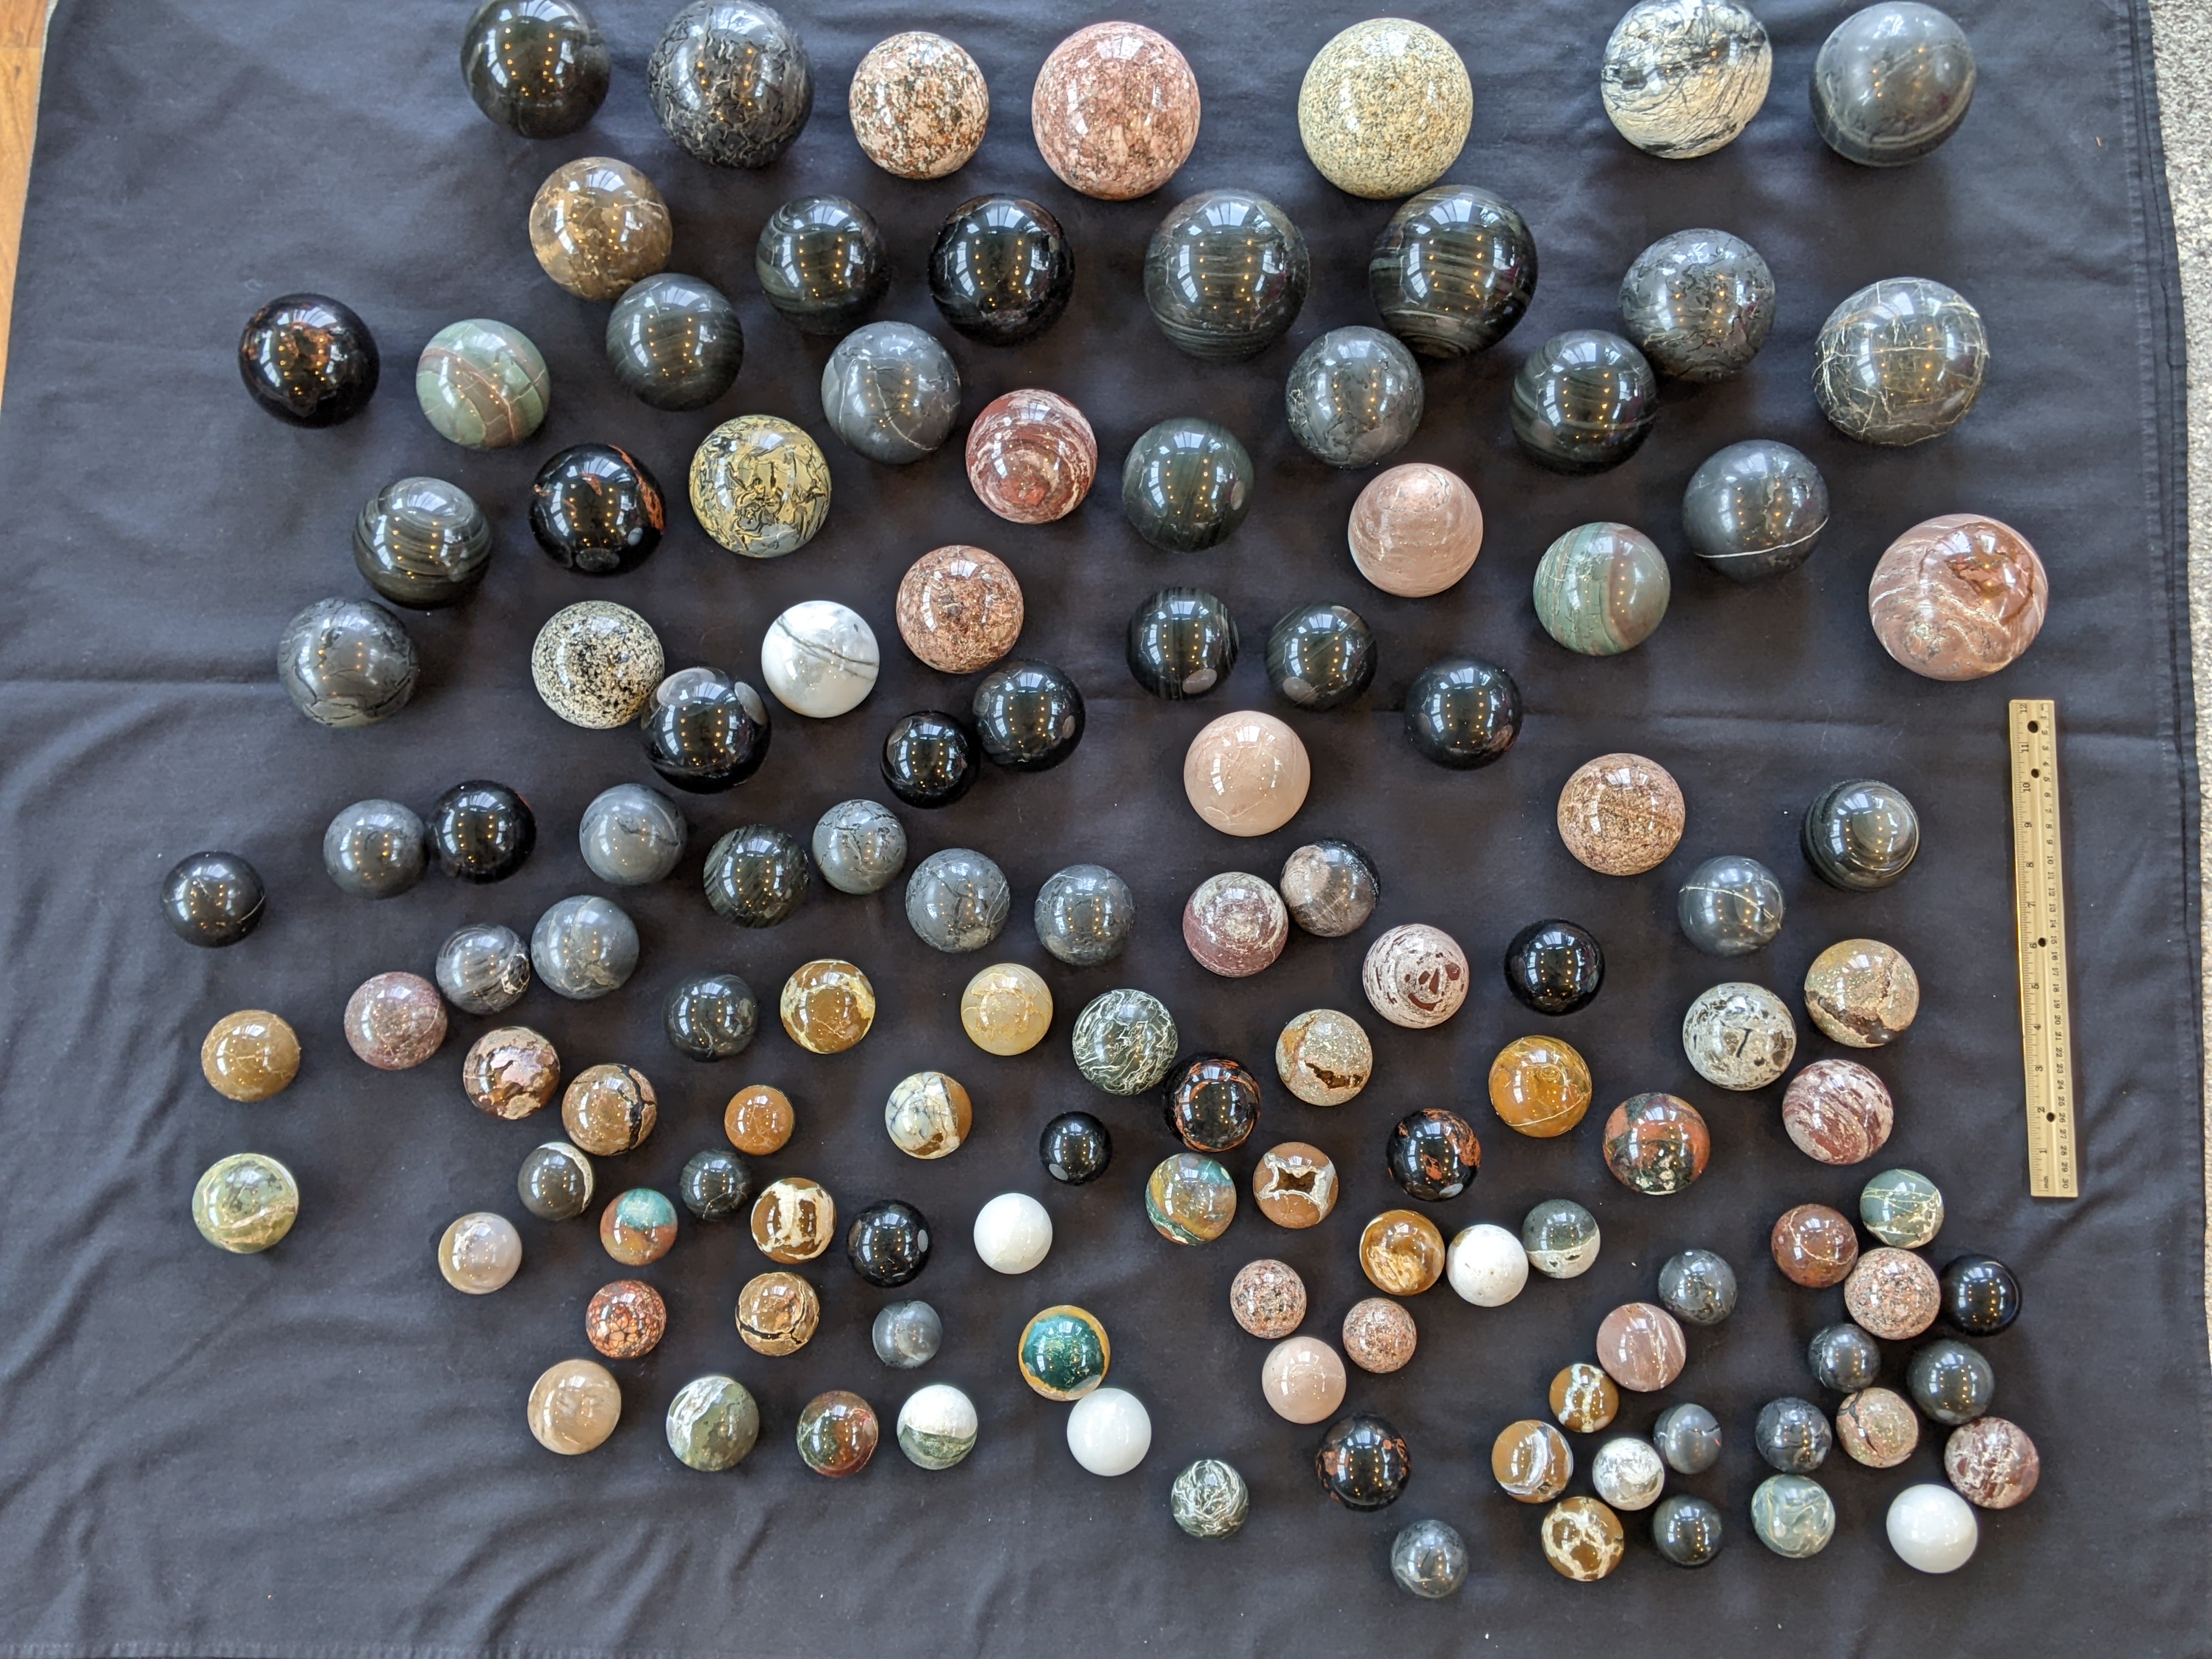 Obsidian from Glass Buttes, OR.  These I pulled out of a river in northwest Montana. Not sure what they are, but they look cool. 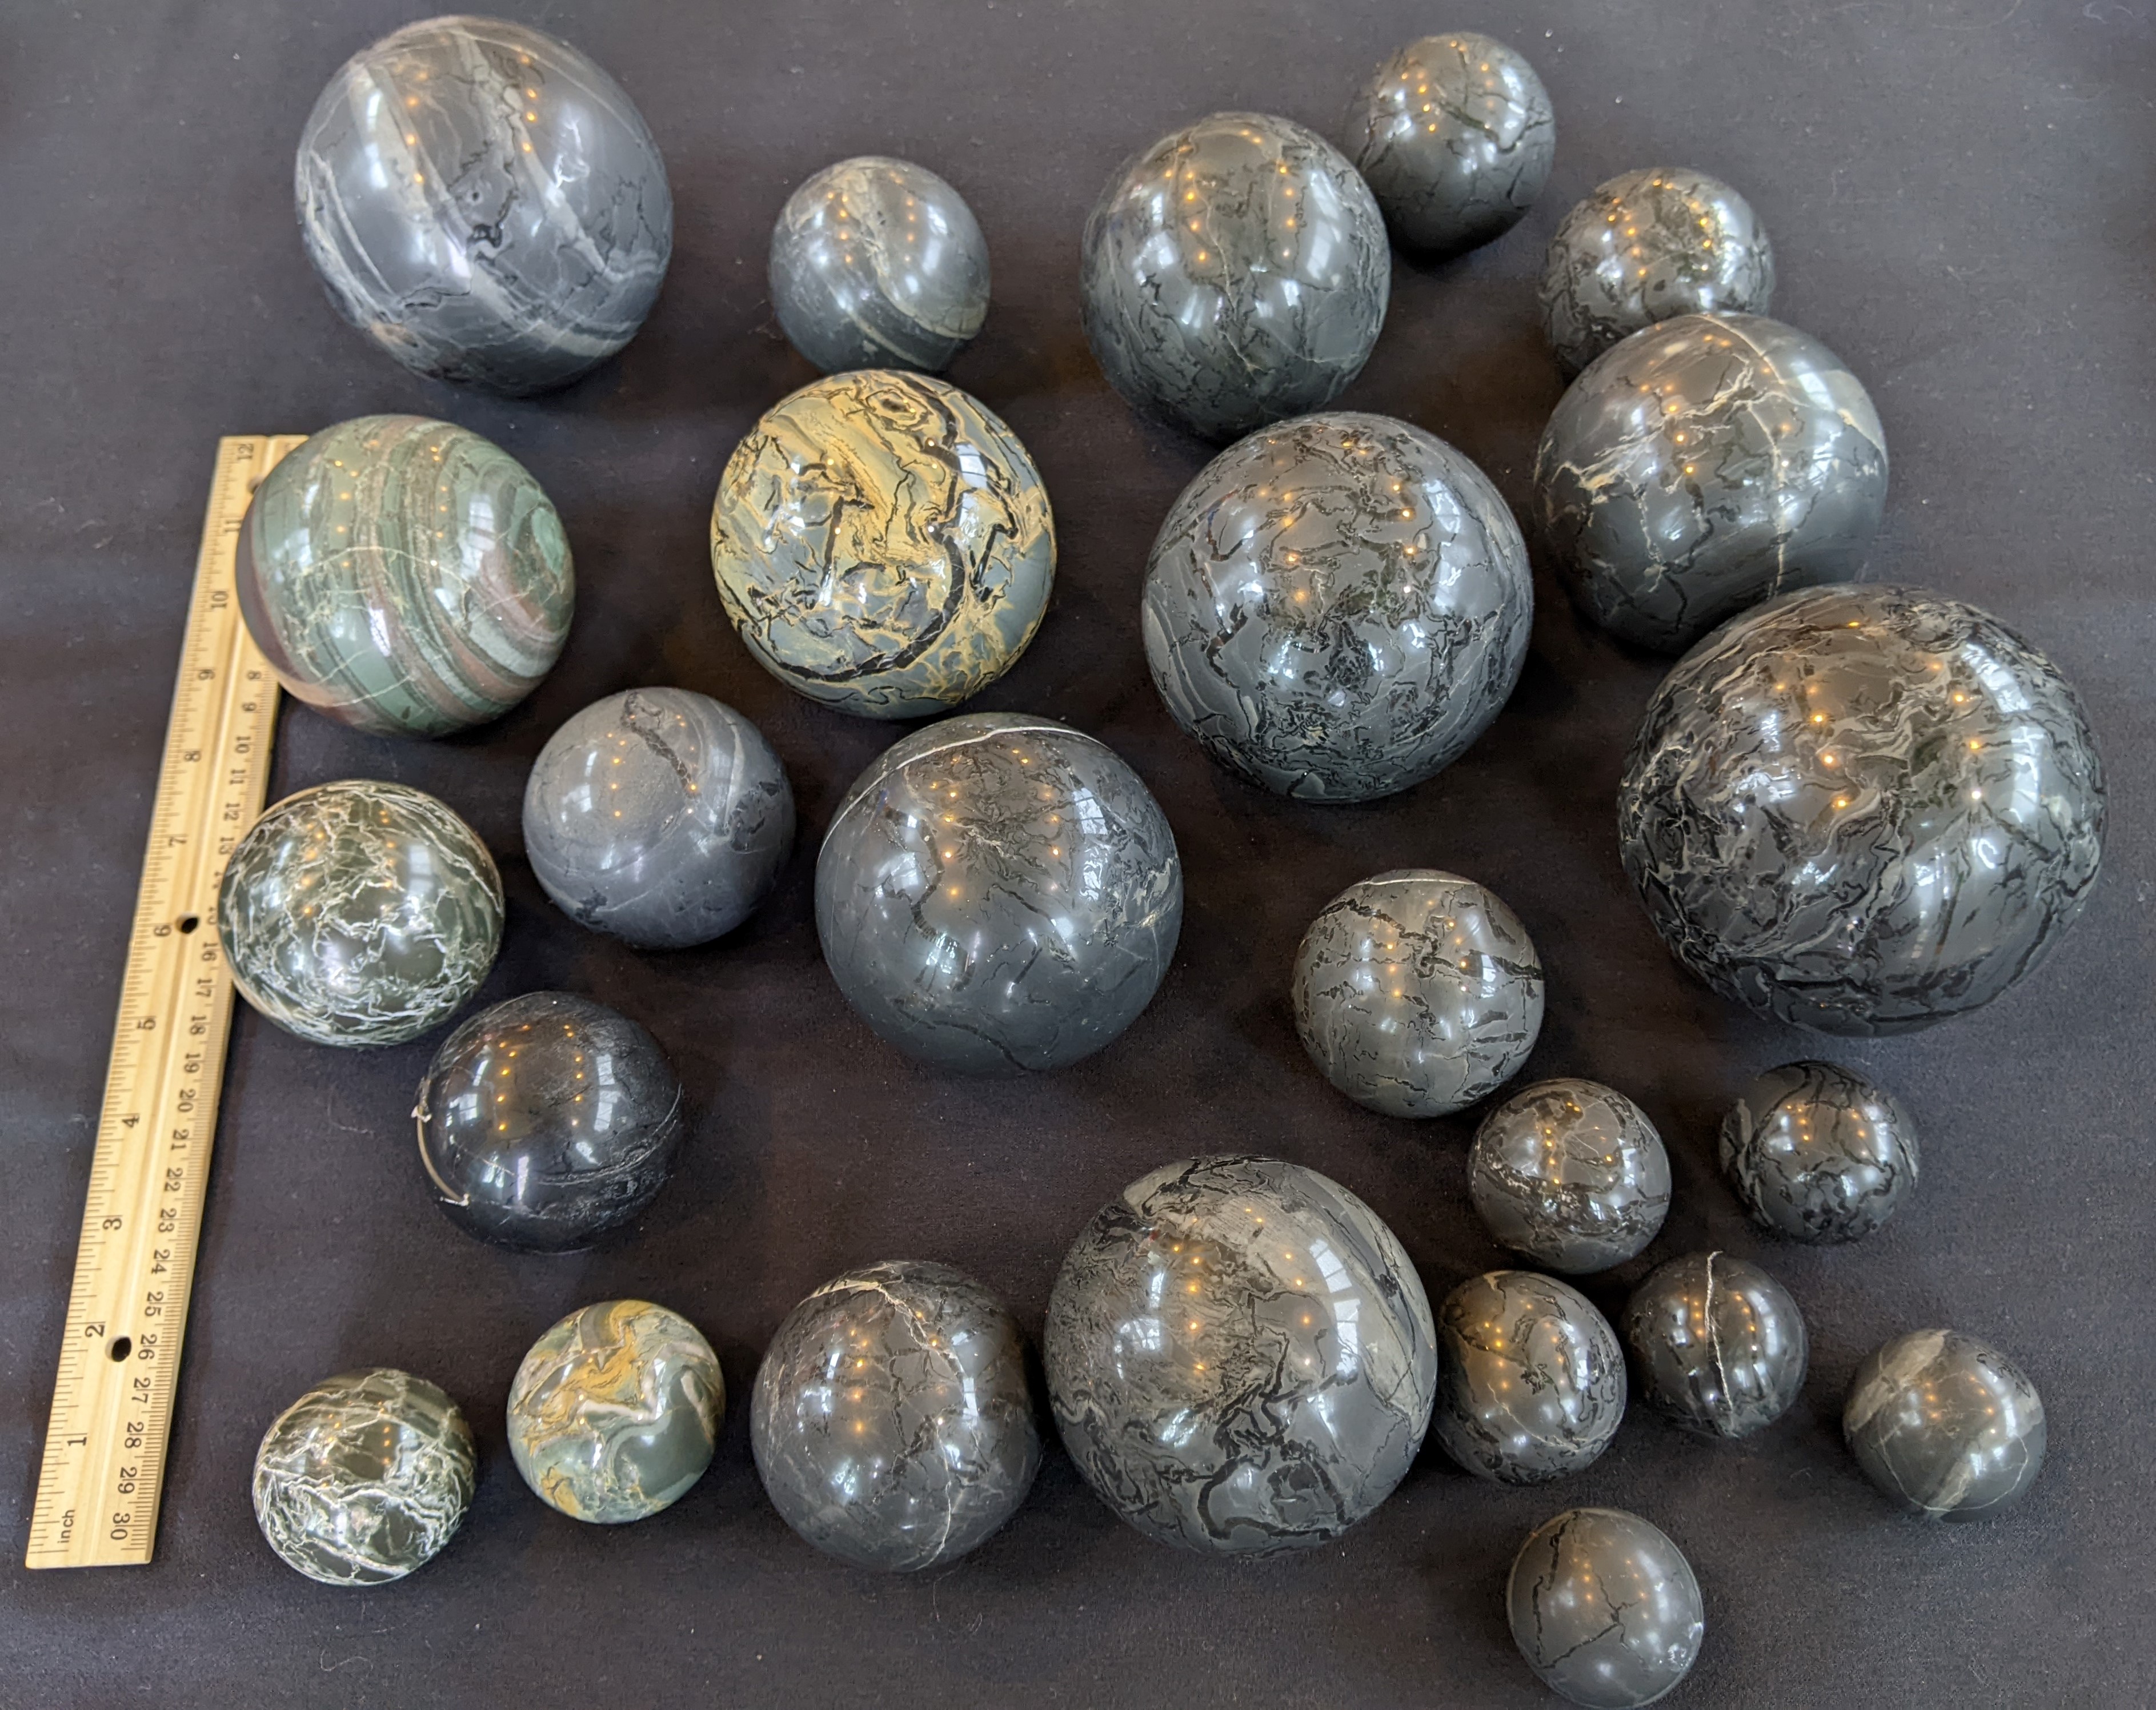 Different granites from MT, WY, and OR.  These came from northwest Montana also, just outside of Glacier Park.  Various petrified woods from AZ, WA, and garage sales.  Marble. The pink stuff is from UT, not sure about the white one.  These came from a rock pile in my brothers neighbors yard.  More from the neighbors rock pile, except the smallest one. I think that one came from a garage sale.  Various jaspers from OR, WA, and MT.  Thundereggs from OR.  Various quartz like rocks from OR.  |
|
jm
having dreams about rocks
Member since October 2015
Posts: 56
|
Post by jm on Nov 18, 2021 23:05:36 GMT -5
Holy cow, that's a lot of spheres!
What are you doing with them all?
I'm not sure yet. I'll probably pick out my favorite ones to keep and give the rest to family and friends. |
|
jm
having dreams about rocks
Member since October 2015
Posts: 56
|
Post by jm on Nov 18, 2021 1:27:21 GMT -5
I know this is a bit of thread necromancy but I’m curious how well this setup held up after extended use? Around here everyone is getting bored so this seems like a good winter project to try and replicate. This setup has lasted several years now and is still running strong. One thing that I think I forgot to mention in my original post was the voltage the drills are running at. The 12v power supply I'm using has an output voltage adjustment, so I turned it all the way down so it's running at about 10.5 volts. That's still a little over what a fully charged battery was supplying to the motor, but not outrageously so. I don't have any good guesstimate on how many hours of runtime I have on it, but it's probably several hundred minimum. I've made well over 100 spheres (including the current batch) so far without any serious issues. The only minor problem I had was that I kept blowing fuses in the speed controllers when I would try to start up sometimes. After a while I realized that I had somehow got ahold of a box of 2A fuses, which were to way to small. I swapped them out with some 5A fuses and haven't had any problems since. I'm currently in the process of making another batch of spheres (see pictures). The big ones are almost done polishing, the smaller ones I've only polished with the 300 grit pads so far. 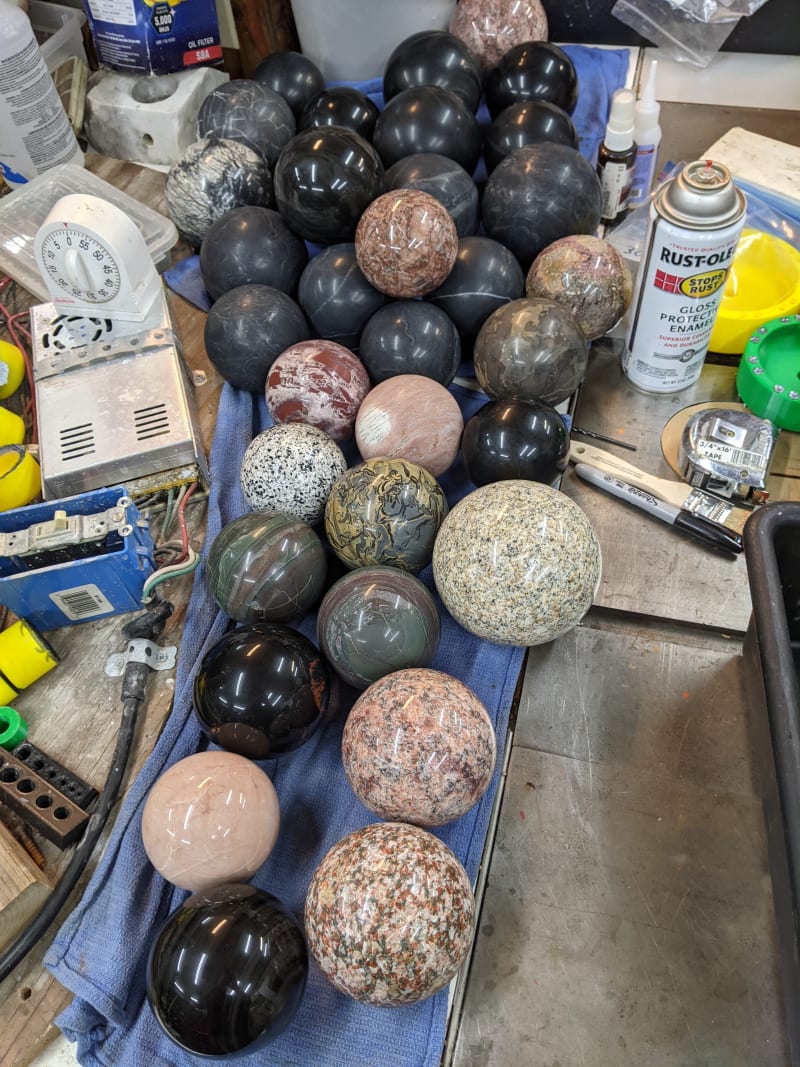 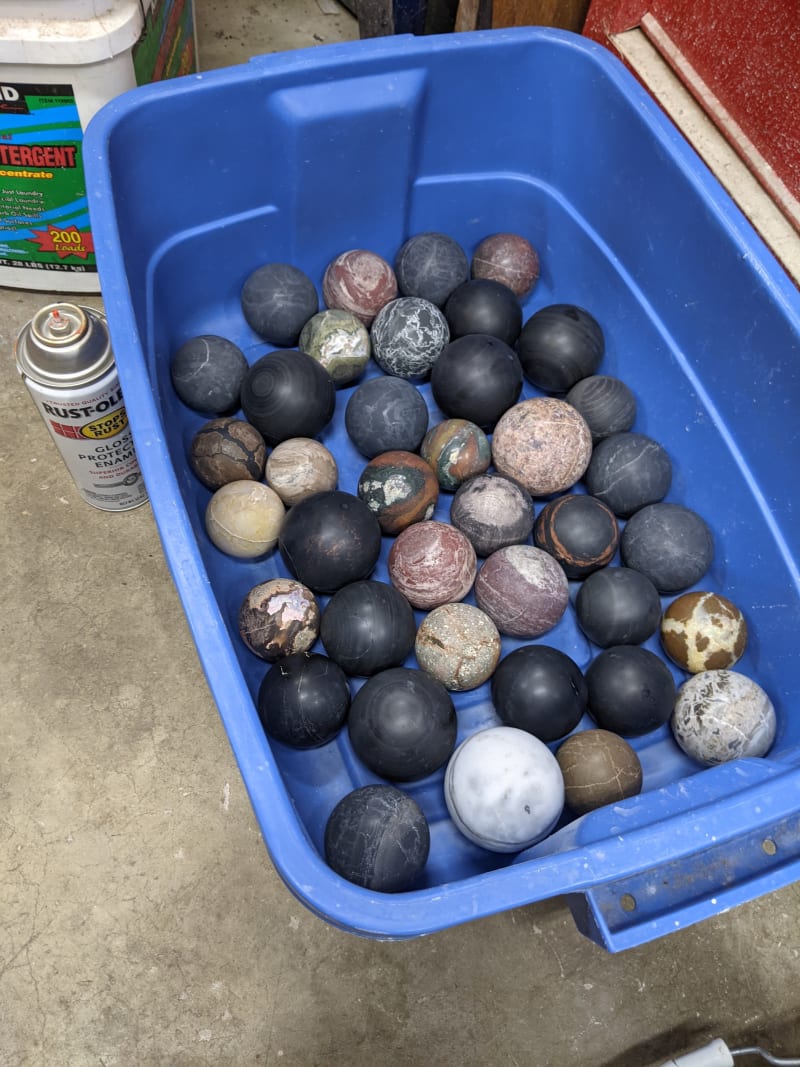  |
|
jm
having dreams about rocks
Member since October 2015
Posts: 56
|
Post by jm on Apr 19, 2019 15:09:58 GMT -5
Based on my somewhat limited experience, those motors are probably good enough for doing small spheres. I built myself a 3 head sphere machine using cordless drills that seems to work just fine. The motors in the drills seem to be a bit less beefy than the ones you are looking at. So far I've made spheres up to 4" in my machine without any problems (I'd make bigger ones, but it's hard cutting bigger preforms on a 10" saw). The motors definitely get warm when running for hours, but I've made several dozen spheres so far and they seem to be holding up ok. Good luck with your project. |
|
jm
having dreams about rocks
Member since October 2015
Posts: 56
|
Post by jm on Jan 12, 2019 1:56:33 GMT -5
I recently built myself a sphere machine and made my first batch of spheres. These ones are petrified wood. 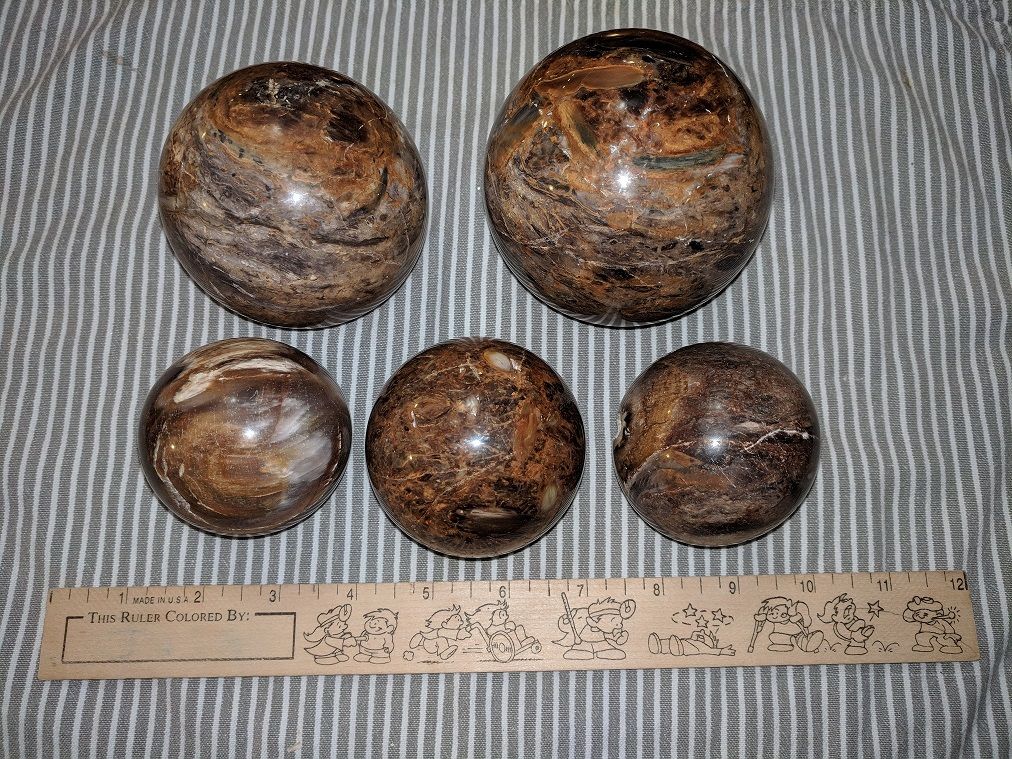 The first 3 are jasper. The bottom left one was a vein of crystal in a basalt lava flow. I'm not sure what it is, I just thought it looked cool when I found it:) 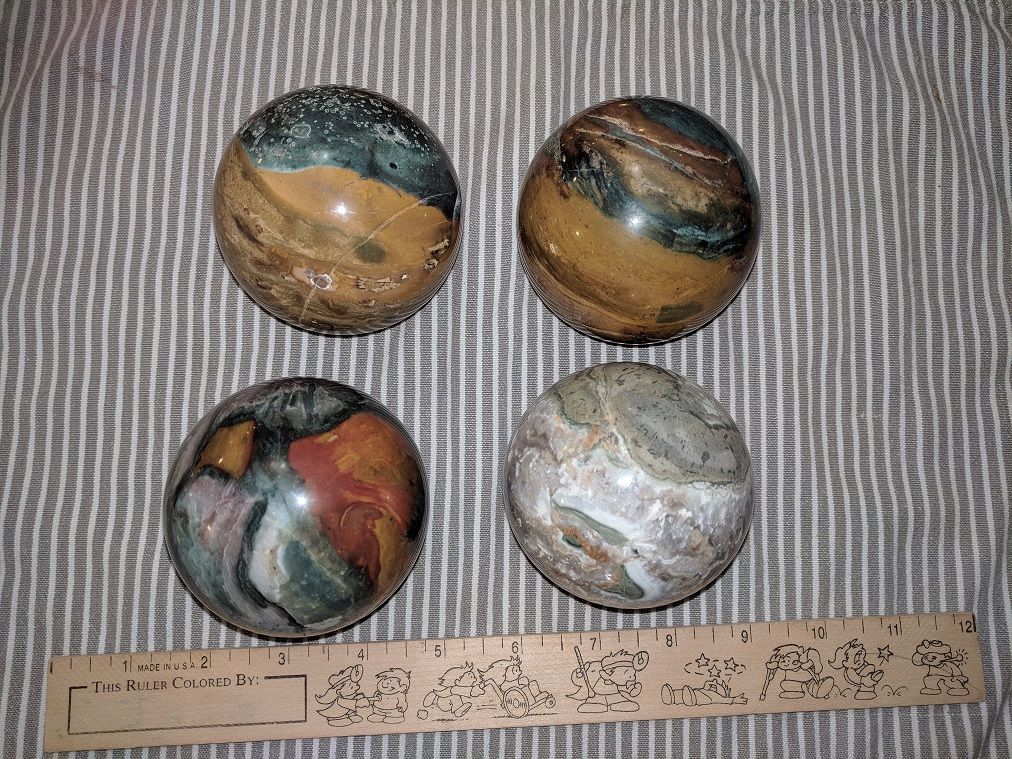 The black one is full of garnets. Not sure what the brown one is, I got it from a garage sale. 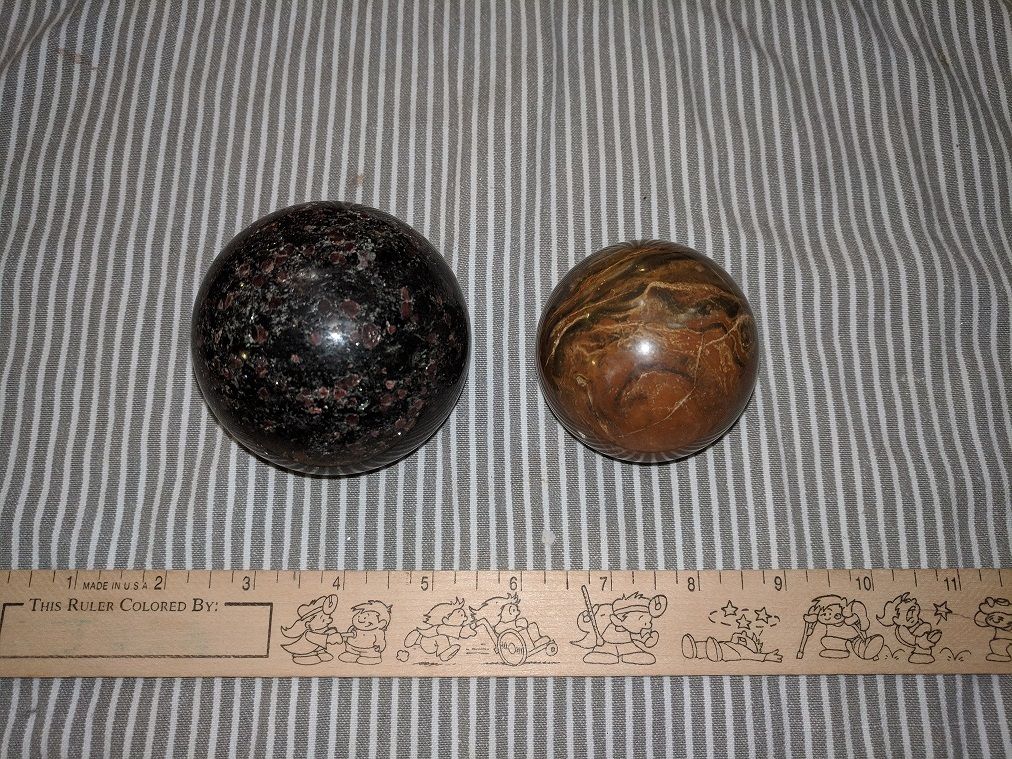 Now that they're done, I can see some of the deeper scratches that didn't buff out. I guess I didn't let them run long enough in the medium grits, so I'll have to go repolish those ones. It's been a fun learning experience so far. |
|
jm
having dreams about rocks
Member since October 2015
Posts: 56
|
Post by jm on Jan 11, 2019 3:05:24 GMT -5
Awesome build! I agree it's a very innovative way to get it done. If you don't mind me asking, what was the total cost of the build? I bought some of the parts for this project over a year ago, so I'm not sure on how much I paid for some of them, but here's my best guess. This is only the parts that I bought specifically for this. It doesn't include all the stuff I already had laying around in my garage  2 cordless drills - $25 3 door hinges - $7 9 pipe caps (3 different sizes) - $28 needle valve - $7 water jug - $1 12V power supply - $19 3 DC speed controllers - $8 diamond segments - $45 polishing pads - $40 bolts - $5 If I can still do math this late at night, that comes to $185. There are probably a few things that I forgot, so I'm going to round it out to an even $200. |
|
jm
having dreams about rocks
Member since October 2015
Posts: 56
|
Post by jm on Jan 11, 2019 2:48:14 GMT -5
jm Good job. Simple yet elegant solution using the cordless drills and the piping end caps. Always admire home-made solutions, good to keep the creative portion of the brain working. A couple of questions; 1) About how long does it take to get to a smooth round. I realize it really depends on how rough the rock is to start. 2) How many stages do you anticipate, or how many sets of grinding/polishing end caps do you anticipate needing. 3) Do the diamond segments come in finer grades for your next end caps?
The amount of time it takes to round out a preform varies greatly, depending on how hard the rock is. I did a rough grind on a couple of 2 1/2 inch spheres a few weeks ago. One made of obsidian took about 10 minutes to completely round out, while a another similar sized one that came from a rock I bought at a garage sale took several hours. On average, though, I'd guess it takes about 20 minutes.
I've made three different sizes of rough grinding cups for making different size spheres, using 1", 1 1/2", and 2" pipe caps. I'll probably need to make at least one more smaller set from 1/2" pipe caps and at least one larger set. I'm not sure on the size for the larger ones yet. I'll probably use something besides pipe caps for the larger ones, since larger pipe caps start getting expensive very quickly.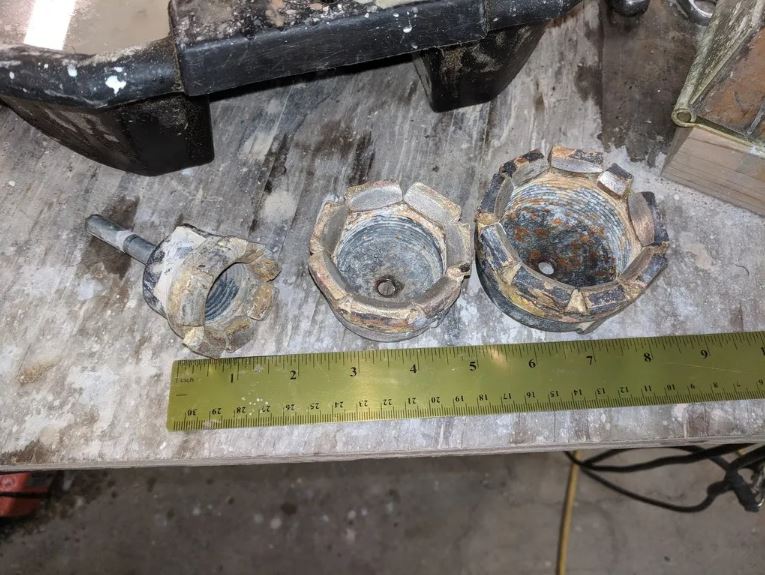 The rough grind is using 50 grit diamond segments. I decided to go with diamond polishing pads for doing the rest of the polishing, since it's much easier (and cheaper) to swap out velcro pads than to build grinding cups for all the different grits. I got the idea for this from www.sphereheaven.com/equipment.htm. I got some of the velcro backer pads and cut out the center so it was in a concave shape. Then I cut the middle part of the polishing pads like it shows on that website. So far I've been using the following grits: 100, 300, 800, 1500, 3000, 6000, 8000. [/span] 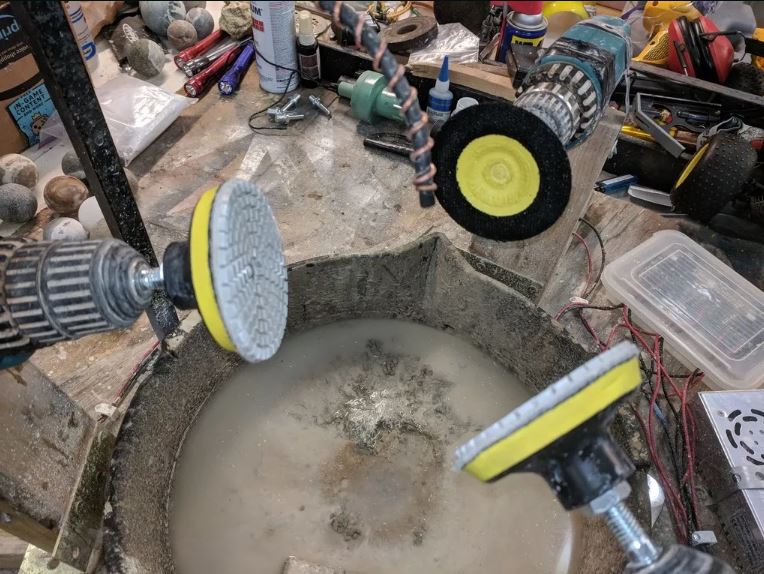 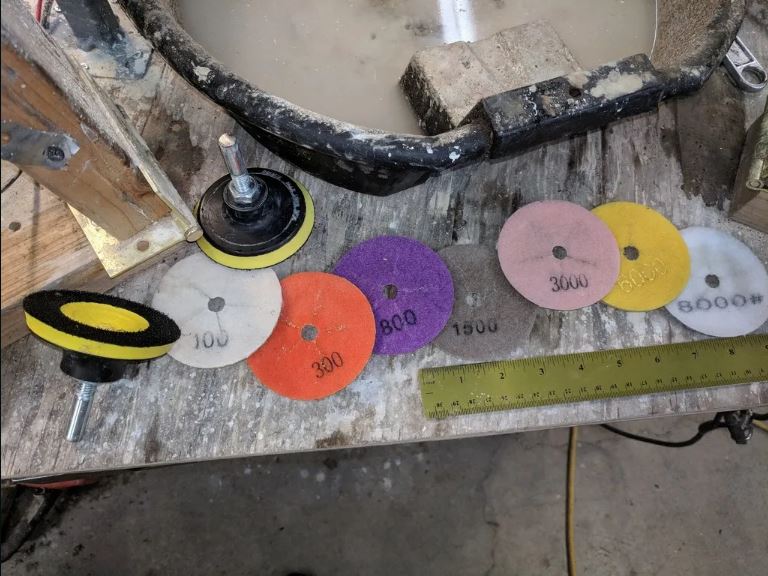 |
|
jm
having dreams about rocks
Member since October 2015
Posts: 56
|
Post by jm on Jan 10, 2019 3:54:42 GMT -5
Now that winter has set in here in the Pacific Northwest and I'm stuck inside, I decided to build the next machine on my list. I've been meaning to build a sphere machine for a year or two now, so this seemed like a good time. The biggest thing that was keeping me from building one up to this point was that I didn't have any good motors and I wanted to spend as little money as possible on it. While digging around in my garage I came across an old Makita cordless drill that I haven't used in years. I looked at it and realized that: it has sealed bearings which would keep out rock dust has lots of torque is made to stand up to a lot of abuse has excellent thrust bearings in it, since it can handle a grown man leaning on it when in operation. After a quick trip to ebay to pick up two more of the same model drill, I was ready to start. (old cordless drills that are sold without batteries or chargers are fairly cheap on ebay.) The first thing I did was open the drills up, remove the forward/reverse switch and the trigger, and solder some wires directly onto the motor. The removed switch/trigger assembly can be seen in the top right of the picture. 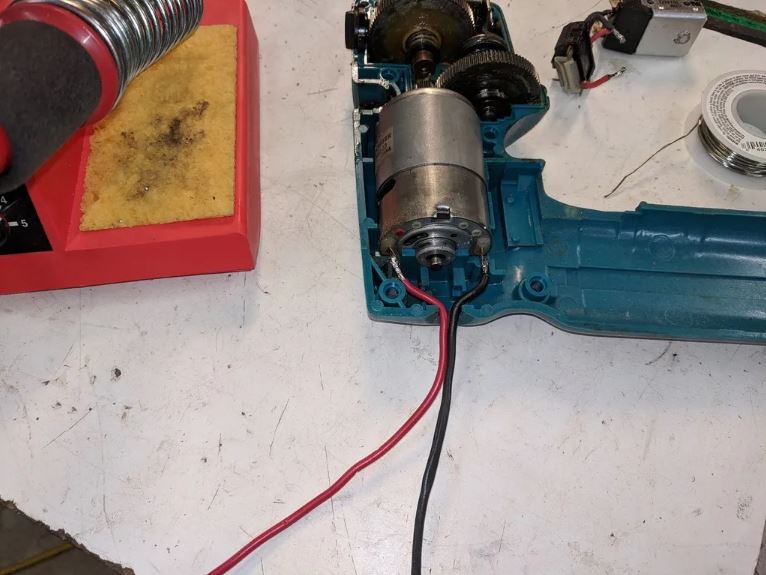 Then I mounted each drill on a hinged framework made from 2x4s and door hinges. 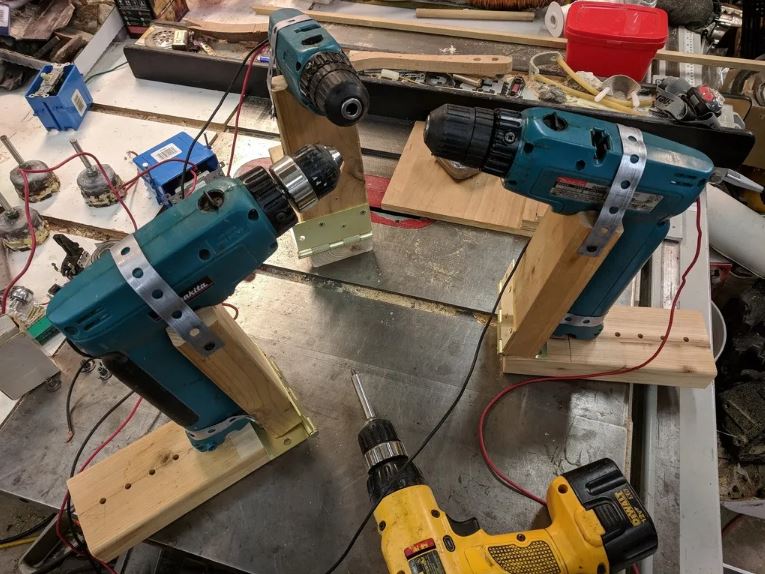 Then I cut a triangular piece of plywood, drilled holes for bolts to go through, and put T-nuts on the bottom for the bolts to hold onto. There are several different holes so the framework holding the drills can be moved in or out to accommodate different sphere sizes. 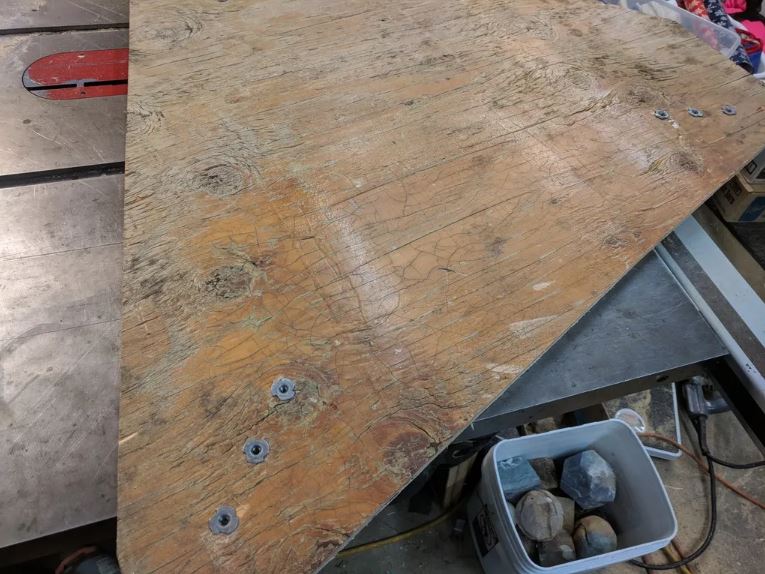 The three frameworks were bolted on from the topside. I welded washers onto the top of some bolts to make them easier to turn by hand. It also make a handy place connect bungee cords. 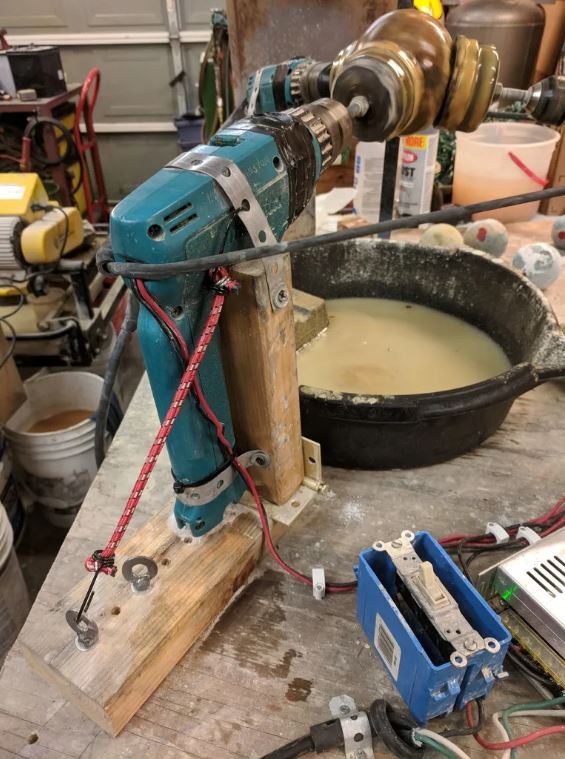 For the power source, I bought a 12V power supply from China. It's supposed to be able to supply 30A. I have my doubts that it will actually supply that much, but it works so I can't complain. I switched the drills to the low speed setting on the transmission, but running them at 12V instead of the 9.6V that the batteries supplied means that even on the low speed setting they are probably spinning at 4-500 rpm. This was fast enough to splatter mud all over the place when I first tried to grind a preform. To solve this, I got a few cheap DC speed controllers (also from China) and wired one up to each drill. This lets me vary the speed of the drills from a couple rpm all the way up to full speed. It's set up so the wall power goes through the light switch to turn the entire thing on/off. The light switch feeds AC power into the power supply. The power supply feeds 12V DC power to the three speed controllers, using a separate set of wires for each controller. The power then goes from the speed controllers to the drill. 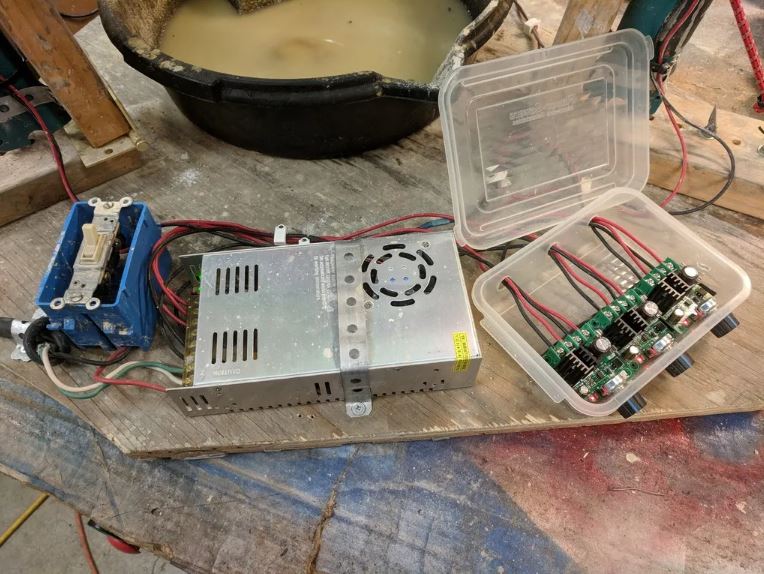 For a water supply, I got a water jug from the dollar store down the street and bolted a needle valve into the bottom of it. The hose is a piece of small engine fuel line wrapped with some wire I stripped out of a chunk of Romex I had laying around. The needle valve makes it easy to vary the water flow anywhere between a few drips a minute and a steady stream.  The speed controllers come in especially handy when grinding a rough preform. Here's a fairly rough thunderegg just starting out. Running something like this at higher speed makes the rock pop out of the grinding cups, but at low speed it handles it just fine. Once it starts getting rounded off, I can start bumping the speed up. For the rough grinding cups I used some black iron pipe caps, drilled and tapped a hole for a 3/8" bolt in the center, and brazed on some diamond segments I got from China. 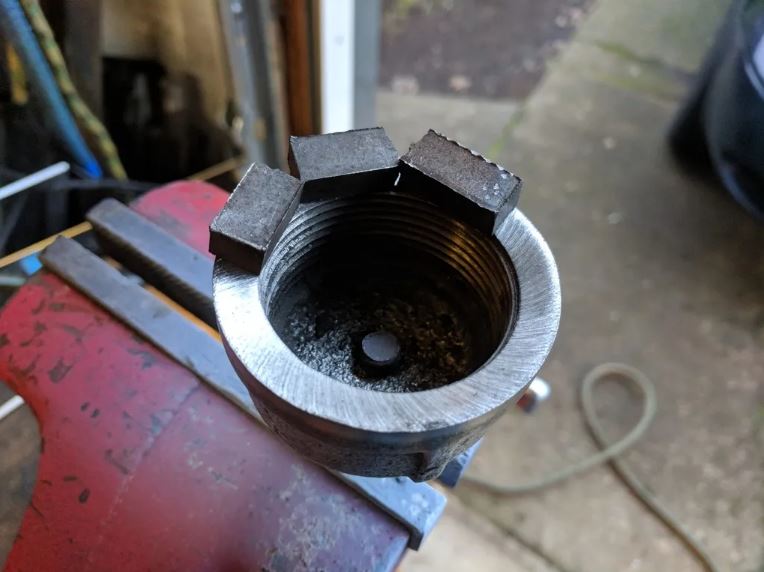 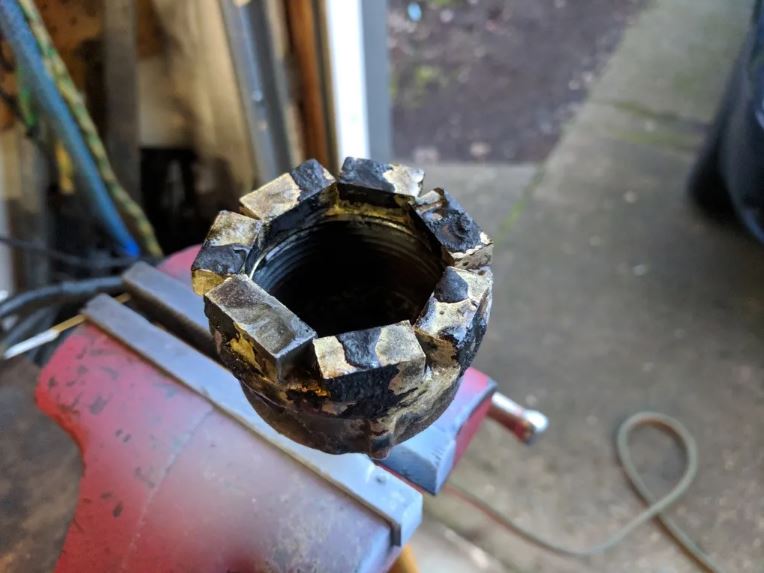 I know, I know, the brazing job looks like it was done by a drunken monkey, but none of the segments have broken off yet so it must not be to bad I've rough ground a couple dozen spheres so far, and everything seems to work fine. I was initially concerned about the motors possibly overheating, but that hasn't been a problem. I usually keeps the speed controllers below 50% in order to keep the rpms in the right range, and since they are PWM speed controllers this effectively means I'm running the drills at less than a 50% duty cycle. The drills get warm after running for a while, but they don't feel overheated to me even after a couple hours of near continuous operation. Questions? Comments? Let me know what you think. |
|
jm
having dreams about rocks
Member since October 2015
Posts: 56
|
Post by jm on May 2, 2018 2:06:52 GMT -5
What is the other system for quickly cutting rocks? Here's a quick video I made to show how I go from cubes to semi rounded preforms. The cube I'm starting with here is about 3/4" square. It takes about 2 minutes to round it off. It's quite a bit faster when I have both hands free, instead of using one hand to hold the camera. |
|
jm
having dreams about rocks
Member since October 2015
Posts: 56
|
Post by jm on Mar 16, 2018 2:10:41 GMT -5
Highland Park used pillow block bearings on most of their equipment back in the day. A lot of that equipment is still running with original bearings. Thanks! I understand they have been used in the past without issues in various lapidary applications. I can find brand name bearings which can surely handle the rpms... but they are like $70 each. My inexpensive grinder idea is quickly becoming expensive. I'm wanting to know if anyone has purchased and successfully used the more affordable 'chinese' bearings... which rarely mention an rpm rating. Such as these: www.amazon.com/UCP202-10-Pillow-Block-Bearing-Pieces/dp/B01IWGKNVEAm I overthinking this? I used some of those cheap chinese imports on a 10" rock saw that I built a couple years ago. I run it at about 1700 rpm, sometimes for hours at a time if I'm cutting lots of rocks. Just tonight I had a chunk of pretty hard rock in there that took about 2 hrs to cut. I haven't noticed any problems with the bearings not being able to handle the speed. If you're looking to do this on the cheap, you can find those same bearings on ebay for a few dollars less than on amazon. |
|
jm
having dreams about rocks
Member since October 2015
Posts: 56
|
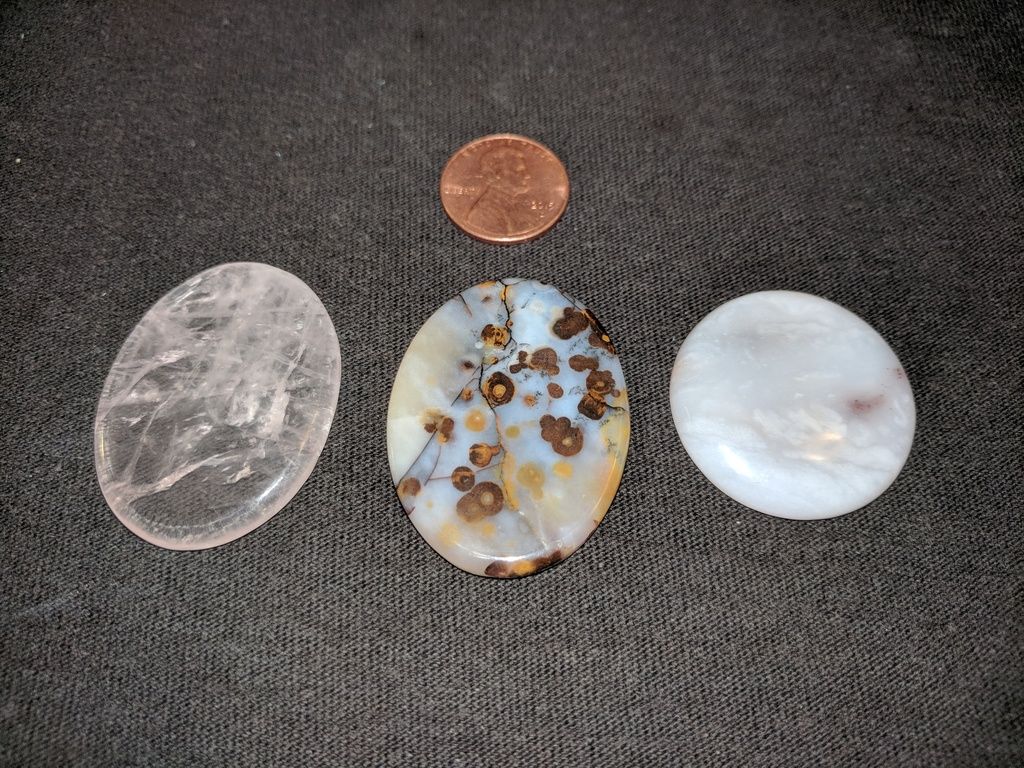
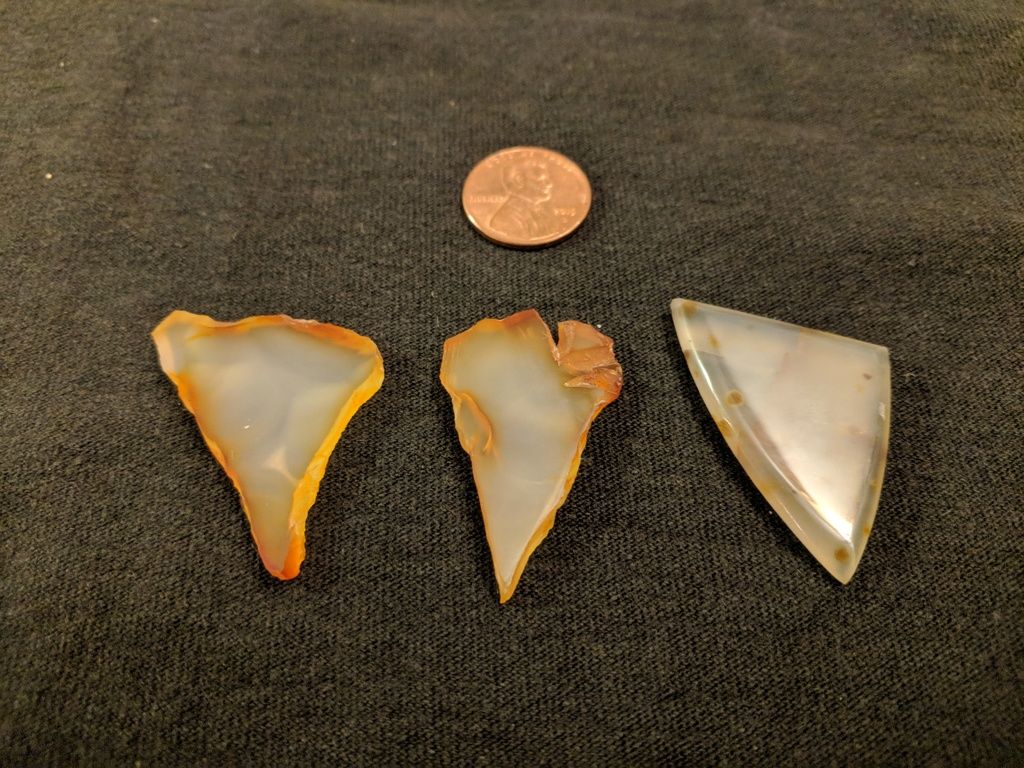
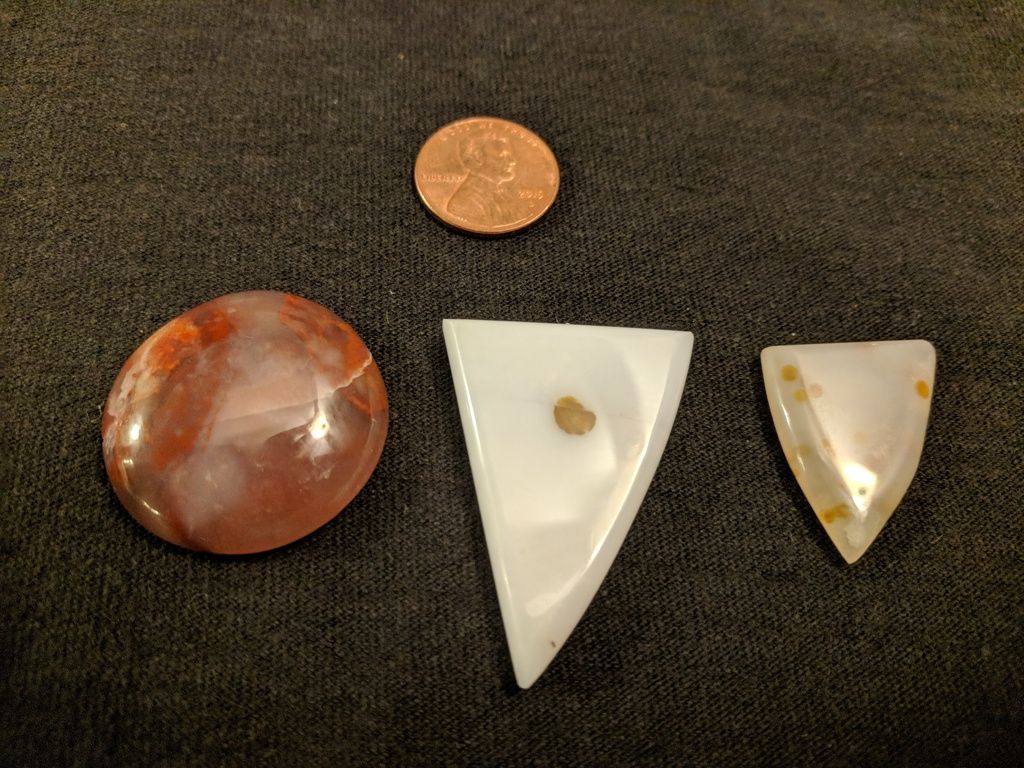
Post by jm on Dec 18, 2017 1:17:27 GMT -5
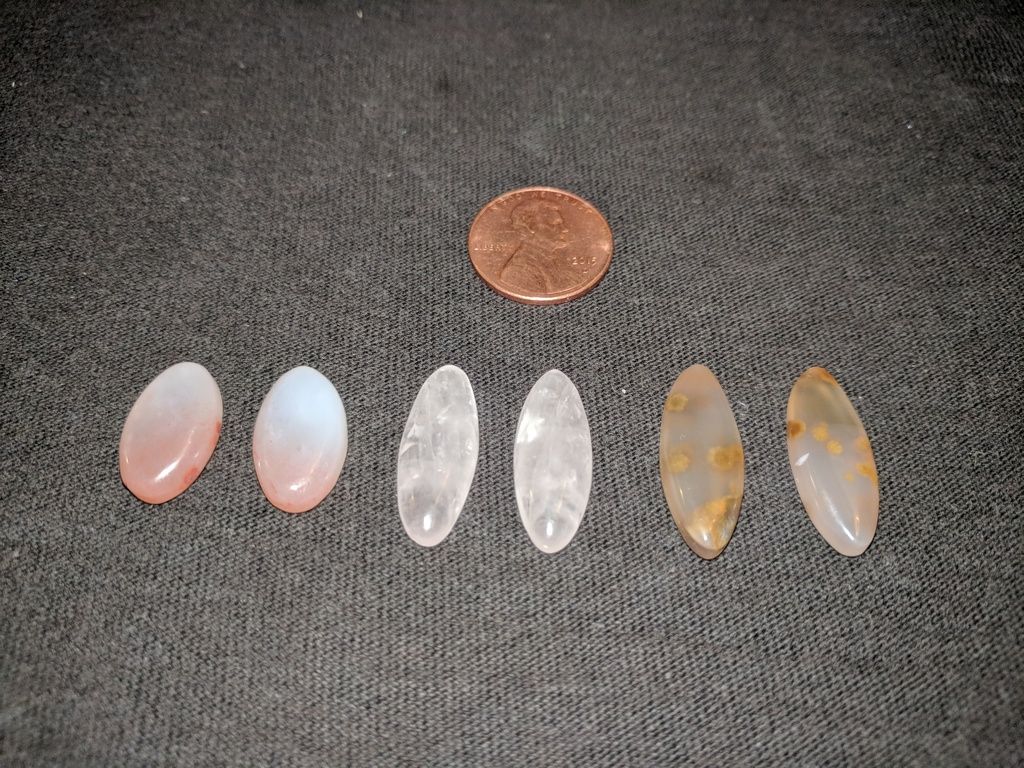
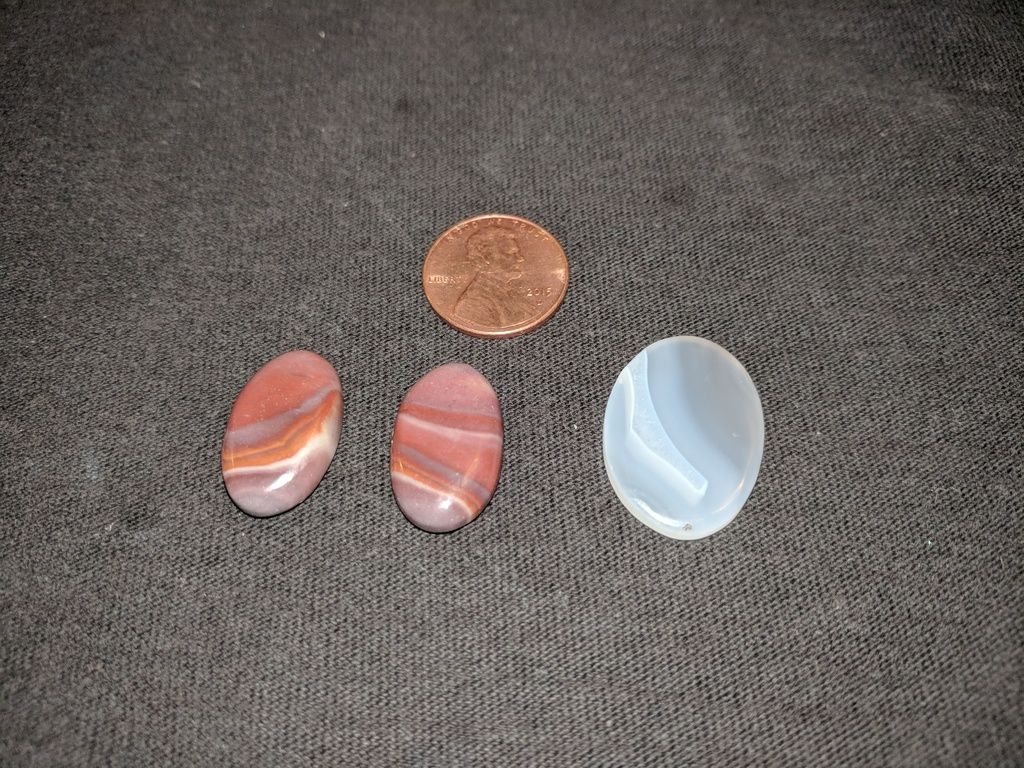
They look great! Did you do these all at once? That's a bunch. Loving that polka dot agate. Yes, it qualifies as a thoughtful gift. It was made by you. Yes, I did all these at once. I've been making them on a flat lap and it seems a lot more efficient to do them in batches. Even though I use a hook/loop backing on my grinding discs, it would still eat up a lot of time to swap discs multiple times for every cab. I'm liking the polka dot agate to, it seems to take a polish fairly easy and it looks great. Some of it is very hard, though. The triangular white piece in the third picture with the single dot in the center came from a chunk I got from the Polka Dot Agate mine last year, and it easily takes twice as long to cut through it with my rock saw as normal agate. |
|
jm
having dreams about rocks
Member since October 2015
Posts: 56
|
Post by jm on Dec 17, 2017 3:07:32 GMT -5
|
|