INTARSIA - a walk through my first piece
Sept 30, 2017 16:10:04 GMT -5
Rockoonz, unclesoska, and 11 more like this
Post by Pat on Sept 30, 2017 16:10:04 GMT -5
You've seen this before. Now I am ready to give more information. Hope it is helpful.
1---
 IMG_2179 by Pat, on Flickr
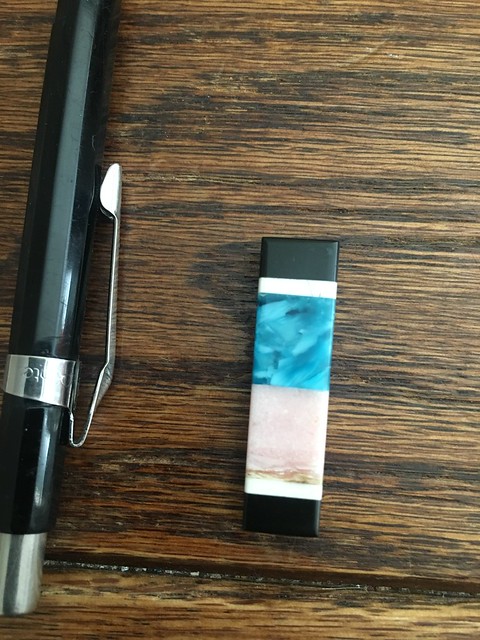
Backside is basenite
Black in front is jade
White strips are magnesite
Blue is Victoria stone
Pink is a jasper (I think)
2---
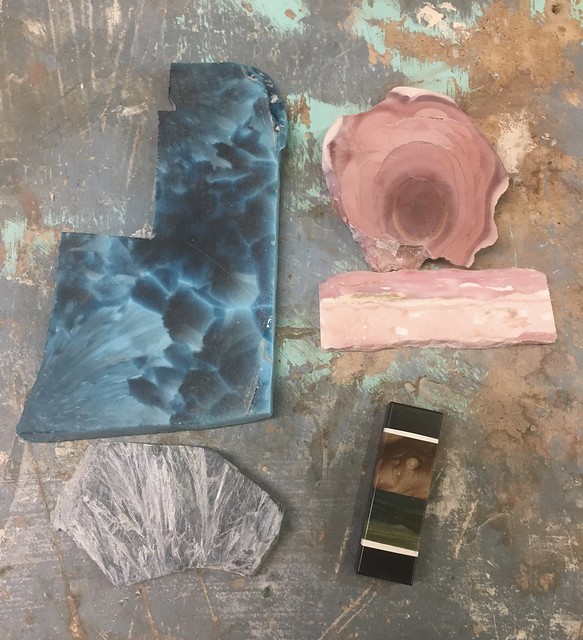 Deciding which two pieces to use. by Pat, on Flickr
Narrowing down the pieces to use. Bottom right made by the teacher. I'm using it as a model.
3---
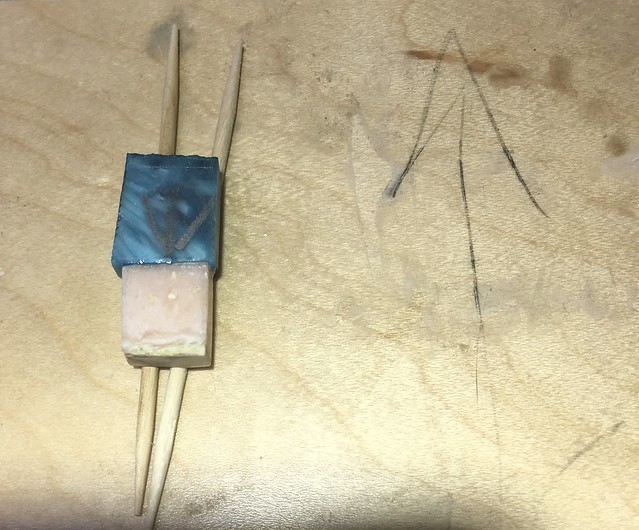 on toothpicks so glue doesn't stick to board by Pat, on Flickr
I've selected my main pieces. On the blue, you can see the pencil marked arrow. That is so I can remember which end is up! On the pink, you can see the details of a seascape, and a sun burning in the sky (top middle).
On the right, is a big pencil arrow on the work board. That is for me to always orient the piece in the same direct.
Piece is on two round toothpicks to keep it off the board after gluing the two pieces together. Any toothpick pieces that can't be removed by fingers, can be on the Genie or flat lap.
4---
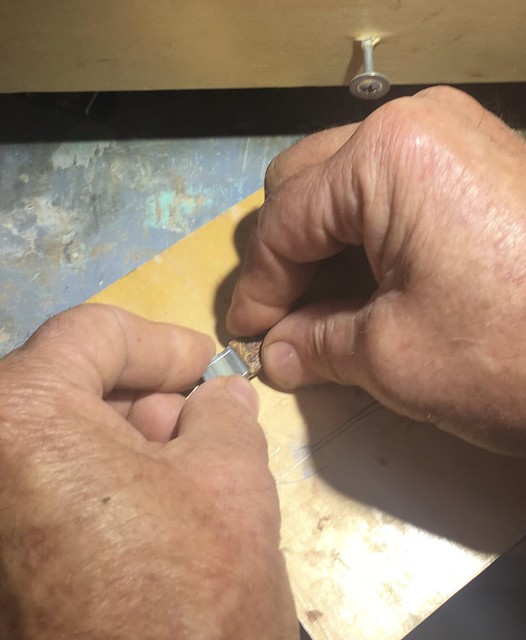 push and hold tigher for minute or two, so glue adhere's by Pat, on Flickr
Bill has just put glue HOT STUFF ORANGE LABEL on other student's (Jo's) piece. Bill is pushing each piece towards the center. Takes about a minute.
Before applying glue, we always used a brush to apply Acetone from the hardware store, not the fingernail polish remover variety. Let it dry a minute or two.
You can see that the size of our pieces are all approximate. They will be made exact on the flat lap later. The extra long white pieces will be taken down on the thin blade saw, then finished on the flat lap.
5---
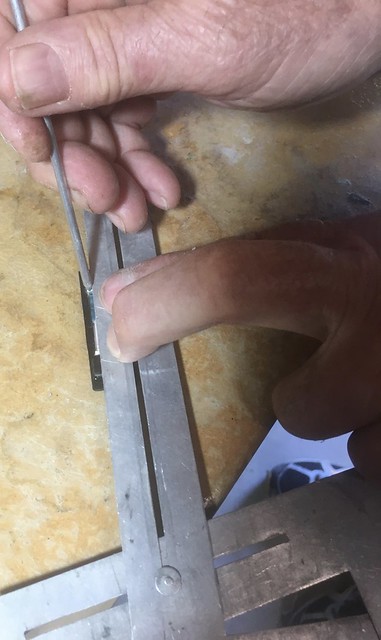 evening up the sideis of the intarsia piece by Pat, on Flickr
Using a straight edge, Bill is drawing a line with an aluminum pencil. We will use this line to to fine tune the edges on a flat lap. Lines were drawn on both sides.
6---
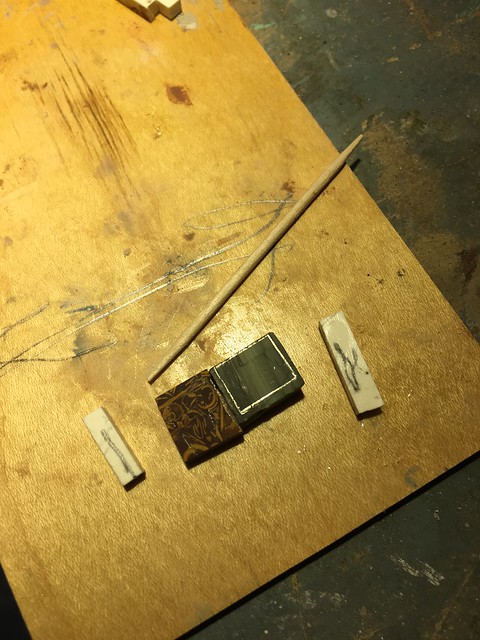 IMG_2162 by Pat, on Flickr
Jo has marked the white with pencil to show which side gets the glue. The piece will be flipped to stick on the main piece. That is, the pencil mark will touch the brown piece. The other white piece will get the same treatment to stick on the green piece. Marking was a good idea to indicate which side of the white we wanted to show when done. We wanted the thin side to show on the top.
7---
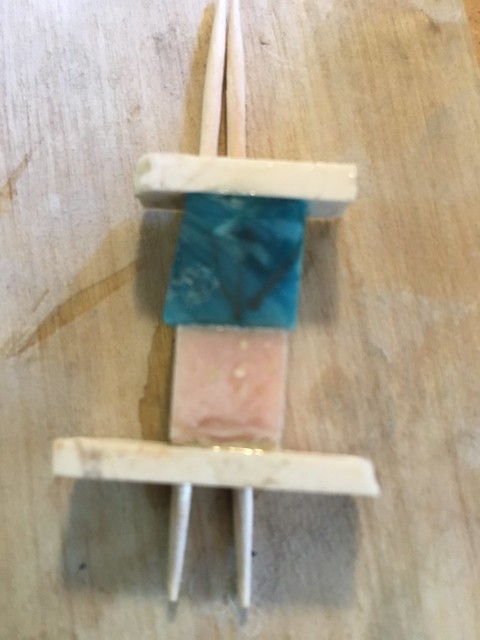 IMG_2164 by Pat, on Flickr
Here's mine. White frame has been glued on top and bottom.
We have used a T-square to check all measurements. Any adjustments were made on the flat lap.
Bill says the orange label Hot Stuff is good for filling small gaps. Smear it on, let dry several minutes, then proceed with sanding disks.
8---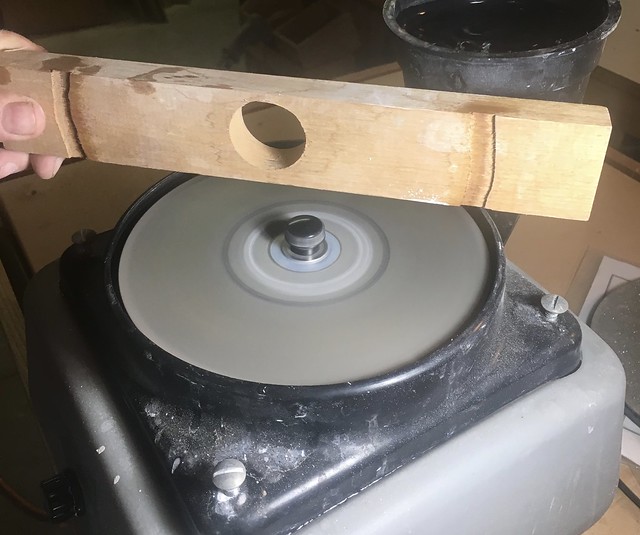 "fence" for flat lap by Pat, on Flickr
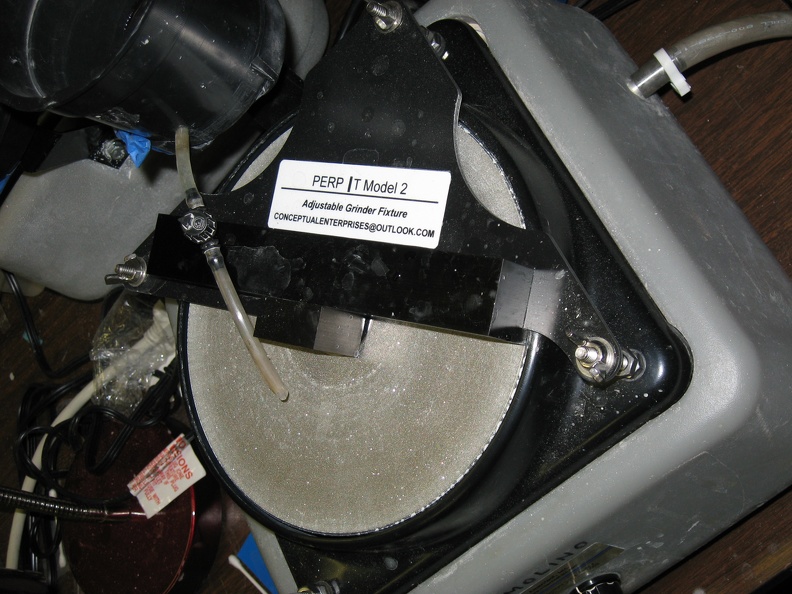
In order to get the right angles, we used Bill's gizmo on the flat lap. Note the two grooves in the board. They are placed on the rim of the flat lap. Hole in middle of board goes over the nut holding down disk. We held the intarsia piece up against the side of the gizmo, flipped the switch and it produced the right angle. That was a very handy gizmo. I think he has one for a 45 degree angle as well.
To polish the edges/angles is done at the same time as the flat areas. "Plant and flop" was our mantra. During the flopping, is when the edges get polished. Set piece onto flat lap disk. Do not lift it up. Roll it over to the adjacent side.
After it has been completely shaped, go through flat lap disks with water: 220,325, 600, 1200, 3000, 100,000. After that, spray a muslin disk with Silicone lubricant to give the final polish to the piece.
Bill suggested magnesite instead of howlite because it is harder.
He also suggested basenite for the back and black jade for the front. Basenite is cheaper.
Now I am eager to do another one, but must make that 90 degree angle gizmo, and one for 45 degree angles.
Thanks.
1---
 IMG_2179 by Pat, on Flickr
Backside is basenite
Black in front is jade
White strips are magnesite
Blue is Victoria stone
Pink is a jasper (I think)
2---
 Deciding which two pieces to use. by Pat, on Flickr
Narrowing down the pieces to use. Bottom right made by the teacher. I'm using it as a model.
3---
 on toothpicks so glue doesn't stick to board by Pat, on Flickr
I've selected my main pieces. On the blue, you can see the pencil marked arrow. That is so I can remember which end is up! On the pink, you can see the details of a seascape, and a sun burning in the sky (top middle).
On the right, is a big pencil arrow on the work board. That is for me to always orient the piece in the same direct.
Piece is on two round toothpicks to keep it off the board after gluing the two pieces together. Any toothpick pieces that can't be removed by fingers, can be on the Genie or flat lap.
4---
 push and hold tigher for minute or two, so glue adhere's by Pat, on Flickr
Bill has just put glue HOT STUFF ORANGE LABEL on other student's (Jo's) piece. Bill is pushing each piece towards the center. Takes about a minute.
Before applying glue, we always used a brush to apply Acetone from the hardware store, not the fingernail polish remover variety. Let it dry a minute or two.
You can see that the size of our pieces are all approximate. They will be made exact on the flat lap later. The extra long white pieces will be taken down on the thin blade saw, then finished on the flat lap.
5---
 evening up the sideis of the intarsia piece by Pat, on Flickr
Using a straight edge, Bill is drawing a line with an aluminum pencil. We will use this line to to fine tune the edges on a flat lap. Lines were drawn on both sides.
6---
 IMG_2162 by Pat, on Flickr
Jo has marked the white with pencil to show which side gets the glue. The piece will be flipped to stick on the main piece. That is, the pencil mark will touch the brown piece. The other white piece will get the same treatment to stick on the green piece. Marking was a good idea to indicate which side of the white we wanted to show when done. We wanted the thin side to show on the top.
7---
 IMG_2164 by Pat, on Flickr
Here's mine. White frame has been glued on top and bottom.
We have used a T-square to check all measurements. Any adjustments were made on the flat lap.
Bill says the orange label Hot Stuff is good for filling small gaps. Smear it on, let dry several minutes, then proceed with sanding disks.
8---
 "fence" for flat lap by Pat, on Flickr
In order to get the right angles, we used Bill's gizmo on the flat lap. Note the two grooves in the board. They are placed on the rim of the flat lap. Hole in middle of board goes over the nut holding down disk. We held the intarsia piece up against the side of the gizmo, flipped the switch and it produced the right angle. That was a very handy gizmo. I think he has one for a 45 degree angle as well.
To polish the edges/angles is done at the same time as the flat areas. "Plant and flop" was our mantra. During the flopping, is when the edges get polished. Set piece onto flat lap disk. Do not lift it up. Roll it over to the adjacent side.
After it has been completely shaped, go through flat lap disks with water: 220,325, 600, 1200, 3000, 100,000. After that, spray a muslin disk with Silicone lubricant to give the final polish to the piece.
Bill suggested magnesite instead of howlite because it is harder.
He also suggested basenite for the back and black jade for the front. Basenite is cheaper.
Now I am eager to do another one, but must make that 90 degree angle gizmo, and one for 45 degree angles.
Thanks.


