Custom Workbench Cabinet for Commercial Tumblers
Jan 8, 2021 2:35:42 GMT -5
drocknut, manofglass, and 11 more like this
Post by Benathema on Jan 8, 2021 2:35:42 GMT -5
Not sure if the Lapidary Equipment page is the best place for this. I'm thinking this may have a place on the DIY page once it's all said and done.
Since I started tumbling I've tried a few different ways of dampening noise while still accounting for airflow. The initial setup was one of those folding luggage racks you find in hotels draped in coats and blankets with a little fan. The second setup involved buying cheap plastic shelfing and running a bigger fan, with the whole thing covered in carpet padding scraps, but still some coats and blankets. Well, I'm finally in a position to build a custom cabinet that encloses everything and implementing a built-in cooling system. I've opted to go wide rather than tall so that I get a workbench and supply storage out of it as well.
I'm building this piecewise at the moment so I'm not swamped with materials all over the place, and in part because I haven't completely decided how I want to build the top (e.g., do I want a place to mount a lamp, or have an outlet handy?)
What I'm showing you all in this post is the internal framing that will ultimately be wrapped in 3/4" plywood.
I've been using boot trays from Walmart as my catch pans and they can nicely hold either two QT12s or two 33Bs. I like them because they're shallow, allowing for airflow, and fairly inexpensive (~$5/ea.). The dimensions for these are 29" x 15" at their outermost points (i.e., the edge of the handles). So all dimensions extend from this to make sure the working area of each shelf section has an unobstructed 30" x 16" area.
Disclaimer: I'm not a seasoned wood elf, but I have done a bit of woodwork here and there. Armed with a skillsaw, jigsaw, drill, and some basic geometry, this is what I've managed to pull off.
Initial sketch: (had to remind myself how big a 2x4 is actually)

Parts list for the internal framing;
Box of #8, 1&5/8" screws, and a box of #10, 3" screws, T25 driven.
2x4s @ 96" long: 10
6 verticals @ 36.5"
5 long supports @ 70.5"
4 cross shelf supports @ 16"
10 top/bottom supports @ 12"
4 shelf supports @ 33.25"
(1 long support and 2 top/bottom supports per board) * 5 --> 5 boards
(2 verticals and 1 cross shelf support per board) * 3 --> 3 boards
2 shelf supports and 1 cross shelf support from 1 board --> 1 board
2 shelf supports from 1 board --> 1 board
3/4" plywood @ 4' x 8' sheet: 1
1 bottom @ 19" x 70.5"
2 shelves @ 16.75" x 33.25"
The bottom plywood gets 1.5" x 3.5" notches cut out in 6 places (4 corners and the middle of the outer long sides) to fit around the verticals. The shelves are symmetrical to each other, left and right, with a 0.75" x 1.5" notch in one back corner and a 0.75" x 1.75" notch on the other back corner (you will see where I goofed this up on mine and made the 0.75" dimension 1.5" on oversight).
Well, they say a picture is worth 1000 words, so lets do that so you can see what I mean.
Parts laid out. 3 of my verticals and 1 of my long supports have been notched out with the skillsaw to create lap joints (I think that's what they're called). These parts go on the rear side of the shelf and help me glue and screw everything together without it being too janky. I knocked the chunks out and used some chisels to clean it up, test fitting to make sure I was good.

Putting the bottom together. This uses the 70.5" and 12" pieces. The top is built this same way. This is where I wished I had used a better way to attach things, because this was a little janky. There's 2 screws coming in at an angle from the 70.5" piece into the 12" piece, then I flipped the whole thing over and drove another screw from the 12" side into the 70.5" piece. This is where I kind of wished I had thought further ahead about doing more of that lap jointing like I did for the back. There's glue between all these, and I figure with plywood glued and screwed on top it is probably bulletproof enough.

Verticals screwed in from the bottom

Plywood bottom shelf glued and screwed everywhere

The 16" going in, acting not only as bracing, but shelf brackets as well. This is where that lap joint shined since I could grab 3 pieces of wood all with 1 screw. The 2 middle 16s are glued and screwed to each other as well.

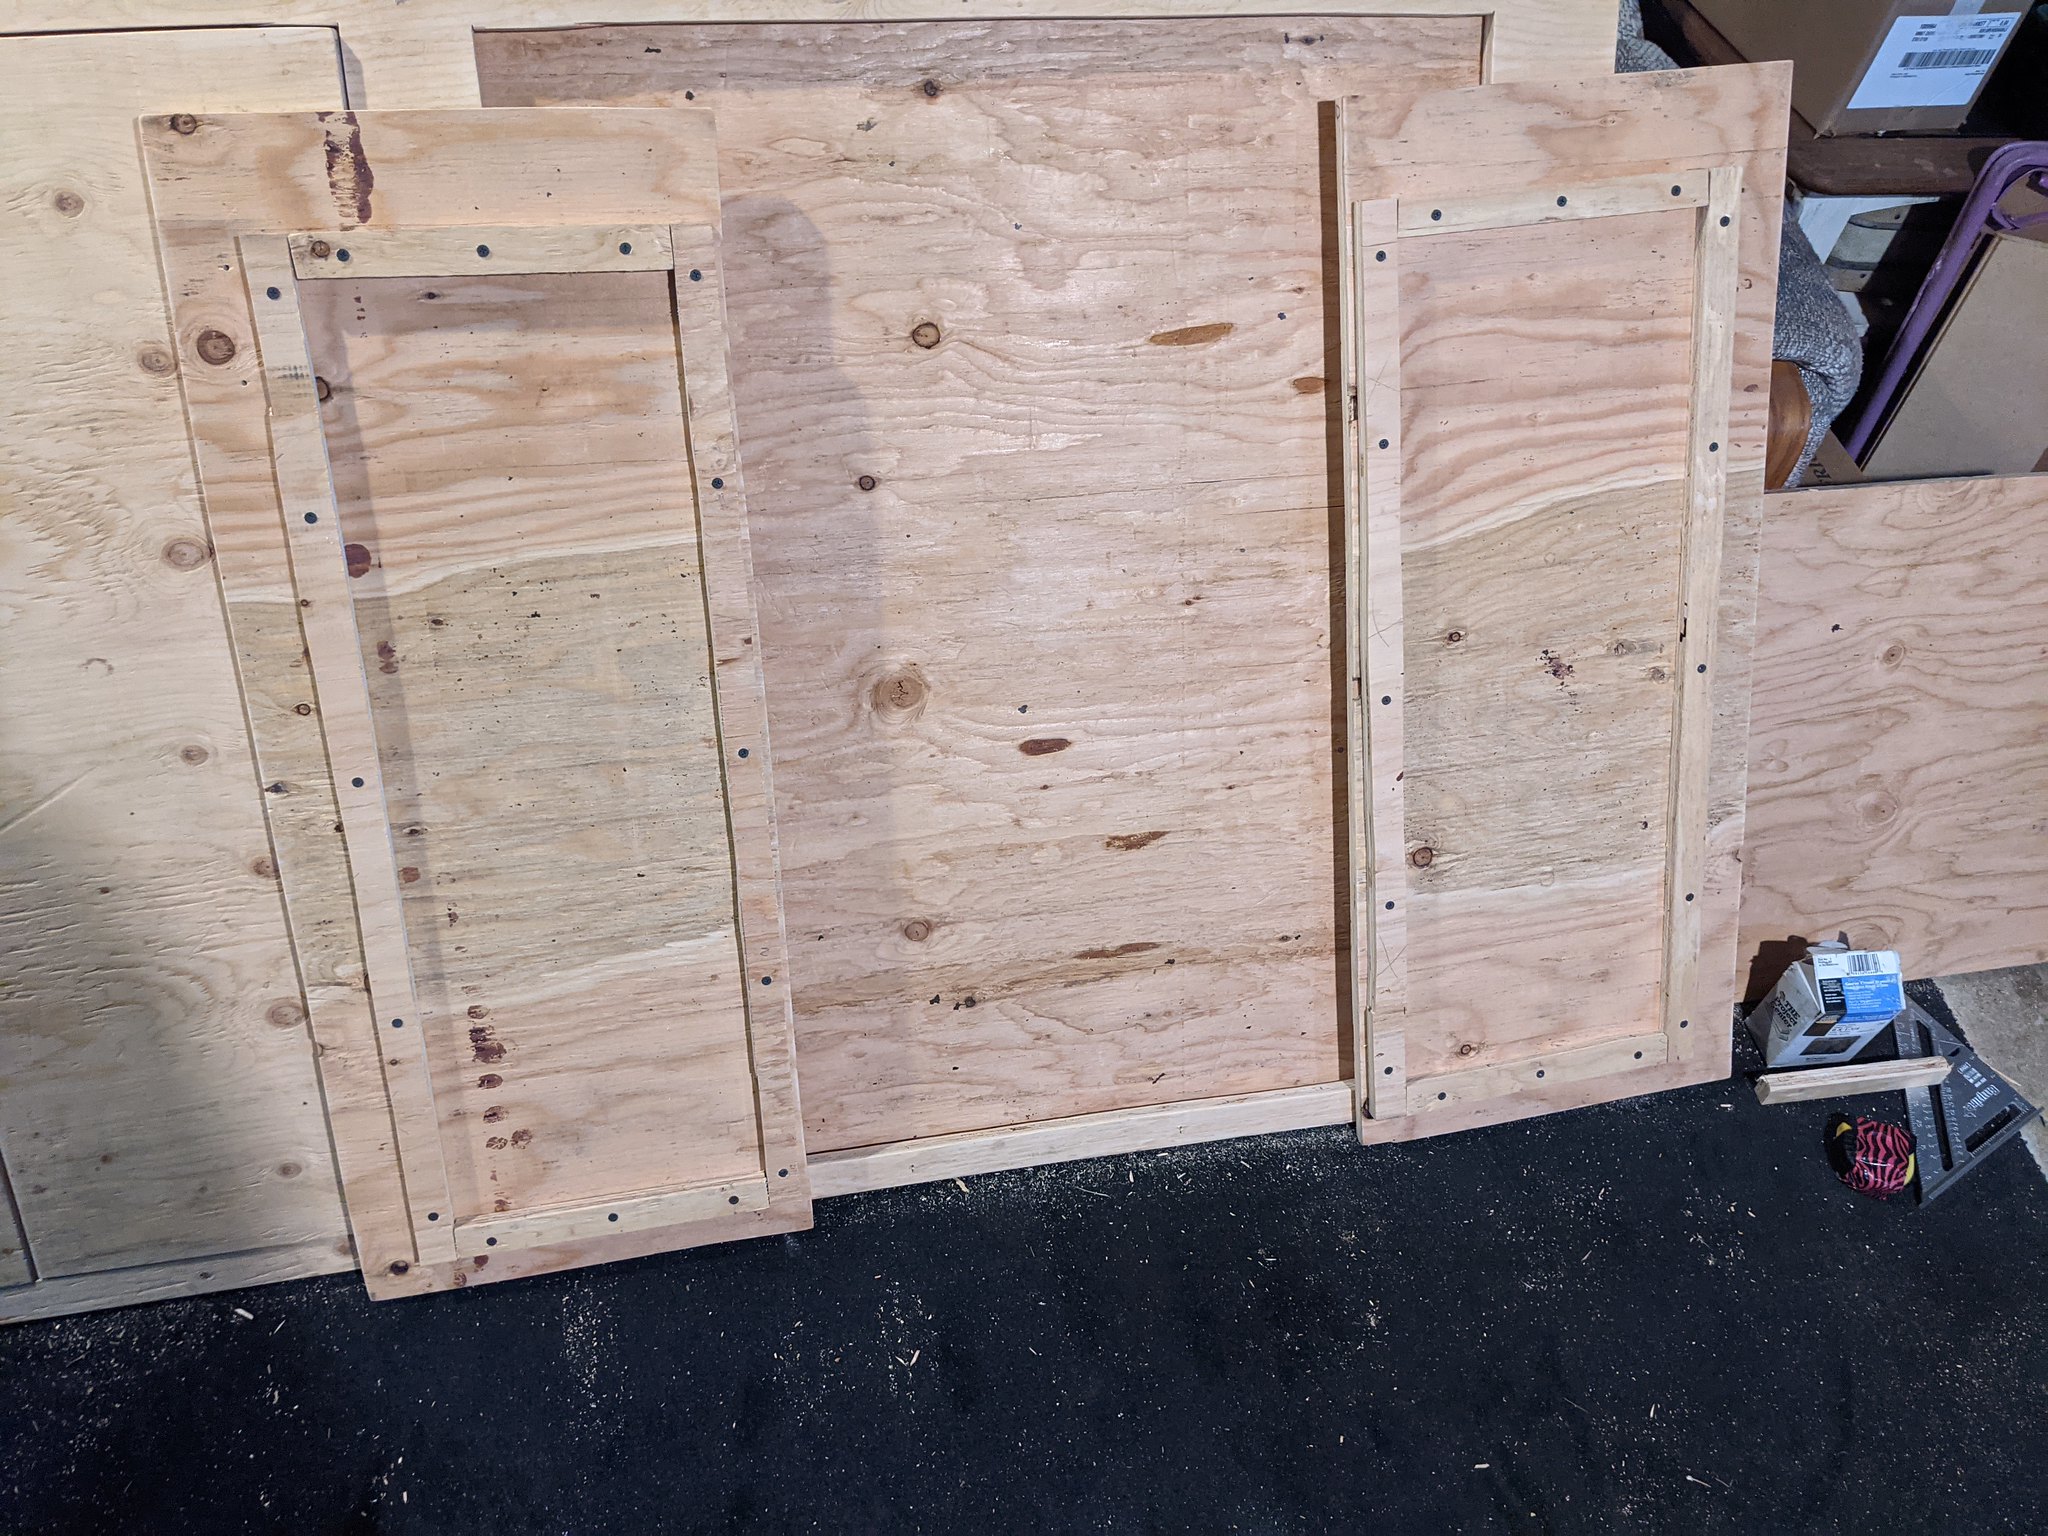
These are the underside of the shelves. The plywood is attached to the 2x4s and the shelves are intended to be removable in the case that a new piece of equipment comes along that needs more headspace.

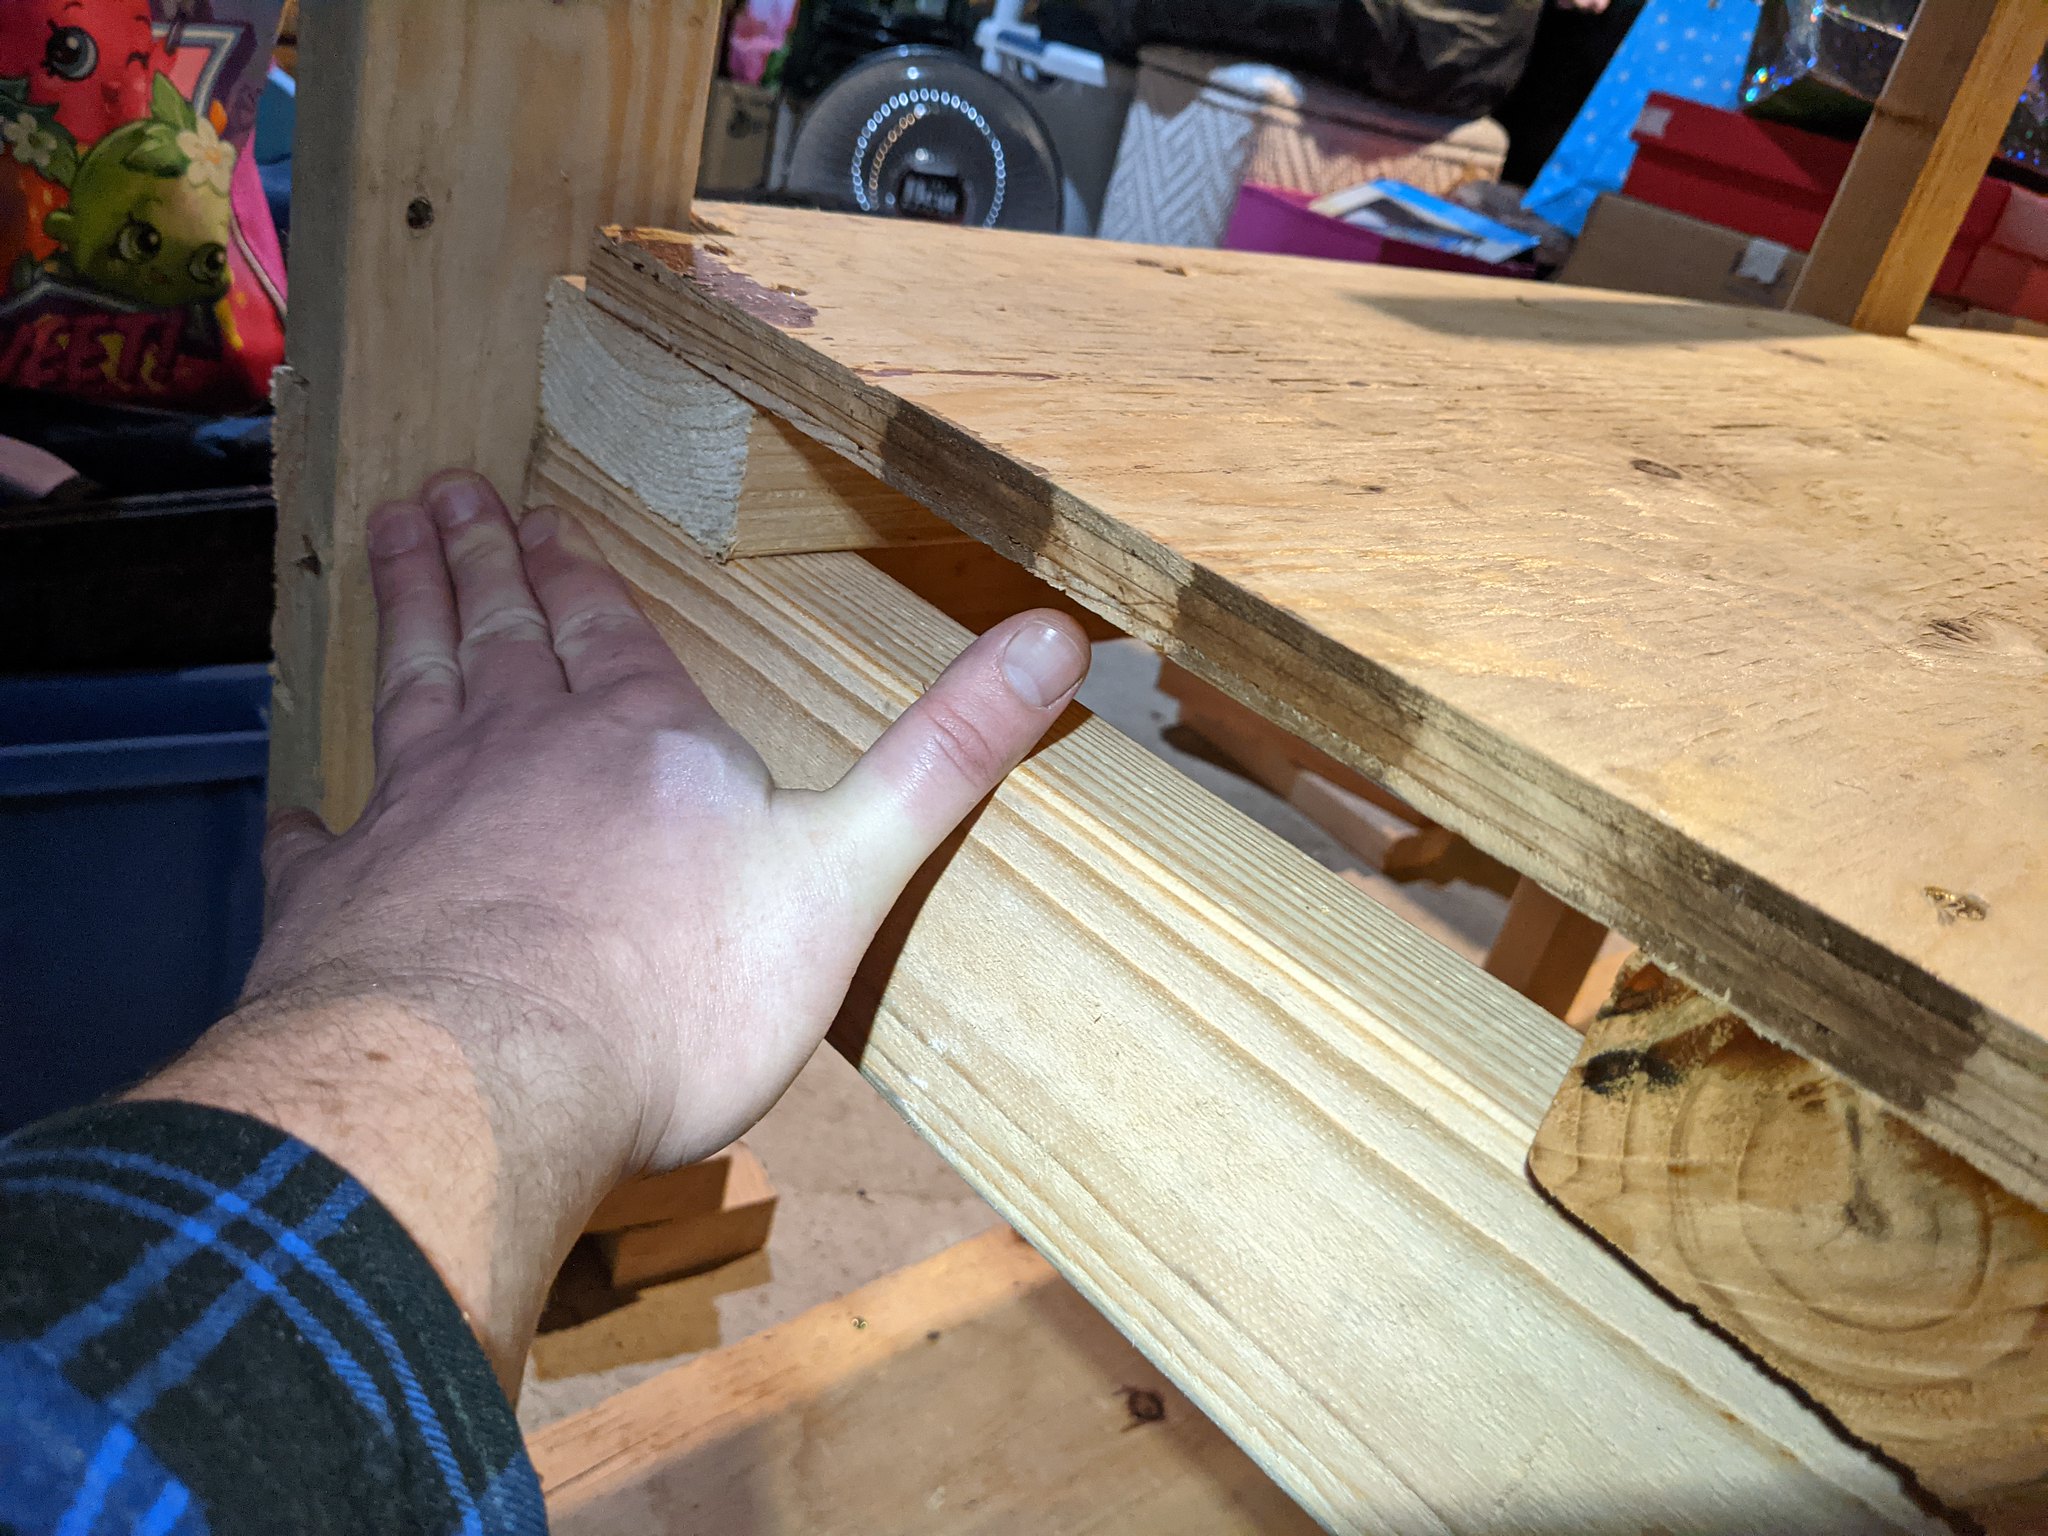
Shelves resting on the 16s. I sat on this with my feet off the ground and not one single squeak or crunch was heard... and I'm not the smallest guy either, coming in round abouts $2.50, so should be able to hold tumbler weight without fail... forever. This is where my notch mistake starts to show. I wanted to leave a 3/4" gap between the back edge of this shelf and the future plywood wall that will be on the back of this for noise dampening insulation. I forgot and made my notches 1.5" in from the edge instead. I was able to make up for the functionality with the 2x4 placement though. The notch in the back keeps the shelf from moving left and right, then by pinching between the front and rear verticals keeps it from moving in and out. Eh? Eh? pretty slick, I think.

These next two pics show the insulation and air gaps I've built into the sides and front of this so warm air can escape from the bottom shelf and be vented out the top back... once I get to that point.

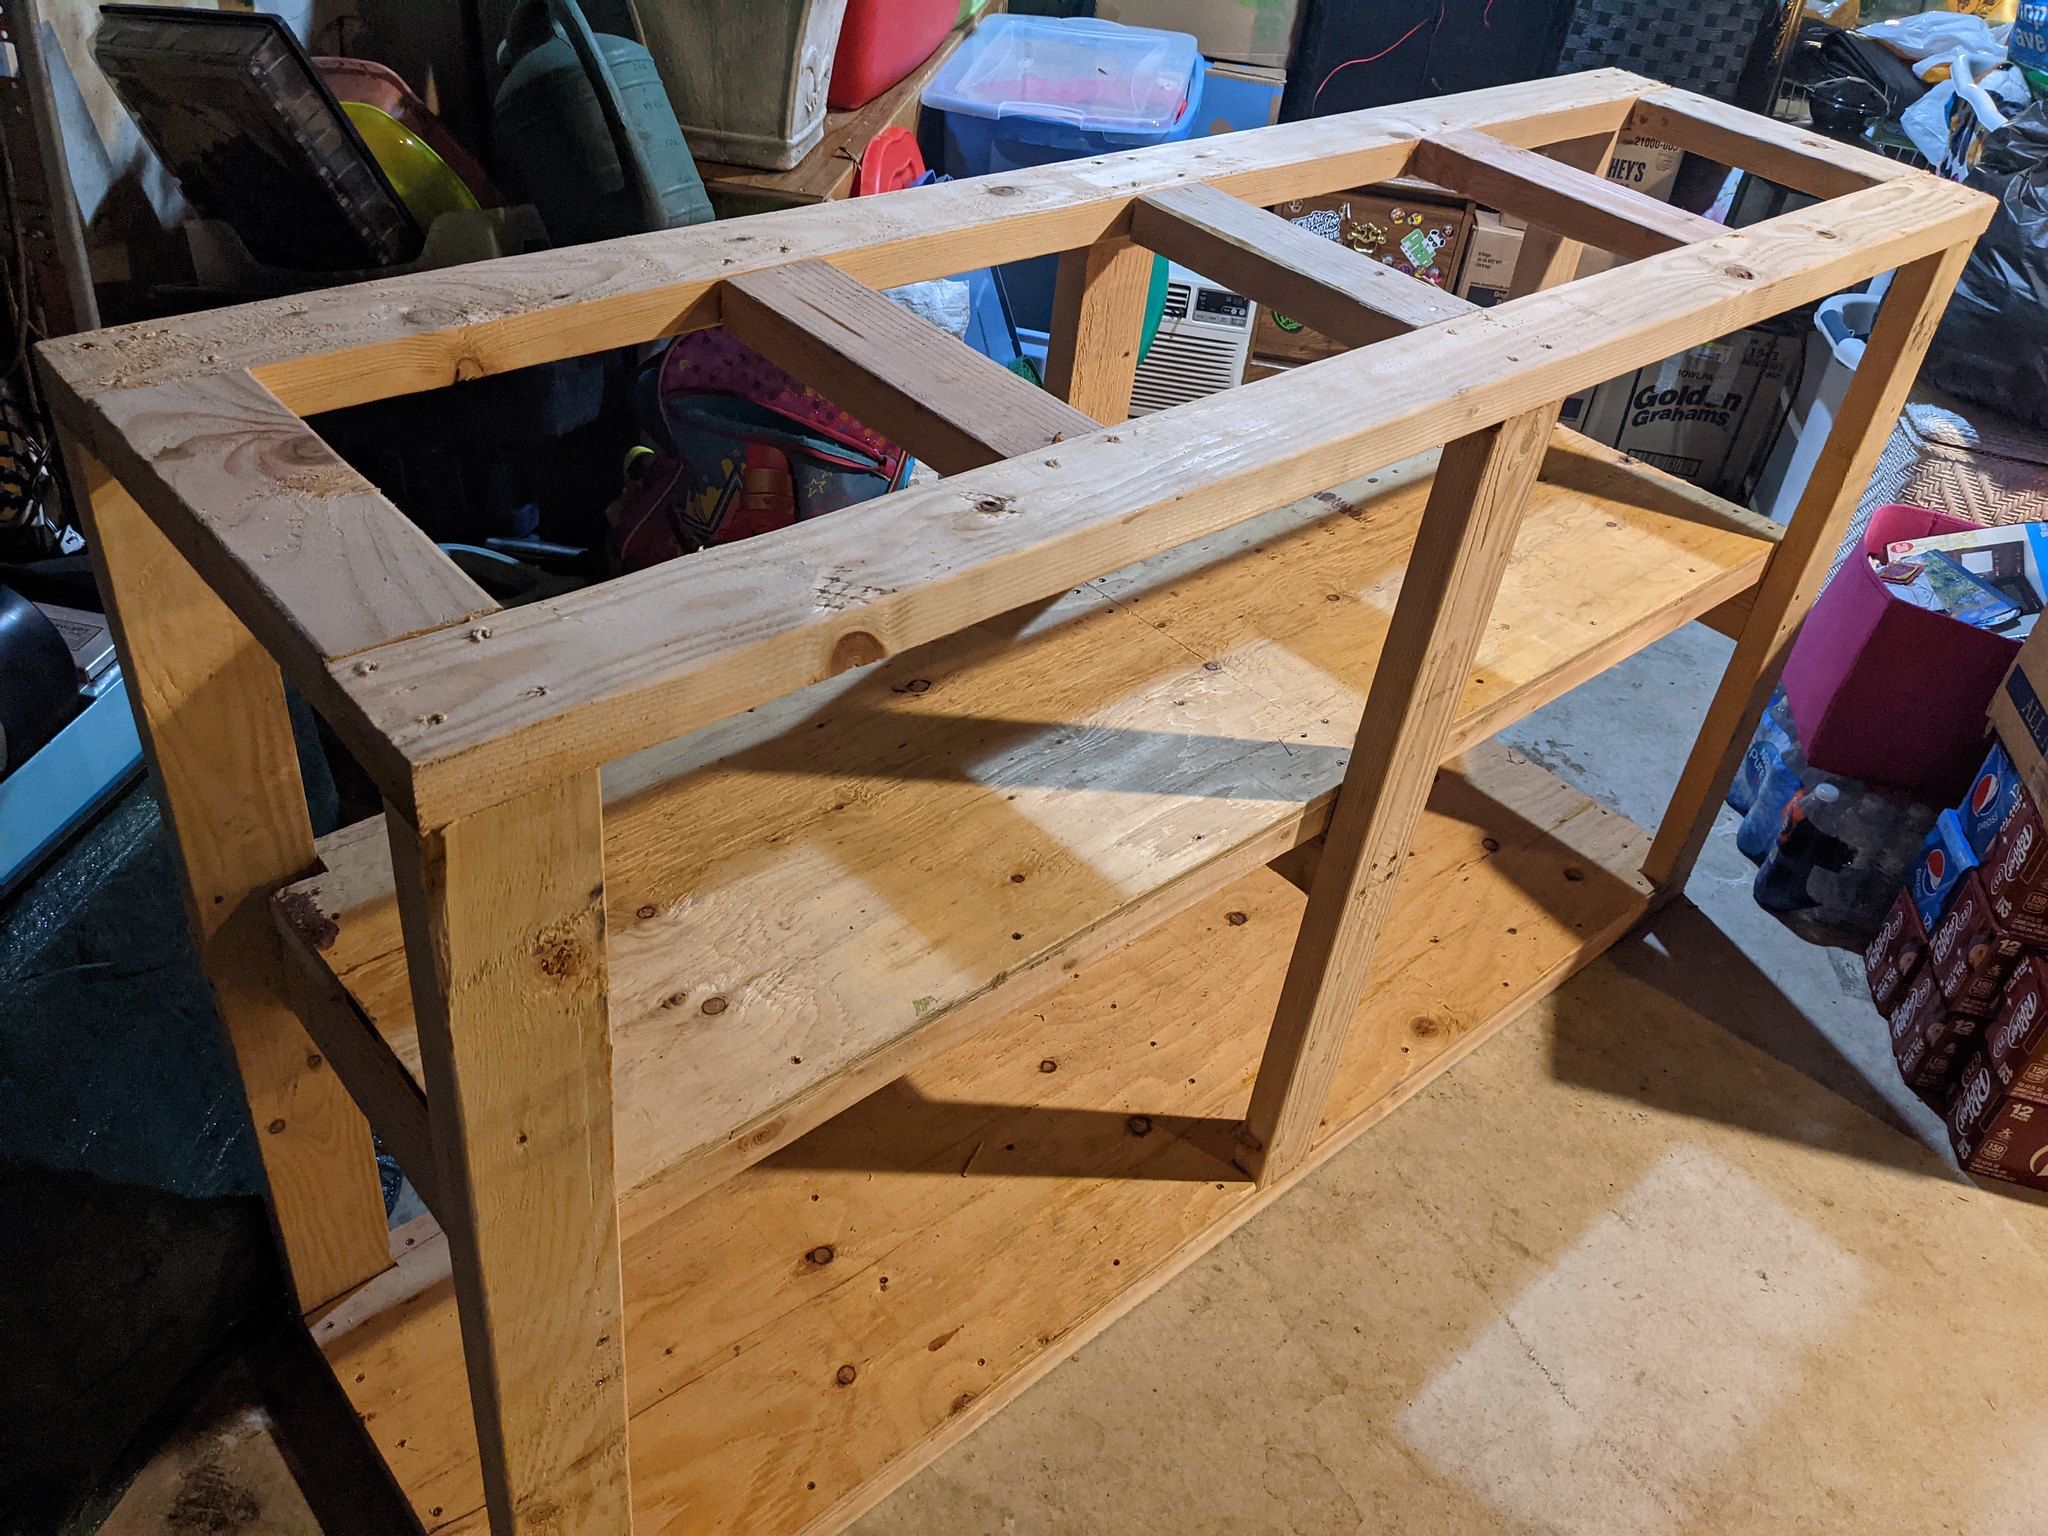
And then with the top installed. I plopped a level on it. It's on point in every direction. That's good. Total height once the top ply goes on will be a little over 40", which is a pretty comfortable bench height for me.
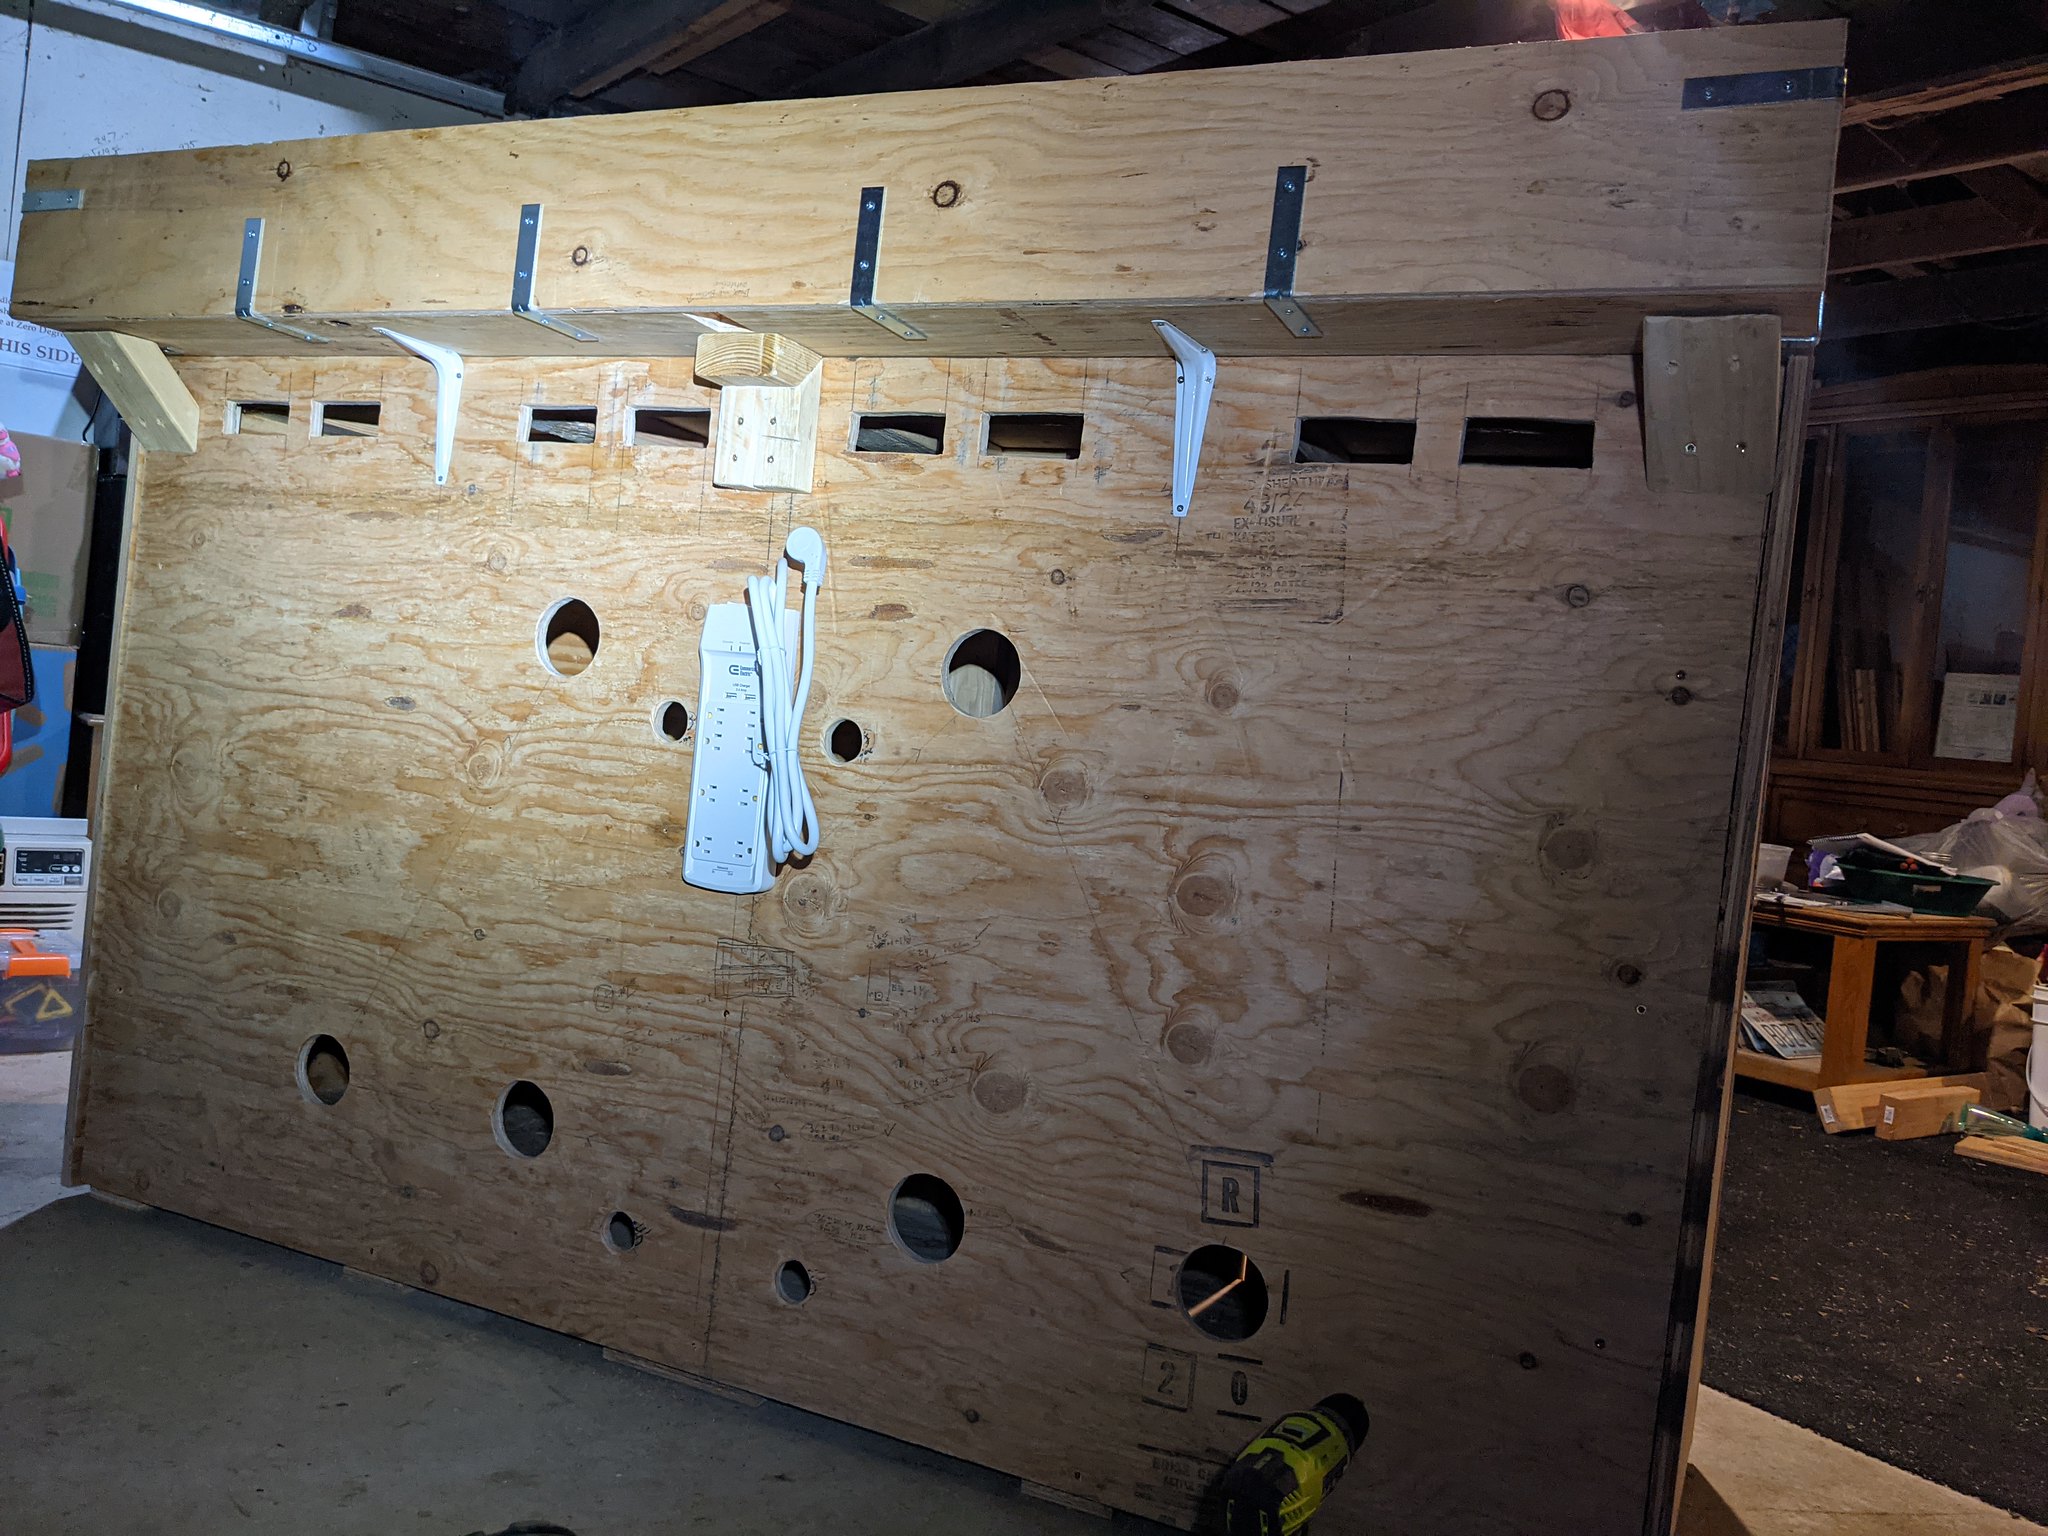
There's a bit more to come with this. I need to draw out how I want all the plywood paneling to go on, vent and wiring holes. The plan is to have all the electronics come in from the back and then the top of the shelf extend past the back a few inches for wire clearance and airflow. They make these fans you can daisy chain together for AV cabinets, and some models have a thermal regulator, which could be really nice for retaining heat in the winter and only running when needed.
I know there are a few electrical nerds in the crowd here. I swear I found something on this forum before, but haven't been able to track it down. Someone installed a magnetic trip switch for their tumbler power so that if the power went out the tumblers wouldn't restart when the power came back on. I'd like to replicate that as a safety feature in the event the tumbler slurry settles and the motor cant get the barrel moving without a push - I don't want a torque-stalled motor burning the house down. The best I've found is that a switch like this is called a No Volt Release (NVR) switch, and is commonly found on things like table saws and drill presses. If anyone wants to chime in and confirm that's what I need, I'd appreciate it.
Thanks for looking!
Since I started tumbling I've tried a few different ways of dampening noise while still accounting for airflow. The initial setup was one of those folding luggage racks you find in hotels draped in coats and blankets with a little fan. The second setup involved buying cheap plastic shelfing and running a bigger fan, with the whole thing covered in carpet padding scraps, but still some coats and blankets. Well, I'm finally in a position to build a custom cabinet that encloses everything and implementing a built-in cooling system. I've opted to go wide rather than tall so that I get a workbench and supply storage out of it as well.
I'm building this piecewise at the moment so I'm not swamped with materials all over the place, and in part because I haven't completely decided how I want to build the top (e.g., do I want a place to mount a lamp, or have an outlet handy?)
What I'm showing you all in this post is the internal framing that will ultimately be wrapped in 3/4" plywood.
I've been using boot trays from Walmart as my catch pans and they can nicely hold either two QT12s or two 33Bs. I like them because they're shallow, allowing for airflow, and fairly inexpensive (~$5/ea.). The dimensions for these are 29" x 15" at their outermost points (i.e., the edge of the handles). So all dimensions extend from this to make sure the working area of each shelf section has an unobstructed 30" x 16" area.
Disclaimer: I'm not a seasoned wood elf, but I have done a bit of woodwork here and there. Armed with a skillsaw, jigsaw, drill, and some basic geometry, this is what I've managed to pull off.
Initial sketch: (had to remind myself how big a 2x4 is actually)
Parts list for the internal framing;
Box of #8, 1&5/8" screws, and a box of #10, 3" screws, T25 driven.
2x4s @ 96" long: 10
6 verticals @ 36.5"
5 long supports @ 70.5"
4 cross shelf supports @ 16"
10 top/bottom supports @ 12"
4 shelf supports @ 33.25"
(1 long support and 2 top/bottom supports per board) * 5 --> 5 boards
(2 verticals and 1 cross shelf support per board) * 3 --> 3 boards
2 shelf supports and 1 cross shelf support from 1 board --> 1 board
2 shelf supports from 1 board --> 1 board
3/4" plywood @ 4' x 8' sheet: 1
1 bottom @ 19" x 70.5"
2 shelves @ 16.75" x 33.25"
The bottom plywood gets 1.5" x 3.5" notches cut out in 6 places (4 corners and the middle of the outer long sides) to fit around the verticals. The shelves are symmetrical to each other, left and right, with a 0.75" x 1.5" notch in one back corner and a 0.75" x 1.75" notch on the other back corner (you will see where I goofed this up on mine and made the 0.75" dimension 1.5" on oversight).
Well, they say a picture is worth 1000 words, so lets do that so you can see what I mean.
Parts laid out. 3 of my verticals and 1 of my long supports have been notched out with the skillsaw to create lap joints (I think that's what they're called). These parts go on the rear side of the shelf and help me glue and screw everything together without it being too janky. I knocked the chunks out and used some chisels to clean it up, test fitting to make sure I was good.
Putting the bottom together. This uses the 70.5" and 12" pieces. The top is built this same way. This is where I wished I had used a better way to attach things, because this was a little janky. There's 2 screws coming in at an angle from the 70.5" piece into the 12" piece, then I flipped the whole thing over and drove another screw from the 12" side into the 70.5" piece. This is where I kind of wished I had thought further ahead about doing more of that lap jointing like I did for the back. There's glue between all these, and I figure with plywood glued and screwed on top it is probably bulletproof enough.
Verticals screwed in from the bottom
Plywood bottom shelf glued and screwed everywhere
The 16" going in, acting not only as bracing, but shelf brackets as well. This is where that lap joint shined since I could grab 3 pieces of wood all with 1 screw. The 2 middle 16s are glued and screwed to each other as well.
These are the underside of the shelves. The plywood is attached to the 2x4s and the shelves are intended to be removable in the case that a new piece of equipment comes along that needs more headspace.
Shelves resting on the 16s. I sat on this with my feet off the ground and not one single squeak or crunch was heard... and I'm not the smallest guy either, coming in round abouts $2.50, so should be able to hold tumbler weight without fail... forever. This is where my notch mistake starts to show. I wanted to leave a 3/4" gap between the back edge of this shelf and the future plywood wall that will be on the back of this for noise dampening insulation. I forgot and made my notches 1.5" in from the edge instead. I was able to make up for the functionality with the 2x4 placement though. The notch in the back keeps the shelf from moving left and right, then by pinching between the front and rear verticals keeps it from moving in and out. Eh? Eh? pretty slick, I think.
These next two pics show the insulation and air gaps I've built into the sides and front of this so warm air can escape from the bottom shelf and be vented out the top back... once I get to that point.
And then with the top installed. I plopped a level on it. It's on point in every direction. That's good. Total height once the top ply goes on will be a little over 40", which is a pretty comfortable bench height for me.
There's a bit more to come with this. I need to draw out how I want all the plywood paneling to go on, vent and wiring holes. The plan is to have all the electronics come in from the back and then the top of the shelf extend past the back a few inches for wire clearance and airflow. They make these fans you can daisy chain together for AV cabinets, and some models have a thermal regulator, which could be really nice for retaining heat in the winter and only running when needed.
I know there are a few electrical nerds in the crowd here. I swear I found something on this forum before, but haven't been able to track it down. Someone installed a magnetic trip switch for their tumbler power so that if the power went out the tumblers wouldn't restart when the power came back on. I'd like to replicate that as a safety feature in the event the tumbler slurry settles and the motor cant get the barrel moving without a push - I don't want a torque-stalled motor burning the house down. The best I've found is that a switch like this is called a No Volt Release (NVR) switch, and is commonly found on things like table saws and drill presses. If anyone wants to chime in and confirm that's what I need, I'd appreciate it.
Thanks for looking!


 ~DUKE
~DUKE


 You're down here in the bilges with the wharf rats. You will get more mileage above on the upper decks.