|
|
Post by superioragates on Jan 23, 2010 14:23:17 GMT -5
I told myself NOT to come back and look at these anymore...but I had to...AND there goes my heart again!! man I gotta calm down a little when I get outta here!!! LOL
Stupendous shine!!!!
Marie
|
|
|
|
Post by roswelljero on Feb 3, 2010 1:47:57 GMT -5
AWESOME!!!
What kind of polish do you use?
Later,
jeri
|
|
|
|
Post by Hard Rock Cafe on Feb 3, 2010 13:30:53 GMT -5
It's good to have you back posting, Don. Your tumbles give us all something to aspire to. Beautiful work!
Chuck
|
|
Haleysdream
has rocks in the head
   K-9 unit Rock Hounds
Member since January 2010
Posts: 654
|
Post by Haleysdream on Feb 7, 2010 10:09:06 GMT -5
WOW, Those are great! Thanks for the effort in reposting them , Beautiful.
>
|
|
|
|
Post by MyNewHobby on Feb 19, 2010 20:53:14 GMT -5
When someone has a chance, could you please pick me up off the floor ....
I think I fainted again!!
As always!
|
|
|
|
Post by MyNewHobby on Mar 20, 2010 18:35:23 GMT -5
I know I have said something a few times here .... but ...
RollingStone ......
You need to post a play by play set of directions for your success. I sit here and look at your finished batches and I just about lose my mind. Now ... there are those awesome wire wrappers that post their instructions, the rules by which they work with to create some of the most awesome wraps! They do this to help those of that have no clue on either where to start or how to finish (there are a half dozen people cracking up right now at me) wraps. Hey I know I have finishing issues.
I can tell from these batches that you are meticulous and very methodical with your work.
Dam Man ......... help the rest of us (well at least me) poor schmucks that dream of these batches have something to go by to try to even come close to what you have done.
Nice work!!!
|
|
rollingstone
starting to spend too much on rocks
 
Member since July 2009
Posts: 236
|
Post by rollingstone on Mar 26, 2010 2:21:25 GMT -5
Hey, thanks for the compliments!
Jeri, I use aluminum oxide from the Rockshed. I used to use CPP polish (which I think is also pure aluminum oxide) from a local supplier, but if I'm making a bulk order it's actually cheaper for me to get stuff from the RockShed. The two polishes seem to give identical results. Plus the Rockshed usually puts some candies in with my order :-)
MyNewHobby, thanks, and I'll try to post my method in the next post. I don't know how to make pdf files, so I hope "copy and paste" will work. I don't really think I do things much differently than some of the other recipes that have been posted on this site... I guess if I had to pick an area where I might be doing something different it would be in the double-wash between stages (I'm always surprised at how icky the water still is on the second wash), or perhaps the up-to-three-week polish stage. Anyhow, I did keep notes on my recipe, as a kind of learning aid for myself. It's designed for "typical" stones, meaning hard materials of around mohs 7 hardness. I probably wouldn't change much for mohs 6 materials, but you'd want a different recipe for mohs 5 rocks like obsidian or sodalite.
Don
|
|
rollingstone
starting to spend too much on rocks
 
Member since July 2009
Posts: 236
|
Post by rollingstone on Mar 26, 2010 2:24:18 GMT -5
ROCK TUMBLER RECIPE
Stage 1, 60/90 silicon carbide.
Charge a 6# barrel at least 3/4 full with very rough, chisel-cracked rock, add 6 fluid ounces water, add 4 Tb of 60/90 grit.
- the 3/4-full barrel is because the volume will shrink quickly as the sharp edges wear off the rock, and after about 1 day you can hear things tumbling much better.
- consider using plastic pellets for rocks that chip easily or have a lot of fractures such as amethyst, rose quartz, petrified wood because the pellets may soften the action a bit and thereby prevent chipping. Pellets can also help if a very big rock is going into the barrel. For things like agates, pellets aren’t needed and only slow down the action in the barrel.
After 2 days, open the barrel and add 3 Tb fresh grit (total now 7 Tb). Need a spray bottle to wash grit from the lip of the barrel, but this doesn’t add much water. Add some extra coarse rock if the level has dropped significantly.
After 2 more days, do another 3 Tb recharge (total now 10 Tb). Again, use water from the spray bottle to rinse the lip of the barrel. If the slurry is getting too thick then add more water, but gravy consistency is good.
Optional after 2 more days, repeat with 3 Tb grit (total 13 Tb) -- this will only work when tumbling very hard materials such as agates. For just about everything else, a total of 10 Tb is the maximum before the slurry gets too thick in the end.
Let tumble 4 more days since last addition of grit. Clean up everything. If the stones are free from imperfections and are nicely shaped, move on to stage 2, otherwise put them back through stage 1, adding fresh-cracked rock to make up to volume. If using all partly-shaped rock, maybe don’t fill the barrel quite so full because there won’t be a rapid volume reduction to help things tumble properly.
With amethyst, I found that 1/3 of the amethyst was ready after 3 weeks, another 1/3 was ready after 5 weeks, and the other 1/3 still needed additional tumbling. Jaspers seem faster, agates seem slower. Agates can take 8-12 weeks, depending on type and size.
Need to do multiple loads and combine them to have enough for a stage 2 and beyond run, because there is a big loss of volume.
Stage 2, 120/220 silicon carbide.
Charge the barrel with about 2/3-3/4 volume of rocks, a good dose of plastic pellets for fractured rocks, 6-8 fl. oz. water (6 oz. for very hard materials, 8 oz. for jaspers or softer), 10 Tb grit. Don’t use the same plastic pellets as for stage 1, keep plastic pellets and sieves separate for each stage. You want enough pellets to cushion things a bit, but still maintain a vigorous tumble that works the stones. The rocks shouldn't be crashing around, but should definitely be making a good tumbling noise. For solid rocks like agates or crazy lace you can get away with no pellets. After 7 days, clean everything thoroughly.
For the cleaning, do a double soap wash -- put rocks and plastic pellets back in the barrel and add water until the water comes about half way up the barrel, add 1.5-2 Tb of shavings from a bar of Ivory soap, and add extra pellets to fill the barrel to within about a half-inch of the top (because the cushioning effect of the slurry is now gone so extra pellets are needed to prevent chipping). Then run the barrel for about 45 minutes, clean thoroughly. Repeat. Separate pellets and rocks, move rocks to next stage and dry pellets for re-use in another 120/220 load.
Stage 3, 500F silicon carbide.
Similar to stage 2 -- place in the barrel the stones from 120/220, 10Tb of grit plus 8 fl.oz. water, then tumble for 7-10 days. Don’t add too many pellets -- should hear rocks clearly tumbling against each other, not crashing, but making some noise -- this speeds up the action in the barrel compared to having lots of pellets and just a faint tumble noise in the barrel.
Finish off with two - 45 minute soap cleanings of pellets and rocks. At this stage, the stones will have a very matte finish that doesn’t look much different than after 60/90, but they should feel noticeably smoother.
Stage 4, polish.
This is where science gives way to art. There is a tricky balance between polish, water, rock and pellets. What seems to happen is that the polish incorporates a lot of air during the first day, forming a foam that usually lasts 10 days or longer. So don’t worry if the tumble initially sounds a slight bit rough, once the air gets mixed in over the next 12-24 hours the tumbling will quiet down.
My basic recipe so far is to charge barrel up to 2/3 with rocks, about 10 fl. oz. of water, add 12 Tb polish compound, add plastic pellets until the barrel is 3/4 full or maybe a bit more, and run for up to 3 weeks. For polish, I use aluminum oxide, which is cheap and good for most stones. The barrel should make the sound of gently tumbling rocks -- not too soft, not crashing about. If too soft, may have to open and remove pellets or add water, if too rough may have to add more pellets. It's best not to open the barrel unless absolutely necessary or to see if the stones are fully polished, because a barrel full of foam is really messy to seal up again.
I've had some stones become fully polished in as little as 9 days but most stones improve for 2-3 weeks, then they won't get any shinier. When I think the stones should be finished, I open the barrel and remove a few stones and examine them with a 10X loupe. Under magnification it's fairly easy to tell if the surface is a good as it's going to get. If in doubt, put them back in the barrel, run things another week, and see if they improve. Patience!
Final Cleaning.
When the stones are polished to your satisfaction, put the barrel-load in a plastic sieve and rinse away the polish but DO NOT LET THE STONES DRY OUT! If the stones become dry, any residual polish in any crack or pit will turn into cement and will never come out. Place the wet stones, pellets, fresh water (to halfway up the barrel) back into barrel, add 1-1.5 Tb shaved bar of ivory soap, then fill the barrel almost to the brim with plastic pellets. This should make for an extremely gentle tumbling sound when the barrel is placed back onto the tumbler -- i.e., just the slightest tumbling noise from the rocks. Run for about 6 hours to clean residual polish out of any cracks.
Rinse, dry, and admire!
|
|
rollingstone
starting to spend too much on rocks
 
Member since July 2009
Posts: 236
|
Post by rollingstone on Mar 26, 2010 2:31:38 GMT -5
The above recipe is for a 6 pound barrel on my Lortone rotary tumbers. Scale to your own barrel size, as needed.
-Don
|
|
rollingstone
starting to spend too much on rocks
 
Member since July 2009
Posts: 236
|
Post by rollingstone on Mar 26, 2010 2:37:07 GMT -5
Oh, and the multiple grit additions in coarse grind are opitional, you could just go with 10 Tb on Day1. That's the way I used to do things, but then I found I really needed to add more grit (5 Tb) after 4 days or so because all the coarse grit had been broken down. Now, by adding the 60/90 grit in stages, I cut down on overall grit usage by at least 1/3, and I believe I get better results as well.
Everyone has a different take on things though, so go with what works best for your conditions and your schedule.
|
|
rollingstone
starting to spend too much on rocks
 
Member since July 2009
Posts: 236
|
Post by rollingstone on Mar 31, 2010 2:55:25 GMT -5
A few more pics... These are from 2009, as my tumbling began to slow. Rough peridot (from a rock shop in Arizona): 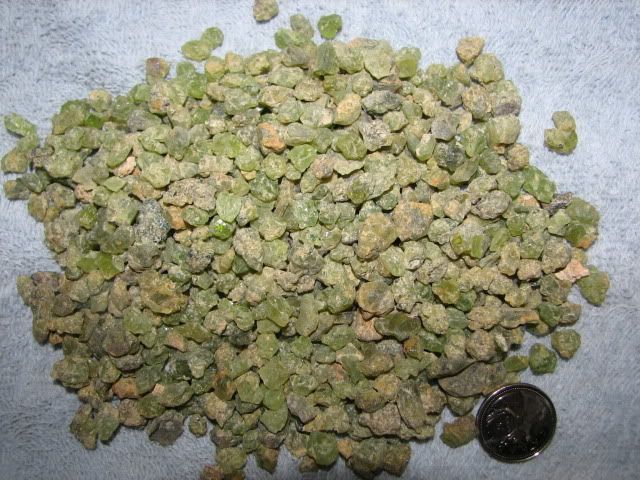 And tumble-polished: 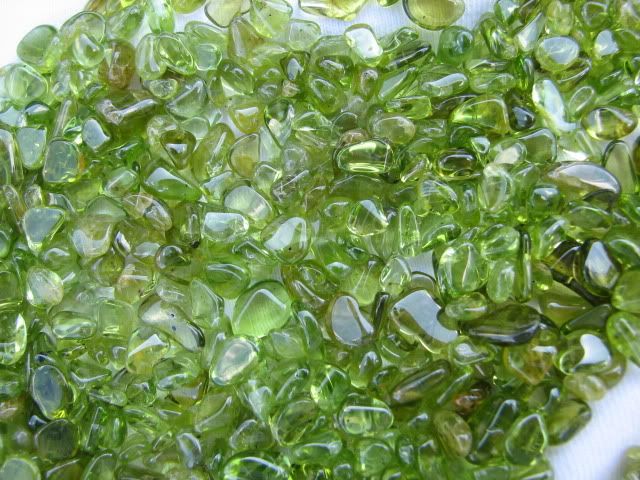 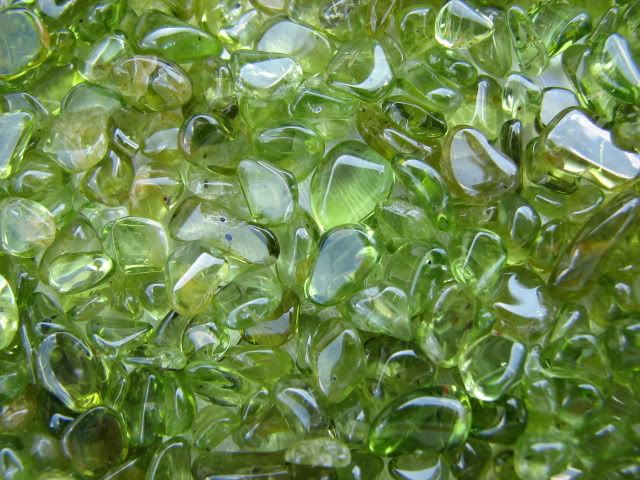 Petrified palm wood: 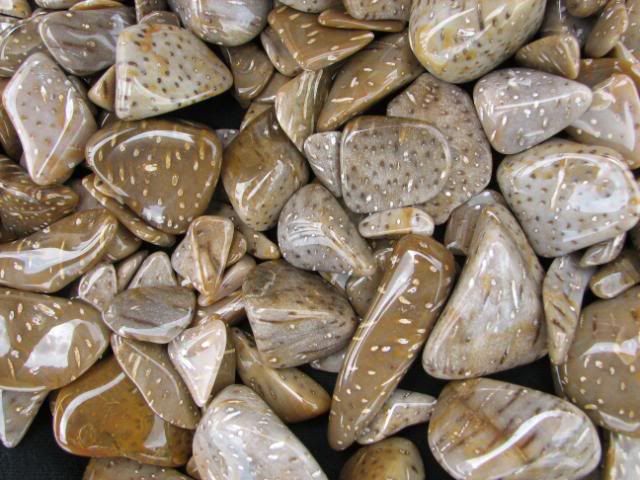 Well, I've posted lots of Botswana agate tumbles in previous posts so I don't want to just add more, but I liked this pic because it has orange Bots, which aren't very common: 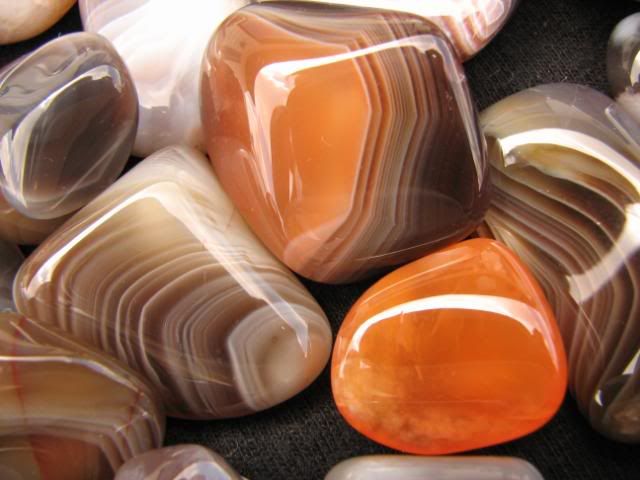 Brecciated jasper from Africa:  And a bit closer: 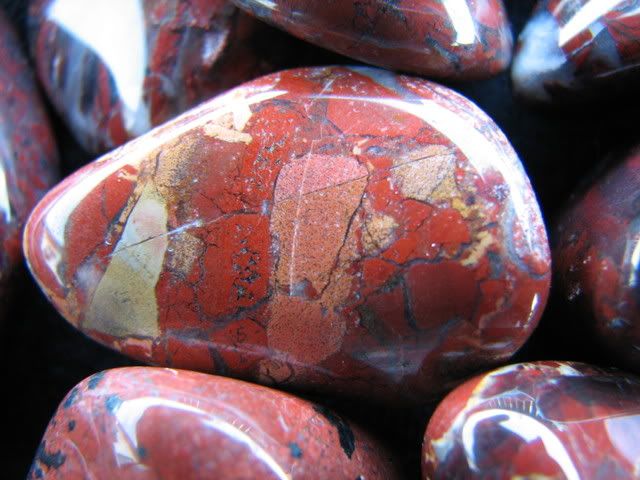 And finally a bit of mookaite: 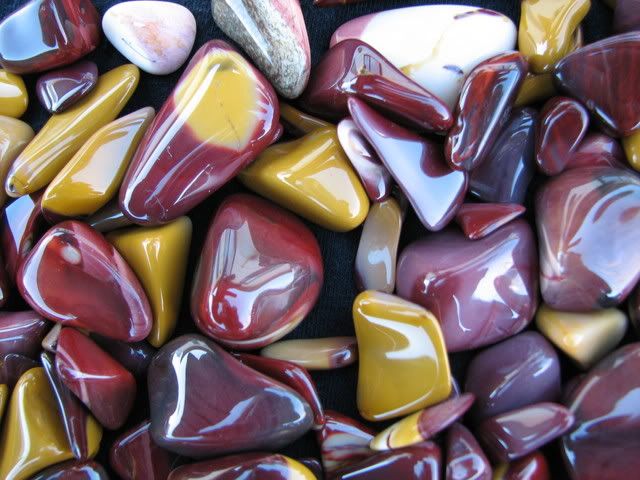 |
|
rollingstone
starting to spend too much on rocks
 
Member since July 2009
Posts: 236
|
Post by rollingstone on Mar 31, 2010 3:20:01 GMT -5
|
|
rollingstone
starting to spend too much on rocks
 
Member since July 2009
Posts: 236
|
Post by rollingstone on Mar 31, 2010 3:38:17 GMT -5
|
|
catskillrocks
fully equipped rock polisher
  
Member since July 2008
Posts: 1,270
|
Post by catskillrocks on Mar 31, 2010 21:40:37 GMT -5
Boy, Don, what beauties. It is posts like this that has me putting rocks with
tiny pits & cracks back into 60/90, trying to get the "perfect shine". Your
tumbles are flawless, what more to say. Thanks.
Don
|
|
|
|
Post by MyNewHobby on Apr 12, 2010 21:09:55 GMT -5
After seeing this thread again ... I have decided to go off somewhere and if anyone finds me .... they will find a heap on the floor ....
I see these again and again and over time they still make whimper ..
One day ... in my own grand dreams ... I will be able to make the glass I see here
NICE!!!
|
|
rockhunter
off to a rocking start

Member since May 2009
Posts: 10 
|
Post by rockhunter on Apr 14, 2010 12:41:00 GMT -5
Wow, these stones are absolutely fantastic.. Thanks for sharing the photos!
|
|
hsnopi
off to a rocking start
 "So, I have a bag of rocks. Now what?"
Member since June 2010
Posts: 18
|
Post by hsnopi on Jun 22, 2010 8:32:48 GMT -5
Ok as a complete newb these pics don't inspire so much as terrify. There's no way I can achieve that result! omg.
|
|
jasperblue
starting to spend too much on rocks
  Diggin' This
Member since August 2010
Posts: 141
|
Post by jasperblue on Oct 12, 2010 21:43:04 GMT -5
Attention all newbies! Yes you can! It will take some time to reach the beautiful heights that Rollingstone has achieved. Follow his recipes and practice, practice, practice. Practice on regular rocks, such as beach or river rocks. And get a good feel for your machine(s). Learn to listen for changes in the sound of the tumbling stones and they will tell you themselves when they need another charge or when they're ready to move to the next grit. Can't say enough about using plastic beads in the final stages,(from 'fine' or 'pre-polish' on. Even during 'burnish' stage). You don't want to go all that way and then have em crackin' into each other during 'polish'.
|
|
lapidarycanary1
off to a rocking start

Member since September 2010
Posts: 4
|
Post by lapidarycanary1 on Oct 17, 2010 3:28:44 GMT -5
I'm not discouraged in the least, responding to page 1! The way you talk about "James" makes me sad I missed his work, at least you peoples got to see it!!!
None the less, I almost want to get into this and am a newbie if you will. Looking at all those shiny rock picks just inspires me to do better giggles!
In any case I posted this last night and thought through my profile I'd be able to see where it was I did so, lol, nope not the case, so I think I will post this question that I have in as many places as it would be right to do, and I'm hoping one day I'll be able to stumble across an answer lol ;D
I have a Harbor Freight Light duty 5 pounder. I wasn’t really planning on doing lots of any kind of rocks, at least just yet. I had previously purchased a dual 3lb =ing 6lbs rotary tumbler in the case I might tumble some day but after hearing about the possible “weeks” involved with it, hmmmmm giggles, maybe won’t go that route just yet.
I had read some where that {IF} I wanted to get a quick view or peek to see the shiny side of a sculptured piece, to put it in a vibrator.
Darned it if I didn't loose the article,,,,, because it told you how to do the procedure without any damage to the work piece, the present work piece is dark jade.
Would anybody have any ideas on how to carry this out without my work piece getting whacked in the process, {it was most of the reason for getting the vibrator} in the first place?
Sincerely,
LC
|
|
|
|
Post by sandsman1 on Oct 21, 2010 19:33:38 GMT -5
man you got some great tumbles there i realy like the OJ that triangle one in the center of one of the pics (7th one down) is just too cool what great eyes haha
|
|