Post by adrian65 on Apr 22, 2009 12:33:44 GMT -5
ADMIN EDIT - repaired broken images - original code below
---------------------------
Hello, everyone!
A lot of people asked me how I do the bail. I don't think it's something special, in a classic wrap there are a lot of bindings that are harder to do than a bail of a groove wrap, at least in my opinion.
So, here we go. There are a lot of pics forward.
Firstly, this is my portable bench. I like it because I can move it wherever I want to work.

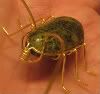
And here's the cab that I'm gonna wrap: it's a wonderstone, although not a classical pattern of it. It looks pretty pictural to me, like a sunrise in the desert.

First thing, bend the extra wires upwards such as there is a gap between them of about 1 mm, then tighten them with a flat nose pliers. This way the wire will be tight in the groove and the cab will not move.

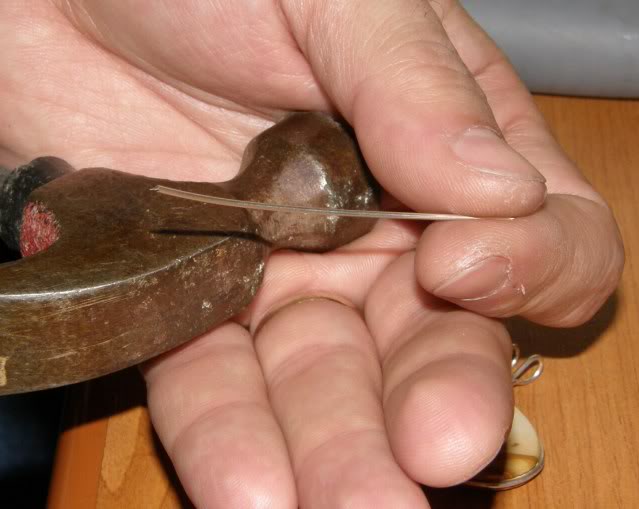
Then, rotate 90 degrees the cab and the wires and tight the plier again (the width of the nose of the plier will be about equal to the height of the coil, so don't use a plier having too wide or too thin nose). While keeping the plier tight, make the loop using a rod (I use a brass rod, as you see)


Maybe some of you folks have more specialized tolls, but I use a nail clipper for the precise cuts. So, I cut the extra length of the bail wire such as it will stop just near the cab.

Here's the bail without coil:

Now the coil. For the coil, some of you could probably use half round wire, so if you do it please ignore the next steps. I make my coil from the same round wire that I use for the wrap.
I take a small piece of wire (about 2 inches) ...
... and I hammer it on the small anvil:

After this, it becomes curved. I straighten it on the same anvil, hammering it gently with a smaller hammer:

One of the surface of the coil wire must be nice and smooth, so I use two diamond files (coarse and fine) to grind the surface:

After this, I used to smooth the surface of the wire using a sort of 4 steps nail polisher. Maybe some of you ladies know better what I'm talking about. Anyway, i recently upgraded my method thanks to Raqui, who sent me some mini-polishing disks that I attach at my Dremmel. Here you can see both of the tools I was talking about:

Both of them work great and give a good shine on the silver, but the disks are far more efficient and time-saving of course.
Now take the coil wire and cut one of its ends obliquely, as you see here:

Take a round nose plier and make a first loop of the coil.

The diameter of the coil should allow the four wires of the bail to fit inside.
The opening of the coil should be just a bit above the diameter of a single wire (1 mm in my case)


Now take that coil wire and spin it around the four bail wires (red arrow) until all the four wires are inside the coil:

Take again the flat nose plier and tighten the first coil. Take care to put the end of the coil on the back of the pendant. Don't press too hard on the first coil, but after that you can tighten pretty hard.
While tightening the existing coil(s), bend the wire with the finger (bold arrow) and take care to bend it slightly downwards too (small arrow), such as you would want to overlap the coil wires a bit. This way no gaps will appear between the coils.

Change the grip of the plier after each 90 degrees bend of the wire. This way the coil will be tight.

You can start the first coils anywhere on the height of the future coil, it's easier than starting it right near the cab, where it should start. But after a few coils, you can bring it down as you see below (hammer GENTLY the nose of the plier while keeping the plier loosely above the coil). Use a soft support - rubber or wood and avoid this step on fragile shapes or rocks:

I use to do 3 to 5 coils on a bail. On this one I made four of them. Before bending the last coil, cut the end obliquely such as that end will reach on the back of the pendant:


And then, finish the coil. After finishing it, I gently hammer it again downwards to get stuck to the cab and then I separate the two loops. This will help the coil to stay on position.

And that's it about the bail. Now the pendant only has to be finished. The wire must be leveled to the edge of the cab. I do this either with a small sanding paper cylinder (pic below) or with a steel (NOT diamond) file:

sorry for the bad focus.
And now the finishing touch, using either the nail 4 steps polisher, or the polishing disks:

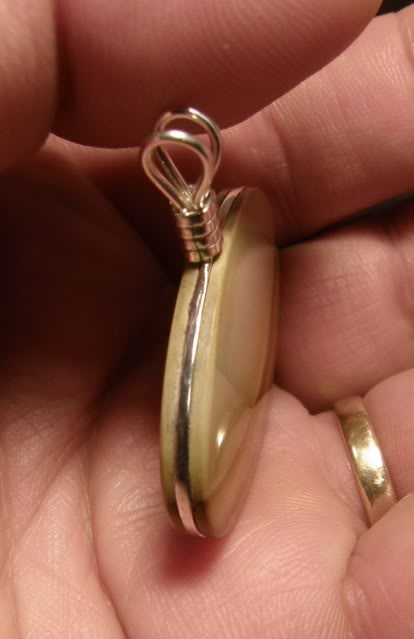
And now it's ready!


Thank you for looking, I hope you find helpful this tutorial. If anyone think this can be improved, please post your ideas.
Adrian
PS. Every time when I say "upwards" or "downwards" I refer to the normal position of the pendant (bail up).
---------------------------
Hello, everyone!
A lot of people asked me how I do the bail. I don't think it's something special, in a classic wrap there are a lot of bindings that are harder to do than a bail of a groove wrap, at least in my opinion.
So, here we go. There are a lot of pics forward.
Firstly, this is my portable bench. I like it because I can move it wherever I want to work.
And here's the cab that I'm gonna wrap: it's a wonderstone, although not a classical pattern of it. It looks pretty pictural to me, like a sunrise in the desert.
First thing, bend the extra wires upwards such as there is a gap between them of about 1 mm, then tighten them with a flat nose pliers. This way the wire will be tight in the groove and the cab will not move.
Then, rotate 90 degrees the cab and the wires and tight the plier again (the width of the nose of the plier will be about equal to the height of the coil, so don't use a plier having too wide or too thin nose). While keeping the plier tight, make the loop using a rod (I use a brass rod, as you see)
Maybe some of you folks have more specialized tolls, but I use a nail clipper for the precise cuts. So, I cut the extra length of the bail wire such as it will stop just near the cab.
Here's the bail without coil:
Now the coil. For the coil, some of you could probably use half round wire, so if you do it please ignore the next steps. I make my coil from the same round wire that I use for the wrap.
I take a small piece of wire (about 2 inches) ...
... and I hammer it on the small anvil:
After this, it becomes curved. I straighten it on the same anvil, hammering it gently with a smaller hammer:
One of the surface of the coil wire must be nice and smooth, so I use two diamond files (coarse and fine) to grind the surface:
After this, I used to smooth the surface of the wire using a sort of 4 steps nail polisher. Maybe some of you ladies know better what I'm talking about. Anyway, i recently upgraded my method thanks to Raqui, who sent me some mini-polishing disks that I attach at my Dremmel. Here you can see both of the tools I was talking about:
Both of them work great and give a good shine on the silver, but the disks are far more efficient and time-saving of course.
Now take the coil wire and cut one of its ends obliquely, as you see here:
Take a round nose plier and make a first loop of the coil.
The diameter of the coil should allow the four wires of the bail to fit inside.
The opening of the coil should be just a bit above the diameter of a single wire (1 mm in my case)
Now take that coil wire and spin it around the four bail wires (red arrow) until all the four wires are inside the coil:
Take again the flat nose plier and tighten the first coil. Take care to put the end of the coil on the back of the pendant. Don't press too hard on the first coil, but after that you can tighten pretty hard.
While tightening the existing coil(s), bend the wire with the finger (bold arrow) and take care to bend it slightly downwards too (small arrow), such as you would want to overlap the coil wires a bit. This way no gaps will appear between the coils.
Change the grip of the plier after each 90 degrees bend of the wire. This way the coil will be tight.
You can start the first coils anywhere on the height of the future coil, it's easier than starting it right near the cab, where it should start. But after a few coils, you can bring it down as you see below (hammer GENTLY the nose of the plier while keeping the plier loosely above the coil). Use a soft support - rubber or wood and avoid this step on fragile shapes or rocks:
I use to do 3 to 5 coils on a bail. On this one I made four of them. Before bending the last coil, cut the end obliquely such as that end will reach on the back of the pendant:
And then, finish the coil. After finishing it, I gently hammer it again downwards to get stuck to the cab and then I separate the two loops. This will help the coil to stay on position.
And that's it about the bail. Now the pendant only has to be finished. The wire must be leveled to the edge of the cab. I do this either with a small sanding paper cylinder (pic below) or with a steel (NOT diamond) file:
sorry for the bad focus.
And now the finishing touch, using either the nail 4 steps polisher, or the polishing disks:
And now it's ready!

Thank you for looking, I hope you find helpful this tutorial. If anyone think this can be improved, please post your ideas.
Adrian
PS. Every time when I say "upwards" or "downwards" I refer to the normal position of the pendant (bail up).
[IMG]http://i155.photobucket.com/albums/s308/adrian65prd/P4211166.jpg[/IMG]
[IMG]http://i155.photobucket.com/albums/s308/adrian65prd/P4211167.jpg[/IMG]
[IMG]http://i155.photobucket.com/albums/s308/adrian65prd/P4211168.jpg[/IMG]
[IMG]http://i155.photobucket.com/albums/s308/adrian65prd/P4211170.jpg[/IMG]
[IMG]http://i155.photobucket.com/albums/s308/adrian65prd/P4211171.jpg[/IMG]
[IMG]http://i155.photobucket.com/albums/s308/adrian65prd/P4211173.jpg[/IMG]
[IMG]http://i155.photobucket.com/albums/s308/adrian65prd/P4211174.jpg[/IMG]
[IMG]http://i155.photobucket.com/albums/s308/adrian65prd/P4211175.jpg[/IMG]
[IMG]http://i155.photobucket.com/albums/s308/adrian65prd/P4211176.jpg[/IMG]
[IMG]http://i155.photobucket.com/albums/s308/adrian65prd/P4211182.jpg[/IMG]
[IMG]http://i155.photobucket.com/albums/s308/adrian65prd/P4211185.jpg[/IMG]
[IMG]http://i155.photobucket.com/albums/s308/adrian65prd/P4211187.jpg[/IMG]
[IMG]http://i155.photobucket.com/albums/s308/adrian65prd/P4211229.jpg[/IMG]
[IMG]http://i155.photobucket.com/albums/s308/adrian65prd/P4211231.jpg[/IMG]
[IMG]http://i155.photobucket.com/albums/s308/adrian65prd/P4211232.jpg[/IMG]
[IMG]http://i155.photobucket.com/albums/s308/adrian65prd/P4211233.jpg[/IMG]
[IMG]http://i155.photobucket.com/albums/s308/adrian65prd/P4211234.jpg[/IMG]
[IMG]http://i155.photobucket.com/albums/s308/adrian65prd/P4211236.jpg[/IMG]
[IMG]http://i155.photobucket.com/albums/s308/adrian65prd/P4211237.jpg[/IMG]
[IMG]http://i155.photobucket.com/albums/s308/adrian65prd/P4211239.jpg[/IMG]
[IMG]http://i155.photobucket.com/albums/s308/adrian65prd/P4211240.jpg[/IMG]
[IMG]http://i155.photobucket.com/albums/s308/adrian65prd/P4211241.jpg[/IMG]
[IMG]http://i155.photobucket.com/albums/s308/adrian65prd/P4211242.jpg[/IMG]
[IMG]http://i155.photobucket.com/albums/s308/adrian65prd/P4211245.jpg[/IMG]
[IMG]http://i155.photobucket.com/albums/s308/adrian65prd/P4211249.jpg[/IMG]
[IMG]http://i155.photobucket.com/albums/s308/adrian65prd/P4221254.jpg[/IMG]
[IMG]http://i155.photobucket.com/albums/s308/adrian65prd/P4221253.jpg[/IMG]
[IMG]http://i155.photobucket.com/albums/s308/adrian65prd/P4221252.jpg[/IMG]
[IMG]http://i155.photobucket.com/albums/s308/adrian65prd/P4221251.jpg[/IMG]
[IMG]http://i155.photobucket.com/albums/s308/adrian65prd/P4221250.jpg[/IMG]