toolnut
starting to shine!

Member since December 2017
Posts: 42 
|
Post by toolnut on Jan 15, 2018 21:05:28 GMT -5
James, I wanted to thank you for the hammering methods video you posted on FB. Never used a hammer on glass, and just Diamond saws,( ring saw, diamond band saw) and wet belt sander. and Stone and diamond wheels. Also, regular glass working hand tools, like Grozers and Breaker Pliers. Working in stained glass and hot glass is so closely related to this hobby, that a lot of the same rules and methods apply to both. Knowing glass and its character and behavior can be a great benefit in both hobbies, but seems to be little shared in tumbling glass. I have researched a lot of information on glass, and my first Teacher in stained glass was a four year apprentice Graduate in a glass company that restored and made Church Windows. Lots of learning in old Traditional methods, like working with chunked glass, and making glass pieces for restorations. One of the tidbits was on working with chunked glass, and making pieces suitable to work with from large chunks or slabs. I also had a book with pictures of the method used, They used an anvil parting wedge, same as a Blacksmith would use, mounted in a wooden stump. The would lay the chunk on top of the wedge, and strike it with hammer. which would cause the fracture to split the piece in the direct the wedge was pointed in. Glass fractures will follow the direction of the initial blow most of the time, in a pretty straight line. As an example, you where striking the glass on a downward angle, in the direction of the way it ended up chipping off. The blows where from the top at a sloped angle and the breaks followed the direction your hammer was traveling in, using the wedge on the edge of the hammer. Same principle in using a glass cutter wheel. The wheel is wedge shaped and fractures the glass surface with a straight down minute fracture. When tapped by the cutter or snapped by hand, the break follows the fracture, in the direction the cutter was held in. If you tilted the cutter when you scored the glass, you would see the break again followed the direction of the glass cutter. The edge of the broken glass would be also wedge shaped following or equal to the angle you tilted the cutter to. So using the iron wedge stake, they manipulated the size, direction, and shape of the split they wanted to make. Maybe something you may consider to play with, I have one of these original antique old stake setups if you wanted to see a picture.
|
|
jamesp
Cave Dweller 
Member since October 2012
Posts: 36,165
|
Post by jamesp on Jan 16, 2018 6:00:38 GMT -5
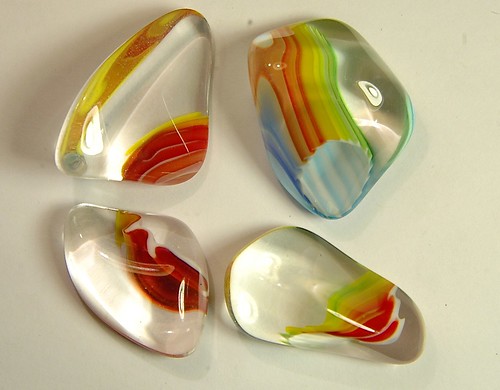
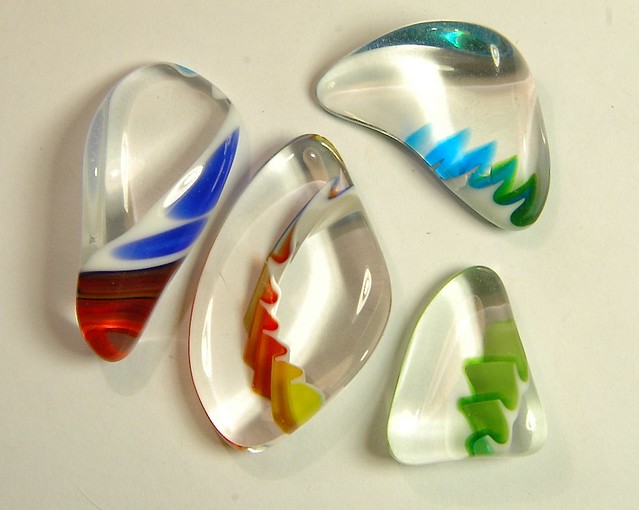
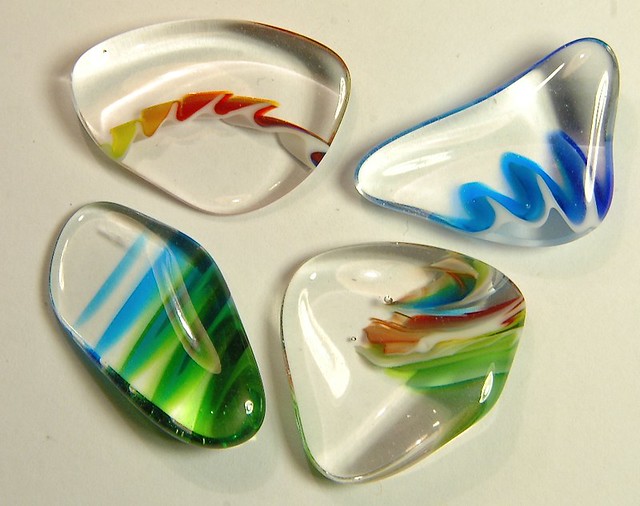
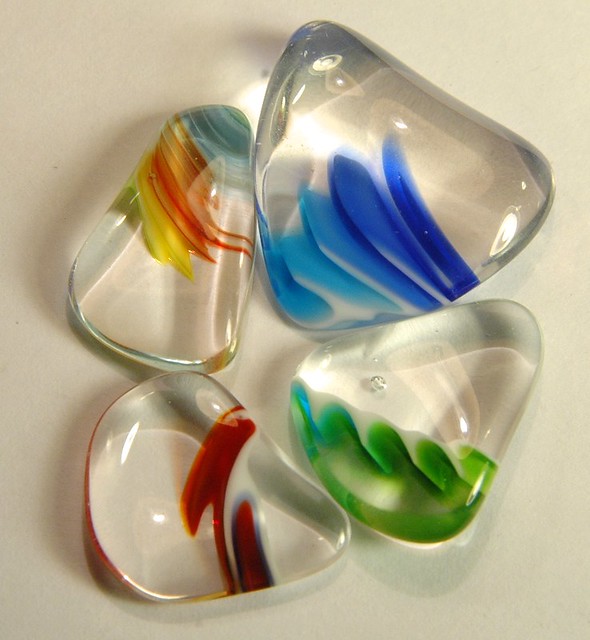
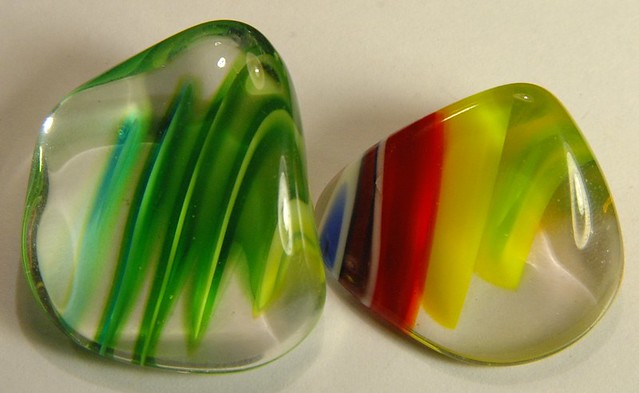
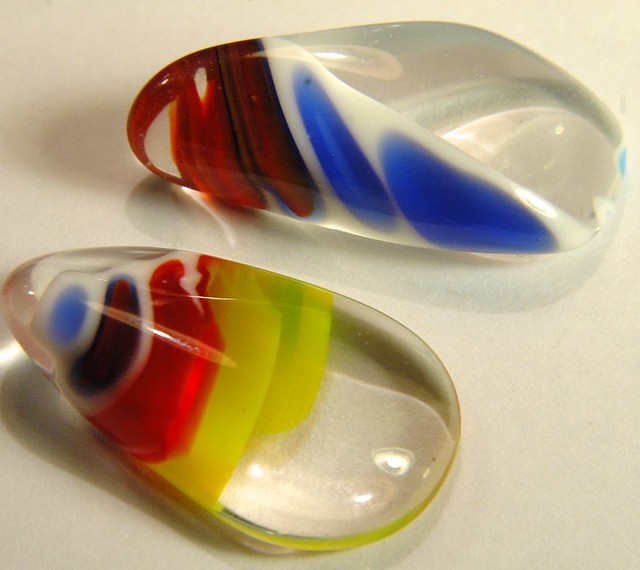
toolnutNot sure why that one melt had a rough surface. It was the only of many, the others all looked flame polished go figure. 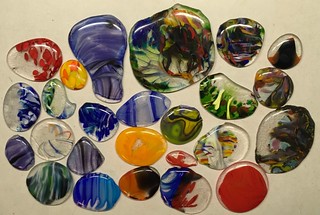 The glass blower in town gives me his trash glass for me to hammer or melt. Sorted, smalls and mediums as received from the glass artist: 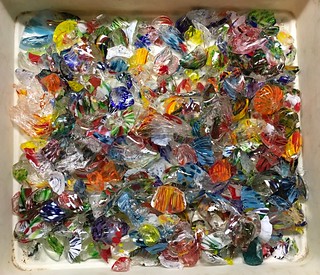 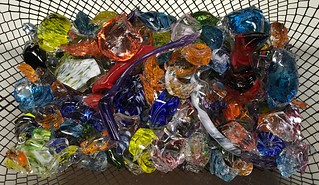 As far as hammering glass it is the exact same technology as the English used to hammer gun flints centuries ago. Brass or softened steel hammers to reduce multiple impact fractures. Small soft hammer head with a long handle for high speed. Instead of using leather on leg or a stump a 1 inch foam pad is used as an anvil. Conchoidal fracturing material only - glass - obsidian - silicified coral - Brazilian agate - high grade moss agate - Montana agate - marine cherts etc. The striking angles you speak of are the most important factor. Angles change with the material and anvil material. Next is accuracy and force of impact. Hammering glass/obsidian is much more unpredictable than agates and cherts. Glad you liked the video. The coral in the video litters some rivers near me. In any size up to several 100 pound chunks. 5 or 6 different weight hammers needed. There are large chip bars in the rivers where native man reduced the coral for his tools and spearheads. No idea what type of hammer those guys used, but they were good at chipping the silicified coral. The colors of the glass at high temp are way different than at room temp. I did have red turn brown, freaked me out at first. Most of the colors were not altered by heat. The glass blowers were buffaloed by the tumble polished glass lol, called them glass rocks. Not so sure they understood the process but were curious. Those guys do have fine glass grinding and polishing equipment. Furnace area and grind/polish area, main shop components. You won the battle on the wood fired kiln for now. Am in the market for a small glass kiln. I see the usefulness of the controllable electric kiln. a bit crazed by melting glass. And it fits in well with the tumbling.
|
|
|
|
Post by Garage Rocker on Jan 17, 2018 9:48:53 GMT -5
Awesome! Love the patterns. That rooster was a great purchase. Good clean pics, too! |
|
jamesp
Cave Dweller
Member since October 2012
Posts: 36,165
|
Post by jamesp on Jan 17, 2018 18:20:13 GMT -5
Awesome! Love the patterns. That rooster was a great purchase. Good clean pics, too! Gone hog wild. Driving to Tallahassee Florida to purchase a used Craig's list glass kiln to melt my own designs. Been dumpster diving at the glass blower's studios getting their fancy glass tailings with their permission. For remelt. Photos got the job done, not garagephotography but descriptive enough. I'll take a compliment from de man any day. |
|
bevsmith1960
starting to shine!
Member since January 2018
Posts: 48 
|
Post by bevsmith1960 on Jan 17, 2018 18:52:29 GMT -5
James, I wanted to thank you for the hammering methods video you posted on FB. Never used a hammer on glass, and just Diamond saws,( ring saw, diamond band saw) and wet belt sander. and Stone and diamond wheels. Also, regular glass working hand tools, like Grozers and Breaker Pliers. Working in stained glass and hot glass is so closely related to this hobby, that a lot of the same rules and methods apply to both. Knowing glass and its character and behavior can be a great benefit in both hobbies, but seems to be little shared in tumbling glass. I have researched a lot of information on glass, and my first Teacher in stained glass was a four year apprentice Graduate in a glass company that restored and made Church Windows. Lots of learning in old Traditional methods, like working with chunked glass, and making glass pieces for restorations. One of the tidbits was on working with chunked glass, and making pieces suitable to work with from large chunks or slabs. I also had a book with pictures of the method used, They used an anvil parting wedge, same as a Blacksmith would use, mounted in a wooden stump. The would lay the chunk on top of the wedge, and strike it with hammer. which would cause the fracture to split the piece in the direct the wedge was pointed in. Glass fractures will follow the direction of the initial blow most of the time, in a pretty straight line. As an example, you where striking the glass on a downward angle, in the direction of the way it ended up chipping off. The blows where from the top at a sloped angle and the breaks followed the direction your hammer was traveling in, using the wedge on the edge of the hammer. Same principle in using a glass cutter wheel. The wheel is wedge shaped and fractures the glass surface with a straight down minute fracture. When tapped by the cutter or snapped by hand, the break follows the fracture, in the direction the cutter was held in. If you tilted the cutter when you scored the glass, you would see the break again followed the direction of the glass cutter. The edge of the broken glass would be also wedge shaped following or equal to the angle you tilted the cutter to. So using the iron wedge stake, they manipulated the size, direction, and shape of the split they wanted to make. Maybe something you may consider to play with, I have one of these original antique old stake setups if you wanted to see a picture. Yes please to the picture! |
|
|
|
Post by Garage Rocker on Jan 17, 2018 21:09:35 GMT -5
How the hell have you not bled yourself out, breaking down all this glass? Your hands probably resemble mine, dealing with sharp kitten claws. Looks like I stuck my hand in a kitchen ninja.
You've got me thinking I need to go take a look at Home Goods or Marshalls for some colorful glass poultry.
|
|
jamesp
Cave Dweller
Member since October 2012
Posts: 36,165
|
Post by jamesp on Jan 18, 2018 6:44:46 GMT -5
How the hell have you not bled yourself out, breaking down all this glass? Your hands probably resemble mine, dealing with sharp kitten claws. Looks like I stuck my hand in a kitchen ninja. You've got me thinking I need to go take a look at Home Goods or Marshalls for some colorful glass poultry. Welding keeps my hands callused. Then farm work. Naugahyde lol. Got one deep one below pinky fingernail along with a bundle of nerves, ouch. The Hobby Lobby had the rooster. They had/have 50% off on fine glass china made figurines. Some of the best tumbling stock, solid glass so must hammer break or tile saw it. Machine blown stuff. $10 to $20 per I bought the other rooster, about my favorite piece of glass. But has a thick clear outer layer, required lots of surgery. |
|
|
|
Post by Garage Rocker on Jan 18, 2018 14:37:02 GMT -5
How the hell have you not bled yourself out, breaking down all this glass? Your hands probably resemble mine, dealing with sharp kitten claws. Looks like I stuck my hand in a kitchen ninja. You've got me thinking I need to go take a look at Home Goods or Marshalls for some colorful glass poultry. Welding keeps my hands callused. Then farm work. Naugahyde lol. Got one deep one below pinky fingernail along with a bundle of nerves, ouch. The Hobby Lobby had the rooster. They had/have 50% off on fine glass china made figurines. Some of the best tumbling stock, solid glass so must hammer break or tile saw it. Machine blown stuff. $10 to $20 per I bought the other rooster, about my favorite piece of glass. But has a thick clear outer layer, required lots of surgery. Checked out Hobby Lobby and found the rooster there. Unfortunately, the price tag said $49.99. Think I'll pass at that price. May check back to see if it's on sale sometime. |
|
jamesp
Cave Dweller
Member since October 2012
Posts: 36,165
|
Post by jamesp on Jan 19, 2018 11:10:54 GMT -5
Welding keeps my hands callused. Then farm work. Naugahyde lol. Got one deep one below pinky fingernail along with a bundle of nerves, ouch. The Hobby Lobby had the rooster. They had/have 50% off on fine glass china made figurines. Some of the best tumbling stock, solid glass so must hammer break or tile saw it. Machine blown stuff. $10 to $20 per I bought the other rooster, about my favorite piece of glass. But has a thick clear outer layer, required lots of surgery. Checked out Hobby Lobby and found the rooster there. Unfortunately, the price tag said $49.99. Think I'll pass at that price. May check back to see if it's on sale sometime. Cheaper in Georgia. $39.99 retail, 50% off on rooster was $16.99. Thankful of poor Georgia math. The rack had about 50 figurines from $5 to $17 at discount. Glass is cheap here. There is a glut. I went back 2 days later after cleaning out one store and they had already re-stocked with different glass. So the source is infinite in this international city with ocean ports in all 3 directions. Atlanta is a big import distribution center. Charleston, Savannah, Miami, Mobile, and many in-between. Biggest airport 12 miles from home. Lots of broken pieces too. Maybe they will drop a whole oversea container full and call me to clean up. |
|
SirRoxalot
freely admits to licking rocks

Member since October 2003
Posts: 790
|
Post by SirRoxalot on Feb 17, 2018 13:40:57 GMT -5
Found this 7 pound solid glass rooster in a HotAtlanta thrift store for $15. Hate to take a hammer to it but that's what is going to happen. With cullet glass chunks costing $10 to $20 per pound this is a bargain. Made in China, exquisitely done. Sorry Mr. Rooster. 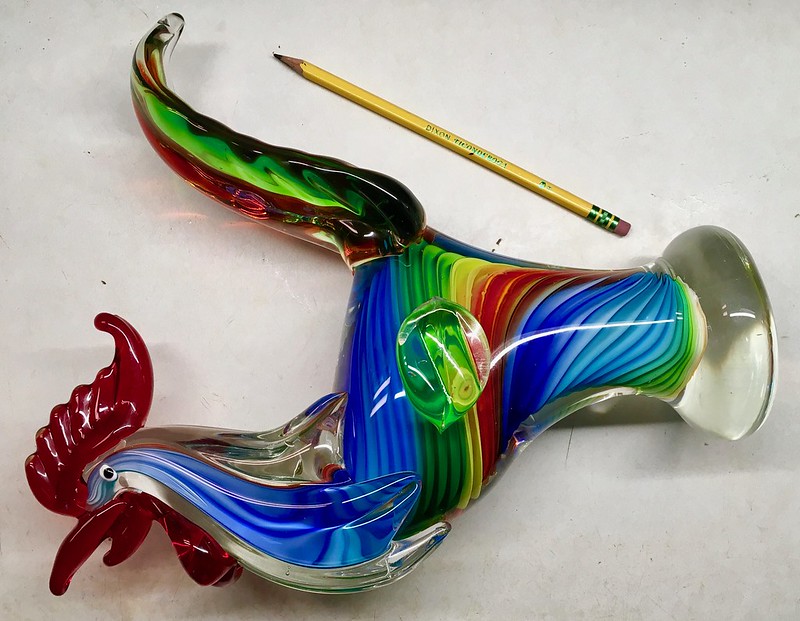 Cullet at an Arkansas quartz shop wholesales for $2.50 a pound, 50 pound minimum... |
|