|
|
Post by BuiltonRock on Feb 5, 2012 19:41:04 GMT -5
That is and you are amazing!!!!
John
|
|
adrian65
Cave Dweller  Arch to golden memories and to great friends.
Member since February 2007
Posts: 10,790
|
Post by adrian65 on Feb 6, 2012 10:38:12 GMT -5
Thank you again! Here's some new progress, not much, but glad that I found the needed copper! ;D Couldn't find copper sheet, but found these copper fittings for plumbing. 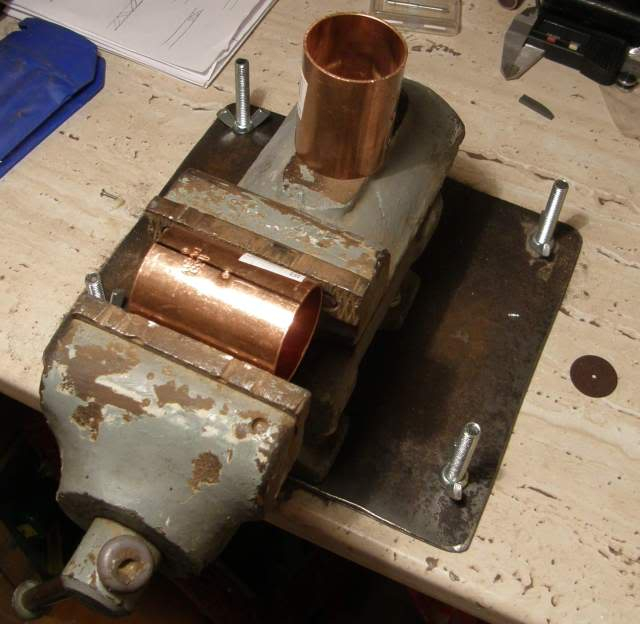 So, I cut one of them and straightened it; one fitting proved to be enough for both of the frames I need.  Here is one of them, fitted in the recess:  The following operations would be cutting the inner window in those copper plates to turn them into frames and then riveting them along the contour. Thanks for looking. Adrian |
|
|
|
Post by mohs on Feb 6, 2012 13:16:01 GMT -5
the groove zipping is favbulous, Adrian
the whole operation is a mind boggling beaut!
Ed
|
|
|
|
Post by Hard Rock Cafe on Feb 6, 2012 13:42:11 GMT -5
Adrian your metal working skills are amazing. I love seeing your work!
Chuck
|
|
|
|
Post by helens on Feb 9, 2012 23:52:19 GMT -5
Wowsers! Your craftsmanship is so precise!! It's wonderful to get to see the pix of the process!!!
|
|
adrian65
Cave Dweller  Arch to golden memories and to great friends.
Member since February 2007
Posts: 10,790
|
Post by adrian65 on Feb 10, 2012 14:41:53 GMT -5
Thank you everyone. Here is a new update. I finished the blade. Here are some pics from the process. Firstly, I cut the windows in the copper frames and brought them to the final shape:  Then I chamfered the inner edges of the frames and I polished those chamfered edges, because once riveted I couldn't polish them without scratching the meteorite slab:  For drilling I used my dremel:  Then I fixed the meteorite slab by riveting the two copper frames, as you see here:  Not very smooth, a lot of hammer dents for the moment, but they're gonna disappear as you will see. Then I shaped the edge of the knife. I used for this the jig I built two years ago when I made the sword. It worked very well now, also:  As you see here, this device helps a lot in keeping a straight surface:  And I also used the jig for the first sanding stages:  This way the edges on the blade were more crisp, without being smoothed by the sanding process:  After that, there was a lot of polishing until I got the desired finish of the blade. Here it is, viewed from different angles:  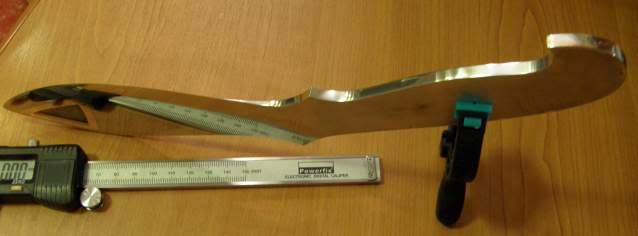 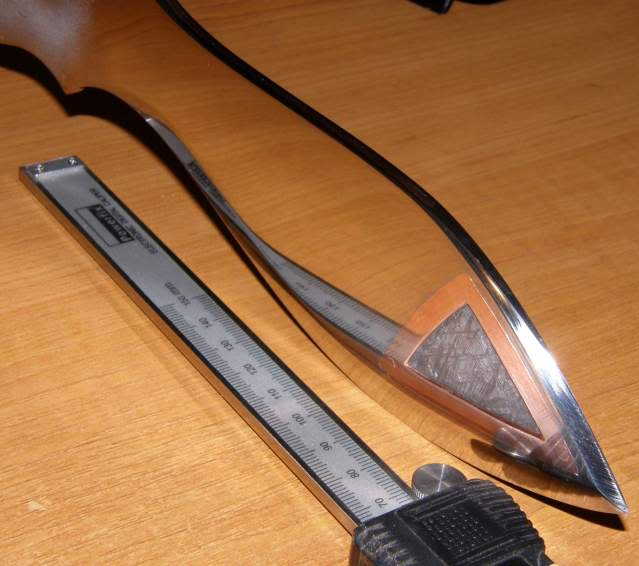  Here's the macro photo of the point of the knife:  That's all for the moment. The bolsters are next to come. Thanks for looking, Adrian |
|
Thunder69
Cave Dweller  Thunder 2000-2015
Member since January 2009
Posts: 3,105
|
Post by Thunder69 on Feb 10, 2012 17:30:11 GMT -5
Adrian if there was not a reflection on the blade I would swear it was glass...Excellent....John
|
|
carloscinco
fully equipped rock polisher
  
Member since July 2008
Posts: 1,639
|
Post by carloscinco on Feb 10, 2012 19:02:36 GMT -5
Excellent symmetry and polish on that blade. Fine work.
|
|
|
|
Post by kk on Feb 10, 2012 21:03:10 GMT -5
You say that some of us are patient to create things, but you school as all beyond compare.
And........ its definitely worth it.
This is an amazing work of art, yet as seen in the previous post as you hold the blade, its also a mean and physically intimidating piece.
Thank you so much, for allowing us to look over your shoulders while creating such a wonderful item. I for one, will look at knives in a completely different way from now on, knowing all the effort that goes into such a fantastic piece. The sword was fantastic too, but then, I had little appreciation for all that the pictures showed, as I usually look at the finished piece and value what I see. But, I did not have the realization as to just how much effort goes into it. I know I'm rambling here, but I just would like to ensue that you realize how much your posts mean to us/me, as you awaken interest even in someone who usually completely stays away from such things (I have a strong dislike for things have an obvious use as weapons).
Thanks again for posting, looking forward to the end-result.
|
|
|
|
Post by helens on Feb 10, 2012 23:43:15 GMT -5
I think Kurt said it far better than I could possibly have...
what patience, what skill, what creativity, what beauty...
May I ask how you got a shine like that on steel? It looks like a mirror!
|
|
adrian65
Cave Dweller  Arch to golden memories and to great friends.
Member since February 2007
Posts: 10,790
|
Post by adrian65 on Feb 11, 2012 6:16:23 GMT -5
Thank you everyone!
Kurt, it means a lot to me to know my work raised your interest for this field. Me neither I don't appreciate very much the weapon side of the knives, but I like their look. Besides, I enjoy the challanges which occur during the building of a knife: the order of mounting the pieces, which surfaces have to be finished and which not, etc.
In addition, it also involves some phisical activity, and with this I am answering to Helen:
For polishing stainless steel, I use sand paper from 150 to 2500 grit. The steps were 150, 180, 320, 500, 100, 1500 and 2500.
In between 500 and 1000, I buffed the blade on a felt pad charged with a mix of grease and 600 SiC
After 2500, I polished the blade with some paste for polishing metals (slightly abrasive, white color and smells kinda like vinegar)
After shaping the edge, it took me some ten to twelve hours to polish the blade.
Thanks again,
Adrian
|
|
|
|
Post by Rockoonz on Feb 11, 2012 12:11:32 GMT -5
That is an incredible bit of workmanship, including the toolmaking skills that have gone into making the tools to do the work.
Lee
|
|
TByrd
fully equipped rock polisher
   Have you performed your random act of kindness?
Member since December 2010
Posts: 1,350
|
Post by TByrd on Feb 11, 2012 13:16:21 GMT -5
I so agree with Kurt and Helen, I think that blade has a mirror finish. It looks awesome. Thank you for sharing with us.
Tammy
|
|
|
|
Post by helens on Feb 12, 2012 5:21:31 GMT -5
That's incredible!! 10-12 hours just to polish the blade... wow!
Another question... you can 'flame polish' glass. What that means is when you shape glass with a tool, it will get 'chill marks', which is an uneven rippling in the glass that doesn't affect the shape. You get rid of these with very gentle heating, and the glass smooths out all the little ripples again.
Can't you do that with steel? VERY gentle and slow heat just to melt the very outside surface? Then temper immediately in cold water? I was curious whether that's doable and would save a lot of polish time maybe?
|
|
adrian65
Cave Dweller  Arch to golden memories and to great friends.
Member since February 2007
Posts: 10,790
|
Post by adrian65 on Feb 16, 2012 11:36:47 GMT -5
Thank you, friends! Helen, about your heat polishing question, I doubt this is possible for steel. But who knows, I am not good in heat related processes (as you see, all the joints I make on this knife are cold formed). So, here's a new update. The bolsters. Not completely done, bust most of them. Firstly, the roughly cut pieces: 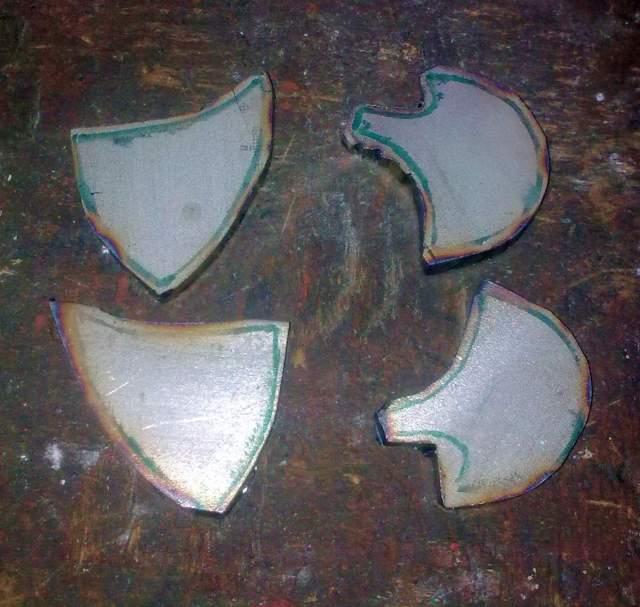 Then, bit by bit, I got them close to their final shape (stuck together two by two, to obtain equal pieces): 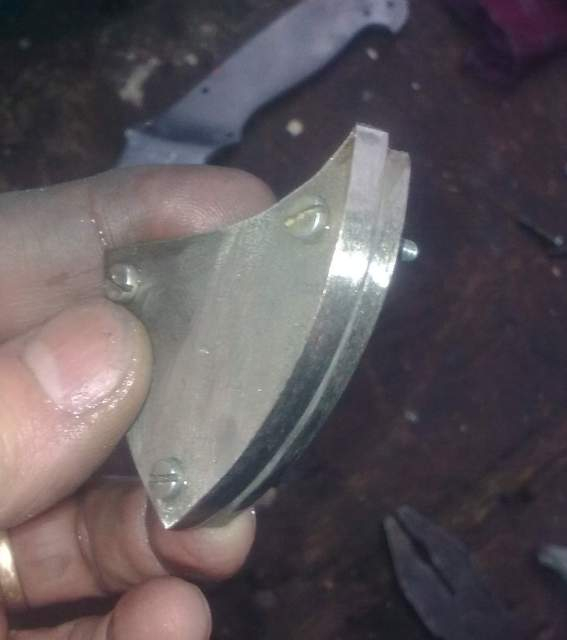 In one of the front bolsters, I cut a window which would host a cab from a special stone. 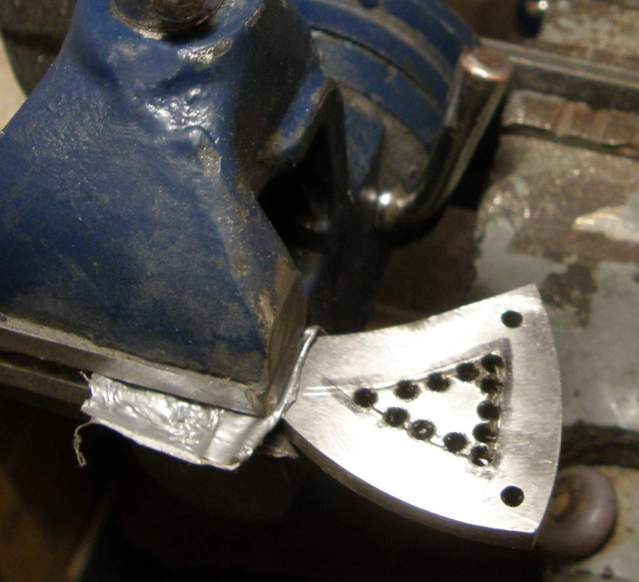 I'm still waiting for the stone, so for the moment this is the stage of the front bolsters:  But meantime I focused on the rear bolsters. Given the resemblance with a hawk's head, I tried to add more to this look by adding a special rivet as an eye. This rivet consists of a copper tube (5 mm ext. diameter) with a stainless steel rod inserted inside:  So, I riveted the rear bolsters using three rivets. The one is described above and the other two are made from a stainless steel rod (in fact an electrode). Here are the rivets, right after hammering:  Not very smooth looking... ... but after a bit of grinding...  ... and more sanding... 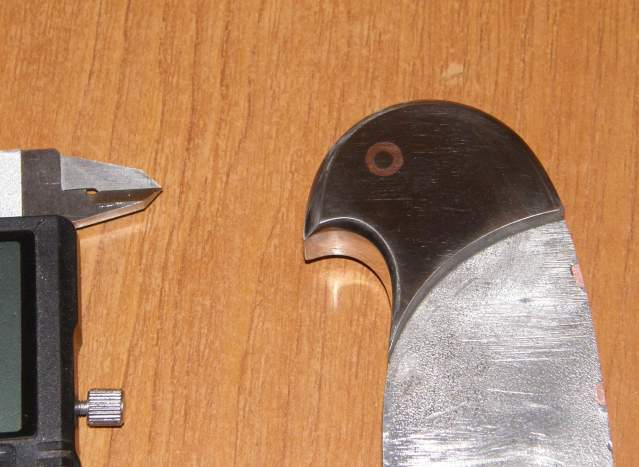 ...the two stainless steel rivets became almost invisible. And the "eye" rivet is helping to the hawk head effect, I think. So the here's the stage of the knife right now:   Thanks for looking,   Adrian |
|
|
|
Post by FrogAndBearCreations on Feb 16, 2012 13:25:25 GMT -5
Very cool, thats some knife!
|
|
|
|
Post by NatureNut on Feb 16, 2012 13:25:47 GMT -5
Oh my goodness... are there no limits to your capabilities? Wow!
|
|
|
|
Post by helens on Feb 16, 2012 16:03:20 GMT -5
Your attention to minute detail is sooo impressive Adrian! That's not a knife, it's a work of art!!
|
|
|
|
Post by Toad on Feb 16, 2012 17:30:52 GMT -5
Incredible. Have you decided on scales yet?
|
|
adrian65
Cave Dweller  Arch to golden memories and to great friends.
Member since February 2007
Posts: 10,790
|
Post by adrian65 on Feb 17, 2012 15:20:32 GMT -5
Thank you everyone.
Todd, I haven't chosen yet the stones for the scales. Workin' on it.
Adrian
|
|